Dell 964 All In One Photo Printer DELL.book
Dell 964 All In One Photo Printer Manual
 |
View all Dell 964 All In One Photo Printer manuals
Add to My Manuals
Save this manual to your list of manuals |
Dell 964 All In One Photo Printer manual content summary:
- Dell 964 All In One Photo Printer | DELL.book - Page 1
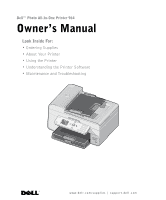
Dell™ Photo All-In-One Printer 964 Owner's Manual Look Inside For: • Ordering Supplies • About Your Printer • Using the Printer • Understanding the Printer Software • Maintenance and Troubleshooting Photo 964 www.dell.com/supplies | support.dell.com - Dell 964 All In One Photo Printer | DELL.book - Page 2
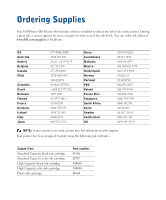
Ordering Supplies Your Dell Photo AIO Printer 964 includes software installed to detect the ink levels in the printer. During a print job, a screen appears on your computer to warn you of low ink levels. You can order ink online at www.dell.com/supplies or by phone. US Australia Austria Belgium - Dell 964 All In One Photo Printer | DELL.book - Page 3
manner whatsoever without the written permission of Dell Inc. is strictly forbidden. Trademarks used in this text: Dell and the DELL logo, Dell Picture Studio, and Dell Ink Management System are trademarks of Dell Inc.; Microsoft and Windows are registered trademarks of Microsoft Corporation. Other - Dell 964 All In One Photo Printer | DELL.book - Page 4
www.dell.com | support.dell.com - Dell 964 All In One Photo Printer | DELL.book - Page 5
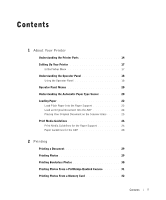
Print Media Guidelines 26 Print Media Guidelines for the Paper Support 26 Paper Guidelines for the ADF 28 2 Printing Printing a Document 29 Printing Photos 29 Printing Borderless Photos 30 Printing Photos From a PictBridge-Enabled Camera 31 Printing Photos From a Memory Card 32 Contents 5 - Dell 964 All In One Photo Printer | DELL.book - Page 6
Show 34 Printing All Photos on Media Card or USB Key 34 Printing Collated Copies of Your Document 35 Printing Last Page First 35 Printing More Than One Page on a Scanning Using the Operator Panel 43 Using the Printer Software 43 Scanning Photos 44 Scanning to Your Computer Over a Network - Dell 964 All In One Photo Printer | DELL.book - Page 7
Operator Panel 55 Send a Fax 55 Send a Broadcast Fax 56 Receive a Fax Automatically 57 Receive a Fax Manually 58 Receive a Fax With an Answering Machine Connected to the Printer 58 Sending a Fax From the Computer 59 Connecting Cables 59 What if I Have a Digital Subscriber Line (DSL 59 - Dell 964 All In One Photo Printer | DELL.book - Page 8
Manager 78 Dell Ink Management System 79 Removing and Reinstalling Software 81 7 Ink Cartridge Maintenance Replacing Ink Cartridges 83 Aligning Ink Cartridges 87 Cleaning the Ink Cartridge Nozzles 88 8 Troubleshooting Setup Problems 89 Computer Problems 89 Printer Problems 91 8 Contents - Dell 964 All In One Photo Printer | DELL.book - Page 9
Warranties and Return Policy 124 Limited Warranty for Dell-Branded Hardware Products (U.S. Only) . 124 Total Satisfaction Return Policy (U.S. Only 127 Dell™ Printer Consumables Limited Warranties 128 Export Regulations 129 Dell™ Software License Agreement 129 Regulatory Notices 130 Index 133 - Dell 964 All In One Photo Printer | DELL.book - Page 10
10 Contents - Dell 964 All In One Photo Printer | DELL.book - Page 11
cord (UPS). • Do not use your printer in a wet environment, for example, Dell-authorized components. The safety features of some parts may not always be obvious. Dell disclaims liability associated with the use of non-Dell-authorized components. • See "Troubleshooting" on page 89 for instructions - Dell 964 All In One Photo Printer | DELL.book - Page 12
www.dell.com | support.dell.com 12 CAUTION: SAFETY INSTRUCTIONS - Dell 964 All In One Photo Printer | DELL.book - Page 13
use the Dell Photo AIO Printer 964 to do a variety of things. A few important things to note: • If your printer is connected to a computer, you can use either the printer operator panel or the printer software to produce quality documents quickly. • You do need to connect your printer to a computer - Dell 964 All In One Photo Printer | DELL.book - Page 14
dell.com | support.dell.com Understanding the Printer Parts 1 9 2 8 Photo 964 3 7 4 Number: 1 2 3 Part: Automatic Document Feeder (ADF) Printer sized documents. Unit you lift to gain access to the ink cartridges. Panel on the printer you use to control copying, scanning, faxing, and - Dell 964 All In One Photo Printer | DELL.book - Page 15
Card Manager" on page 78. Top of printer that holds your document or photo flat while you scan it. You can ink cartridges or paper, visit www.dell.com/supplies. 11 Express Service Code • Identify your printer when you use support.dell.com or contact technical support. • Enter the Express Service - Dell 964 All In One Photo Printer | DELL.book - Page 16
www.dell.com | support.dell.com 12 13 14 15 16 17 12 FAX connector ( - Connects your printer to an active telephone DSL (digital subscriber line) or ISDN (integrated services digital network) without using a digital line filter to the printer. 13 PHONE jack connector Remove the blue plug - Dell 964 All In One Photo Printer | DELL.book - Page 17
Up Your Printer NOTE: The Dell Photo All-In-One Printer 964 supports Microsoft® Windows® 2000, Windows XP, and Windows XP Professional X64 Edition. To set up your printer, follow the steps on your Setting Up Your Printer poster. If you encounter problems during setup, see "Troubleshooting" on page - Dell 964 All In One Photo Printer | DELL.book - Page 18
www.dell.com | support.dell.com Understanding the Operator Panel Using the Operator Panel The operator panel buttons allow you to copy documents and photos, fax documents, and print photos from a memory card or PictBridge-enabled camera without connecting to a computer. The printer is on when - Dell 964 All In One Photo Printer | DELL.book - Page 19
list. - Type numbers to enter or edit the date and time shown on the printer display. • In copy mode, select the number of copies you want to make. the number. • Start a scan, copy, or fax job. • In photo mode, print photos. NOTE: If you initiate a copy without specifying color or black and white, - Dell 964 All In One Photo Printer | DELL.book - Page 20
www.dell.com | support.dell.com Operator Panel Menus From the main menu menu, you can navigate to the Copy, Photo, Fax, Scan, Setup, or Maintenance modes available on your printer. You can also view photos, send a fax, or perform quick copy or quick scan directly from the main menu. For more - Dell 964 All In One Photo Printer | DELL.book - Page 21
automatic paper type sensor for all print jobs: 1 In Windows XP, click Start→ Control Panel→ Printers and Other Hardware→ Printers and Faxes. In Windows 2000, click Start→ Settings→ Printers. 2 Right-click the Dell Photo AIO Printer 964 icon. 3 Click Printing Preferences. 4 Click the Print Setup tab - Dell 964 All In One Photo Printer | DELL.book - Page 22
www.dell.com | support.dell.com Loading Paper Load Plain Paper Into the Paper Support 1 Lift the paper exit tray, and extend the paper support. 2 Insert paper into the paper input tray. 22 About Your Printer - Dell 964 All In One Photo Printer | DELL.book - Page 23
3 Squeeze and slide the paper guides to rest against the left and right edges and bottom of the paper. NOTE: Do not force the paper into the printer. 4 Lower the paper exit tray. About Your Printer 23 - Dell 964 All In One Photo Printer | DELL.book - Page 24
www.dell.com | support.dell.com 5 Extend the paper exit tray stop to catch paper as it exits the printer. NOTE: The paper exit tray can hold up to 50 sheets of paper. For information on print media guidelines, see "Print Media Guidelines for the Paper Support" on page 26. Load an Original Document - Dell 964 All In One Photo Printer | DELL.book - Page 25
scanner glass in the upper left corner. To get a copy with portrait (vertical) orientation: To get a copy with landscape (horizontal) orientation: 3 Close the top cover. Photo 964 About Your Printer 25 - Dell 964 All In One Photo Printer | DELL.book - Page 26
the paper support. • You squeeze and slide the paper guide to the left edge of the banner paper. • You use banner paper designed for inkjet printers. NOTE: You must select A4 Banner or Letter Banner paper size in Print Properties. Failure to do so will cause a paper jam. See "Paper Problems" on page - Dell 964 All In One Photo Printer | DELL.book - Page 27
The paper is centered in the paper support. • You select Normal or Photo print quality. • The paper guides rest against the right and left edges of the paper. • The paper guide rests against the bottom edge of the paper. • You follow the loading instructions on the iron-on transfer packaging. • The - Dell 964 All In One Photo Printer | DELL.book - Page 28
www.dell.com | support.dell.com Paper Guidelines for the ADF Load up to: 50 the ADF. • You do not use media printed with metallic ink particles in the ADF. • You avoid embossed designs. • The document is loaded text side up. • The paper guide is against the edge of the paper. • Your paper size - Dell 964 All In One Photo Printer | DELL.book - Page 29
Printing Printing a Document 1 Turn on your computer and printer, and make sure they are connected. 2 Load paper for the Paper Support" on page 26. 2 Make sure you have a color cartridge and a photo cartridge (sold separately) installed. For more information, see "Replacing Ink Cartridges" on page - Dell 964 All In One Photo Printer | DELL.book - Page 30
photos from sticking together or smudging, remove each photo after it exits the printer. NOTE: Before placing your prints in a nonadhesive photo Support" on page 26. 2 Make sure you have a color cartridge and a photo cartridge (sold separately) installed. For more information, see "Replacing Ink - Dell 964 All In One Photo Printer | DELL.book - Page 31
Printing Photos From a PictBridge-Enabled Camera Your printer supports PictBridge-enabled cameras. 1 Insert one end of the USB cable into the camera. 2 Insert the other end of the USB cable into the PictBridge port on the front of the printer. Refer to the instructions included with your camera for - Dell 964 All In One Photo Printer | DELL.book - Page 32
From a Memory Card Most digital cameras use a memory card to store photos. The Dell Photo AIO Printer 964 supports the following digital media: • CompactFlash Type I and II • Memory Stick • Memory Stick PRO • Memory Stick Duo • Microdrive • SmartMedia • Secure Digital • MultiMediaCard • xD-Picture - Dell 964 All In One Photo Printer | DELL.book - Page 33
Part Number 311-4340 • DELL - 64 MB High Speed USB 2.0 Memory Key, Part Number 311-4339 When you insert a memory card or USB key, the printer automatically switches to Photo mode. NOTE: Do not insert more than one memory card or USB key at a time. NOTE: The printer supports FAT32 data format. Files - Dell 964 All In One Photo Printer | DELL.book - Page 34
www.dell.com | support.dell.com Viewing a Slide Show You can view all the photos stored on a memory card or USB key through a slide show. 1 Insert a memory card or USB key. The printer automatically switches to Photo Mode. 2 Press Select to access the Photo Mode menu. 3 From the Photo Mode menu, - Dell 964 All In One Photo Printer | DELL.book - Page 35
Printing Collated Copies of Your Document When your printer is attached to your computer, you can print black and white or color collated copies. To print collated copies: 1 Make sure you have paper loaded in the paper support. 2 With your document open, click File→ Print. 3 Click Properties, - Dell 964 All In One Photo Printer | DELL.book - Page 36
www.dell.com | support.dell.com Printing More Than One Page on a Sheet of Paper 1 Make sure you have paper loaded in the paper support. For help, see "Load Plain Paper Into the Paper Support" on page 22. 2 With your document open, click File→ Print. 3 Click Properties, Options, Setup, or - Dell 964 All In One Photo Printer | DELL.book - Page 37
stack of banner paper (20 sheets or less) in front of the printer, and feed in the first sheet. 2 With your document open, or operating system). NOTE: Once the printer begins printing, wait until you can see the leading edge of the banner exiting the printer, and then carefully unfold the paper down - Dell 964 All In One Photo Printer | DELL.book - Page 38
www.dell.com | support.dell.com 38 Printing - Dell 964 All In One Photo Printer | DELL.book - Page 39
Documents Using the Operator Panel 1 Turn on your printer. 2 Load paper in the paper support. For more information, see "Loading Paper" on page left corner of the front of the item aligns with the arrow on the printer. For more information, see "Placing Your Original Document on the Scanner Glass" - Dell 964 All In One Photo Printer | DELL.book - Page 40
www.dell.com | support.dell.com 6 Click Start→ Programs or All Programs→ Dell Printers→ Dell Photo AIO Printer 964→ Dell All-In-One Center. The Dell All-In-One Center opens. 7 Select a copy quantity (1-99) and color setting. 8 Click See More Copy Settings to: - Choose a copy quality. - Select the - Dell 964 All In One Photo Printer | DELL.book - Page 41
Programs or All Programs→ Dell Printers→ Dell Photo AIO Printer 964→ Dell All-In-One Center. The Dell All-In-One Center opens. 5 Click Preview your printer without a computer, you can print collated copies: 1 Load paper in the paper support. For help, see "Load Plain Paper Into the Paper Support" on - Dell 964 All In One Photo Printer | DELL.book - Page 42
dell.com | support.dell.com Changing Copy Settings 1 Click Start→ Programs or All Programs→ Dell Printers→ Dell Photo AIO Printer 964→ Dell All-In-One Center. The Dell All-In-One newspapers (descreen). Select whether to process with Best quality or Best speed. • Reduce the background noise on your - Dell 964 All In One Photo Printer | DELL.book - Page 43
. Using the Printer Software 1 Turn on your computer and printer, and make sure Printers→ Dell Photo AIO Printer 964→ Dell All-In-One Center. The Dell All-In-One Center opens. 4 Click Preview Now to see your scanned image. NOTE: If the size of the scan (found in the lower right of the preview window - Dell 964 All In One Photo Printer | DELL.book - Page 44
page 25. 3 Click Start→ Programs or All Programs→ Dell Printers→ Dell Photo AIO Printer 964→ Dell All-In-One Center. The Dell All-In-One Center opens. NOTE: You can also open the Dell All-In-One Center from the operator panel on your printer. When your printer is in Scan mode, press the Start button - Dell 964 All In One Photo Printer | DELL.book - Page 45
the up and down Arrow buttons to scroll to Scan, and press Select . The printer automatically detects if it is connected to a network. If it is connected to a in the upper right corner of the All-In-One Main Page. For help, see "Using the Dell All-In-One Center" on page 73. The PIN is not - Dell 964 All In One Photo Printer | DELL.book - Page 46
page 25. 2 Click Start→ Programs or All Programs→ Dell Printers→ Dell Photo AIO Printer 964→ Dell All-In-One Center. The Dell All-In-One Center opens. NOTE: You can also open the Dell All-In-One Center from the operator panel on your printer. When your printer is in Scan mode, press the Start button - Dell 964 All In One Photo Printer | DELL.book - Page 47
printer drivers. 1 Load your original document. For help, see "Load an Original Document Into the ADF" on page 24 or "Placing Your Original Document on the Scanner Glass" on page 25. 2 Click Start→ Programs or All Programs→ Dell Printers→ Dell Photo AIO Printer 964→ Dell All-In-One Center. The Dell - Dell 964 All In One Photo Printer | DELL.book - Page 48
www.dell.com | support.dell.com Editing Scanned Images With most graphics programs, you can customize your image. 1 Click Start→ Programs or All Programs→ Dell Printers→ Dell Photo AIO Printer 964→ Dell All-In-One Center. The Dell All-In-One Center opens. NOTE: You can also open the Dell All-In-One - Dell 964 All In One Photo Printer | DELL.book - Page 49
page 25. 2 Click Start→ Programs or All Programs→ Dell Printers→ Dell Photo AIO Printer 964→ Dell All-In-One Center. The Dell All-In-One Center opens. NOTE: You can also open the Dell All-In-One Center from the operator panel on your printer. When your printer is in Scan mode, press the Start button - Dell 964 All In One Photo Printer | DELL.book - Page 50
Paper Support" on page 22. 2 Load your original document. For help, see "Placing Your Original Document on the Scanner Glass" on page 25 or "Load an Original Document Into the ADF" on page 24. 3 Click Start→ Programs or All Programs→ Dell Printers→ Dell Photo AIO Printer 964→ Dell All-In-One Center - Dell 964 All In One Photo Printer | DELL.book - Page 51
55. NOTE: For faxing instructions using the computer software, see "Sending a Fax From the Computer" on page 59. Setting Up the Printer With Equipment Equipment • printer • phone cord (provided) • printer • telephone (sold separately) • two phone cords (one provided) • printer • telephone (sold - Dell 964 All In One Photo Printer | DELL.book - Page 52
www.dell.com | support.dell.com Connecting directly to a telephone wall jack Connect a phone cord from the FAX connector ( - left side connector) on the printer to the telephone wall jack. 1 Connect one end of the phone cord to the FAX connector ( - left side connector) of the printer. 2 Connect - Dell 964 All In One Photo Printer | DELL.book - Page 53
for additional devices in these countries. Connecting to an answering machine 1 Connect a phone cord from the FAX connector ( - left side connector) on the printer to the telephone wall jack. 2 Remove the protective plug from the PHONE jack connector ( - right side connector) on the back of the - Dell 964 All In One Photo Printer | DELL.book - Page 54
delivers digital data to a computer through a telephone line. Your Dell Photo AIO Printer 964 is designed to work with analog data. If you are faxing printer directly to the output of the DSL filter. NOTE: Do not install any splitters between the DSL filter and the printer. Contact your DSL service - Dell 964 All In One Photo Printer | DELL.book - Page 55
services digital network) and cable modems are not fax modems and are not supported for faxing. Faxing Using the Printer Operator Panel Send a Fax 1 Make sure your printer numbers display in the Fax Number Window. to scroll to Fax, and 5 Press Start . The printer scans your document and sends - Dell 964 All In One Photo Printer | DELL.book - Page 56
dell.com | support.dell.com Send a Broadcast Fax A broadcast fax allows you to send the same fax to multiple fax numbers at once. You can enter up to 30 different numbers. 1 Make sure your printer the fax number. The numbers display in the Fax Number Window. to scroll to Fax, and 5 Press the down - Dell 964 All In One Photo Printer | DELL.book - Page 57
connected to the FAX connector ( - left side connector) on the printer. 2 Make sure Auto Answer is turned on or is currently turned on and be turned off. d Press Select . 3 Set the number of rings the printer should allow before answering the incoming fax. a From the main menu, choose Fax as the - Dell 964 All In One Photo Printer | DELL.book - Page 58
www.dell.com | support.dell.com Receive a Fax Manually 1 Make sure your printer is on, and an active telephone line is connected to the FAX connector ( - left side connector) on the printer. 2 Make sure the Auto Answer feature has been turned off. a On the main screen in Fax mode, use the up and - Dell 964 All In One Photo Printer | DELL.book - Page 59
data to a computer through a telephone line. Your Dell Photo AIO Printer 964 is designed to work with analog data. If you are printer. Contact your DSL service provider if you need more help. NOTE: ISDN (integrated services digital network) and cable modems are not fax modems and are not supported - Dell 964 All In One Photo Printer | DELL.book - Page 60
Click Start→ Programs or All Programs→ Dell Printers→ Dell Photo AIO Printer 964→ Dell All-In-One Center. 4 Place the document you want to fax face down under the lid of the printer. 5 Select Fax from the Scan drop-down menu. 6 Click Scan Now. 7 Follow the instructions on the computer screen to send - Dell 964 All In One Photo Printer | DELL.book - Page 61
Dell Printers→ Dell Photo AIO Printer 964→ Dell All-In-One Center. 2 From the Dell All-In-One Center, click the Maintain/Troubleshoot tab, and then click Display the Printer Setup Utility. Printer PBX). • Enter a dialing prefix. • Choose how (manually, if fax tones are detected, or after a certain - Dell 964 All In One Photo Printer | DELL.book - Page 62
Windows XP Only) or Fax Service Management (Windows 2000 Only) to send and receive faxes: • Use Fax Console or Fax Service Management to print and receive files as faxes, or • Use the Dell All-In-One case you may not receive voice mail. a Select Manual answer or specify the number of rings, and click - Dell 964 All In One Photo Printer | DELL.book - Page 63
Document Into the ADF" on page 24. 3 Click Start→ Programs or All Programs→ Dell Printers→ Dell Photo AIO Printer 964→ Dell All-In-One Center. 4 Place the document you want to fax face down under the lid of the printer. 5 Select File from the Scan drop-down menu. 6 Save your file to a desired - Dell 964 All In One Photo Printer | DELL.book - Page 64
www.dell.com | support.dell.com 7 Open the file you just scanned and saved. 8 Click File → Print. 9 In the printer list, select Fax. 10 Click Print. 11 Follow the instructions on the computer screen to send your fax. Receive a Fax Using Fax Console or Fax Service Management 1 Make sure that an - Dell 964 All In One Photo Printer | DELL.book - Page 65
5 Click the fax in the right pane for which you want to view the status, and then click Preferences or Properties. 6 Click the General tab, and view the Status line. 7 Click Close when you are finished. Speed Dial To make sending faxes easier, you can enter up to 99 speed dial numbers. Up to 89 - Dell 964 All In One Photo Printer | DELL.book - Page 66
| support.dell.com 7 Use the down Arrow button 8 Press Select . to scroll down to Add Entry. Create a Speed Dial List From the Computer 1 Click Start→ Programs or All Programs→ Dell Printers→ Dell Photo AIO Printer 964→ Printer Setup Utility. 2 Click the Speed Dial tab. 3 Follow the instructions - Dell 964 All In One Photo Printer | DELL.book - Page 67
entering a speed dial entry. If more than two numbers are entered, the printer assumes it is a fax number. NOTE: To send a fax between two fax machines within an office that utilizes one- or two-digit extensions, the printer recognizes the numbers entered as an extension instead of a speed dial if - Dell 964 All In One Photo Printer | DELL.book - Page 68
.dell.com | support.dell.com Manually Dialing a Fax While Listening to a Telephone Line (On Hook Dial) 1 From the main menu, use the up and down Arrow buttons press Select . to scroll to Fax, and 2 Use the up and down Arrow buttons to scroll to On Hook Dial. 3 Press Select to make the printer - Dell 964 All In One Photo Printer | DELL.book - Page 69
, and then press Select . NOTE: The lowest possible blocked fax number is automatically assigned to this contact. You cannot change the blocked fax number. Your printer no longer accepts faxes from the fax numbers you entered when fax blocking is turned on. Faxing 69 - Dell 964 All In One Photo Printer | DELL.book - Page 70
www.dell.com | support.dell.com Turning Fax Blocking On 1 From the main menu, use the Select 4 Use the left and right Arrow buttons to choose On from Blocked List. If the printer detects a fax from one of the numbers on the Blocked Fax List, the transmission is disconnected. 5 Press Select . - Dell 964 All In One Photo Printer | DELL.book - Page 71
Code window opens. 5 Using the keypad, specify a new one- to seven-digit keycode. NOTE: Valid characters for the pickup code are 0-9, pound (#), and star (*). Any other characters entered are ignored. 6 Press Select . The keycode is saved. The next time you want to answer a fax manually - Dell 964 All In One Photo Printer | DELL.book - Page 72
www.dell.com | support.dell.com Using Auto Fax Convert If you are faxing a high-resolution document to a fax machine that prints at a lower resolution, the Dell Photo AIO Printer 964 can automatically adjust the fax you send. NOTE: If you turn off Auto Fax Convert and you attempt to send a fax - Dell 964 All In One Photo Printer | DELL.book - Page 73
, and convert photos and other types of images. • Memory Card Manager - Allows you to display, manage, edit, print, and save photos to your computer. • Dell Ink Management System™ - Warns you when your printer is running low on ink. Using the Dell All-In-One Center Understanding the Software 73 - Dell 964 All In One Photo Printer | DELL.book - Page 74
troubleshooting and maintenance information. • Preview images you want to print or copy. • Manage photos (copy them to folders, print them, perform creative copying). To access the Dell All-In-One Center: Click Start→ Programs or All Programs→ Dell Printers→ Dell Photo AIO Printer 964→ Dell All - Dell 964 All In One Photo Printer | DELL.book - Page 75
Optical Character Recognition). • Modify an image with a photo editor. • Select a portion of the preview image to scan. • View an image of what will be printed or copied. For more information about the Dell All-In-One Center, click Help in the Dell All-In-One Center. Understanding the Software 75 - Dell 964 All In One Photo Printer | DELL.book - Page 76
To access Printing Preferences when a document is not open: 1 In Windows XP, click Start→ Control Panel→ Printers and Other Hardware→ Printers and Faxes. In Windows 2000, click Start→ Settings→ Printers. 2 Right-click the printer icon, and then select Printing Preferences. NOTE: Changes made to the - Dell 964 All In One Photo Printer | DELL.book - Page 77
selected if you have a photo cartridge installed. Media Type - Allows you to set the paper type manually, or have the printer sensor detect the paper type Booklet, or Borderless. Automatic Image Sharpening - Automatically select the best image sharpening level based on image content. More Options - - Dell 964 All In One Photo Printer | DELL.book - Page 78
www.dell.com | support.dell.com Using Dell Picture Studio In Dell Picture Studio, you can explore digital photography and learn how to organize, create, or print photos. There are two components to the Dell Picture Studio: • Paint Shop Photo Album 5 Click Start→ Programs or All Programs→ Dell - Dell 964 All In One Photo Printer | DELL.book - Page 79
from your computer by clicking Start→ Programs or All Programs→ Dell Printers→ Dell Photo AIO Printer 964→ Activate Memory Card Manager. For more information on using MCM, see "Printing Photos From a Memory Card" on page 32. Dell Ink Management System Each time you print a job, a printing progress - Dell 964 All In One Photo Printer | DELL.book - Page 80
www.dell.com | support.dell.com If your black ink cartridge is out of ink, you can choose to print black from the color ink cartridge (Process . The Reserve Tank dialog does not display again until after the low ink cartridge has been replaced. The Complete-A-Print check box is automatically reset - Dell 964 All In One Photo Printer | DELL.book - Page 81
→ Programs or All Programs→ Dell Printers→ Dell Photo AIO Printer 964→ Uninstall Dell Photo AIO Printer 964. 2 Follow the instructions on the computer screen to remove the printer software. 3 Restart your computer before installing the software again. 4 Insert the Drivers and Utilities CD, and then - Dell 964 All In One Photo Printer | DELL.book - Page 82
www.dell.com | support.dell.com 82 Understanding the Software - Dell 964 All In One Photo Printer | DELL.book - Page 83
Supplies" on page 2 Dell recommends Dell ink cartridges for your printer. Dell does not provide warranty coverage for problems caused by using accessories, parts, or components not supplied by Dell. 1 Turn on your printer. 2 Lift the printer unit. Photo 964 The ink cartridge carrier moves and - Dell 964 All In One Photo Printer | DELL.book - Page 84
www.dell.com | support.dell.com 3 Press down on the ink cartridge lever to raise each ink cartridge lid. 4 Remove the old ink cartridges. 5 Store the cartridges in an air-tight container (one is included with each photo cartridge you purchase), or dispose of them. 84 Ink Cartridge Maintenance - Dell 964 All In One Photo Printer | DELL.book - Page 85
a color cartridge (use for normal printing). For photo printing, use a photo cartridge (sold separately) and a color cartridge. 7 Insert the new ink cartridges. Make sure the black or photo ink cartridge is secure in the left ink cartridge carrier, and the color ink cartridge is secure in the right - Dell 964 All In One Photo Printer | DELL.book - Page 86
www.dell.com | support.dell.com 8 Snap each lid closed. 9 Close the printer unit. Photo 964 An alignment page automatically prints. 86 Ink Cartridge Maintenance - Dell 964 All In One Photo Printer | DELL.book - Page 87
the ink cartridges: 1 Load paper in the paper support. For more information, see "Loading Paper" on page 22. 2 In Windows XP, click Start→ Control Panel→ Printers and Other Hardware→ Printers and Faxes. In Windows 2000, click Start→ Settings→ Printers. 3 Right-click the Dell Photo AIO Printer 964 - Dell 964 All In One Photo Printer | DELL.book - Page 88
clean the ink cartridge nozzles: 1 Load the paper. For more information, see "Loading Paper" on page 22. 2 In Windows XP, click Start→ Control Panel→ Printers and Other Hardware→ Printers and Faxes. In Windows 2000, click Start→ Settings→ Printers. 3 Right-click the Dell Photo AIO Printer 964 icon - Dell 964 All In One Photo Printer | DELL.book - Page 89
panel display, write down the exact message. Setup Problems Computer Problems VER IF Y T H AT YOU R P RI N T ER I S C OM P AT I B L E W IT H Y OU R CO MP U T ER. The Dell Photo AIO Printer 964 supports Windows 2000, Windows XP, and Windows XP Professional x64 Edition. VERIFY YOUR COMPUTER MEETS THE - Dell 964 All In One Photo Printer | DELL.book - Page 90
R. Windows XP 1 Click Start→ Control Panel→ Printers and Other Hardware→ Printers and Faxes. 2 Right-click Dell Photo AIO Printer 964, and select Set as Default. Windows 2000 1 Click Start→ Settings→ Printers. 2 Right-click Dell Photo AIO Printer 964, and select Set as Default. 90 Troubleshooting - Dell 964 All In One Photo Printer | DELL.book - Page 91
Printer Problems ENSURE THAT THE PRINTER POWER CABLE IS FIRMLY CONNECTED TO THE PRINTER AND THE ELECTRICAL OUTLET. DETERMINE IF THE PRINTER HAS BEEN HELD OR PAUSED. Windows XP 1 Click Start→ Control Panel→ Printers and Other Hardware→ Printers and Faxes. 2 Double-click Dell Photo AIO Printer 964 INK - Dell 964 All In One Photo Printer | DELL.book - Page 92
XP, click Start→ Control Panel→ Printers and Other Hardware→ Printers and Faxes. In Windows 2000, click Start→ Settings→ Printers. 2 Check for multiple printer objects for your Dell printer, which might be shown as Dell 964, Dell 964 (Copy 1), Dell 964 (Copy 2), and so on. 3 Print a job to each one - Dell 964 All In One Photo Printer | DELL.book - Page 93
OF PAPER WHEN PRINTING MULTIPLE PAGES. For more information, see "Print Media Guidelines for the Paper Support" on page 26. MAKE SURE THE PAPER IS NOT WRINKLED, TORN OR DAMAGED. MAKE SURE THE PAPER GUIDES REST AGAINST THE LEFT AND RIGHT EDGES AND B O T T O M O F T H E P A P E R. Troubleshooting 93 - Dell 964 All In One Photo Printer | DELL.book - Page 94
www.dell.com | support.dell.com CHECK FOR A PAPER JAM. Near the ADF 1 Lift the ADF cover your print job to print any missing pages. NOTE: To avoid paper jams, do not force paper into the All-In-One. Near the paper input tray 1 Lift the paper exit tray. 2 Pull firmly on the paper to remove it. 3 - Dell 964 All In One Photo Printer | DELL.book - Page 95
Near the paper exit tray 1 Raise the printer unit. Photo 964 2 Pull firmly on the paper to remove it. 3 Close the printer unit. 4 Press Select . 5 Resend your print job to print any missing pages. Near the rear access door 1 Open the rear access door. 2 Pull firmly on - Dell 964 All In One Photo Printer | DELL.book - Page 96
in Printing Preferences. Network Problems SCANNING PROGRAMS UNAVAILABLE THROUGH THE NETWORK After installing your Dell 964 All-in-One Printer and Dell Wireless Printer Adapter 3300 on your computer with Microsoft® Windows® XP Service Pack 2 installed, the Downloading Application List fails to work - Dell 964 All In One Photo Printer | DELL.book - Page 97
Ink Cartridges" on page 83. Install a Color ink cartridge. For more information, see "Replacing Ink Cartridges" on page 83. Remove the cartridge, and install the correct Black or Photo cartridge for your printer. For more information, see "Replacing Ink Cartridges" on page 83. Troubleshooting - Dell 964 All In One Photo Printer | DELL.book - Page 98
. There is a problem with the ink cartridges or the print heads. Data error or incomplete data. Scan carrier error. A paper feed error has occurred. The attached device is not supported, or the PictBridge-enabled digital camera is not set to the correct USB mode. The printer is not communicating - Dell 964 All In One Photo Printer | DELL.book - Page 99
, try aligning or cleaning the ink cartridges. For more information on aligning, see "Aligning Ink Cartridges" on page 87. For more information on cleaning ink cartridges, see "Cleaning the Ink Cartridge Nozzles" on page 88. For additional solutions, go to support.dell.com. Troubleshooting 99 - Dell 964 All In One Photo Printer | DELL.book - Page 100
www.dell.com | support.dell.com 100 Troubleshooting - Dell 964 All In One Photo Printer | DELL.book - Page 101
Assistance If you need help with a technical problem, Dell is ready to assist you. 1 Call technical support from a telephone near or at the printer so that technical support can assist you with any necessary procedures. When calling Dell, use your Express Service Code to help expedite the routing of - Dell 964 All In One Photo Printer | DELL.book - Page 102
www.dell.com | support.dell.com Automated Order-Status Service To check on the status of any Dell products that you have ordered, you can go to support.dell.com, or you can call the automated order-status service. A recording prompts you for the information needed to locate and report on your order - Dell 964 All In One Photo Printer | DELL.book - Page 103
for desktop and portable computers: [email protected] E-mail for servers and EMC: [email protected] Customer Care Tech Support Tech Support Services Sales Aruba General Support Australia (Sydney) E-mail (Australia): [email protected] International Access Code: 0011 E-mail - Dell 964 All In One Photo Printer | DELL.book - Page 104
Fax City Code: 51 Customer Care Fax Sales British Virgin Islands General Support Brunei Customer Technical Support (Penang, Malaysia) Country Code: 673 Customer Service (Penang, Malaysia) Sales (Singapore) 104 Contacting Dell Area Codes, Local Numbers, and Toll-Free Numbers 0820 240 530 - Dell 964 All In One Photo Printer | DELL.book - Page 105
Access Code Country Code City Code Department Name or Service Area, Website and E-Mail Address Canada (North York, Ontario) Online Order Status: www.dell.ca/ostatus International Access Code: 011 AutoTech (automated technical support) Customer Care (Home Sales/Small Business) Customer Care (med - Dell 964 All In One Photo Printer | DELL.book - Page 106
Service Area, Website and E-Mail Address Technical Support website: support.dell.com.cn Technical Support E-mail: [email protected] Customer Care E-mail: [email protected] Technical Support Fax Technical Support (Dell™ Dimension™ and Inspiron™) Technical Support (OptiPlex™, Latitude™, and Dell - Dell 964 All In One Photo Printer | DELL.book - Page 107
Code Country Code City Code Department Name or Service Area, Website and E-Mail Address Czech Republic (Prague) Website: support.euro.dell.com International Access Code: 00 E-mail: [email protected] Country Code: 420 Technical Support Customer Care Fax Tech Fax Switchboard Denmark - Dell 964 All In One Photo Printer | DELL.book - Page 108
: 00 Country Code: 49 City Code: 6103 Department Name or Service Area, Website and E-Mail Address Website: support.euro.dell.com E-mail: support.euro.dell.com/fr/fr/emaildell/ Home and Small Business Technical Support Customer Care Switchboard Switchboard (calls from outside of France) Sales Fax - Dell 964 All In One Photo Printer | DELL.book - Page 109
/gr/en/emaildell/ Country Code: 30 Technical Support Gold Service Technical Support Switchboard Gold Service Switchboard Sales Fax Grenada General Support Guatemala General Support Guyana General Support Hong Kong Website: support.ap.dell.com International Access Code: 001 Technical - Dell 964 All In One Photo Printer | DELL.book - Page 110
Code: 00 Country Code: 39 City Code: 02 Jamaica Department Name or Service Area, Website and E-Mail Address Website: support.euro.dell.com E-mail: [email protected] Technical Support U.K. Technical Support (dial within U.K. only) Home User Customer Care Small Business Customer Care - Dell 964 All In One Photo Printer | DELL.book - Page 111
, and Latitude) Technical Support outside of Japan (Dell Precision, OptiPlex, and Latitude) Technical Support (PDAs, projectors, printers, routers) Technical Support outside of Japan (PDAs, projectors, printers, routers) Faxbox Service 24-Hour Automated Order Service Customer Care Business - Dell 964 All In One Photo Printer | DELL.book - Page 112
Fax (Brussels, Belgium) Switchboard (Brussels, Belgium) Technical Support Customer Service (Xiamen, China) Transaction Sales (Xiamen, China) Website: support.ap.dell.com Technical Support (Dell Precision, OptiPlex, and Latitude) Technical Support (Dimension, Inspiron, and Electronics and Accessories - Dell 964 All In One Photo Printer | DELL.book - Page 113
Service Main Montserrat Netherlands Antilles Netherlands (Amsterdam) International Access Code: 00 Country Code: 31 City Code: 20 New Zealand International Access Code: 00 Country Code: 64 Nicaragua General Support General Support Website: support.euro.dell.com Technical Support Technical Support - Dell 964 All In One Photo Printer | DELL.book - Page 114
/Small Business Customer Care Switchboard Fax Switchboard Panama General Support Peru General Support Poland (Warsaw) Website: support.euro.dell.com International Access Code: 011 E-mail: [email protected] Country Code: 48 Customer Service Phone City Code: 22 Customer Care Sales - Dell 964 All In One Photo Printer | DELL.book - Page 115
, and Electronics and Accessories) Technical Support (OptiPlex, Latitude, and Dell Precision) Technical Support (PowerApp, PowerEdge, PowerConnect, and PowerVault) Customer Service (Penang, Malaysia) Sales Slovakia (Prague) Website: support.euro.dell.com International Access Code: 00 E-mail - Dell 964 All In One Photo Printer | DELL.book - Page 116
Name or Service Area, Website and E-Mail Address Website: support.euro.dell.com E-mail: support.euro.dell.com/es/es/emaildell/ Home and Small Business Technical Support Customer Care Sales Switchboard Fax Corporate Technical Support Customer Care Switchboard Fax Website: support.euro.dell.com E-mail - Dell 964 All In One Photo Printer | DELL.book - Page 117
Code Country Code City Code Department Name or Service Area, Website and E-Mail Address Taiwan Website: support.ap.dell.com International Access Code: 002 E-mail: [email protected] Country Code: 886 Technical Support (OptiPlex, Latitude, Inspiron, Dimension, and Electronics and Accessories - Dell 964 All In One Photo Printer | DELL.book - Page 118
Access Code: 00 Country Code: 44 City Code: 1344 Uruguay Department Name or Service Area, Website and E-Mail Address Area Codes, Local Numbers, and Toll-Free Numbers Website: support.euro.dell.com Customer Care website: support.euro.dell.com/uk/en/ECare/Form/Home.asp E-mail: dell_direct_support - Dell 964 All In One Photo Printer | DELL.book - Page 119
877-577-3355 Financial Services (Dell Preferred Accounts [DPA]) toll-free: 1-800-283-2210 Business Customer Service and Technical Support toll-free: 1-800-822-8965 Employee Purchase Program (EPP) Customers toll-free: 1-800-695-8133 Printers and Projectors Technical Support toll-free: 1-877 - Dell 964 All In One Photo Printer | DELL.book - Page 120
www.dell.com | support.dell.com 120 Contacting Dell - Dell 964 All In One Photo Printer | DELL.book - Page 121
("Agreement") apply to your purchase of computer systems and/or related products and/or services and support sold in the United States ("Product") by the Dell entity named on the invoice or acknowledgement ("Dell") provided to you. By accepting delivery of the Product, you accept and are bound - Dell 964 All In One Photo Printer | DELL.book - Page 122
the return or exchange instructions and policies provided by Dell, Dell is not responsible or Discontinued Product. Dell's policy is one of ongoing update and revision. Dell may revise and DATA OR SOFTWARE, OR THE PROVISION OF SERVICES AND SUPPORT. EXCEPT AS EXPRESSLY PROVIDED HEREIN, DELL WILL NOT - Dell 964 All In One Photo Printer | DELL.book - Page 123
FORTH IN THIS AGREEMENT SHALL APPLY EVEN IF SUCH REMEDIES FAIL THEIR ESSENTIAL PURPOSE. DELL IS NOT LIABLE TO YOU FOR WARRANTIES, SUPPORT, OR SERVICE MADE BY OR PURCHASED FROM A THIRD PARTY AND NOT DIRECTLY FROM DELL. DELL IS NOT RESPONSIBLE FOR REPRESENTATIONS OR OMISSIONS MADE BY A THIRD PARTY. 10 - Dell 964 All In One Photo Printer | DELL.book - Page 124
of software • Non-Dell-branded and Solution Provider Direct products and accessories • Problems that result from: - External causes such as accident, abuse, misuse, or problems with electrical power - Servicing not authorized by Dell - Usage that is not in accordance with product instructions - Dell 964 All In One Photo Printer | DELL.book - Page 125
Commercial Customers, Healthcare Customers, and Value-Added Resellers (VARs): Technical Support and Customer Service Government and Education Customers: Technical Support and Customer Service Dell-Branded Memory support.dell.com/ContactUs/ContactUsHome.aspx?c =us&l=en&s=gen U.S. Only 1-800-624 - Dell 964 All In One Photo Printer | DELL.book - Page 126
contract? If your service contract is with Dell, service will be provided to you under the terms of the service agreement. Please refer to that contract for details on how to obtain service. If you purchased through us a service contract with one of our third-party service providers, please refer - Dell 964 All In One Photo Printer | DELL.book - Page 127
, printers, projectors, MP3 players, PDAs, battery chargers, un-preinstalled third-party software, wireless cards/access points/routers), including but not limited to those sold by or through Dell's "Software & Peripherals" or "Electronics & Accessories" groups, may be returned within twenty-one - Dell 964 All In One Photo Printer | DELL.book - Page 128
printer consumables (ink cartridges, toner cartridges, photo print packs, and photo paper) for Dell-branded printers, for the U.S. Consumables Limited Warranty (U.S. Only) Dell NOT BEING AVAILABLE FOR USE, OR FOR LOST DATA OR LOST SOFTWARE. DELL'S LIABILITY WILL BE NO MORE THAN THE AMOUNT YOU PAID - Dell 964 All In One Photo Printer | DELL.book - Page 129
, missiles or the support of missile projects, and chemical or biological weapons. Dell™ Software License Agreement This is a legal agreement between you, the user, and Dell Products, L.P ("Dell"). This agreement covers all software that is distributed with the Dell product, for which there - Dell 964 All In One Photo Printer | DELL.book - Page 130
resulted from accident, abuse, misapplication, or service or modification by someone other than Dell. Any replacement disk is warranted for the acquire the software and documentation with only those rights set forth herein. Contractor/manufacturer is Dell Products, L.P., One Dell Way, Round - Dell 964 All In One Photo Printer | DELL.book - Page 131
encouraged to try to correct the interference by one or more of the following measures: • Reorient services. Using shielded cables ensures that you maintain the appropriate Electromagnetic Compatibility classification for the intended environment. For parallel printers, a cable is available from Dell - Dell 964 All In One Photo Printer | DELL.book - Page 132
www.dell.com | support.dell.com 132 Appendix - Dell 964 All In One Photo Printer | DELL.book - Page 133
cards, loading, 26 cleaning ink cartridge nozzles, 88 connecting printer to a computer modem, photos using the operator panel, 40 photos using your computer, 40 custom paper loading in the ADF, 28 loading in the paper tray, 27 D Dell contacting, 101 Dell All-In-One Service Management, 64 Index 133 - Dell 964 All In One Photo Printer | DELL.book - Page 134
One Center, 60 receiving manually, 58 receiving with an answering machine connected to the printer, 58 sending a fax using Fax Console or Fax Service Management, 63 sending from the All-In-One the ADF, 28 paper into the paper support, 22 photo cards, 26 photo paper, 27 plain paper in the paper tray - Dell 964 All In One Photo Printer | DELL.book - Page 135
48 software Dell All-In-One Center, 73 Memory Card Manager, 78 Printer Setup Utility, 61 Printing Preferences, 76 removing, 81 speed dial list, 65 creating from the computer, 66 creating from the operator panel, 65 using, 67 support contacting Dell, 101 T transparencies, loading, 27 troubleshooting - Dell 964 All In One Photo Printer | DELL.book - Page 136
136 Index
-
 1
1 -
 2
2 -
 3
3 -
 4
4 -
 5
5 -
 6
6 -
 7
7 -
8
-
9
-
10
-
11
-
12
-
13
-
14
-
15
-
16
-
17
-
18
-
19
-
20
-
21
-
22
-
23
-
24
-
25
-
26
-
27
-
28
-
29
-
30
-
31
-
32
-
33
-
34
-
35
-
36
-
37
-
38
-
39
-
40
-
41
-
42
-
43
-
44
-
45
-
46
-
47
-
48
-
49
-
50
-
51
-
52
-
53
-
54
-
55
-
56
-
57
-
58
-
59
-
60
-
61
-
62
-
63
-
64
-
65
-
66
-
67
-
68
-
69
-
70
-
71
-
72
-
73
-
74
-
75
-
76
-
77
-
78
-
79
-
80
-
81
-
82
-
83
-
84
-
85
-
86
-
87
-
88
-
89
-
90
-
91
-
92
-
93
-
94
-
95
-
96
-
97
-
98
-
99
-
100
-
101
-
102
-
103
-
104
-
105
-
106
-
107
-
108
-
109
-
110
-
111
-
112
-
113
-
114
-
115
-
116
-
117
-
118
-
119
-
120
-
121
-
122
-
123
-
124
-
125
-
126
-
127
-
128
-
129
-
130
-
131
-
132
-
133
-
134
-
135
-
136
 |
 |
www.dell.com/supplies | support.dell.com
Dell™ Photo All-In-One Printer 964
Owner’s Manual
Look Inside For:
• Ordering Supplies
• About Your Printer
• Using the Printer
• Understanding the Printer Software
• Maintenance and Troubleshooting
Photo 964