Dell 966 All In One Photo Printer User Guide - Page 115
Dell Photo AIO Printer 966, Dell All-In-One Center, See More Copy Settings, Advanced, Copy Now,
 |
View all Dell 966 All In One Photo Printer manuals
Add to My Manuals
Save this manual to your list of manuals |
Page 115 highlights
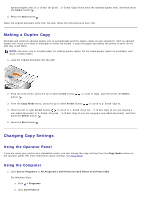
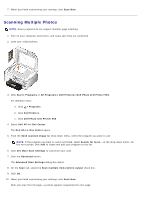
c. Click Dell Photo AIO Printer 966. 2. Select Dell All-In-One Center. The Dell All-In-One Center opens. 3. Select the number of copies (1-99) and color setting from the Copy drop-down menu. 4. Click See More Copy Settings to: Choose a copy quality. Select the paper size. Select the original document size. Lighten or darken your document. Reduce or enlarge your document. 5. Click the Advanced button to change options such as paper size and quality. 6. To make any changes, click the following tabs: Click this tab: Print Scan Image Enhancements Image Patterns To: Select the paper size and type. Select borderless printing options. Select the print quality. Collate copies. Print the last page first. Select the color depth and scan resolution. Auto-crop the scanned image. Adjust the sensitivity of the auto-crop tool. Set the size of the area to be scanned. Straighten images after scan (deskew). Sharpen your blurry images. Adjust the brightness of your image. Adjust the color correction curve (gamma) of your image. Smooth the conversion of a gray image to a black and white dot pattern. Remove image patterns from magazines or newspapers (descreen). Reduce the background noise on your color document. 7. Click OK. 8. When you are finished customizing your settings, click Copy Now.
-
 1
1 -
2
-
3
-
4
-
5
-
6
-
7
-
8
-
9
-
10
-
11
-
12
-
13
-
14
-
15
-
16
-
17
-
18
-
19
-
20
-
21
-
22
-
23
-
24
-
25
-
26
-
27
-
28
-
29
-
30
-
31
-
32
-
33
-
34
-
35
-
36
-
37
-
38
-
39
-
40
-
41
-
42
-
43
-
44
-
45
-
46
-
47
-
48
-
49
-
50
-
51
-
52
-
53
-
54
-
55
-
56
-
57
-
58
-
59
-
60
-
61
-
62
-
63
-
64
-
65
-
66
-
67
-
68
-
69
-
70
-
71
-
72
-
73
-
74
-
75
-
76
-
77
-
78
-
79
-
80
-
81
-
82
-
83
-
84
-
85
-
86
-
87
-
88
-
89
-
90
-
91
-
92
-
93
-
94
-
95
-
96
-
97
-
98
-
99
-
100
-
101
-
102
-
103
-
104
-
105
-
106
-
107
-
108
-
109
-
 110
110 -
 111
111 -
 112
112 -
 113
113 -
 114
114 -
 115
115 -
 116
116 -
 117
117 -
 118
118 -
 119
119 -
 120
120 -
121
-
122
-
123
-
124
-
125
-
126
-
127
-
128
-
129
-
130
-
131
-
132
-
133
-
134
-
135
 |
 |