Dell 966 All In One Photo Printer User Guide - Page 23
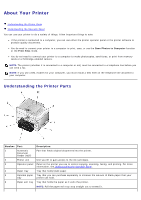
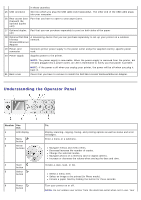
Understanding the Operator Panel
 |
View all Dell 966 All In One Photo Printer manuals
Add to My Manuals
Save this manual to your list of manuals |
Page 23 highlights
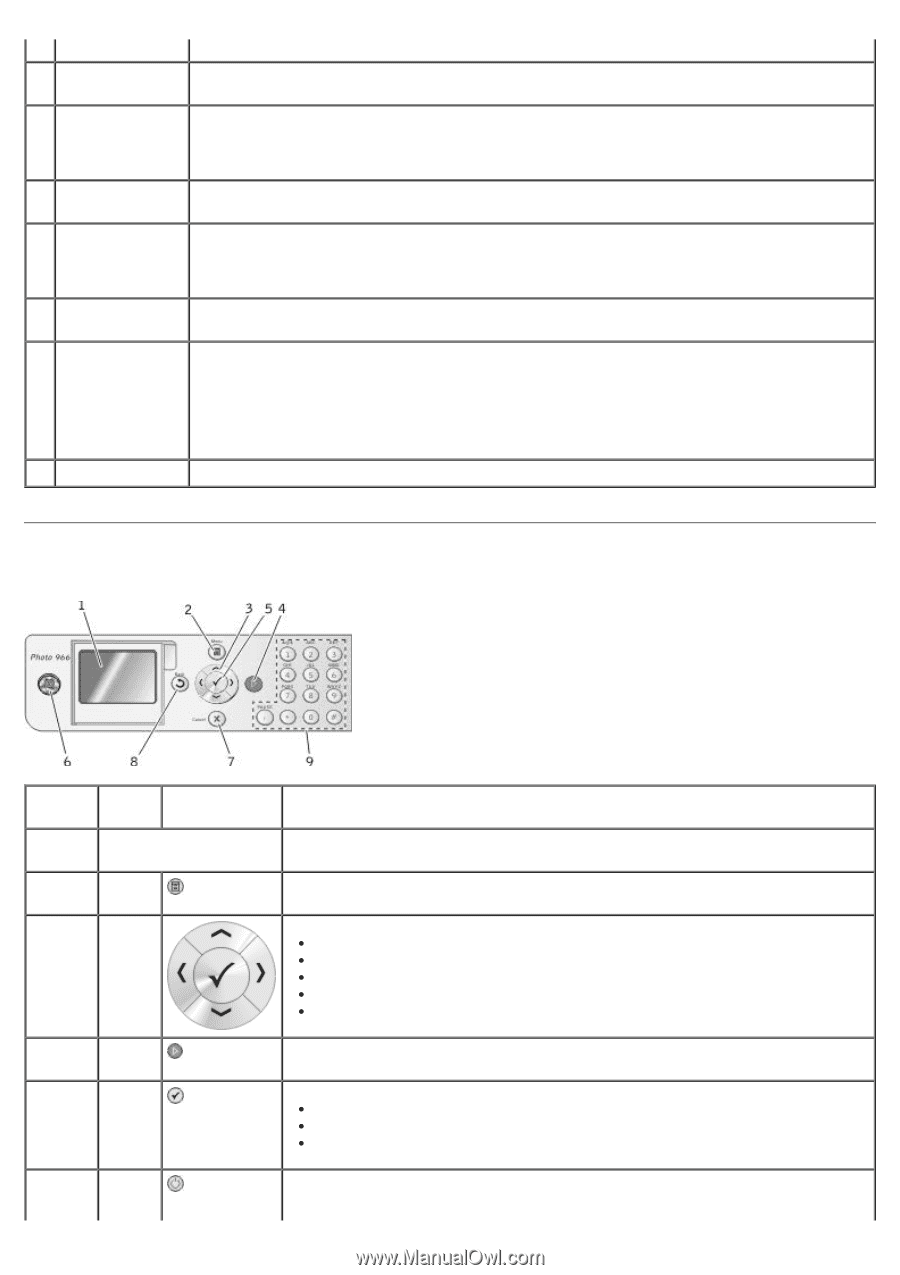
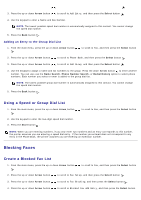
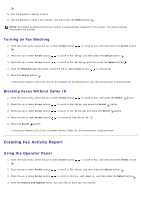
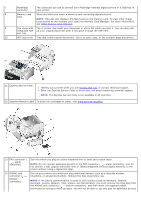
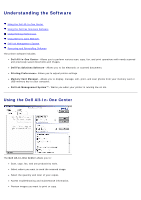
in these countries. 15 USB connector Slot into which you plug the USB cable (sold separately). The other end of the USB cable plugs into your computer. 16 Rear access door (beneath the optional duplex unit) Part that you have to open to clear paper jams. 17 Optional duplex Part that you can purchase separately to print on both sides of the paper. unit 18 Optional Dell 966 A networking device that you can purchase separately to set up your printer on a wireless Internal network. Wireless/Ethernet Adapter 19 Power cord connector Connects printer power supply to the power outlet using the supplied country-specific power cord. 20 Power supply Supplies power to the printer. NOTE: The power supply is removable. When the power supply is removed from the printer, but remains plugged into a power outlet, an LED is illuminated to notify you that power is present. 21 Back cover NOTE: If the power is off when you unplug your printer, the power will be off when you plug it back in. Cover that you have to remove to install the Dell 966 Internal Wireless/Ethernet Adapter. Understanding the Operator Panel Number Use the: 1 LCD display 2 Menu button 3 Arrow buttons 4 Start button 5 Select button 6 Power button To: Display scanning, copying, faxing, and printing options as well as status and error messages. Enter a menu or a submenu. Navigate menus and menu items. Decrease/increase the number of copies. Change the selected modes. Navigate photos on a memory card or digital camera. Increase or decrease the values when setting the date and time. Initiate a copy, scan, or fax. Select a menu item. Select an image to be printed (in Photo mode). Initiate a paper feed by holding the button for three seconds. Turn your printer on or off. NOTE: Do not unplug your printer from the electrical outlet when not in use. Your
-
 1
1 -
2
-
3
-
4
-
5
-
6
-
7
-
8
-
9
-
10
-
11
-
12
-
13
-
14
-
15
-
16
-
17
-
 18
18 -
 19
19 -
 20
20 -
 21
21 -
 22
22 -
 23
23 -
 24
24 -
 25
25 -
 26
26 -
 27
27 -
 28
28 -
29
-
30
-
31
-
32
-
33
-
34
-
35
-
36
-
37
-
38
-
39
-
40
-
41
-
42
-
43
-
44
-
45
-
46
-
47
-
48
-
49
-
50
-
51
-
52
-
53
-
54
-
55
-
56
-
57
-
58
-
59
-
60
-
61
-
62
-
63
-
64
-
65
-
66
-
67
-
68
-
69
-
70
-
71
-
72
-
73
-
74
-
75
-
76
-
77
-
78
-
79
-
80
-
81
-
82
-
83
-
84
-
85
-
86
-
87
-
88
-
89
-
90
-
91
-
92
-
93
-
94
-
95
-
96
-
97
-
98
-
99
-
100
-
101
-
102
-
103
-
104
-
105
-
106
-
107
-
108
-
109
-
110
-
111
-
112
-
113
-
114
-
115
-
116
-
117
-
118
-
119
-
120
-
121
-
122
-
123
-
124
-
125
-
126
-
127
-
128
-
129
-
130
-
131
-
132
-
133
-
134
-
135
 |
 |