Dell 966 All In One Photo Printer User Guide - Page 36

Print Files Mode, Fax Mode
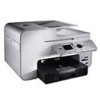
Page 36 highlights

Print Files Mode Use the Print Files mode to print Microsoft® Office files stored on your USB key or memory card. The printer recognizes Microsoft Office files that have filename extensions *.DOC, *.XLS, and *.PPT. To view or change the Print Files Mode menu settings: 1. Make sure that the printer is connected to your computer that has Microsoft Office installed. 2. Insert a memory card into the card slots or a USB key into the PictBridge port. NOTICE: Do not remove the memory card or USB key, or touch the printer near the area of the memory card or USB key while actively reading, writing, or printing from these devices. Data corruption can occur. 3. Press the up or down Arrow button to scroll to Print Files, and then press the Select button. Print Files Mode Menu Menu item Settings Quality Auto* Draft Normal Photo Paper Press the Select button to enter the Paper Handling menu, and then select the size and type of the Handling blank paper loaded in the input tray. If you have an optional input tray, you can also specify the paper source. For more information, see Paper Handling Menu. Change Press the Select button to enter the Print Files Default Settings menu. For more information, see Print Default File Default Settings Menu. Settings * Factory default settings Fax Mode To view or change the Fax Mode menu: 1. From the main menu, press the up or down Arrow button to scroll to Fax. 2. Press the Select button . In order for faxing to function properly: The printer's FAX connector ( -upper connector) must be connected to an active telephone line. See Setting Up the Printer With External Devices for setup details. NOTE: You cannot fax with a DSL (digital subscriber line) or ISDN (integrated signature digital network) unless you purchase a digital line filter. Contact your Internet Service Provider for more details. If you are using the Dell Fax to send a fax from within an application, the printer must be connected to a computer with a USB cable. Fax Options Menu Menu item Action Fax Number Use the keypad to enter the number to which you want to send a fax. The number displays in the Window window.

  • 1
  • 2
  • 3
  • 4
  • 5
  • 6
  • 7
  • 8
  • 9
  • 10
  • 11
  • 12
  • 13
  • 14
  • 15
  • 16
  • 17
  • 18
  • 19
  • 20
  • 21
  • 22
  • 23
  • 24
  • 25
  • 26
  • 27
  • 28
  • 29
  • 30
  • 31
  • 32
  • 33
  • 34
  • 35
  • 36
  • 37
  • 38
  • 39
  • 40
  • 41
  • 42
  • 43
  • 44
  • 45
  • 46
  • 47
  • 48
  • 49
  • 50
  • 51
  • 52
  • 53
  • 54
  • 55
  • 56
  • 57
  • 58
  • 59
  • 60
  • 61
  • 62
  • 63
  • 64
  • 65
  • 66
  • 67
  • 68
  • 69
  • 70
  • 71
  • 72
  • 73
  • 74
  • 75
  • 76
  • 77
  • 78
  • 79
  • 80
  • 81
  • 82
  • 83
  • 84
  • 85
  • 86
  • 87
  • 88
  • 89
  • 90
  • 91
  • 92
  • 93
  • 94
  • 95
  • 96
  • 97
  • 98
  • 99
  • 100
  • 101
  • 102
  • 103
  • 104
  • 105
  • 106
  • 107
  • 108
  • 109
  • 110
  • 111
  • 112
  • 113
  • 114
  • 115
  • 116
  • 117
  • 118
  • 119
  • 120
  • 121
  • 122
  • 123
  • 124
  • 125
  • 126
  • 127
  • 128
  • 129
  • 130
  • 131
  • 132
  • 133
  • 134
  • 135

Print Files Mode
Use the
Print Files
mode to print Microsoft
®
Office files stored on your USB key or memory card. The printer recognizes
Microsoft Office files that have filename extensions *.DOC, *.XLS, and *.PPT.
To view or change the
Print Files Mode
menu settings:
1. Make sure that the printer is connected to your computer that has Microsoft Office installed.
2. Insert a memory card into the card slots or a USB key into the PictBridge port.
3. Press the up or down
Arrow
button
to scroll to
Print Files
, and then press the
Select
button.
Fax Mode
To view or change the
Fax Mode
menu:
1. From the main menu, press the up or down
Arrow
button
to scroll to
Fax
.
2. Press the
Select
button
.
In order for faxing to function properly:
The printer's FAX connector (
—upper connector) must be connected to an active telephone line. See
Setting Up
the Printer With External Devices
for setup details.
NOTE:
You cannot fax with a DSL (digital subscriber line) or ISDN (integrated signature digital network)
unless you purchase a digital line filter. Contact your Internet Service Provider for more details.
If you are using the
Dell Fax
to send a fax from within an application, the printer must be connected to a
computer with a USB cable.
NOTICE:
Do not remove the memory card or USB key, or touch the printer near the area of the memory card
or USB key while actively reading, writing, or printing from these devices. Data corruption can occur.
Print Files Mode Menu
Menu
item
Settings
* Factory default settings
Quality
Auto*
Draft
Normal
Photo
Paper
Handling
Press the
Select
button
to enter the
Paper Handling
menu, and then select the size and type of the
blank paper loaded in the input tray. If you have an optional input tray, you can also specify the paper
source. For more information, see
Paper Handling Menu
.
Change
Default
Settings
Press the
Select
button
to enter the
Print Files Default Settings
menu. For more information, see
Print
File Default Settings Menu
.
Fax Options Menu
Menu item
Action
Fax Number
Window
Use the keypad to enter the number to which you want to send a fax. The number displays in the
window.