Dell 966 All In One Photo Printer User Guide - Page 58
Setting up the Adapter to Work on a Wireless Network
 |
View all Dell 966 All In One Photo Printer manuals
Add to My Manuals
Save this manual to your list of manuals |
Page 58 highlights
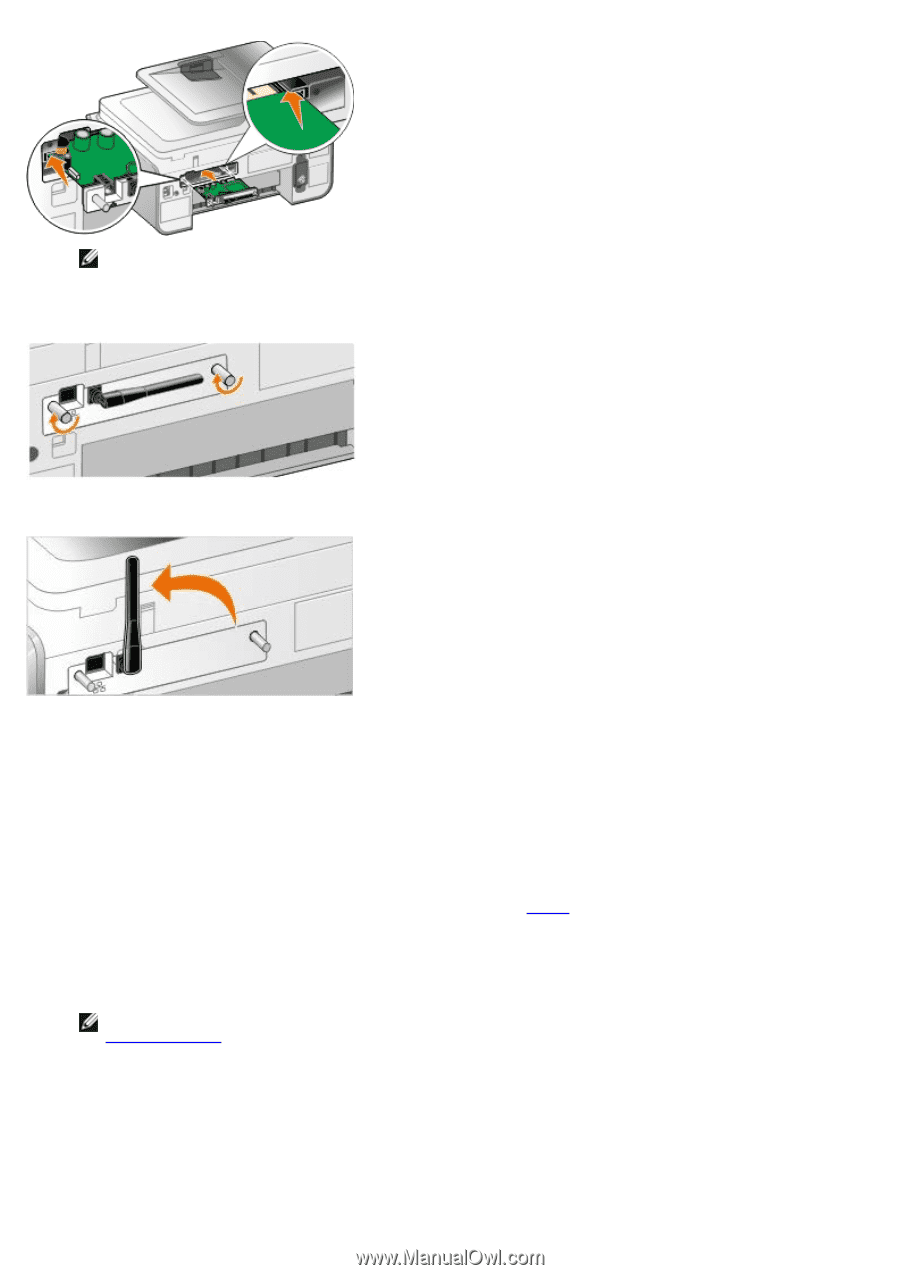
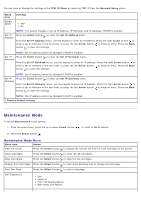
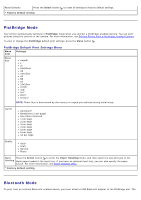
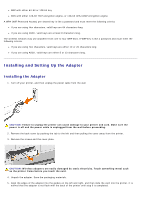
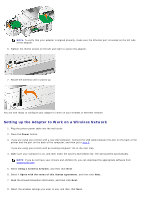
NOTE: To verify that your adapter is aligned properly, make sure the Ethernet port is located on the left side of the adapter. 6. Tighten the thumb screws on the left and right to secure the adapter. 7. Rotate the antenna until it points up. You are now ready to configure your adapter to work on your wireless or Ethernet network. Setting up the Adapter to Work on a Wireless Network 1. Plug the printer power cable into the wall outlet. 2. Press the Power button. 3. If you are using your printer with a new Dell computer: Connect the USB cable between the port on the back of the printer and the port on the back of the computer, and then go to step 8. If you are using your printer with an existing computer: Go to the next step. 4. Make sure your computer is on, and then insert the Drivers and Utilities CD. The CD launches automatically. NOTE: If you do not have your Drivers and Utilities CD, you can download the appropriate software from support.dell.com . 5. Select Using a wireless network, and then click Next. 6. Select I Agree with the terms of this license agreement, and then click Next. 7. Read the Firewall Exception information, and then click Next. 8. Select the wireless settings you want to use, and then click Next.
-
 1
1 -
2
-
3
-
4
-
5
-
6
-
7
-
8
-
9
-
10
-
11
-
12
-
13
-
14
-
15
-
16
-
17
-
18
-
19
-
20
-
21
-
22
-
23
-
24
-
25
-
26
-
27
-
28
-
29
-
30
-
31
-
32
-
33
-
34
-
35
-
36
-
37
-
38
-
39
-
40
-
41
-
42
-
43
-
44
-
45
-
46
-
47
-
48
-
49
-
50
-
51
-
52
-
 53
53 -
 54
54 -
 55
55 -
 56
56 -
 57
57 -
 58
58 -
 59
59 -
 60
60 -
 61
61 -
 62
62 -
 63
63 -
64
-
65
-
66
-
67
-
68
-
69
-
70
-
71
-
72
-
73
-
74
-
75
-
76
-
77
-
78
-
79
-
80
-
81
-
82
-
83
-
84
-
85
-
86
-
87
-
88
-
89
-
90
-
91
-
92
-
93
-
94
-
95
-
96
-
97
-
98
-
99
-
100
-
101
-
102
-
103
-
104
-
105
-
106
-
107
-
108
-
109
-
110
-
111
-
112
-
113
-
114
-
115
-
116
-
117
-
118
-
119
-
120
-
121
-
122
-
123
-
124
-
125
-
126
-
127
-
128
-
129
-
130
-
131
-
132
-
133
-
134
-
135
 |
 |