Dell A940 All In One Personal Printer Faxing
Dell A940 All In One Personal Printer Manual
 |
View all Dell A940 All In One Personal Printer manuals
Add to My Manuals
Save this manual to your list of manuals |
Dell A940 All In One Personal Printer manual content summary:
- Dell A940 All In One Personal Printer | Faxing - Page 1
modem. • Your printer must be connected to the computer with a USB cable. USB cable NOTE: A data/fax modem is not built into your printer. NOTE: DSL (digital subscriber line), ISDN (integrated services digital network) and cable modems are not fax modems and are not supported. computer connector - Dell A940 All In One Personal Printer | Faxing - Page 2
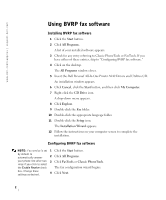
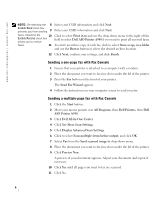
3 Check for any entry referring to Classic PhoneTools or FaxTools. If you have either of these entries, skip to "Configuring BVRP fax software." 4 Click on the desktop. The All Programs window closes. 5 Insert the Dell Personal All-In-One Printer A940 Drivers and Utilities CD. An installation window - Dell A940 All In One Personal Printer | Faxing - Page 3
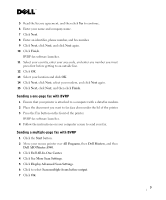
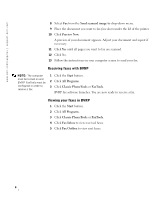
the printer. BVRP fax software launches. 4 Follow the instructions on your computer screen to send your fax. Sending a multiple-page fax with BVRP 1 Click the Start button. 2 Move your mouse pointer over All Programs, then Dell Printers, and then Dell AIO Printer A940. 3 Click Dell All-In-One Center - Dell A940 All In One Personal Printer | Faxing - Page 4
www.dell.com/supplies | support.dell.com 8 Select Fax from the Send scanned image to drop-down menu. 9 Place the document you want to fax face down under the lid of the printer. 10 Click Preview Now. A preview of your document appears. Adjust your document and repeat if necessary. 11 Click Yes - Dell A940 All In One Personal Printer | Faxing - Page 5
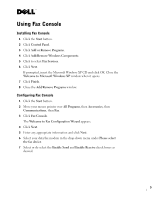
Installing Fax Console 1 Click the Start button. 2 Click Control Panel. 3 Click Add or Remove Programs. 4 Click Add/Remove Windows Components. 5 Click to select Fax Services. 6 Click Next. If prompted, insert the Microsoft Windows XP CD and click OK. Close the Welcome to Microsoft Windows XP window - Dell A940 All In One Personal Printer | Faxing - Page 6
Wizard appears. 4 Follow the instructions on your computer screen to send your fax. Sending a multiple-page fax with Fax Console 1 Click the Start button. 2 Move your mouse pointer over All Programs, then Dell Printers, then Dell AIO Printer A940. 3 Click Dell All-In-One Center. 4 Click See More - Dell A940 All In One Personal Printer | Faxing - Page 7
check troubleshooting If you are having trouble sending or receiving a fax, ensure that: • Your computer is equipped with a working data/fax modem. • An active phone line is connected to the line-in connector of your data/fax modem. • Faxing software is installed and configured. • Your printer - Dell A940 All In One Personal Printer | Faxing - Page 8
www.dell.com/supplies | support.dell.com 8
-
 1
1 -
 2
2 -
 3
3 -
 4
4 -
 5
5 -
 6
6 -
 7
7 -
8
 |
 |

1
Faxing
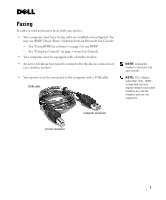
In order to send and receive faxes with your printer:
•
Your computer must have faxing software installed and configured. You
may use BVRP Classic Phone Tools/FaxTools
or
Microsoft Fax Console.
–
See "Using BVRP fax software" on page2 to use BVRP.
–
See "Using Fax Console" on page 5 to use Fax Console.
•
Your computer must be equipped with a data/fax modem.
NOTE:
A data/fax
modem is not built into
your printer.
•
An active telephone line must be connected to the line-in connector of
your data/fax modem.
NOTE:
DSL (digital
subscriber line), ISDN
(integrated services
digital network) and cable
modems are
not
fax
modems and are
not
supported.
•
Your printer must be connected to the computer with a USB cable.
printer connector
computer connector
USB cable