Dell Alienware Area-51 Service Manual
Dell Alienware Area-51 Manual
 |
View all Dell Alienware Area-51 manuals
Add to My Manuals
Save this manual to your list of manuals |
Dell Alienware Area-51 manual content summary:
- Dell Alienware Area-51 | Service Manual - Page 1
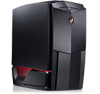
ALIENWARE® AREA-51 SERVICE MANUAL 01 /01 - Dell Alienware Area-51 | Service Manual - Page 2
how to avoid the problem. WARNING: A WARNING manual: Alienware is a registered trademark of Alienware Corporation. Dell is a trademark of Dell Inc.; Intel and SpeedStep are registered trademarks of Intel Corporation in the U.S. and other countries; Microsoft, Windows, Windows Vista, and Windows - Dell Alienware Area-51 | Service Manual - Page 3
Right Bottom-Panel 18 Removing the Chassis-Intrusion Switch 19 Replacing the Chassis-Intrusion Switch 19 CONTENTS CHAPTER 4: SHROUDS 20 Removing the PCI Shroud 22 Replacing the PCI Shroud 22 Removing the Drive-Bay Shroud 23 Replacing the Drive-Bay Shroud 23 CHAPTER 5: MEMORY MODULE(S 24 - Dell Alienware Area-51 | Service Manual - Page 4
CHAPTER 8: FRONT BEZEL 44 Removing the Front Bezel 46 Replacing the Front Bezel 46 CHAPTER 9: FANS 47 Removing the PCI Fan 49 Replacing the PCI Fan 50 Removing the Hard-Drive Fan(s 51 Replacing the Hard-Drive Fan(s 52 CHAPTER 10: ACTIVE-VENTING ASSEMBLY 53 Removing the Active-Venting - Dell Alienware Area-51 | Service Manual - Page 5
Batteries 91 Replacing the Theater-Lighting Batteries 92 CHAPTER 19: SYSTEM SETUP 93 Overview 95 Entering System Setup 95 System Setup Options 96 Clearing CMOS Settings 102 Flashing the BIOS 103 CONTENTS 05 /05 - Dell Alienware Area-51 | Service Manual - Page 6
CHAPTER 1: BEFORE YOU BEGIN CHAPTER 1: BEFORE YOU BEGIN CHAPTER 1: BEFORE YOU BEGIN This manual provides procedures for removing and installing the components in your computer. Unless otherwise noted, each procedure assumes that the following conditions exist: • You have performed - Dell Alienware Area-51 | Service Manual - Page 7
Recommended Tools The procedures in this document may require the following tools: • Small flat-blade screwdriver • Phillips screwdriver CHAPTER 1: BEFORE YOU BEGIN Turning Off Your Computer CAUTION: To avoid losing data, save and close all open files and exit all open programs before you turn off - Dell Alienware Area-51 | Service Manual - Page 8
instructions servicing that is not authorized by Dell™ is not covered by your warranty. CAUTION: Handle components and cards with care. Do not touch the components or contacts on a card. Hold a card by its edges. Hold a component such as a processor to support the computer with the side panel(s) - Dell Alienware Area-51 | Service Manual - Page 9
CHAPTER 2: TECHNICAL OVERVIEW CHAPTER 2: TECHNICAL OVERVIEW CHAPTER 2: TECHNICAL OVERVIEW 09 /09 - Dell Alienware Area-51 | Service Manual - Page 10
Technical Overview WARNING: Before working inside your computer, read the safety information that shipped with your computer. For additional safety best practices information, see the Regulatory Compliance Homepage at www.dell.com/regulatory_compliance. CHAPTER 2: TECHNICAL OVERVIEW 010 /010 - Dell Alienware Area-51 | Service Manual - Page 11
internal USB header (USB2) 3 CPU-fan connector (CPUFAN1) 17 internal USB header (USB3) 4 memory-module connector (DIMM1) 18 IEEE 1394 header (1394_1) 5 memory-module connector (DIMM2) 19 S/PDIF header (SPDIF_IN) 6 memory-module connector (DIMM3) 20 front-panel audio connector (FP_AUDIO) 7 main - Dell Alienware Area-51 | Service Manual - Page 12
Master I/O Board Components 1 2 34 76 5 CHAPTER 2: TECHNICAL OVERVIEW 1 fan connector (FANCONN1) 2 PCI-fan connector (PCI_FAN1) 3 hard-drive fan connector (HDD_FAN2) 4 hard-drive fan connector (HDD_FAN1) 5 system-board USB header (MB_USB1) 6 bluetooth-module connector (BLUETOOTH) 7 wireless- - Dell Alienware Area-51 | Service Manual - Page 13
CHAPTER 3: CHASSIS CHAPTER 3: CHASSIS CHAPTER 3: CHASSIS 013 /013 - Dell Alienware Area-51 | Service Manual - Page 14
side panels, bezels, filler brackets, front-panel inserts, etc.) removed. CAUTION: Only a certified service technician should perform repairs on your computer. Damage due to servicing that CAUTION: Ensure that sufficient space exists to support the computer with the side panel(s) opened. 014 /014 - Dell Alienware Area-51 | Service Manual - Page 15
and rotate it away from the chassis to release it from the hinges. Replacing the Left Side-Panel 1. Follow the instructions in "Before You Begin" on page 6. 2. If the left side-panel was removed completely from the chassis, align it with the hinges and replace it in the chassis. 3. Push the left - Dell Alienware Area-51 | Service Manual - Page 16
and rotate it away from the chassis to release it from the hinges. Replacing the Right Side-Panel 1. Follow the instructions in "Before You Begin" on page 6. 2. If the right side-panel was removed completely from the chassis, align it with the hinges and replace it in the chassis. 3. Push the right - Dell Alienware Area-51 | Service Manual - Page 17
SIDE_LEFT connector on the master I/O board. 4. Press out to release the left bottom-panel clamps that secure the left bottom-panel to the chassis. 5. Remove the left bottom-panel. Replacing the Left Bottom-Panel 1. Follow the instructions in "Before You Begin" on page 6. 2. Route the left bottom - Dell Alienware Area-51 | Service Manual - Page 18
Remove the hard-drive fans (see "Removing the Hard-Drive Fan(s)" on page 51). 5. Press out to release the right bottom-panel clamps that secure the right bottom-panel to the chassis. 6. Remove the right bottom-panel. Replacing the Right Bottom-Panel 1. Follow the instructions in "Before You Begin - Dell Alienware Area-51 | Service Manual - Page 19
Removing the Chassis-Intrusion Switch 1. Follow the instructions in "Before You Begin" on page 6. 2. Remove the left side-panel (see "Removing the Left Side-Panel" on page 15). 3. Disconnect the chassis-intrusion switch cable from the master I/O board connector. 4. Slide the chassis-intrusion switch - Dell Alienware Area-51 | Service Manual - Page 20
CHAPTER 4: SHROUDS CHAPTER 4: SHROUDS CHAPTER 4: SHROUDS 020 /020 - Dell Alienware Area-51 | Service Manual - Page 21
: Do not operate your equipment with any cover(s) (including side panels, bezels, filler brackets, front-panel inserts, etc.) removed. CAUTION: Only a certified service technician should perform repairs on your computer. Damage due to servicing that is not authorized by Dell™ is not covered by your - Dell Alienware Area-51 | Service Manual - Page 22
Shroud 1. Follow the instructions in "Before You Begin" on page 6. 2. Lift the release panel and open the left side-panel 3. Press the PCI- PCI shroud up and away from the chassis. Replacing the PCI Shroud 1. Follow the instructions in "Before You Begin" on page 6. 2. If the PCI shroud was removed - Dell Alienware Area-51 | Service Manual - Page 23
Removing the Drive-Bay Shroud 1. Follow the instructions in "Before You Begin" on page 6. 2. Remove the left side-panel (see "Removing the Left Side-Panel" on page 15). 3. Remove the PCI shroud (see "Removing the PCI Shroud" on page 22). 4. Disconnect the drive-bay shroud cables from the master I/O - Dell Alienware Area-51 | Service Manual - Page 24
board. See the specifications in your Desktop Manual or in the Comprehensive Specifications at support.dell.com for information on the memory supported by your computer. Install only memory modules that are supported by your computer. NOTE: Memory modules purchased from Dell or Alienware are covered - Dell Alienware Area-51 | Service Manual - Page 25
: Do not operate your equipment with any cover(s) (including side panels, bezels, filler brackets, front-panel inserts, etc.) removed. CAUTION: Only a certified service technician should perform repairs on your computer. Damage due to servicing that is not authorized by Dell™ is not covered by your - Dell Alienware Area-51 | Service Manual - Page 26
Removing Memory Module(s) 1. Follow the instructions in "Before You Begin" on page 6. 2. Lift the release panel and open the left side-panel. 3. Locate the memory-module connectors on the system board (see "System Board Connectors" on page 11). CAUTION: The memory module(s) may become very hot - Dell Alienware Area-51 | Service Manual - Page 27
Module(s) 1. Follow the instructions in "Before You Begin" on page 6. 2. Align the notch on the bottom of the memory module with the tab on the memory-module connector. CAUTION: To avoid damage to the memory module, press the memory module straight down into the memory-module connector while you - Dell Alienware Area-51 | Service Manual - Page 28
boots, it detects the additional memory and automatically updates the system configuration information. To confirm the amount of memory installed in the computer: Windows Vista® Click Start → Control Panel→ System and Maintenance. Windows® 7 Click Start → Control Panel→ System and Security→ System - Dell Alienware Area-51 | Service Manual - Page 29
CHAPTER 6: PCI AND PCI-EXPRESS CARDS CHAPTER 6: PCI AND PCI-EXPRESS CARDS CHAPTER 6: PCI AND PCI-EXPRESS CARDS 029 /029 - Dell Alienware Area-51 | Service Manual - Page 30
: Do not operate your equipment with any cover(s) (including side panels, bezels, filler brackets, front-panel inserts, etc.) removed. CAUTION: Only a certified service technician should perform repairs on your computer. Damage due to servicing that is not authorized by Dell™ is not covered by your - Dell Alienware Area-51 | Service Manual - Page 31
Removing PCI and PCI-Express Cards 1. Follow the instructions in "Before You Begin" on page 6. 2. Lift the release panel and open the left side-panel. 3. Remove the PCI shroud (see "Removing the PCI Shroud" on page 22). 4. Disconnect any cables connected to the card (if applicable). 5. Remove the - Dell Alienware Area-51 | Service Manual - Page 32
Replacing PCI and PCI-Express Cards 1. Follow the instructions in "Before You Begin" on page 6. 2. Remove the Replace the PCI shroud (see "Replacing the PCI Shroud" on page 22). 7. Close the left side-panel. 8. Connect your computer and devices to electrical outlets, and then turn them on. 2 3 1 PCI - Dell Alienware Area-51 | Service Manual - Page 33
CHAPTER 7: DRIVES CHAPTER 7: DRIVES CHAPTER 7: DRIVES 033 /033 - Dell Alienware Area-51 | Service Manual - Page 34
(s) (including side panels, bezels, filler brackets, front-panel inserts, etc.) removed. WARNING: If you remove the hard drive from the computer when the drive is hot, do not touch the metal housing of the hard drive. CHAPTER 7: DRIVES CAUTION: Only a certified service technician should perform - Dell Alienware Area-51 | Service Manual - Page 35
Removing Optical Drive(s) 1. Follow the instructions in "Before You Begin" on page 6. 2. Press the AlienHead to lower the drive panel. 1 drive panel CHAPTER 7: DRIVES 1 2 2 AlienHead 035 /035 - Dell Alienware Area-51 | Service Manual - Page 36
3. Lift the release panel and open the left side-panel. 4. Disconnect the power cable and the data cable from the back of the optical drive. 5. Pull the securing tab on the optical-drive bracket and slide the optical drive out through the front of the computer. 3 2 1 CHAPTER 7: DRIVES 4 1 data - Dell Alienware Area-51 | Service Manual - Page 37
(s) 1. Follow the instructions in "Before You -drive bracket and slide the optical-drive bay filler out through the front of the computer. 4. Pull the securing tab on the optical-drive optical drive. 6. Close the left side-panel. 7. Connect your computer and devices to electrical outlets, and then turn them - Dell Alienware Area-51 | Service Manual - Page 38
Removing the Media Card Reader 1. Follow the instructions in "Before You Begin" on page 6. 2. Press the AlienHead to lower the drive panel. 1 drive panel CHAPTER 7: DRIVES 1 2 2 AlienHead 038 /038 - Dell Alienware Area-51 | Service Manual - Page 39
and open the left side-panel. 4. Disconnect the FlexBay cable from the back of the Media Card Reader. 2 5. Pull the securing tab on the FlexBay bracket and slide the Media Card Reader out through the front of the computer. 1 CHAPTER 7: DRIVES 3 1 FlexBay cable 2 Media Card Reader 3 securing - Dell Alienware Area-51 | Service Manual - Page 40
Reader 1. Follow the instructions in "Before You on the FlexBay bracket and slide the FlexBay filler out through the front of the computer. 4. Pull the securing tab on the FlexBay bracket Card Reader. 6. Close the left side-panel. 7. Connect your computer and devices to electrical outlets, and then turn - Dell Alienware Area-51 | Service Manual - Page 41
Removing Hard Drive(s) 1. Follow the instructions in "Before You Begin" on page 6. 2. Lift the release panel and open the right side-panel. 1 3. Press the hard-drive release tabs simultaneously and slide the hard drive towards the top and out of the computer. 2 CHAPTER 7: DRIVES 1 hard-drive - Dell Alienware Area-51 | Service Manual - Page 42
4. If you are removing a solid-state drive (SSD): a. Remove the four screws that secure the SSD to the hard-drive bracket. b. Slide and lift the SSD out of the hard-drive bracket. 1 2 3 1 screws (4) 2 hard-drive bracket CHAPTER 7: DRIVES 3 SSD 042 /042 - Dell Alienware Area-51 | Service Manual - Page 43
Replacing Hard Drive(s) 1. Follow the instructions in "Before You Begin" on page 6. 1 NOTE: drive connector. 4. Press the hard drive down until it locks into place. 5. Close the right side-panel. 6. Connect your computer and devices to electrical outlets, and then turn them on. 1 hard drive CHAPTER - Dell Alienware Area-51 | Service Manual - Page 44
CHAPTER 8: FRONT BEZEL CHAPTER 8: FRONT BEZEL CHAPTER 8: FRONT BEZEL 044 /044 - Dell Alienware Area-51 | Service Manual - Page 45
: Do not operate your equipment with any cover(s) (including side panels, bezels, filler brackets, front-panel inserts, etc.) removed. CAUTION: Only a certified service technician should perform repairs on your computer. Damage due to servicing that is not authorized by Dell™ is not covered by your - Dell Alienware Area-51 | Service Manual - Page 46
Right Side-Panel" on page 16). 4. Disconnect the front-bezel cables from the master I/O board connectors. 5. Release the front-bezel clamps that secure the front bezel to the chassis. 6. Pull the front bezel away from the front of the computer. Replacing the Front Bezel 1. Follow the instructions in - Dell Alienware Area-51 | Service Manual - Page 47
CHAPTER 9: FANS CHAPTER 9: FANS CHAPTER 9: FANS 047 /047 - Dell Alienware Area-51 | Service Manual - Page 48
: Do not operate your equipment with any cover(s) (including side panels, bezels, filler brackets, front-panel inserts, etc.) removed. CAUTION: Only a certified service technician should perform repairs on your computer. Damage due to servicing that is not authorized by Dell™ is not covered by your - Dell Alienware Area-51 | Service Manual - Page 49
Removing the PCI Fan 1. Follow the instructions in "Before You Begin" on page 6. 2. Remove the left side-panel (see "Removing the Left Side-Panel" on page 15). 3. Remove the drive-bay shroud (see "Removing the Drive-Bay Shroud" on page 23). 4. Disconnect the PCI-fan cable from the PCI_FAN1 connector - Dell Alienware Area-51 | Service Manual - Page 50
the four rubber grommets that secure the PCI fan to the PCI-fan shroud. 3 2 1 CHAPTER 9: FANS Replacing the PCI Fan 1. Follow the instructions in "Before You Begin" on page 6. 2. Orient the PCI-fan cable downward and replace the PCI fan in the PCI-fan shroud. 3. Align the rubber grommets with the - Dell Alienware Area-51 | Service Manual - Page 51
the Hard-Drive Fan(s) 1. Follow the instructions in "Before You Begin" on page 6. 2. Remove the left side-panel (see "Removing the Left Side-Panel" on page 15). 3. Remove the PCI shroud (see "Removing the PCI Shroud" on page 22). 2 4. If you are removing the left hard-drive fan, remove the - Dell Alienware Area-51 | Service Manual - Page 52
Fan(s) 1. Follow the instructions in "Before You Begin" on page 6. 2. Replace the hard-drive fan in the hard-drive fan shroud. 3. Replace the two screws that secure the hard-drive fan to the hard-drive fan shroud. 4. Push the hard-drive fan left side-panel (see "Replacing the Left Side-Panel" on page - Dell Alienware Area-51 | Service Manual - Page 53
CHAPTER 10: ACTIVE-VENTING ASSEMBLY CHAPTER 10: ACTIVE-VENTING ASSEMBLY CHAPTER 10: ACTIVE-VENTING ASSEMBLY 053 /053 - Dell Alienware Area-51 | Service Manual - Page 54
: Do not operate your equipment with any cover(s) (including side panels, bezels, filler brackets, front-panel inserts, etc.) removed. CAUTION: Only a certified service technician should perform repairs on your computer. Damage due to servicing that is not authorized by Dell™ is not covered by your - Dell Alienware Area-51 | Service Manual - Page 55
Removing the Active-Venting Assembly 1. Follow the instructions in "Before You Begin" on page 6. 2. Remove the left side-panel (see "Removing the Left Side-Panel" on page 15). 3. Remove the right side-panel (see "Removing the Right Side-Panel" on page 16). 4. Disconnect the active-venting assembly - Dell Alienware Area-51 | Service Manual - Page 56
-Venting Assembly 1. Follow the instructions in "Before You Begin" on page 6. 2. Replace the active-venting assembly on the chassis. 3. Replace the six screws (three on each side) that secure the active-venting assembly to the chassis. 4. Replace the active-venting panels. 5. Replace the six screws - Dell Alienware Area-51 | Service Manual - Page 57
CHAPTER 11: TOP I/O PANEL CHAPTER 11: TOP I/O PANEL CHAPTER 11: TOP I/O PANEL 057 /057 - Dell Alienware Area-51 | Service Manual - Page 58
: Do not operate your equipment with any cover(s) (including side panels, bezels, filler brackets, front-panel inserts, etc.) removed. CAUTION: Only a certified service technician should perform repairs on your computer. Damage due to servicing that is not authorized by Dell™ is not covered by your - Dell Alienware Area-51 | Service Manual - Page 59
1. Follow the instructions in "Before You Begin" on page 6. 1 2. Remove the left side-panel (see "Removing the Left Side-Panel" on page 15). 3. Remove the right side-panel (see "Removing the Right Side-Panel" on page 16). 4. Remove the front bezel (see "Removing the Front Bezel" on page 46 - Dell Alienware Area-51 | Service Manual - Page 60
the top I/O panel cables from the system board connectors and remove the cables from their routing guides. 9. Remove the four screws that secure the top I/O panel to the chassis. 10. Pull the top I/O panel off the chassis. CHAPTER 11: TOP I/O PANEL 1 2 1 screws (4) 2 top I/O panel 060 /060 - Dell Alienware Area-51 | Service Manual - Page 61
hard-drive shroud to the chassis. 8. Replace the front bezel (see "Replacing the Front Bezel" on page 46). 9. Replace the right side-panel (see "Replacing the Right Side-Panel" on page 16). 10. Replace the left side-panel (see "Replacing the Left Side-Panel" on page 15). 11. Connect your computer - Dell Alienware Area-51 | Service Manual - Page 62
CHAPTER 12: BLUETOOTH MODULE CHAPTER 12: BLUETOOTH MODULE CHAPTER 12: BLUETOOTH MODULE 062 /062 - Dell Alienware Area-51 | Service Manual - Page 63
: Do not operate your equipment with any cover(s) (including side panels, bezels, filler brackets, front-panel inserts, etc.) removed. CAUTION: Only a certified service technician should perform repairs on your computer. Damage due to servicing that is not authorized by Dell™ is not covered by your - Dell Alienware Area-51 | Service Manual - Page 64
Removing the Bluetooth Module 1. Follow the instructions in "Before You Begin" on page 6. 2. Remove the left side-panel (see "Removing the Left Side-Panel" on page 15). 3. Disconnect the Bluetooth®-module cable from the BLUETOOTH connector on the master I/O board (see "Master I/O Board Connectors" - Dell Alienware Area-51 | Service Manual - Page 65
Replacing the Bluetooth Module 1. Follow the instructions in "Before You Begin" on page 6. 2. Replace the see "Master I/O Board Connectors" on page 12). 5. Replace the left side-panel (see "Replacing the Left Side-Panel" on page 15). 6. Connect your computer and devices to electrical outlets, and - Dell Alienware Area-51 | Service Manual - Page 66
CHAPTER 13: LIQUID-COOLING ASSEMBLY CHAPTER 13: LIQUID-COOLING ASSEMBLY CHAPTER 13: LIQUID-COOLING ASSEMBLY 066 /066 - Dell Alienware Area-51 | Service Manual - Page 67
: Do not operate your equipment with any cover(s) (including side panels, bezels, filler brackets, front-panel inserts, etc.) removed. CAUTION: Only a certified service technician should perform repairs on your computer. Damage due to servicing that is not authorized by Dell™ is not covered by your - Dell Alienware Area-51 | Service Manual - Page 68
Removing the Liquid-Cooling Assembly 1. Follow the instructions in "Before You Begin" on page 6. 2. Remove the left side-panel (see "Removing the Left Side-Panel" on page 15). 3. Disconnect the liquid-cooling assembly cable from the liquid-cooling assembly. 4. Push the release latch towards the back - Dell Alienware Area-51 | Service Manual - Page 69
1. Follow the instructions in "Before You Begin" on page 6. 2. Replace the liquid-cooling assembly in the chassis and rotate the liquid‑cooling assembly upwards until it snaps into place. 3. Connect the liquid-cooling assembly cable to the liquid-cooling assembly. 4. Replace the left side-panel (see - Dell Alienware Area-51 | Service Manual - Page 70
CHAPTER 14: PROCESSOR CHAPTER 14: PROCESSOR CHAPTER 14: PROCESSOR 070 /070 - Dell Alienware Area-51 | Service Manual - Page 71
: Do not operate your equipment with any cover(s) (including side panels, bezels, filler brackets, front-panel inserts, etc.) removed. CAUTION: Only a certified service technician should perform repairs on your computer. Damage due to servicing that is not authorized by Dell™ is not covered by your - Dell Alienware Area-51 | Service Manual - Page 72
Removing the Processor 1. Follow the instructions in "Before You Begin" on page 6. 2. Remove the left side-panel (see "Removing the Left Side-Panel" on page 15). 3. Remove the PCI shroud (see "Removing the PCI Shroud" on page 22). 4. Remove the liquid-cooling assembly (see "Removing the Liquid- - Dell Alienware Area-51 | Service Manual - Page 73
you install the processor. 5. Set the processor lightly in the socket and ensure that the processor is positioned correctly. 6. When the processor is fully seated in the socket, close the processor cover. Ensure that the tab on the processor cover is positioned underneath the center cover latch on - Dell Alienware Area-51 | Service Manual - Page 74
grease to the top of the processor. 9. Replace the liquid-cooling assembly (see "Replacing the Liquid-Cooling Assembly" on page 69). 10. Replace the PCI shroud (see "Replacing the PCI Shroud" on page 22). 11. Replace the left side-panel (see "Replacing the Left Side-Panel" on page 15). 12. Connect - Dell Alienware Area-51 | Service Manual - Page 75
CHAPTER 15: MASTER I/O BOARD CHAPTER 15: MASTER I/O BOARD CHAPTER 15: MASTER I/O BOARD 075 /075 - Dell Alienware Area-51 | Service Manual - Page 76
: Do not operate your equipment with any cover(s) (including side panels, bezels, filler brackets, front-panel inserts, etc.) removed. CAUTION: Only a certified service technician should perform repairs on your computer. Damage due to servicing that is not authorized by Dell™ is not covered by your - Dell Alienware Area-51 | Service Manual - Page 77
Removing the Master I/O Board 1. Follow the instructions in "Before You Begin" on page 6. 2. Remove the left side-panel (see "Removing the Left Side-Panel" on page 15). 3. Remove the PCI shroud (see "Removing the PCI Shroud" on page 22). 4. Disconnect all cables from the master I/O board. Note the - Dell Alienware Area-51 | Service Manual - Page 78
Replacing the Master I/O Board 1. Follow the instructions in "Before You Begin" on page 6. 2. Replace the (see "Replacing the PCI Shroud" on page 22). 6. Replace the left side-panel (see "Replacing the Left Side-Panel" on page 15). CAUTION: Before turning on the computer, replace all screws and - Dell Alienware Area-51 | Service Manual - Page 79
CHAPTER 16: SYSTEM BOARD CHAPTER 16: SYSTEM BOARD CHAPTER 16: SYSTEM BOARD 079 /079 - Dell Alienware Area-51 | Service Manual - Page 80
panels, bezels, filler brackets, front-panel inserts, etc.) removed. CAUTION: Only a certified service technician should perform repairs on your computer. Damage due to servicing . For information on contacting Dell, see your Desktop Manual. CAUTION: To avoid electrostatic discharge, ground yourself - Dell Alienware Area-51 | Service Manual - Page 81
PCI Express Cards" on page 31). 5. Remove the memory modules (see "Removing Memory Module(s)" on page 26). 6. Remove the liquid-cooling assembly (see "Removing the Liquid-Cooling Assembly" on page 68). 7. Remove the processor (see "Removing the Processor" on page 72). 8. Disconnect all cables from - Dell Alienware Area-51 | Service Manual - Page 82
1. Follow the instructions in "Before You Begin" on page 6. 2. Replace the system-board tray in the chassis. 3. Replace the two screws that secure the system-board tray to the chassis. 4. Route and connect the cables that you removed from the system board. 5. Replace the processor (see "Replacing - Dell Alienware Area-51 | Service Manual - Page 83
CHAPTER 17: POWER SUPPLY CHAPTER 17: POWER SUPPLY CHAPTER 17: POWER SUPPLY 083 /083 - Dell Alienware Area-51 | Service Manual - Page 84
: Do not operate your equipment with any cover(s) (including side panels, bezels, filler brackets, front-panel inserts, etc.) removed. CAUTION: Only a certified service technician should perform repairs on your computer. Damage due to servicing that is not authorized by Dell™ is not covered by your - Dell Alienware Area-51 | Service Manual - Page 85
Removing the Power Supply 1. Follow the instructions in "Before You Begin" on page 6. 2. Remove the left side-panel (see "Removing the Left Side-Panel" on page 15). 3. Remove the PCI shroud (see "Removing the PCI Shroud" on page 22). 4. Push the power-supply handle inwards to unlock it. 5. Using - Dell Alienware Area-51 | Service Manual - Page 86
the instructions in "Before You Begin" on page 6. 2. Replace the power supply in the chassis and partially slide it towards the front of the PCI Shroud" on page 22). 7. Replace the left side-panel (see "Replacing the Left Side-Panel" on page 15). 8. Connect your computer and devices to electrical - Dell Alienware Area-51 | Service Manual - Page 87
CHAPTER 18: BATTERY CHAPTER 18: BATTERY CHAPTER 18: BATTERY 087 /087 - Dell Alienware Area-51 | Service Manual - Page 88
: Do not operate your equipment with any cover(s) (including side panels, bezels, filler brackets, front-panel inserts, etc.) removed. CAUTION: Only a certified service technician should perform repairs on your computer. Damage due to servicing that is not authorized by Dell™ is not covered by your - Dell Alienware Area-51 | Service Manual - Page 89
see "System Setup" on page 93) so that you can restore the correct settings after the new battery has been installed. 2. Follow the instructions in "Before You Begin" on page 6. 3. Lift the release panel and open the left side-panel. 4. Remove the PCI shroud (see "Removing the PCI Shroud" on page 22 - Dell Alienware Area-51 | Service Manual - Page 90
1. Follow the instructions in "Before You Begin" on page 6. 2. Insert the new battery (CR2032) into the socket with the side labeled "+" facing up, and press the battery into place. 3. Replace the PCI shroud (see "Replacing the PCI Shroud" on page 22). 4. Close the left-side panel. 5. Connect your - Dell Alienware Area-51 | Service Manual - Page 91
Removing the Theater-Lighting Batteries 1. Follow the instructions in "Before You Begin" on page 6. 2. Lift the release panel and open the left side-panel. 3. Open the theater-lighting battery-compartment door. 4. Remove the two theater-lighting batteries. CHAPTER 18: BATTERY 1 2 1 theater- - Dell Alienware Area-51 | Service Manual - Page 92
Lighting Batteries 1. Follow the instructions in "Before You Begin" on page 6. 2. Insert the two new batteries (rechargeable AA, NiMH type) in the theater- lighting battery compartment. 3. Close the theater-lighting battery-compartment door. 4. Close the left side-panel. 5. Connect your computer and - Dell Alienware Area-51 | Service Manual - Page 93
CHAPTER 19: SYSTEM SETUP CHAPTER 19: SYSTEM SETUP CHAPTER 19: SYSTEM SETUP 093 /093 - Dell Alienware Area-51 | Service Manual - Page 94
: Do not operate your equipment with any cover(s) (including side panels, bezels, filler brackets, front-panel inserts, etc.) removed. CAUTION: Only a certified service technician should perform repairs on your computer. Damage due to servicing that is not authorized by Dell™ is not covered by your - Dell Alienware Area-51 | Service Manual - Page 95
in your desktop. • Set or change a user-selectable option such as the user password. • View the installed amount of memory or set the type logo appears, continue to wait until you see the Microsoft® Windows® desktop, then shut down your desktop and try again. NOTE: Keyboard failure may result when a - Dell Alienware Area-51 | Service Manual - Page 96
Version Displays the BIOS version, number, and date information. Input Service Tag Allows you to input the service tag. Service Tag Displays the service tag of the computer. Asset Tag Displays the asset tag of the computer. Memory Installed Displays the amount of memory installed in your - Dell Alienware Area-51 | Service Manual - Page 97
dynamically updated according to the hard drives detected. Sets the CD/DVD drive boot priority. Enable XD Bit Capability to allow the processor to distinguish between the bits of code that can be executed and the ones that cannot be executed. If enabled, the processor clock speed and core voltage - Dell Alienware Area-51 | Service Manual - Page 98
action the computer takes when power is restored. Sets the system to wake up from an onboard LAN, PCIE-X1 LAN card, or a PCI LAN card. Allows the computer to start up at a certain time. Displays the current processor speed. Displays the current memory speed. Displays current QPI Speed. Allows you to - Dell Alienware Area-51 | Service Manual - Page 99
the factory (only displayed with an XE processor). CHAPTER 19: SYSTEM SETUP Advance DRAM Configuration Submenu Memory-Z Opens submenu to display the SPD configuration for each memory module. Advanced Memory Settings Allows you to toggle to Manual mode and set all of the timing parameters. tCL - Dell Alienware Area-51 | Service Manual - Page 100
Temperature Sensor VCore Dynamic CPU VCore Offset DDR3 Memory Voltage IOH Voltage QPI and Uncore Voltage Displays the processor temperature in Celsius and Fahrenheit. Displays processor core voltage. Processor core voltage offset. Adjust the DDR3 memory voltage. Adjust the IOH voltage. Adjust QPI - Dell Alienware Area-51 | Service Manual - Page 101
Security Features Change Supervisor Password Change User Password Allows you to set or change the supervisor password. Allows you to set or change the user password. You cannot use the user password to make change to the BIOS settings. Exit Exit Options Provides options to Save Changes and Exit - Dell Alienware Area-51 | Service Manual - Page 102
Clearing CMOS Settings NOTE: This procedure does not clear or reset system and setup passwords. 1. Follow the instructions in "Before You Begin" on page 6. 2. Remove the left side-panel (see "Removing the Left Side-Panel" on page 15). 3. Remove the PCI shroud (see "Removing the PCI Shroud" on page - Dell Alienware Area-51 | Service Manual - Page 103
the latest BIOS file. The File Download window appears. 8. Click Save to save the file on your desktop. The file downloads to your desktop. 9. Click Close if the Download Complete window appears. The file icon appears on your desktop and is titled the same as the downloaded BIOS update file. 10
-
 1
1 -
 2
2 -
 3
3 -
 4
4 -
 5
5 -
 6
6 -
 7
7 -
8
-
9
-
10
-
11
-
12
-
13
-
14
-
15
-
16
-
17
-
18
-
19
-
20
-
21
-
22
-
23
-
24
-
25
-
26
-
27
-
28
-
29
-
30
-
31
-
32
-
33
-
34
-
35
-
36
-
37
-
38
-
39
-
40
-
41
-
42
-
43
-
44
-
45
-
46
-
47
-
48
-
49
-
50
-
51
-
52
-
53
-
54
-
55
-
56
-
57
-
58
-
59
-
60
-
61
-
62
-
63
-
64
-
65
-
66
-
67
-
68
-
69
-
70
-
71
-
72
-
73
-
74
-
75
-
76
-
77
-
78
-
79
-
80
-
81
-
82
-
83
-
84
-
85
-
86
-
87
-
88
-
89
-
90
-
91
-
92
-
93
-
94
-
95
-
96
-
97
-
98
-
99
-
100
-
101
-
102
-
103
 |
 |

01
01
/
A
L
IENWARE
®
AREA-51
SERVICE MANUAL