Dell B1160W User Manual - Page 140
Printing quality problems
 |
View all Dell B1160W manuals
Add to My Manuals
Save this manual to your list of manuals |
Page 140 highlights
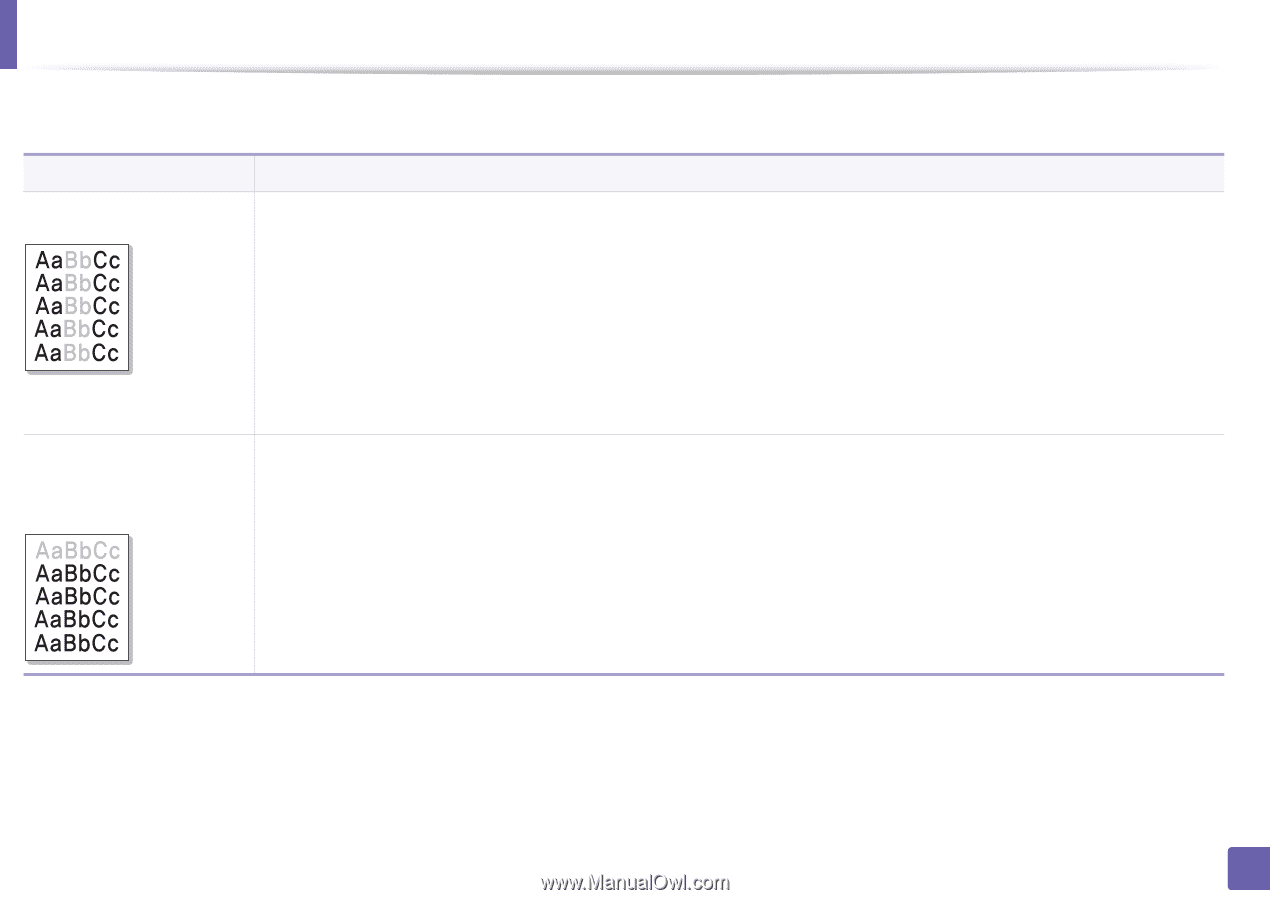
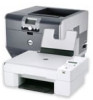
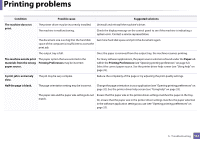
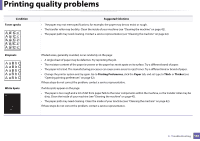
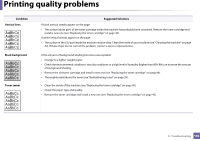
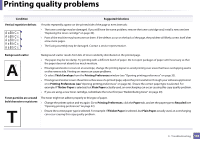
Printing quality problems If the inside of the machine is dirty or paper has been loaded improperly, there might be a reduction in print quality. See the table below to clear the problem. Condition Suggested Solutions Light or faded print • If a vertical white streak or faded area appears on the page, the toner supply is low. Install a new toner cartridge (see "Replacing the toner cartridge" on page 40). • The paper may not meet paper specifications; for example, the paper may be too moist or rough. • If the entire page is light, the print resolution setting is too low or the toner save mode is on. Adjust the print resolution and turn the toner save mode off. See the help screen of the printer driver. • A combination of faded or smeared defects may indicate that the toner cartridge needs cleaning. Clean the inside of your machine (see "Cleaning the machine" on page 42). • The surface of the LSU part inside the machine may be dirty. Clean the inside of your machine (see "Cleaning the machine" on page 42). If these steps do not correct the problem, contact a service representative. The top half of the paper is The toner might not adhere properly to this type of paper. printed lighter than the rest • Change the printer option and try again. Go to Printing Preferences , click the Paper tab, and set the paper type to Recycled (see of the paper "Opening printing preferences" on page 32). 5. Troubleshooting 140
-
 1
1 -
2
-
3
-
4
-
5
-
6
-
7
-
8
-
9
-
10
-
11
-
12
-
13
-
14
-
15
-
16
-
17
-
18
-
19
-
20
-
21
-
22
-
23
-
24
-
25
-
26
-
27
-
28
-
29
-
30
-
31
-
32
-
33
-
34
-
35
-
36
-
37
-
38
-
39
-
40
-
41
-
42
-
43
-
44
-
45
-
46
-
47
-
48
-
49
-
50
-
51
-
52
-
53
-
54
-
55
-
56
-
57
-
58
-
59
-
60
-
61
-
62
-
63
-
64
-
65
-
66
-
67
-
68
-
69
-
70
-
71
-
72
-
73
-
74
-
75
-
76
-
77
-
78
-
79
-
80
-
81
-
82
-
83
-
84
-
85
-
86
-
87
-
88
-
89
-
90
-
91
-
92
-
93
-
94
-
95
-
96
-
97
-
98
-
99
-
100
-
101
-
102
-
103
-
104
-
105
-
106
-
107
-
108
-
109
-
110
-
111
-
112
-
113
-
114
-
115
-
116
-
117
-
118
-
119
-
120
-
121
-
122
-
123
-
124
-
125
-
126
-
127
-
128
-
129
-
130
-
131
-
132
-
133
-
134
-
 135
135 -
 136
136 -
 137
137 -
 138
138 -
 139
139 -
 140
140 -
 141
141 -
 142
142 -
 143
143 -
 144
144 -
 145
145 -
146
-
147
-
148
-
149
-
150
-
151
-
152
-
153
-
154
-
155
-
156
-
157
-
158
-
159
-
160
-
161
-
162
-
163
-
164
-
165
 |
 |