Dell B1265dnf Dell Users Guide
Dell B1265dnf Manual
 |
View all Dell B1265dnf manuals
Add to My Manuals
Save this manual to your list of manuals |
Dell B1265dnf manual content summary:
- Dell B1265dnf | Dell Users Guide - Page 1
User's Guide Dell B1265dfw BBAASSIICC This guide provides information concerning installation, basic operation and troubleshooting on windows. ADVANCED This guide provides information about installation, advanced configuration, operation and troubleshooting on various OS environments. Some - Dell B1265dnf | Dell Users Guide - Page 2
67 Storing the toner cartridge 69 Redistributing toner 71 Replacing the toner cartridge 72 Monitoring the supplies life 73 Setting the toner low alert 74 Cleaning the machine 75 Tips for moving & storing your machine 81 4. Troubleshooting Tips for avoiding paper jams 83 Clearing - Dell B1265dnf | Dell Users Guide - Page 3
BASIC 5. Appendix Specifications 99 Dell technical support policy 109 Contacting Dell 110 Warranty and return policy 111 Regulatory information 112 Copyright 124 3 - Dell B1265dnf | Dell Users Guide - Page 4
you need to know before using the machine. • Key benefits 5 • Features 7 • Useful to know 9 • About this user's guide 10 • Safety information 11 • Machine overview 16 • Control panel overview 19 • Turning on the machine 22 • Installing the driver locally 23 • Reinstalling the - Dell B1265dnf | Dell Users Guide - Page 5
™ enabled apps (see "Google Cloud Print™" on page 149). • Dell Printer Manager and Dell Printer Status Monitor are a program that monitors and informs you of the machine's status and allows you to customize the machine's settings. • You can access Dell Support at www.dell.com or www.dell.com/support - Dell B1265dnf | Dell Users Guide - Page 6
paper and can then be taped together to form a poster (see "Using advanced print features" on page 199). • You can print in various operating systems (see "System requirements" on page 104). • Your machine is equipped with a USB interface and/or a network interface. Supports various wireless network - Dell B1265dnf | Dell Users Guide - Page 7
model include: Operating System Operating System Windows Mac Linux Unix (●: supported) Software B1265dnf B1265dfw Software Firmware Download Utility Dell Printer Status Embedded Web Service Fax Dell Network PC Fax Scan Twain scan driver WIA scan driver Dell Scan Assistant PaperPort - Dell B1265dnf | Dell Users Guide - Page 8
Features Variety feature Features Hi-Speed USB 2.0 Network Interface Ethernet 10/100 Base TX wired LAN B1265dnf ● ● Network Interface 802.11b/g/n wireless LANa Eco printing ● Duplex (2-sided) printing (Manual) ● Automatic Document Feeder (ADF) ● Google Cloud Print™ ● Fax Multi-send ● - Dell B1265dnf | Dell Users Guide - Page 9
paper in this manual and troubleshoot accordingly (see "Clearing paper jams" on page 87). Printouts are blurry. • The toner level might be low or uneven. Shake the toner cartridge. • Try a different print resolution setting. • Replace the toner cartridge. Where can I download the machine's driver - Dell B1265dnf | Dell Users Guide - Page 10
information or detailed specification of the machine function and feature. 1 Conventions Some terms in this guide are used interchangeably, as below: • Document is synonymous with original. • Paper is synonymous with media, or print media. • Machine refers to printer or MFP. 1. Introduction 10 - Dell B1265dnf | Dell Users Guide - Page 11
Be sure to read and understand all of these instructions before using the machine. After reading this section property damage. Do not attempt. 4 Operating environment Warning Do not use if the The user should be able to access the power outlet in case of emergencies that might require the user to - Dell B1265dnf | Dell Users Guide - Page 12
power supply, remove the power cord from the electrical outlet. Be care when replacing paper or removing jammed paper. New paper has sharp edges and can cause painful cuts. When printing large quantities, the bottom part of the paper output area may get hot. Do not allow children to touch. Burns can - Dell B1265dnf | Dell Users Guide - Page 13
Safety information Do not allow too many papers to stack up in the paper output tray. It can damage the performance of procedures other than those specified herein may result in hazardous radiation exposure. 6 Installation / Moving Warning Do not place the machine in an area with dust, humidity, - Dell B1265dnf | Dell Users Guide - Page 14
do not spray water directly into the machine. This could result in electric shock or fire. When you are working inside the machine replacing supplies or cleaning the inside, do not operate the machine. You could get injured. Keep cleaning supplies away from children. Children could get hurt. Do not - Dell B1265dnf | Dell Users Guide - Page 15
such as toner cartridge or fuser unit. This could cause an explosion or uncontrollable fire. When storing supplies such as toner cartridges, keep them away from children. Toner dust can be dangerous if inhaled or ingested. When changing the toner cartridge or removing jammed paper, be careful - Dell B1265dnf | Dell Users Guide - Page 16
overview 9 Accessories Power cord Software CDa a. The software CD contains the print drivers and software applications. b. Miscellaneous accessories included with your machine may vary by country of purchase and specific model. Quick installation guide Misc. accessoriesb 1. Introduction 16 - Dell B1265dnf | Dell Users Guide - Page 17
feeder output tray 4 Control Panel 5 Paper level indicator 6 Tray 7 Manual feeder tray 8 Front cover 9 Output tray 10 Output support 11 Paper width guide on a manual feeder 12 Scanner lid 13 Scanner glass 14 Document feeder input tray 15 Paper width guide on a document feeder 16 Document feeder - Dell B1265dnf | Dell Users Guide - Page 18
Machine overview 11 Rear view 1 Network port 2 Extension telephone socket (EXT) 3 Telephone line socket (Line) 4 USB port 5 Power receptacle 6 Rear cover 1. Introduction 18 - Dell B1265dnf | Dell Users Guide - Page 19
report - Press and hold this button for about 15 seconds until the green LED on, and release. • Prints manual - Press this button each time you load a sheet of paper in the tray if you have selected Manual Feeder for Source in your printer driver. Allows you to copy both sides of an ID card like - Dell B1265dnf | Dell Users Guide - Page 20
Control panel overview 7 Scan Switches to Scan mode. 8 Menu 9 Left/Right Arrows 10 OK 11 Back Opens Menu mode back to the upper menu level. 12 Start Starts a job. 13 Stop/Clear Stops an operations at any time. 14 Status LED 15 Numeric keypad 16 On Hook Dial 17 Redial/ Pause - Dell B1265dnf | Dell Users Guide - Page 21
Control panel overview 13 Adjusting the control panel 1. Introduction 21 - Dell B1265dnf | Dell Users Guide - Page 22
Turning on the machine Connect the machine to the electricity supply first. 1. Introduction 22 - Dell B1265dnf | Dell Users Guide - Page 23
steps below and go on to installing a network connected machine's driver (see "Installing driver over the network" on page 138). • If you are a Mac, Linux, or Unix OS user, refer to the "Software Installation" on page 128. • The installation window in this User's Guide may differ depending on the - Dell B1265dnf | Dell Users Guide - Page 24
If you install the driver using the supplied software CD, V4 driver is not installed. If you want to use the V4 driver in the Desktop screen, you can download from the Dell website, www.Dell.com >find your product > Support or downloads. • If you want to install Dell's printer management tools, you - Dell B1265dnf | Dell Users Guide - Page 25
Installing the driver locally • If you want to install Dell's printer management tools, you need to install them using the supplied software CD. • You can download Dell Printer Experience app from the Windows Store. You need have a Microsoft account to use the Windows Store. 1 From Charms, select - Dell B1265dnf | Dell Users Guide - Page 26
work properly, follow the steps below to reinstall the driver. 15 Windows 1 From the Start menu, select All Programs > Dell > Dell Printers > your printer driver name > Uninstall. 2 Follow the instructions in the uninstallation window. 3 Insert the software CD into your CD/DVD drive and install - Dell B1265dnf | Dell Users Guide - Page 27
2. Menu overview and basic setup This chapter provides information about the overall menu structure and the basic setup options. • Menu overview 28 • Changing the display language 34 • Media and tray 35 • Basic printing 49 • Basic copying 55 • Basic scanning 59 • Basic faxing 60 - Dell B1265dnf | Dell Users Guide - Page 28
on its options. 1 Accessing the menu 1 Select the Fax, Copy, or Scan button on the control panel depending on the feature to be used. 2 Select return to the ready mode. Items Fax Feature Darkness Contrast Resolution Scan Size Multi Send Delay Send Options Light+5- Light+1 Normal Dark+1- - Dell B1265dnf | Dell Users Guide - Page 29
Send Forward Secure Receive Add Page Cancel Job Sending Options Fax PC On Off Print Redial Times Redial Term Prefix Dial ECM Mode Fax Setup DRPD Mode Duplex Print Change Default Resolution Darkness Contrast Scan Size Auto Report On Off Copy Feature Scan Size Reduce/Enlarge Darkness Light+5- - Dell B1265dnf | Dell Users Guide - Page 30
Enhance Lev.2 Erase Lev.1- Erase Lev.4 Off 1 -> 2 Side Long 1 -> 2 SideShort Items Copy Setup Print Setup Change Default Orientation Duplex Copies Resolution Darkness Options Scan Size Copies Copy Collation Reduce/Enlarge Duplex Darkness Contrast Original Type Adjust Bkgd. Portrait Landscape Off - Dell B1265dnf | Dell Users Guide - Page 31
Setup Options Machine ID Fax Number Date & Time Clock Mode Language Power Save Wakeup Event System Timeout Job Timeout Altitude Adj. Auto Continueb Paper Mismatch Paper Substitb PrintBlankPage Toner Save Eco Settings Paper Size Paper Type Paper Source Margin 2. Menu overview and basic setup 31 - Dell B1265dnf | Dell Users Guide - Page 32
Key Sound Alarm Sound Speaker Ringer All Report Configuration Supplies Info. Address Book Fax Send Fax Sent Fax Received Schedule Jobs Junk Fax Network Conf. Usage Counter Fax Options CLR Empty Msgc Supplies Life Serial NO. TonerLow Alert Items System Setup Clear Setting Options All Settings Print - Dell B1265dnf | Dell Users Guide - Page 33
100Mbps Half 100Mbps Full Clear Setting Network Conf. a. This setting may not be available depending on your country. b. This option only appears if "paper mismatch" is enabled. c. This option only appears when small amount of toner is left in the cartridge. 2. Menu overview and basic setup 33 - Dell B1265dnf | Dell Users Guide - Page 34
the display language To change the language that is displayed on the control panel, follow these steps: 1 Select (Menu) > System Setup > Machine Setup > Language on the control panel. It may - Dell B1265dnf | Dell Users Guide - Page 35
media (see "Print media specifications" on page 101). To change the size, you need to adjust the paper guides. 2 1 3 1 Tray extension guide 2 Paper length guide 3 Paper width guide The use of inflammable media or foreign materials left in the printer may lead to overheating of the unit and, in - Dell B1265dnf | Dell Users Guide - Page 36
Media and tray The paper quantity indicator shows the amount of paper in the tray. 1 Full 2 Empty 1 2 Paper type available for duplex printing Depending on the power voltage your machine uses, available paper types for duplex printing differs. Refer to the below table. Power voltage 110V 220V - Dell B1265dnf | Dell Users Guide - Page 37
Media and tray 3 Loading paper in the tray When printing using the tray, do not load paper on the manual feeder, it may cause a paper jam. 2. Menu overview and basic setup 37 - Dell B1265dnf | Dell Users Guide - Page 38
, size and weight of print media at time in the manual feeder. • To prevent paper jams, do not add paper while printing when there is still paper in the manual feeder. • Print media should be loaded face up with the top edge going into the manual feeder first and be placed in the center of the tray - Dell B1265dnf | Dell Users Guide - Page 39
IMedia and tray :'''''' ~ ~'''''''' 2. Menu overview and basic setup 39 - Dell B1265dnf | Dell Users Guide - Page 40
higest printing quality, select the proper media type from the Printing preferences window > Paper tab > Paper Type (see "Opening printing preferences" on page 51). For example, Cotton Recycled ● Archive ● (●: supported, Blank: Not available) Manual feeder 2. Menu overview and basic setup - Dell B1265dnf | Dell Users Guide - Page 41
• Do not use envelopes with clasps, snaps, windows, coated lining, self- adhesive seals, or other the heat and pressure of the machine during operation. 1 Acceptable 2 Unacceptable • Envelopes with might cause wrinkling, creasing, or jams, and may even damage the fuser. • For the best print - Dell B1265dnf | Dell Users Guide - Page 42
media: Transparency for a color laser printer by Xerox, such as 3R 91331(A4), 3R 2780 (Letter) • Must withstand the machine's fusing temperature. • Place them on a flat surface after removing them from the machine. • Do not leave unused transparencies in the paper - Dell B1265dnf | Dell Users Guide - Page 43
for use in laser printers. - Condition: Do not use labels with wrinkles, bubbles, or other indications of separation. • Make sure that there is no exposed adhesive material between labels. Exposed areas can cause labels to peel off during printing, which can cause paper jams. Exposed adhesive - Dell B1265dnf | Dell Users Guide - Page 44
printed side should be facing up with an uncurled edge at the front. If you experience problems with paper feeding, turn the paper around. Note that print quality is not guaranteed. • In the software application, set the margins to at least 6.4 mm (0.25 inches) away from the edges of the material - Dell B1265dnf | Dell Users Guide - Page 45
prevent paper jam, low print quality and machine damage. - Carbon-paper or carbon-backed paper - Coated paper - Onion skin or thin paper - Wrinkled or creased paper - Curled or rolled paper - Torn paper • Remove all staples and paper clips before loading. • Make sure any glue, ink, or correction - Dell B1265dnf | Dell Users Guide - Page 46
a fax. 2 Place the original face down on the scanner glass. Align it with the registration guide at the top left corner of the glass. On the scanner glass Using the scanner glass, you can copy or scan originals. You can get the best scan quality, especially for colored or gray-scaled images. Make - Dell B1265dnf | Dell Users Guide - Page 47
hurt. • Do not look the light from inside of the scanner while copying or scanning. It is harmful to eyes. 2 Load the original face up into the document feeder input tray. Make sure that the bottom of the original stack matches the paper size marked on the document input tray. In the document - Dell B1265dnf | Dell Users Guide - Page 48
Media and tray 3 Adjust the document feeder width guides to the paper size. • Dust on the document feeder glass may cause black lines on the printout. Always keep the glass clean (see "Cleaning the machine" on page 75). • To print on both sides of the paper using the ADF, from the control panel - Dell B1265dnf | Dell Users Guide - Page 49
print features" on page 199). 3 Select your machine from the Select Printer list. 9 Printing • If you are a Mac or Linux user, refer to the "Mac printing" on page 206 or "Linux printing" on page 207. • For Windows 8 user, see "Basic printing" on page 239. The following Printing Preferences - Dell B1265dnf | Dell Users Guide - Page 50
Basic printing 10 Canceling a print job If the print job is waiting in the print queue or print spooler, cancel the job as follows: • You can access this window by simply double-clicking the machine icon ( ) in the Windows task bar. • You can also cancel the current job by pressing (Stop/Clear) on - Dell B1265dnf | Dell Users Guide - Page 51
8 user, see "Opening more settings" on page 240. 1 Open the document you want to print. 2 Select Print from the file menu. The Print window appears. 3 Select your machine from the Select Printer. You can check the machine's current status using the Printer Status button (see "Using Dell Printer - Dell B1265dnf | Dell Users Guide - Page 52
for the Dell tab, allows you to save the current preferences for future use. To save a Favorites item, follow these steps: 1 Change the settings as click (Delete). You can also restore the printer driver's default settings by selecting Default Favorite from the Favorites drop-down list. 3 - Dell B1265dnf | Dell Users Guide - Page 53
panel, eco mode is enabled. The default setting of Eco mode is Double-sided printing (Long Edge), Multiple Pages per Side (2), Skip blank pages, and Toner Save. Setting Eco mode on the control panel If you set the eco mode on with a password from the Embedded Web Service (Settings tab > Machine - Dell B1265dnf | Dell Users Guide - Page 54
Eco options • Printer Default: Follows the settings from the machine's control panel. • None: Disables Eco mode. • Eco Printing: Enables eco mode. Activate the various Eco items you want to use. • Password: If the administrator has enabled Eco mode, you have toenter the password to change the status - Dell B1265dnf | Dell Users Guide - Page 55
special printing features, refer to the Advanced Guide (see "Copy menu" on page 178). 14 Basic copy 15 Changing the settings for each copy Your machine provides default settings for copying so that you can quickly and easily make a copy. However, if you want to change the options for each copy, use - Dell B1265dnf | Dell Users Guide - Page 56
. Reduced or enlarged copy You can reduce or enlarge the size of a copied image from 25% to 400% when you copy original documents from the scanner glass. 2. Menu overview and basic setup 56 - Dell B1265dnf | Dell Users Guide - Page 57
machine prints one side of the original on the upper half of the paper and the other side on the lower half without reducing the size of a small-sized item such as business card. • The original must be placed on the scanner glass to use this feature. • If the machine set to Eco mode, this feature is - Dell B1265dnf | Dell Users Guide - Page 58
lid. 5 Turn the original over and place it on the scanner glass where arrows indicate as shown. Then, close the scanner lid. 6 Press Start. 3 Place Front Side and Press [Start] appears on the display. 4 Press Start. Your machine begins scanning the front side and shows Place Back Side and Press - Dell B1265dnf | Dell Users Guide - Page 59
. • if you want to scan using the network, refer to the Advanced Guide (see "Scanning from network connected machine" on page 214). Enable Scan from Device Panel in Dell Printer Manager > advanced mode > Scan to PC Settings. Switch to 3 Select the application program you want and press OK. Default - Dell B1265dnf | Dell Users Guide - Page 60
to the Advanced Guide (See "Fax features" on page 217). • You cannot use this machine as a fax via the internet phone. For more information ask your internet service provider. • We recommend using traditional analog phone services (PSTN: Public Switched Telephone Network) when connecting telephone - Dell B1265dnf | Dell Users Guide - Page 61
4 Enter the destination fax number. 5 Press (Start) on the control panel. The machine starts to scan and send the fax to the destinations. • If you want to send a fax directly from your computer, use Dell Network PC Fax (see "Sending a fax in the computer" on page 218). • When you want to cancel - Dell B1265dnf | Dell Users Guide - Page 62
see Advanced Guide). 6 10 destinations. 21 Adjusting the document settings Before starting a fax, change default at the factory. When you printer. • Super Fine: Originals containing extremely fine detail. Super Fine mode is enabled only if the machine with which you are communicating also supports - Dell B1265dnf | Dell Users Guide - Page 63
supported by the other fax machine. Darkness You can select the degree of darkness of the original document. The darkness setting is applied to the current fax job. To change the default you are communicating with supports color fax reception and you send the fax manually. 2 Select a darkness - Dell B1265dnf | Dell Users Guide - Page 64
information about purchasing supplies, accessories and maintenance parts available for your machine. • Ordering supplies and accessories 65 • Available supplies 66 • Installing accessories 67 • Redistributing toner 71 • Replacing the toner cartridge 72 • Monitoring the supplies life 73 - Dell B1265dnf | Dell Users Guide - Page 65
parts. To order Dell-authorized supplies and accessories visit www.dell.com/supplies, or contact your local Dell dealer or the retailer where you purchased your machine. You can also visit www.dell.com or www.dell.com/support, select your country/region, and obtain information on calling for service - Dell B1265dnf | Dell Users Guide - Page 66
does not recommend using non-genuine Dell toner cartridge such as refilled or remanufactured toner. Dell cannot guarantee non-genuine Dell toner cartridge's quality. Service or repair required as a result of using non-genuine Dell toner cartridges will not be covered under the machine's warranty - Dell B1265dnf | Dell Users Guide - Page 67
properties item has a ▶mark, you can select other printer drivers connected with the selected printer. 5 Select Device Options or Device Settings. The Printer properties window may differ depending on the driver or operating system you are using. 6 Select the appropriate option. Some menus may - Dell B1265dnf | Dell Users Guide - Page 68
Installing accessories • Administrator Settings: You can select the Printer status and EMF Spooling. • Custom Paper Size Settings: You can specify custom paper size. 7 Click OK until you exit the Printer properties window. 3. Maintenance 68 - Dell B1265dnf | Dell Users Guide - Page 69
the top opening of the cartridge with paper and store in a dark cabinet. Opening the cartridge package prior to use dramatically shortens its useful shelf and operating life. Do not store on the floor. If the toner cartridge is removed from the printer, follow the instructions below to store the - Dell B1265dnf | Dell Users Guide - Page 70
the print density of the pages you print on, operating environment, percentage of image area, printing interval, media type and/or media size. For example, if you print a lot of graphics, the consumption of the toner is higher and you may need to change the cartridge more often. 3. Maintenance 70 - Dell B1265dnf | Dell Users Guide - Page 71
and/or density variation side to side. • The Status LED blinks red. If this happens, you can temporarily improve print quality by redistributing the remaining toner in the cartridge. In some cases, white streaks or light printing will still occur even after you have redistributed the - Dell B1265dnf | Dell Users Guide - Page 72
cold water. Hot water sets toner into fabric. • Shake the toner cartridge thorougly, it will increase the initial print quality. • Do not touch the green underside of the toner cartridge. Use the handle on the cartridge to avoid touching this area. When a toner cartridge has reached the end of life - Dell B1265dnf | Dell Users Guide - Page 73
experience frequent paper jams or printing problems, check the number of pages the machine has printed or scanned. Replace the corresponding parts, if ADF Scan: Displays the number of pages printed by using the document feeder. • Platen Scan: Displays the number of pages scanned by using scanner - Dell B1265dnf | Dell Users Guide - Page 74
low alert If the amount of toner in the cartridge is low, a message or LED informing the user to change the toner cartridge appears. You can set the option for whether or not this message or LED appears. 1 Select (Menu) > System Setup > Maintenance > Toner Low Alert on the control panel. 2 Select - Dell B1265dnf | Dell Users Guide - Page 75
to clean it. If you use a vacuum cleaner, toner blows in the air and might be harmful to you. • During the printing process, paper, toner, and dust particles can accumulate inside the machine. This buildup can cause print quality problems, such as toner specks or smearing. Cleaning the inside of the - Dell B1265dnf | Dell Users Guide - Page 76
the machine 5 Cleaning the inside During the printing process, paper, toner, and dust particles can accumulate inside the machine. This buildup can cause print quality problems, such as toner specks or smearing. Cleaning the inside of the machine clears and reduces these problems. 3. Maintenance 76 - Dell B1265dnf | Dell Users Guide - Page 77
Cleaning the machine • Use a dry lint-free cloth to clean the machine. • If your machine has a power switch, turn the power switch off before cleaning the machine. • Before opening the front cover, close the output support first. 3. Maintenance 77 - Dell B1265dnf | Dell Users Guide - Page 78
Cleaning the machine 6 Cleaning the pickup roller • Before opening the front cover, close the output support first. • If your machine has a power switch, turn the power switch before cleaning the machine. 3. Maintenance 78 - Dell B1265dnf | Dell Users Guide - Page 79
you clean the scan unit at the start of each day and during the day as needed. 1 Slightly dampen a soft, lint-free cloth or paper towel with water. 2 Lift and open the scanner lid. 3 Wipe the surface of the scanner glass until it is clean and dry. 1 Scanner lid 2 Scanner glass 3 Document feeder - Dell B1265dnf | Dell Users Guide - Page 80
Cleaning the machine 4 Wipe the underside of the scanner lid and white sheet until it is clean and dry. 5 Close the scanner lid. 3. Maintenance 80 - Dell B1265dnf | Dell Users Guide - Page 81
& storing your machine • When moving the machine, do not tilt or turn it upside down. Otherwise, the inside of the machine may be contaminated by toner, which can cause damage to the machine or reduce print quality. • When moving the machine, make sure at least two people are holding the machine - Dell B1265dnf | Dell Users Guide - Page 82
screen, check the message on the display screen first to solve the error.If you cannot find a solution to your problem in this chapter, refer to the Troubleshooting chapter in the Advanced User's Guide.If you cannot find a solution in the User's Guide or the problem persists, call for service. - Dell B1265dnf | Dell Users Guide - Page 83
for avoiding paper jams By selecting the correct medias, most paper jams can be avoided. To avoid paper jams, refer to the following guidelines: • Ensure that the adjustable guides are positioned correctly (see "Tray overview" on page 35). • Do not overload the tray. Ensure that the paper level is - Dell B1265dnf | Dell Users Guide - Page 84
in the document feeder, a warning message appears on the display. To avoid tearing the document, remove the jammed document slowly and carefully. To prevent document jams, use the scanner glass for thick, thin or mixed paper- originals. 1 Original paper jam in front of scanner 4. Troubleshooting 84 - Dell B1265dnf | Dell Users Guide - Page 85
Clearing original document jams 2 Original paper jam inside of scanner 4. Troubleshooting 85 - Dell B1265dnf | Dell Users Guide - Page 86
Clearing original document jams 3 Original paper jam in exit area of scanner 1 Remove any remaining pages from the document feeder. 2 Gently remove the jammed paper from the document feeder. 4. Troubleshooting 86 - Dell B1265dnf | Dell Users Guide - Page 87
Clearing paper jams To avoid tearing the paper, pull the jammed paper out slowly and gently. 4 In tray 4. Troubleshooting 87 - Dell B1265dnf | Dell Users Guide - Page 88
Clearing paper jams 5 In the manual tray 4. Troubleshooting 88 - Dell B1265dnf | Dell Users Guide - Page 89
Clearing paper jams 6 Inside the machine The fuser area is hot. Take care when removing paper from the machine. 4. Troubleshooting 89 - Dell B1265dnf | Dell Users Guide - Page 90
Clearing paper jams 7 In the exit area 4. Troubleshooting 90 - Dell B1265dnf | Dell Users Guide - Page 91
Clearing paper jams 8 In the duplex unit area 1 2 1 2 4. Troubleshooting 91 - Dell B1265dnf | Dell Users Guide - Page 92
the error, look at the error message and its instructions from the troubleshooting part. • You also can resolve the error with the guideline from the Printing Status Monitorprogram window. • If the problem persists, call a service representative. Status LED Status Off Green Blinking On Red - Dell B1265dnf | Dell Users Guide - Page 93
19752. The number of pages may be affected by operating environment, percentage of image area, printing interval, graphics, media and media size. Some amount of toner may remain in the cartridge even when red LED is on and the printer stops printing. b. Wireless model only. 4. Troubleshooting 93 - Dell B1265dnf | Dell Users Guide - Page 94
the service representative with the contents of display message. • Some messages may not appear on the display depending on the options or models. • [error number] indicates the error number. • [tray type] indicates the tray number. 9 Paper Jam-related messages Message Paper Jam in Manual Feeder - Dell B1265dnf | Dell Users Guide - Page 95
10 Toner-related messages Message Install Toner Cartridge Not Compatible Toner cartridge Prepare new cartridge Meaning Suggested solutions A toner cartridge is not installed. Install a toner cartridge. The toner cartridge you have installed is not for your machine. Install a Dell-genuine toner - Dell B1265dnf | Dell Users Guide - Page 96
result in printing quality issues (see "Replacing the toner cartridge" on page 72). Dell does not recommend using a non-genuine Dell toner cartridge such as refilled or remanufactured. Dell cannot guarantee a non-genuine Dell toner cartridge's quality. Service or repair required as a result of using - Dell B1265dnf | Dell Users Guide - Page 97
. Reboot the power. If the problem persists, please call for service. Message Network Problem: IP Conflict Meaning Suggested solutions The network IP address you have set is being used by someone else. Check the IP address and reset it if necessary (see Advanced Guide). 4. Troubleshooting 97 - Dell B1265dnf | Dell Users Guide - Page 98
5. Appendix This chapter provides product specifications and information concerning applicable regulations. • Specifications 99 • Dell technical support policy 109 • Contacting Dell 110 • Warranty and return policy 111 • Copyright 124 - Dell B1265dnf | Dell Users Guide - Page 99
to change without notice. See www.dell.com or www.dell.com/support for possible changes in Scan mode (scanner glass) 52 dB (A) Scan mode (document feeder) 53 dB (A) Operation 10 to 32°C (50 to 89.6°F) Storage (packed) -20 to 40°C (-4 to 104°F) Operation 20 to 80% RH Storage (packed) 10 - Dell B1265dnf | Dell Users Guide - Page 100
consumption Average operating mode Less than 400W Ready mode Less than 50 W Power save mode Less than 3.0 W Power off mode Less than 0.2 W (0.1 Wc) Wirelessd Module SPW-B4319S a. Sound Pressure Level, ISO 7779. Configuration tested: basic machine installation, A4 paper, simplex printing - Dell B1265dnf | Dell Users Guide - Page 101
inches) 176 x 250 mm (6.93 x 9.84 inches) 184 x 267 mm (7.25 x 10.5 inches) 148 x 210 mm (5.83 x 8.27 inches) 105 x 148 mm (4.13 x 5.83 inches) Print media weight/Capacitya Tray Manual feederb 70 to 90 g/m2 (16 to 43 lbs bond) • 250 sheets of 80 g/m2 (21 lbs bond) 70 to 90 - Dell B1265dnf | Dell Users Guide - Page 102
Dimensions Envelope Thick paper Thicker paper Thin paper Transparency Labelsc Envelope Monarch 98 x 191 mm (3.87 x 7.5 inches) Envelope No. 10 105 x 241 ISO B5, Executive, A5 Refer to the Plain paper section Print media weight/Capacitya Tray Manual feederb Not available in tray 60 to 220 - Dell B1265dnf | Dell Users Guide - Page 103
smoothness of the labels used in this machine is 100 to 250 (sheffield). This means the numeric level of smoothness. d. The paper types available in the manual feeder: Plan, Thick, Thicker, Thin, Cotton, Colored, Pre-printed, Recycled, Envelope, Transparency, Labels, Cardstock, Bond, Archive e. The - Dell B1265dnf | Dell Users Guide - Page 104
Windows® Operating system Windows® 2000 Windows® XP Windows Server® 2003 Windows Server® 2008 Windows Vista® Windows® 7 Windows Server® 2008 R2 Windows 1 GB (2 GB) • Support for DirectX® 9 graphics with 128 MB memory (to enable the Aero theme). • DVD 10 GB 15 GB 16 GB 10 GB 16 GB 5. Appendix 104 - Dell B1265dnf | Dell Users Guide - Page 105
Users who have administrator rights can install the software. • Windows Terminal Services is compatible with your machine. • For Windows 2000, Services Pack 4 or higher is required. Mac Operating system Mac OS X 10.5 Mac OS X 10.6 Mac OS X 10.7 CPU • Intel® processors • 867 MHz or faster Power PC - Dell B1265dnf | Dell Users Guide - Page 106
Operating system CPU RAM Free HDD space Requirements Redhat® Enterprise Linux WS 4, 5, 6(32/64 bit) Fedora 5 ~ 15 (32/64 bit) OpenSuSE® 10.2, 10.3, 11.0, 11.1, 11.2, 11.3, 11.4 (32/64 bit) Mandriva 2007, 2008, 2009, 2009.1, 2010 (32/64 bit) Ubuntu 6.06, 6.10, 7.04, 7.10, 8.04, 8.10, 9.04, 9.10, 10 - Dell B1265dnf | Dell Users Guide - Page 107
Specifications Unix Items Operating system Free HDD space Requirements Sun Solaris 9, 10, 11 (x86, SPARC) HP-UX 11.0, 11i v1, 11i v2, 11i v3 (PA-RISC, Itanium) IBM AIX 5.1, 5.2, 5.3, 5.4, 6.1, 7.1 Up to 100 MB 5. Appendix 107 - Dell B1265dnf | Dell Users Guide - Page 108
shows the network environments supported by the machine. Items Network interface Network operating system Network protocols Wireless security Specifications • Ethernet 10/100 Base-TX Wired Lan • Windows 2000/Server 2003 /Server 2008/XP/Vista/7/Server 2008 R2 • Various Linux OS • Mac OS X 10.4 ~ 10 - Dell B1265dnf | Dell Users Guide - Page 109
in the troubleshooting process and provides for restoration of the Operating System, application software, and hardware drivers to the original default configuration as shipped from Dell, as well as the verification of appropriate functionality of the printer and all Dell-installed hardware. In - Dell B1265dnf | Dell Users Guide - Page 110
only) • Anonymous file transfer protocol (FTP) - ftp.dell.com Log in as user: anonymous, and use your email address as your password. • Electronic Support Service - [email protected] - [email protected] - [email protected] (Latin America and Caribbean countries only) - apsupport - Dell B1265dnf | Dell Users Guide - Page 111
and return policy Dell Inc. ("Dell") manufactures its hardware products from parts and components that are new or equivalent to new in accordance with industry-standard practices. For information about the Dell warranty for your printer, refer to the Product Information Guide. 5. Appendix 111 - Dell B1265dnf | Dell Users Guide - Page 112
there is never any human access to laser radiation above a Class I level during normal operation, user maintenance or prescribed service condition. Warning Never operate or service the printer with the protective cover removed from laser/scanner assembly. The reflected beam, although invisible, can - Dell B1265dnf | Dell Users Guide - Page 113
heavier than air, keep the product in a place with good ventilation. 7 Mercury Safety Contains Mercury, Dispose According to Local, State or Federal Laws.(U.S.A. only) This printer contains advanced energy conservation technology that reduces power consumption when it is not in active use. When the - Dell B1265dnf | Dell Users Guide - Page 114
10 other household waste at the end of their working life. To prevent possible harm to the sustainable reuse of material resources. Household users should contact either the retailer where they nearest recycling location, go to our website: www.Dell.com/recyclingdirect Or call, (877) 278 - 0799 - Dell B1265dnf | Dell Users Guide - Page 115
to the user This device complies with Part 15 of the FCC Rules. Operation is subject to installed and used in accordance with the instructions, may cause harmful interference to radio communications. However, there is no guarantee that interference will not occur in a particular installation - Dell B1265dnf | Dell Users Guide - Page 116
authorization to use it. Contact manufacturer for service. Intentional emitter per FCC Part 15 Low power, Radio LAN devices (radio frequency (RF) wireless communication devices), operating in the 2.4 GHz/5 GHz Band, may be present (embedded) in your printer system. This section is only applicable - Dell B1265dnf | Dell Users Guide - Page 117
Regulatory information 15 Russia only 18 Thailand only 16 Germany only 17 Turkey only 19 Canada only This product meets the applicable Industry Canada technical specifications. / Le present materiel est conforme aux specifications techniques applicables d'Industrie Canada. The Ringer Equivalence - Dell B1265dnf | Dell Users Guide - Page 118
service from the telephone company. In some cases, a sum of five may not be usable on your line. If any of your telephone equipment is not operating properly, you should immediately remove it from your telephone line, as it may cause harm to the telephone network. The equipment complies with Part - Dell B1265dnf | Dell Users Guide - Page 119
state that changes or modifications to this equipment not expressly approved by the manufacturer could void the user's authority to operate this equipment. In the event that terminal equipment causes harm to the telephone network, the telephone company should notify the customer that service may be - Dell B1265dnf | Dell Users Guide - Page 120
plug, adaptor, or at the distribution board. Approvals and Certifications Hereby, Dell Inc. declares that this [B1165nfw Series] is in compliance with the of conformity may be consulted at www.Dell.com, go to Support > Download center and enter your printer (MFP) name to browse the EuDoC. January - Dell B1265dnf | Dell Users Guide - Page 121
work with the national PSTNs and compatible PBXs of the European countries: In the event of problems, you should contact the Euro QA Lab of Dell 2454-2483.5 MHz for devices above 10 mW transmitting power such as wireless operating in the 2.4 GHz/5 GHz band, may be present (embedded) in your printer - Dell B1265dnf | Dell Users Guide - Page 122
in the 2.4 GHz/5 GHz Band, may be present (embedded) in your printer system. The following section is a general overview of considerations while operating a wireless device. Additional limitations, cautions, and concerns for specific countries are listed in the specific country sections (or - Dell B1265dnf | Dell Users Guide - Page 123
. If your system came equipped with an internal embedded wireless device, do not operate the wireless device unless all covers and shields are in place and the system is fully assembled. Wireless devices are not user serviceable. Do not modify them in any way. Modification to a wireless device will - Dell B1265dnf | Dell Users Guide - Page 124
text: Dell, the Dell logo, and Dell Toner Management System are trademarks of Dell Inc.; Microsoft, Windows, Windows Vista, and Windows Server iPod touch, TrueType, Mac and Mac OS are trademarks of Apple Inc., registered in the U.S and other countries. AirPrint and the AirPrint logo are trademarks of - Dell B1265dnf | Dell Users Guide - Page 125
information about installation, advanced configuration, operation and troubleshooting on various OS environments. Some features may not be available depending on models or countries. BASIC This guide provides information concerning installation, basic operation and troubleshooting on windows. - Dell B1265dnf | Dell Users Guide - Page 126
Management Tools Accessing management tools 228 Using Firmware update utility 229 Using Dell Supplies Ordering Utility 230 Using Embedded Web Service 231 Using Dell Printer Manager 233 Using Dell Printer Status 236 Using Dell Printer Experience 238 Using the Linux Unified Driver - Dell B1265dnf | Dell Users Guide - Page 127
ADVANCED 6. Troubleshooting Paper feeding problems 247 Power and cable connecting problems 248 Printing problems 249 Printing quality problems 253 Copying problems 261 Scanning problems 262 Faxing problems 263 Operating system problems 265 127 - Dell B1265dnf | Dell Users Guide - Page 128
's driver (see "Installing driver over the network" on page 138). • Installation for Mac 129 • Reinstallation for Mac 130 • Installation for Linux 131 • Reinstallation for Linux 132 • If you are a Windows OS user, refer to the Basic Guide for installing the machine's driver (see "Installing - Dell B1265dnf | Dell Users Guide - Page 129
and add it to your printer list. • For MFP models, Click Add Fax button to select your fax and add it to your fax list. 12 After the installation is finished, click Close or Restart. 3 Double-click the CD/DVD icon that appears on your Mac desktop. • For Mac OS X 10.8, double-click the CD/DVD - Dell B1265dnf | Dell Users Guide - Page 130
for Mac If the printer driver does not work properly, uninstall the driver and reinstall it. 1 Open the Applications folder > Dell > Printer Software Uninstaller. 2 To uninstall printer software, click Continue. 3 Check the program you want to delete and click Uninstall. 4 Enter the password and - Dell B1265dnf | Dell Users Guide - Page 131
Administrator Login window appears, type "root" in the Login field and enter the system password. You must log in as a super user (root) to install the machine software. If you are not a super user, ask your system administrator. 3 From the Dell website, download the Unified Linux Driver package - Dell B1265dnf | Dell Users Guide - Page 132
Login field and enter the system password. You must log in as a super user (root) to uninstall the printer driver. If you are not a super user, ask your system administrator. 3 Open Terminal program. When the Terminal screen appears, type in the following. [root@localhost root]#cd /opt/Dell/mfp - Dell B1265dnf | Dell Users Guide - Page 133
step instructions for setting up a network connected machine and software. • Useful network programs 134 • Wired network setup 135 • Installing driver over the network 138 • IPv6 configuration 145 • AirPrint 148 • Google Cloud Print™ 149 • Wireless network setup 152 Supported optional - Dell B1265dnf | Dell Users Guide - Page 134
Embedded Web Service 2 SetIP wired network setup This utility program allows you to select a network interface and manually configure the IP addresses for use with the TCP/IP protocol. • See "IPv4 configuration using SetIP (Windows)" on page 135. • See "IPv4 configuration using SetIP (Mac)" on page - Dell B1265dnf | Dell Users Guide - Page 135
supported by this program. First, you have to set up an IP address for network printing and managements. instructions in the installation window. 3 Connect your machine to the network with a network cable. 4 Turn on the machine. 5 From the Windows Start menu, select All Programs > Dell >Printers - Dell B1265dnf | Dell Users Guide - Page 136
with a network cable. 2 Insert the supplied software CD into your CD/DVD drive. 3 Double-click the CD/DVD icon that appears on your Mac desktop. • For Mac OS X 10.8, Double-click the CD/DVD icon that appears on your Finder. 4 Double-click the MAC_Installer folder > Installer OS X icon. 5 Click - Dell B1265dnf | Dell Users Guide - Page 137
firewall from System Preferences or Administrator. The following instructions may vary from your model or operating systems. 1 Open /opt/Dell/mfp/share/utils/. 2 Double-click the SetIPApplet.html file. 3 Click to open the TCP/IP configuration window. 4 Enter the machine's new information into the - Dell B1265dnf | Dell Users Guide - Page 138
Installing driver over the network The machine that does not support the network interface, it will not be able to use this feature (see "Rear view" on page 18). 5 Windows 1 Make sure that the machine is connected to the network and powered on. Also, your machine's IP address should have been set - Dell B1265dnf | Dell Users Guide - Page 139
off the firewall and click Update. For Windows operating system, Start > Control Panel and start windows firewall, and set this option unactivated. For other operating system, refer to its on-line guide. 7 Follow the instructions in the installation window. 2. Using a Network-Connected Machine 139 - Dell B1265dnf | Dell Users Guide - Page 140
the V4 driver in the Desktop screen, you can download from the Dell website, www.Dell.com >find your product > Support or downloads. • If you want to install Dell's printer management tools, you need to install them using the supplied software CD. You can print a Network Configuration Report from - Dell B1265dnf | Dell Users Guide - Page 141
7 Linux You need to download Linux software packages from the Dell website to install the printer software (www.dell.com or www.dell.com/support > find your product > Support or Downloads). 9 Enter the password and click OK. 10 Select Network connection on the Printer Connection Type and click - Dell B1265dnf | Dell Users Guide - Page 142
Installing driver over the network 10 Input the printer description and Next. 11 After the machine is added, click Finish. 12 When installation is done, click Finish. Add a network printer 1 Double-click the Unified Driver Configurator. 2 Click Add Printer. 3 The Add printer wizard window opens. - Dell B1265dnf | Dell Users Guide - Page 143
command to verify installation results. 8 Run "installprinter" from the command line. This will bring up the Add Printer Wizard window. Setup the printer in this window referring to the following procedures. On some UNIX OS, for example on Solaris 10, just added printers may not be enabled and/or - Dell B1265dnf | Dell Users Guide - Page 144
Installing driver over the network 4 Specify any printer description in the Description field. This is optional. 5 Specify the printer location in the Location field. 6 Type the IP address or DNS name of the printer in the Device textbox for network-connected printers. On IBM AIX with - Dell B1265dnf | Dell Users Guide - Page 145
IPv6 is supported properly only in Windows Vista or higher. 7 The Add Printer Wizard window appears. Follow the instructions in the window. If the IPv6 network seems to not be working, set all the network setting to the factory defaults and try again. If the machine does not work in the - Dell B1265dnf | Dell Users Guide - Page 146
need to log-in as an administrator. Type in the below default ID and password. • ID: admin • Password: dell00000 3 When the Embedded Web Service window opens, move the mouse cursor over the Settings of the top menu bar and then click Network Settings. 4 Click TCP/IPv6 on the left pane of the website - Dell B1265dnf | Dell Users Guide - Page 147
the Apply button. Using Embedded Web Service 1 Start a web browser, such as Internet Explorer, that supports IPv6 addressing as a URL. 2 Select one of the IPv6 addresses (Link-local Address, Stateless Address, Stateful Address, Manual Address) from Network Configuration Report (see "Printing - Dell B1265dnf | Dell Users Guide - Page 148
methods. 5 When the Embedded Web Service window opens, click Settings > Network Settings. 6 Click Raw TCP/IP, LPR, IPP or mDNS . You can enable the IPP protocol or mDNS protocol. 12 Printing via AirPrint For example, the iPad manual provides these instructions: 1 Check whether the machine is - Dell B1265dnf | Dell Users Guide - Page 149
's your first time logging into Embedded Web Service you need to log-in as an administrator. Type in the below default ID and Password. We recommend you to change the default password for security reasons. • ID: admin • Password: dell00000 If the network environment is using a proxy server, you need - Dell B1265dnf | Dell Users Guide - Page 150
supports Google Cloud Print™ service. Make sure the printer is turned on and connected to a wired or wireless network that has access to the Internet. To share your printer phone. 1 Install the Cloud Print application on your mobile device. If you do not have the application, download it from the - Dell B1265dnf | Dell Users Guide - Page 151
Cloud Print™ Printing from the Chrome browser The following steps are an example of using the Chrome browser. 1 Run Chrome. 2 Open the document or email that you want to print. 3 Click the wrench icon in the browser's top right corner. 4 Click Print. A new tab for printing appears. 5 Select Print - Dell B1265dnf | Dell Users Guide - Page 152
Make sure your machine supports wireless networking. Wireless networking may not be available depending on the model. • If the IPv6 network seems to not be working, set all the network settings to the factory defaults and try again. 15 Getting started Wireless network name and network key Wireless - Dell B1265dnf | Dell Users Guide - Page 153
USB cable ( ) • Windows user, see "Ad hoc via USB cable in Windows" on page 162. • Mac user, see "Ad hoc via USB cable in Mac" on page 167. If problems occur during wireless set up or driver installation, refer to the troubleshooting chapter (see "Troubleshooting for wireless network" on page 172 - Dell B1265dnf | Dell Users Guide - Page 154
information on a WiFi Protected Setup™ WPS-enabled access point (or wireless router). Factory default in your machine is PBC mode, which is recommended for a typical wireless network environment. Items to prepare • Check if the access point (or wireless router) supports Wi-Fi Protected Setup™ (WPS - Dell B1265dnf | Dell Users Guide - Page 155
and hold the (WPS) button on the control panel for about 2 - 4 seconds until the status LED blinks quickly. The machine starts connecting to the wireless network. The LED blinks slowly for up to two minutes until you press the PBC button on the access point (or wireless router). 2 Press the WPS - Dell B1265dnf | Dell Users Guide - Page 156
is finished, the light blinks fast on the WPS LED. Then, the wireless network connection is automatically disconnected and the WPS LED turns off. 18 Setup using Windows Dell Printer Easy Wi-Fi Install Before Using Dell Printer Easy Wi-Fi Install, please ensure that OS of your computer should be - Dell B1265dnf | Dell Users Guide - Page 157
with the letter that represents your CD/DVD drive and click OK. If "Tap to choose what happens with this disc." pop-up window appears, click the window and select Run Setup.exe. 4 Click New Printer. 5 Choose Wireless. 6 The software searches for printers. 2. Using a Network-Connected Machine 157 - Dell B1265dnf | Dell Users Guide - Page 158
Next. 9 After the installation is finished, a window asking you to print a test page appears. If you want to print a test page, click Print a test page. Otherwise, just click Next and go to step 10. 10 Click Finish. 8 Setup installing printer software. 2. Using a Network-Connected Machine 158 - Dell B1265dnf | Dell Users Guide - Page 159
setup Access point via USB cable in Windows • Items to prepare - Access point - Network-connected computer - Software CD that was provided with your machine - The machine installed with a wireless network interface - USB cable 1 Check whether the USB cable is connected to the machine. 2 Turn - Dell B1265dnf | Dell Users Guide - Page 160
network setup 4 Click New Printer. 6 Click Next 5 Choose Wireless. 7 The software searches the wireless network. If the search has failed, you may check if the USB cable is properly connected between the computer and machine, and follow the instructions on the window. 2. Using a Network - Dell B1265dnf | Dell Users Guide - Page 161
want to choose, or if you want to set the wireless configuration manually, click (Plus) button. • Enter the wireless Network Name: Enter the SSID of access point you want (SSID is case-sensitive). • Operation Mode: Select Infrastructure. • Authentication: Select an authentication type. Open System - Dell B1265dnf | Dell Users Guide - Page 162
setup 9 When the wireless network setting is completed, disconnect the USB cable between the computer and machine. Click Next. 10 Click Next when the Install Printer Driver window appear. 11 After the installation is finished, a window asking you to print a test page appears. If you want to print - Dell B1265dnf | Dell Users Guide - Page 163
. 6 The software searches the wireless network. If the software has failed to search the network, check if the USB cable is connected properly between the computer and machine, and follow the instruction in the window. 7 After searching the wireless networks, a list of wireless networks your machine - Dell B1265dnf | Dell Users Guide - Page 164
Click Next when the Install Printer Driver window appears. 12 Select the components to be installed. Click Next. 13 After selecting the components, you can also change the machine name, set the machine to be shared on the network, set the machine as the default machine, and change the port name of - Dell B1265dnf | Dell Users Guide - Page 165
Wireless network setup 14 After the installation is finished, a window asking you to print a test page Setup using Mac • Items to prepare - Access point - Network-connected computer - Software CD that was provided with your machine - The machine installed with a wireless network interface - - Dell B1265dnf | Dell Users Guide - Page 166
, click Continue. 10 Click Wireless Network Setting button on the User Options Pane. 11 The software searches the wireless network. If the search has failed, you may check if the USB cable is connected between the computer and machine properly, and follow the instructions in the window. 12 After - Dell B1265dnf | Dell Users Guide - Page 167
Wi-Fi Direct Option appears on the screen only if your printer supports this feature. • Can start to build Wi-Fi Direct by using Dell Printer Manager (see "Setting up Wi-Fi Direct" on page 170). • Network Name(SSID): The default Network Name is the model name and the maximum length is 22 characters - Dell B1265dnf | Dell Users Guide - Page 168
individual components to install. 9 Enter the password and click OK. 10 Select Wireless connection on the Printer Connection Type and click Continue. 12 After searching the wireless networks, a list of wireless networks your machine has searched appears. If you want to use the Dell default ad hoc - Dell B1265dnf | Dell Users Guide - Page 169
DHCP method If the IP address assignment method is DHCP, check if DHCP is shown in the Confirm Wireless Network Settings window. If it shows Static, click Change TCP/IP to change the assignment method to Receive IP address automatically (DHCP). • For the Static method If the IP address assignment - Dell B1265dnf | Dell Users Guide - Page 170
click Login. • ID: admin • Password: dell00000 5 When the Embedded Web Service window opens, click Settings > Network Settings. 6 Click Wireless > Custom. You can also turn the Wi-Fi network on/off. Wi-Fi Direct is an easy-to-setup peer-to-peer connecting between method for your printer and - Dell B1265dnf | Dell Users Guide - Page 171
in Mac" on page 167. • After the driver installation is complete, Dell Printer Manager can be set and changes in the Wi-Fi Direct can be made. • Wifi direct setup can also be done from Ad hoc mode as well, when no network is available. Users will have to enable it through Dell Printer Manager as - Dell B1265dnf | Dell Users Guide - Page 172
Wireless network setup 22 Troubleshooting for wireless network Problems during setup or driver installation Printers Not Found • does not support wireless networking. Check the machine's user's guide included on the software CD supplied with your machine and prepare a wireless network machine. - Dell B1265dnf | Dell Users Guide - Page 173
Address: is the IP address on the network configuration Sheet. 3 Change the printer port's IP address if it is different from the network information report's. If you want to use the software installation CD to change the port IP, click Connect to a network printer to the computer from the Select - Dell B1265dnf | Dell Users Guide - Page 174
are not supported. • When using the ad hoc mode, in operating systems such as Windows Vista, you might need to set the wireless connection setting every time you use the wireless machine. • You cannot use infrastructure mode and ad hoc mode at the same time for Dell wireless network machines. • The - Dell B1265dnf | Dell Users Guide - Page 175
3. Useful Setting Menus This chapter explains how to browse the current status of your machine, and the method of setting for advanced machine setup. • Before you begin reading a chapter 176 • Print menu 177 • Copy menu 178 • Fax menu 182 • System setup 185 - Dell B1265dnf | Dell Users Guide - Page 176
begin reading a chapter This chapter explains all the features available for this series' models to help users easily understand the features.You can check the features available for each model in the Basic Guide (see "Menu overview" on page 28).The following are tips for using this chapter • The - Dell B1265dnf | Dell Users Guide - Page 177
see "Menu overview" on page 28). Item Emulation To change the menu options: • Press (Menu) > Print a page. To print on both sides of the paper, choose the binding edge. You can enter the number the best result. Use the Light toner density setting to save toner. Prints text darker than on a - Dell B1265dnf | Dell Users Guide - Page 178
" on page 28). To change the menu options: • Press (copy) > (Menu) > Copy Feature on the control panel. Item Scan Size Copies Reduce/Enlarge Description Sets the size of the original images and prints 2 or 4 pages onto one sheet of paper. 1 2 2 Layout > 2-up or 4-up 3 4 1 This copy feature - Dell B1265dnf | Dell Users Guide - Page 179
machine prints one side of the original on the upper half of the paper and the other side on the lower half without reducing the size of only when you place originals on the scanner glass. • Your original is divided into 9 portions. Each portion is scanned and printed one by one in the following - Dell B1265dnf | Dell Users Guide - Page 180
a single page. The number of images is automatically determined by the original image and the paper size. Item Layout > Clone Copy • This copy feature is available only when you place originals on the scanner glass. • You cannot adjust the copy size using Reduce/Enlarge for the Clone Copy feature - Dell B1265dnf | Dell Users Guide - Page 181
models. If so, it is not applicable to your machine (see "Menu overview" on page 28). To change the menu options: Press (copy) > (Menu) > Copy Setup on the control panel. Item Change Default Description Resets the value or setting to the printer's out-of-box state. 3. Useful Setting Menus 181 - Dell B1265dnf | Dell Users Guide - Page 182
scan an original that is easier to read, when the original contains too faint or too dark contents. The default Scans the original into memory and immediately transmits it when the current operation received or sent fax to other destination by a fax or PC. If you are out of office but have to receive - Dell B1265dnf | Dell Users Guide - Page 183
printing out. To print received documents, you need to enter the password. You can prevent your received faxes from being accessed by unauthorized so, it is not applicable to your machine (see "Menu overview" on page 28). To change the menu options: • Press (fax) > (Menu) > Fax Setup > Sending on - Dell B1265dnf | Dell Users Guide - Page 184
(see "Menu overview" on page 28). To change the menu options: • Press (fax) > Code Description Selects the default fax receiving mode. Specifies preset to *9* at the factory. Item Auto Reduction Discard Size fit the size of the paper loaded in the machine. on your country. Enables a user to use a - Dell B1265dnf | Dell Users Guide - Page 185
is not applicable to your machine (see "Menu overview" on page 28). To change the menu options: • Press (Menu) > System Setup > Machine Setup on . • Scanner: When you insert paper in the document feeder, the machine wake up from the power save mode. • Printer: When you open or close the scan unit, - Dell B1265dnf | Dell Users Guide - Page 186
size to Letter in the printer driver, the machine prints on A4 paper and vice versa. The printer detects the printing data from computer whether a page is empty or not. You can set to print or skip the blank page. Activating this mode extends the life of your toner cartridge and reduces your cost - Dell B1265dnf | Dell Users Guide - Page 187
(see "Menu overview" on page 28). To change the menu options: • Press (Menu) > System Setup > Paper Setup on the control panel. Item Paper Size Paper Type Paper Source Margin Description Sets the paper size as A4, Letter, or other paper sizes, according to your requirements. Chooses the type - Dell B1265dnf | Dell Users Guide - Page 188
until you hear the volume you want. d Press On Hook Dial to save the change and return to ready mode. Adjusts the ringer volume. For the ringer volume, you not applicable to your machine (see "Menu overview" on page 28). To change the menu options: • Press (Menu) > System Setup > Report on the - Dell B1265dnf | Dell Users Guide - Page 189
Alert Description When toner cartridge is empty, this option appears. You can clear the empty message. Shows the supply life indicators (see "Monitoring the supplies life" on page 73.) Shows the machine's serial number. When you call for service or register as a user on the Dell website, you can - Dell B1265dnf | Dell Users Guide - Page 190
To change the menu options: • Press (Menu) > System Setup > Clear Setting on the control panel. Item All Setting Print Setup Fax Setup Copy Setup System Setup Network Setup Description Clears all of the data stored in memory and resets all of your settings to the factory default. Restores - Dell B1265dnf | Dell Users Guide - Page 191
. TCP/IP (IPv6) Ethernet Speed Clear Setting Network Conf. Selects this option to use the network environment through IPv6 (see "IPv6 configuration" on page 145). Configure the network transmission speed. Reverts the network settings to the default values. (Reboot required.) This list shows - Dell B1265dnf | Dell Users Guide - Page 192
193 • Entering various characters 194 • Setting up the fax address book 195 • Printing features 199 • Scan features 211 • Fax features 217 • The procedures in this chapter are mainly based on Windows 7. • It may be necessary to press OK to navigate to lower-level menus for some models. - Dell B1265dnf | Dell Users Guide - Page 193
• For Windows and Mac users, see "Device Settings" on page 235. You can set the altitude value from Device Settings in Dell Printer Manager program or Machine section in Printer Settings Utility program. If your machine is connected to the network, you can set the altitude via Embedded Web Service - Dell B1265dnf | Dell Users Guide - Page 194
JKLjkl5 6 MNOmno6 7 PQRSpqrs7 8 TUVtuv8 9 WXYZwxyz9 0 &+-,0 These symbols are available when you type for network authentication.) These symbols are available when you type for network authentication.) • Special character sets may differ from your machine depending on its options. • Some - Dell B1265dnf | Dell Users Guide - Page 195
up speed number with the fax numbers you use frequently via Embedded Web Service and then easily and quickly enter fax numbers by entering the location the number you choose, the display shows the message to allow you to change it. To start over with another speed dial number, press (Back). 4 - Dell B1265dnf | Dell Users Guide - Page 196
dial number and press OK. If an entry is already stored in the number you choose, the display shows the message to allow you to change it. To start over with another speed dial number, press (Back). 3 Search by entering the first few letters of the speed dial's name to put - Dell B1265dnf | Dell Users Guide - Page 197
Number? and press OK. 7 Press (Stop/Clear) to return to ready mode. There are two ways to search for a number in memory. You can either scan from A to Z sequentially, or you can search by entering the first letters of the name associated with the number. 1 Select ct (fax) > (Address Book - Dell B1265dnf | Dell Users Guide - Page 198
Setting up the fax address book 9 Printing address book You can check your (Address Book) settings by printing a list. 1 Select ct (fax) > (Address Book) > Print on the control panel. 2 The machine begins printing. 4. Special Features 198 - Dell B1265dnf | Dell Users Guide - Page 199
the settings for each print job, change it in Printing Preferences. XPS printer driver: used to print XPS file format. • The XPS printer driver can be installed only on Windows Vista OS or higher. • You can install the XPS printer driver when you insert the software CD into your CD/DVD drive. When - Dell B1265dnf | Dell Users Guide - Page 200
using your machine. To take advantage of the printer features provided by your printer driver, click Properties or Preferences in the application's Print window to change the print settings. The machine name, that appears in the printer properties window may differ depending on the machine in use - Dell B1265dnf | Dell Users Guide - Page 201
(Poster 2x2), 9 (Poster 3x3), or 16 (Poster 4x4) sheets of paper, for the purpose of pasting the sheets together to form one poster-size Prints your document on both sides of a sheet of paper and arranges the pages so that the paper can be folded in half after printing to produce a booklet - Dell B1265dnf | Dell Users Guide - Page 202
complete the printing job manually. The machine prints every other page of the document first. After that, a message appears on your computer. • We recommend not to print on both sides of the special media, such as labels, envelopes, or thick paper. It may cause a paper jam or damage the machine - Dell B1265dnf | Dell Users Guide - Page 203
a text message in the Watermark Message box. You can enter up to 256 characters. The message displays in the preview window. a To change the print settings from your software application, access Printing Preferences. b Click the Advanced tab, select Edit from the Watermark drop-down list. The Edit - Dell B1265dnf | Dell Users Guide - Page 204
only when you use the SPL/ PCL printer driver. An overlay is text and/or images stored in the computer hard disk drive (HDD) as a special file format that can be printed on any document. Overlays are often used to take the place of letterhead paper. Rather than using preprinted letterhead, you can - Dell B1265dnf | Dell Users Guide - Page 205
when you access the Open window. After you select the box is checked, a message window appears each time you submit a window. Item Description Overlay (Deleting a page overlay) a In the Printing Preferences window window appears, click Yes. f Click OK or Print until you exit the Print window. - Dell B1265dnf | Dell Users Guide - Page 206
differ depending on the machine in use. Except for the name, the composition of the printer properties window is similar to the following. Printing a document When you print with a Mac, you need to check the printer driver settings in each application you use. Follow the steps below to print from - Dell B1265dnf | Dell Users Guide - Page 207
window appears with information about that option's feature, which is provided from the driver. 14 Linux printing Some features may not be available depending on models or options. It means that the features are not supported some applications). 3 Choose your paper size, orientation, and make sure - Dell B1265dnf | Dell Users Guide - Page 208
for more details. Configuring Printer Properties Using the Printer Properties window provided by the Printers configuration, you can change the various properties for your machine as a printer. 1 Open the Unified Driver Configurator. If necessary, switch to Printers configuration. 2 Select your - Dell B1265dnf | Dell Users Guide - Page 209
added. 3 Select the printing options from the window such as Page Selection. 4 Select how many copies are needed in Number of Copies. 5 Press OK to start the print job. Changing the machine settings The UNIX printer driver Print Job Manager in which the user can select various print options in - Dell B1265dnf | Dell Users Guide - Page 210
printer and depend on the PPD file. • Multiple pages: Print several pages on one side of the paper default, margins are not enabled. The user can change the margin settings by changing the values in the respective fields. Set by default, these values depend on the page size selected. • Unit: Change - Dell B1265dnf | Dell Users Guide - Page 211
via the local connection or the network connection (see "Scanning from image editing program" on page 212). 1 Open Dell Printer Manager (see "Using Dell Printer Manager" on page 233). 2 Select the appropriate machine from the Printer List. 3 Select Scan to PC Settings menu. 4 Select the option you - Dell B1265dnf | Dell Users Guide - Page 212
(Scan) > Scan to PC > Network PC on the control panel. If you see Not Available message, check the port connection. 3 Select your registered computer ID, and enter the Password if necessary. • ID is the same ID as the registered scan ID for Dell Printer Manager > Switch to advanced mode > Scan to PC - Dell B1265dnf | Dell Users Guide - Page 213
components provided by Microsoft Windows 7 and works with digital cameras and scanners. Unlike the TWAIN driver, the WIA driver allows you to scan and easily adjust images without using additional software: The WIA driver works only on Windows OS (not supported Windows 2000) with a USB port - Dell B1265dnf | Dell Users Guide - Page 214
Bonjour Devices. - If you want to scan using TWAIN, refer to the Mac OS X10.4 steps above. • For 10.6-10.8, select your device below SHARED. 5 Set the scan options on this program. 6 Scan and save your scanned image. If scanning does not operate in Image Capture, update Mac OS to the latest version - Dell B1265dnf | Dell Users Guide - Page 215
Scan features • If scanning does not operate in Image Capture, update Mac OS to the latest version. • For more information, refer to the Image Capture's help. • You can also scan using TWAIN-compliant software, such as Adobe Photoshop. 4 Select the scanner on the list. 23 Linux scanning Scanning - Dell B1265dnf | Dell Users Guide - Page 216
. Editing an image with Image Manager The Image Manager application provides you with menu commands and tools to edit your scanned image. 9 Drag the pointer to set the image area to be scanned in the Preview Pane. 10 Select the option you want. 11 Scan and save your scanned image. For later use - Dell B1265dnf | Dell Users Guide - Page 217
Guide time depends on the country's factory default setting. When the display shows change the time interval between redials and the number of redial attempts. 3 When an original is loaded in the document feeder, the machine automatically begins to send. If an original is placed on the scanner - Dell B1265dnf | Dell Users Guide - Page 218
machine. To send a fax from your computer, the Dell Network PC Fax program must be installed. This program will be installed when you installed the printer driver. 1 Open the document to be sent. 2 Select Print from the File menu. The Print window will be displayed. It may look slightly different - Dell B1265dnf | Dell Users Guide - Page 219
be sent at that time on the following day. 9 The original is scanned into memory before transmission. The machine returns to ready mode. The display press OK when Yes highlights and repeat steps 5. • You can add up to 10 destinations. • Once you entered a group dial number, you cannot enter another - Dell B1265dnf | Dell Users Guide - Page 220
be sent ahead of reserved operations. The original is scanned into memory and immediately transmitted when the current operation is finished. 1 Place a the job name and press OK. 5 If an original is placed on the scanner glass, select Yes to add another pages. Load another original and press OK. - Dell B1265dnf | Dell Users Guide - Page 221
Fax features 30 Forwarding a sent fax to another destination 31 Forwarding a received fax You can set the machine to forward the received or sent fax to other destination by a fax. If you are out of office but have to receive the fax, this feature may be useful. You can set the machine to - Dell B1265dnf | Dell Users Guide - Page 222
open it with default application. • None: After receiving a fax, the machine does not notify the user or opens the application. 5 Press OK. 33 Changing the receive modes 1 Open the Dell Printer Manager. 2 Select the appropriate machine from the Printer List. 3 Select Fax to PC Settings menu. 4 Use - Dell B1265dnf | Dell Users Guide - Page 223
. • DRPD: you can receive a call using the Distinctive Ring Pattern Detection (DRPD) feature. Distinctive Ring is a telephone company service which enables an user to use a single telephone line to answer several different telephone numbers. For further details, see "Receiving faxes using DRPD mode - Dell B1265dnf | Dell Users Guide - Page 224
the factory. The first and the last asterisks are fixed, but you can change the middle number to whatever you want. While you are talking over the telephone connected to the EXT socket, copy and scan features are not available. Distinctive Ring is a telephone company service which enables an user - Dell B1265dnf | Dell Users Guide - Page 225
receiving mode 39 Printing faxes on both sides of the paper This feature may not be available depending on model or > Fax Feature > Secure Receive > Print on the control panel. 2 Enter a four-digit password and press OK. 3 The machine prints all of the faxes stored in memory. • Some menus - Dell B1265dnf | Dell Users Guide - Page 226
. 41 Printing sent fax report automatically You can set the machine to print a report with detailed information about the previous 50 communication operations, including time and dates. 1 Press (fax) > (Menu) > Fax Setup > Auto Report > On on the control panel. 2 Press (Stop/Clear) to return to - Dell B1265dnf | Dell Users Guide - Page 227
management tools 228 • Using Firmware update utility 229 • Using Dell Supplies Ordering Utility 230 • Using Embedded Web Service 231 • Using Dell Printer Manager 233 • Using Dell Printer Status 236 • Using Dell Printer Experience 238 • Using the Linux Unified Driver Configurator - Dell B1265dnf | Dell Users Guide - Page 228
Programs or All Programs. • For Windows 8, from the Charms, select Search > Apps. 3 Find Dell Printers. 4 Under Dell Printers, you can see installed management tools. 5 Click the management tool you want to use. • After installing the driver, for some management tools, you can access them directly - Dell B1265dnf | Dell Users Guide - Page 229
or All Programs > Dell > Dell Printers > your printer driver name > Firmware Update Utility. 2 Download the latest firmware. Click http://www.dell.com/support. 3 If your printer is connected with an USB cable, click USB Connected Printer or Network Connected Printer. 4 Click Browse and - Dell B1265dnf | Dell Users Guide - Page 230
replacement toner cartridges or supplies from Dell: Availabe for Windows or Mac OS users only. 2 The Dell Supplies Ordering Utility window opens. 1 Double-click the Dell Supplies Ordering Utility icon on your desktop. OR From the Start menu, select Programs or All Programs >Dell > Dell Printers - Dell B1265dnf | Dell Users Guide - Page 231
Web Service explanation in this user's guide may differ from your machine depending on its options or models. • Network model only (see "Software" on page 7). 1 Click Login on the upper right of the Embedded Web Service website. 2 Type in the ID and Password then click Login. • ID: admin • Password - Dell B1265dnf | Dell Users Guide - Page 232
such as TCP/IP and network protocols. Maintenance tab This tab allows you to maintain your machine by upgrading firmware and setting contact information for sending emails. You can also connect to Dell website or download drivers by selecting the Link menu. • Firmware Upgrade: Upgrade your machine - Dell B1265dnf | Dell Users Guide - Page 233
Using Dell Printer Manager • Available for Windows and Mac OS users only (see "Software" on page 7). • For Windows, Internet Explorer 6.0 or higher is the minimum requirement for Dell Printer Manager. The screenshot may differ depending on operating system you are using. Dell Printer Manager is - Dell B1265dnf | Dell Users Guide - Page 234
Printer Manager Printer information 2 This area gives you general information about your machine. You can check information, such as the machine's model name, IP address (or Port name), and machine status. You can view the online User's Guide. Application information Includes links for changing - Dell B1265dnf | Dell Users Guide - Page 235
Using Dell Printer Manager 4 Advanced settings user interface overview The advanced user interface is intended to be used by the person responsible for managing the network and machines. Some menus may not appear in the display depending on options or models. If so, it is not applicable to your - Dell B1265dnf | Dell Users Guide - Page 236
also launch Dell Printer Status manually. Go to the Printing Preferences, click the Basic tab > Printer Status button. These icons appear on the Windows task bar: Toner Level 1 You can view the level of toner remaining in each toner cartridge. The machine and the number of toner cartridge(s) shown - Dell B1265dnf | Dell Users Guide - Page 237
Using Dell Printer Status 2 Option Order Supplies 3 4 User's Guide 5 Close You can set printing job alert related settings. You can order replacement toner cartridge(s) from online. You can view the online User's Guide. Close the window. 5. Useful Management Tools 237 - Dell B1265dnf | Dell Users Guide - Page 238
Dell application that combines Dell machine settings and machine management into one location. You can set device settings, order supplies, open troubleshooting guides, visit Dell's web site, and check connected machine information. This application will be automatically downloaded from the Windows - Dell B1265dnf | Dell Users Guide - Page 239
open the troubleshooting section in the user's guide. 7 Printing from Windows 8 This section explains common printing tasks from the Start screen. Basic printing Order Supplies 3 Visit Dell 4 Device List & Latest Scanned 5 Image Click on this button to order replacement toner cartridges online - Dell B1265dnf | Dell Users Guide - Page 240
Using Dell Printer Experience 5 Click the Print button to start the print job. Cancelling a print job If the printing job is waiting in the print queue or print spooler, cancel the job as follows: • You can access this window by simp ly double-clicking the machine icon ( ) in the Windows task bar. - Dell B1265dnf | Dell Users Guide - Page 241
Using Dell Printer Experience Basic tab Advanced tab Basic This option allows you to choose the basic printing settings such as copies, orientation, and document type. Eco settings This option allows you to choose multiple pages per side to save media. Paper settings This option allows you to - Dell B1265dnf | Dell Users Guide - Page 242
Using Dell Printer Experience 8 Scanning from Windows 8 7 Click Scan ( )and save the image. This section is for the users with multi-functional printers. Scanning with your machine lets you turn pictures and text into digital files that can be stored on your computer. • When you place the - Dell B1265dnf | Dell Users Guide - Page 243
on the left to switch to the corresponding configuration window. 1 Printer Configuration 2 Port Configuration To use the on screen help, the Help or button from the window. 3 After changing the configurations, click Exit to close the Unified Driver Configurator. 5. Useful Management Tools 243 - Dell B1265dnf | Dell Users Guide - Page 244
• Set as Default: Sets the current selected machine as a default machine. • Stop/Start: Stops/starts the machine. • Test: Allows you to print a test page to ensure the machine is working properly. • Properties: Allows you to view and change the printer's properties. 5. Useful Management Tools 244 - Dell B1265dnf | Dell Users Guide - Page 245
Using the Linux Unified Driver Configurator Classes tab The Classes tab shows a list of available machine classes. 11 Ports configuration In this window, you can view the list of available ports, the available ports list. • Release port: Releases the selected port. 5. Useful Management Tools 245 - Dell B1265dnf | Dell Users Guide - Page 246
6. Troubleshooting This chapter gives helpful information for what to do if you encounter an error. • Paper feeding problems 247 • Power and cable connecting problems 248 • Printing problems 249 • Printing quality problems 253 • Copying problems 261 • Scanning problems 262 • Faxing - Dell B1265dnf | Dell Users Guide - Page 247
stick together in the paper Use only transparencies specifically designed for laser printers. Remove each transparency as it exits from the machine. exit. Envelopes skew or fail to feed correctly. Ensure that the paper guides are against both sides of the envelopes. 6. Troubleshooting 247 - Dell B1265dnf | Dell Users Guide - Page 248
Power and cable connecting problems Condition The machine is not receiving power, or the connection cable between the computer and the machine is not connected . If the machine has a • Disconnect the machine's cable and reconnect it. (Power) button on the control, press it. 6. Troubleshooting 248 - Dell B1265dnf | Dell Users Guide - Page 249
as your default machine in Windows. Check the machine for the following: • The cover is not closed. Close the cover. • Paper is jammed. Clear the paper jam (see "Clearing paper jams" on page 87). • No paper is loaded. Load paper (see "Loading paper in the tray" on page 37). • The toner cartridge is - Dell B1265dnf | Dell Users Guide - Page 250
. Ensure that the paper size in the printer driver settings matches the paper in the tray.Or, ensure that the paper size in the printer driver settings matches the paper selection in the software application settings you use (see "Opening printing preferences" on page 51). 6. Troubleshooting 250 - Dell B1265dnf | Dell Users Guide - Page 251
machine is selected. The software application is malfunctioning. Try printing a job from another application. The operating system is malfunctioning. Exit Windows and reboot the computer. Turn the machine off and back on again. Pages print, but they are The toner cartridge is defective or out - Dell B1265dnf | Dell Users Guide - Page 252
Printing Preferences (see "Opening printing preferences" on page 51). The printed billing paper The paper type setting does not match. is curled. Change the printer option and try again. Go to Printing Preferences, click Paper tab, and set type to Thick (see "Opening printing preferences" on page - Dell B1265dnf | Dell Users Guide - Page 253
on page 75). If these steps do not correct the problem, contact a service representative. The top half of the paper is printed lighter than the rest of the paper The toner might not adhere properly to this type of paper. • Change the printer option and try again. Go to Printing Preferences, click - Dell B1265dnf | Dell Users Guide - Page 254
to reject toner. Try a different kind or brand of paper. • Change the printer option and try again. Go to Printing Preferences, click the Paper tab, and set type to Thick (see "Opening printing preferences" on page 51). If these steps do not correct the problem, contact a service representative. If - Dell B1265dnf | Dell Users Guide - Page 255
redistribute the toner (see "Redistributing toner" on page 71). • Clean the inside of the machine (see "Cleaning the machine" on page 75). • Check the paper type and quality. • Remove the toner cartridge and install a new one (see "Replacing the toner cartridge" on page 72). 6. Troubleshooting 255 - Dell B1265dnf | Dell Users Guide - Page 256
causing this copy quality problem. • If you are using a new toner cartridge, redistribute the toner first (see "Redistributing toner" on page 71). Toner particles are around bold The toner might not adhere properly to this type of paper. characters or pictures • Change the printer option and try - Dell B1265dnf | Dell Users Guide - Page 257
too tight or too loose against the paper stack. • Ensure that the paper is loaded properly. • Check the paper type and quality. Both high temperature and humidity can cause paper curl. • Turn the stack of paper over in the tray. Also try rotating the paper 180° in the tray. 6. Troubleshooting 257 - Dell B1265dnf | Dell Users Guide - Page 258
not be installed properly. Remove the cartridge and reinsert it. • The toner cartridge may be defective. Remove the toner cartridge and install a new one (see "Replacing the toner cartridge" on page 72). • The machine may require repairing. Contact a service representative. 6. Troubleshooting 258 - Dell B1265dnf | Dell Users Guide - Page 259
. Remove the cartridge and reinsert it. • The toner cartridge may be defective. Remove the toner cartridge and install a new one (see "Replacing the toner cartridge" on page 72). If the problem persists, the machine may require repairing. Contact a service representative. 6. Troubleshooting 259 - Dell B1265dnf | Dell Users Guide - Page 260
Printing quality problems Condition Curl Suggested solutions If the printed paper is curled or paper does not feed into the machine: • Turn the stack of paper over in the tray. Also try rotating the paper 180° in the tray. • Change the printer's paper option and try again. Go to Printing - Dell B1265dnf | Dell Users Guide - Page 261
. Check/adjust the paper guides, if necessary. • Ensure that the paper is the proper type and weight (see "Print media specifications" on page 101). • Check for copy paper or pieces of copy paper remaining in the machine after a paper jam has been cleared. Toner cartridge produces fewer • Your - Dell B1265dnf | Dell Users Guide - Page 262
Scanning problems Condition Suggested solutions The scanner does not work. • Make sure that you place the original to be scanned face down on the scanner printer cable may be improperly connected or the power may be off. mode you want. • The scanner driver is not installed or the operating - Dell B1265dnf | Dell Users Guide - Page 263
fax machine sending you the fax may be faulty. • A noisy phone line can cause line errors. • Check your machine by making a copy. • A toner cartridge has almost reached its estimated cartridge life. Replace the toner cartridge (see "Replacing the toner cartridge" on page 72). 6. Troubleshooting 263 - Dell B1265dnf | Dell Users Guide - Page 264
, and then try to store the fax again. Call for service. Blank areas appear at the bottom of each page or on other pages, with a small strip of text at the top. You may have chosen the wrong paper settings in the user option setting. Check the paper size and type again. 6. Troubleshooting 264 - Dell B1265dnf | Dell Users Guide - Page 265
Operating system problems 1 Common Windows problems Condition Suggested solutions "File in Use" message appears Exit all software applications. Remove all software from the startup group, then restart Windows. Reinstall the printer driver. during installation. "General Protection Fault", " - Dell B1265dnf | Dell Users Guide - Page 266
Operating system problems 2 Common Mac problems Condition Suggested solutions The machine does not print PDF files correctly. Some parts of graphics, text, or illustrations are missing. Printing the PDF file as an image may enable the file to print. Turn on Print As Image from the Acrobat - Dell B1265dnf | Dell Users Guide - Page 267
Operating system problems 3 Common Linux problems Condition Suggested solutions The machine does not print. • Check if the printer driver is installed in your system. Open Unified Driver Configurator and switch to the Printers tab in the Printers configuration window to look at the list of - Dell B1265dnf | Dell Users Guide - Page 268
is installed in your system. Open Unified Linux Driver configurator, switch to Scanners configuration, then press Drivers. Make sure that driver with a name corresponding to your machine's name is listed in the window. • Ensure the port is not busy. Since functional components of machine (printer - Dell B1265dnf | Dell Users Guide - Page 269
this user's guide. 802.11 802.11 is a set of standards for wireless local area network ( paper so that the machine can scan some amount of the paper at once. AppleTalk AppleTalk is a proprietary suite of protocols developed by Apple, Inc for computer networking. It was included in the original Mac - Dell B1265dnf | Dell Users Guide - Page 270
Document Feeder (DADF) is a scanning unit that will automatically feed and turn over an original sheet of paper so that the machine can scan on both sides of the paper. Default The value or setting that is in effect when taking a printer out of its box state, reset, or initialized. Glossary 270 - Dell B1265dnf | Dell Users Guide - Page 271
is a telephone company service which enables a user to use a single telephone line to answer several different telephone numbers. Duplex A mechanism that will automatically turn over a sheet of paper so that the machine can print (or scan) on both sides of the paper. A printer equipped with a Duplex - Dell B1265dnf | Dell Users Guide - Page 272
files over any network that supports the TCP/IP protocol (such as the Internet or an intranet). Fuser Unit The part of a laser printer that fuses the toner onto the print media. It consists of a heat roller and a pressure roller. After toner is transferred onto the paper, the fuser unit applies heat - Dell B1265dnf | Dell Users Guide - Page 273
, a printer). Intranet A private network that uses Internet Protocols, network connectivity, and possibly the public telecommunication system to securely share part of an organization's information or operations with its employees. Sometimes the term refers only to the most visible service, the - Dell B1265dnf | Dell Users Guide - Page 274
as managing print jobs, media size, resolution, and so forth. IPP can be used locally or over the Internet to hundreds of printers, and also supports Exchange. It is a networking protocol used by the Novell NetWare operating systems. IPX and SPX both provide connection services similar to TCP/IP, - Dell B1265dnf | Dell Users Guide - Page 275
an aid for routers trying to locate machines on large networks. MFP Multi Function Peripheral (MFP) is an office machine that includes the following functionality in one physical body, so as to have a printer, a copier, a fax, a scanner and etc. MH Modified Huffman (MH) is a compression method for - Dell B1265dnf | Dell Users Guide - Page 276
Glossary NetWare OSI A network operating system developed by Novell, Inc. It initially used cooperative multitasking to run various services on a PC, and the network protocols were based on the archetypal Xerox XNS stack. Today NetWare supports TCP/IP as well as IPX/SPX. OPC Open Systems - Dell B1265dnf | Dell Users Guide - Page 277
Dial In User Service (RADIUS) is a protocol for remote user authentication and accounting. RADIUS enables centralized management of authentication data such as usernames and passwords using an AAA (authentication, authorization, and accounting) concept to manage network access. Resolution - Dell B1265dnf | Dell Users Guide - Page 278
. Toner Cartridge A kind of bottle or container used in a machine like a printer which contains toner. Toner is a powder used in laser printers and photocopiers, which forms the text and images on the printed paper. Toner can be fused by by a combination of heat/pressure from the fuser, causing - Dell B1265dnf | Dell Users Guide - Page 279
scanners and software. By using a TWAIN-compliant scanner with a TWAIN-compliant program, a scan can be initiated from within the program. It is an image capture API for Microsoft Windows and Apple Mac operating systems. UNC Path Uniform Naming Convention (UNC) is a standard way to access network - Dell B1265dnf | Dell Users Guide - Page 280
Key) is special mode of WPA for small business or home users. A shared key, or password, is configured in the wireless access point (WAP) and home network. If your wireless access point supports WPS, you can configure the wireless network connection easily without a computer. XPS XML Paper - Dell B1265dnf | Dell Users Guide - Page 281
195 195 195 148 76 75 78 79 75 19 10 178 19 55 reducing or enlarging copies 56 D default settings tray setting 45 Dell printer experience 238 Dell Printer Status 236 driver installation Unix 142 E eco printing 53 Embedded Web Service 231 entering character 194 error message 94 - Dell B1265dnf | Dell Users Guide - Page 282
avoiding paper jams 84, 87 83 L LCD display browsing the machine status 178, 181, 182, 188 Linux common Linux problems 267 driver installation for network connected 141, 131, 132 printer properties 208, 207 scanning 215, 107 unifled driver configurator 243, 137 linux scanning 215 - Dell B1265dnf | Dell Users Guide - Page 283
Windows 49 200 setting as a default machine 199 UNIX 209 printing a document Linux 207 Macintosh 206 UNIX 209 printing feature 199 problem operating system problems 265 problems copying problems 261 faxing problems 263 paper feeding problems 247, 248, 249, 253 scanning - Dell B1265dnf | Dell Users Guide - Page 284
the supplies life ordering replacing toner cartridge Supplies Ordering Utility T toner cartridge estimated life handling instructions non-Dell and refilled redistributing toner storing tray adjusting the width and length changing the tray size loading paper in manual feeder/multi-purpose tray
-
 1
1 -
 2
2 -
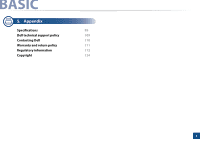 3
3 -
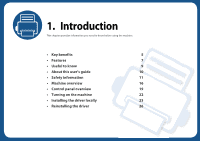 4
4 -
 5
5 -
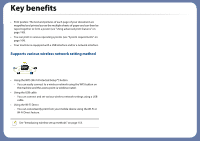 6
6 -
 7
7 -
8
-
9
-
10
-
11
-
12
-
13
-
14
-
15
-
16
-
17
-
18
-
19
-
20
-
21
-
22
-
23
-
24
-
25
-
26
-
27
-
28
-
29
-
30
-
31
-
32
-
33
-
34
-
35
-
36
-
37
-
38
-
39
-
40
-
41
-
42
-
43
-
44
-
45
-
46
-
47
-
48
-
49
-
50
-
51
-
52
-
53
-
54
-
55
-
56
-
57
-
58
-
59
-
60
-
61
-
62
-
63
-
64
-
65
-
66
-
67
-
68
-
69
-
70
-
71
-
72
-
73
-
74
-
75
-
76
-
77
-
78
-
79
-
80
-
81
-
82
-
83
-
84
-
85
-
86
-
87
-
88
-
89
-
90
-
91
-
92
-
93
-
94
-
95
-
96
-
97
-
98
-
99
-
100
-
101
-
102
-
103
-
104
-
105
-
106
-
107
-
108
-
109
-
110
-
111
-
112
-
113
-
114
-
115
-
116
-
117
-
118
-
119
-
120
-
121
-
122
-
123
-
124
-
125
-
126
-
127
-
128
-
129
-
130
-
131
-
132
-
133
-
134
-
135
-
136
-
137
-
138
-
139
-
140
-
141
-
142
-
143
-
144
-
145
-
146
-
147
-
148
-
149
-
150
-
151
-
152
-
153
-
154
-
155
-
156
-
157
-
158
-
159
-
160
-
161
-
162
-
163
-
164
-
165
-
166
-
167
-
168
-
169
-
170
-
171
-
172
-
173
-
174
-
175
-
176
-
177
-
178
-
179
-
180
-
181
-
182
-
183
-
184
-
185
-
186
-
187
-
188
-
189
-
190
-
191
-
192
-
193
-
194
-
195
-
196
-
197
-
198
-
199
-
200
-
201
-
202
-
203
-
204
-
205
-
206
-
207
-
208
-
209
-
210
-
211
-
212
-
213
-
214
-
215
-
216
-
217
-
218
-
219
-
220
-
221
-
222
-
223
-
224
-
225
-
226
-
227
-
228
-
229
-
230
-
231
-
232
-
233
-
234
-
235
-
236
-
237
-
238
-
239
-
240
-
241
-
242
-
243
-
244
-
245
-
246
-
247
-
248
-
249
-
250
-
251
-
252
-
253
-
254
-
255
-
256
-
257
-
258
-
259
-
260
-
261
-
262
-
263
-
264
-
265
-
266
-
267
-
268
-
269
-
270
-
271
-
272
-
273
-
274
-
275
-
276
-
277
-
278
-
279
-
280
-
281
-
282
-
283
-
284
 |
 |

BASIC
Dell B1265dfw
User’s Guide
BASIC
User’s Guide
This guide provides information concerning installation, basic operation and
troubleshooting on windows.
ADVANCED
This guide provides information about installation, advanced configuration, operation and
troubleshooting on various OS environments.
Some features may not be available depending on models or countries.