Dell B2360D User Guide
Dell B2360D Manual
 |
View all Dell B2360D manuals
Add to My Manuals
Save this manual to your list of manuals |
Dell B2360D manual content summary:
- Dell B2360D | User Guide - Page 1
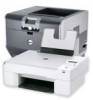
Dell B2360d-dn Laser Printer User's Guide May 2012 www.dell.com | support.dell.com Trademarks Information in this document is subject to change without notice. © 2012 Dell, Inc. All rights reserved. Reproduction of this material in any manner whatsoever without the written permission of Dell Inc. - Dell B2360D | User Guide - Page 2
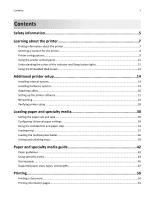
Loading trays...31 Loading the multipurpose feeder...36 Linking and unlinking trays...39 Paper and specialty media guide 42 Paper guidelines...42 Using specialty media...44 Storing paper...46 Supported paper sizes, types, and weights 47 Printing...50 Printing a document...50 Printing information - Dell B2360D | User Guide - Page 3
money and the environment 83 Saving paper and toner...83 Saving energy...83 Recycling...86 Securing the printer 87 Using the security lock feature... volatile memory...88 Finding printer security information...88 Maintaining the printer 89 Cleaning the printer...89 Checking the status of parts - Dell B2360D | User Guide - Page 4
flap. [23y.xx 109 Jam, tray [x] [24y.xx]...111 Jam, MP feeder [250.xx]...111 Troubleshooting 113 Understanding the printer messages...113 Solving printer problems...121 Solving print problems...127 Embedded Web Server does not open 149 Contacting technical support...150 Appendix 151 Index...153 - Dell B2360D | User Guide - Page 5
uses a laser. Use emissions. You must understand the section in your operating instructions the printer, then turn the printer problems. Remove the power cord from the electrical outlet before inspecting it. Refer service or repairs, other than those described in the user documentation, to a service - Dell B2360D | User Guide - Page 6
set up this product or make any electrical or cabling connections, such as the fax feature, power cord, or telephone, during a lightning storm. SAVE THESE INSTRUCTIONS. - Dell B2360D | User Guide - Page 7
Instructions for: • Connecting the printer to an Ethernet network • Troubleshooting printer connection problems Help using the printer software The latest supplemental information, updates, and technical support: • Documentation • Driver downloads • Product upgrades • Service call and repair - Dell B2360D | User Guide - Page 8
? • Software and Drivers-Certified drivers for my printer and installers for Dell printer software • Readme files-Last‑minute technical changes, or advanced technical reference materials for experienced users or technicians • Supplies and accessories for my printer • Replacement cartridges • Safety - Dell B2360D | User Guide - Page 9
-POTENTIAL INJURY: To reduce the risk of equipment instability, load each tray separately. Keep all other trays closed until needed. You can configure your printer by adding one optional 550‑sheet tray. For instructions on installing the optional tray, see "Installing an optional tray" on page 19. - Dell B2360D | User Guide - Page 10
Learning about the printer 10 1 Printer control panel 2 Paper stop 3 Standard bin 4 Front door release button 5 Controller board access door 6 Standard 250‑sheet tray 7 Optional 550‑sheet tray 8 50‑sheet multipurpose feeder 9 Front door - Dell B2360D | User Guide - Page 11
Use the To 1 Menus button Open the menus. Notes: 2 Display • The menus are available only when the printer is in the Ready state. • Pressing the button while navigating within the menus returns the printer control panel to the top‑level menu screen. View printing options as well as status and - Dell B2360D | User Guide - Page 12
the Embedded Web Server to do the following: • View the virtual display of the printer control panel. • Check the status of the printer supplies. • Configure supply notifications. • Configure printer settings. • Configure network settings. • View reports. To access the Embedded Web Server for your - Dell B2360D | User Guide - Page 13
Learning about the printer 13 2 Open a Web browser, and then type the printer IP address in the address field. 3 Press Enter. The Embedded Web Server page appears. - Dell B2360D | User Guide - Page 14
CAUTION-SHOCK HAZARD: If you are accessing the controller board or installing optional hardware or memory devices sometime after setting up the printer, then turn the printer off, and unplug the power cord from the electrical outlet before continuing. If you have any other devices attached to the - Dell B2360D | User Guide - Page 15
CAUTION-SHOCK HAZARD: If you are accessing the controller board or installing optional hardware or memory devices sometime after setting up the printer, then turn the printer off, and unplug the power cord from the electrical outlet before continuing. If you have any other devices attached to the - Dell B2360D | User Guide - Page 16
it clicks into place. 1 2 5 Close the controller board access door. Note: When the printer software and any hardware options are installed, it may be necessary to manually add the options in the printer driver to make them available for print jobs. For more information, see "Updating available - Dell B2360D | User Guide - Page 17
card CAUTION-SHOCK HAZARD: If you are accessing the controller board or installing optional hardware or memory devices sometime after setting up the printer, then turn the printer off, and unplug the power cord from the electrical outlet before continuing. If you have other devices attached to the - Dell B2360D | User Guide - Page 18
against the controller board. 5 Close the controller board access door. Note: When the printer software and any hardware options are installed, it may be necessary to manually add the options in the printer driver to make them available for print jobs. For more information, see "Updating available - Dell B2360D | User Guide - Page 19
CAUTION-SHOCK HAZARD: If you are accessing the controller board or installing optional hardware or memory devices sometime after setting up the printer, then turn the printer off, and unplug the power cord from the electrical outlet before continuing. If you have any other devices attached to the - Dell B2360D | User Guide - Page 20
, then to a properly grounded electrical outlet, and then turn on the printer. Note: When the printer software and any hardware options are installed, you may need to manually add the options in the printer driver to make them available for print jobs. For more information, see "Updating available - Dell B2360D | User Guide - Page 21
printer in place. * These ports are available only in select printer models. Setting up the printer software Installing the printer software Note: If you installed the printer dialog does not appear after a minute, then launch the CD manually: a Click , or click Start and then click Run. b - Dell B2360D | User Guide - Page 22
instructions on the computer screen. Notes: • Use the Local Printer Settings Utility to change the toner darkness, power saver, and paper size settings for all print jobs. Use the printer software to change these settings for individual print jobs. • This utility is supported only in select printer - Dell B2360D | User Guide - Page 23
Supplies > Driver 2 Add any installed hardware options, and then click OK. Networking Notes: • Purchase a wireless network adapter first before setting up the printer on a wireless network. To install the wireless network adapter, see the instruction sheet that came with the adapter. • A Service Set - Dell B2360D | User Guide - Page 24
access for computers on a different subnet than the printer. 3 Install the printer driver on the computer. a Insert the Software and Documentation CD, and then double‑click the installer package for the printer. b Follow the instructions on the computer screen. c Select a destination, and then - Dell B2360D | User Guide - Page 25
is working properly. Make sure you have the following information before setting up the printer on a wireless network: • SSID-The SSID is also referred to as the ad hoc networks will also require the automatic setting. Check with your system support person if you are not sure which channel to select - Dell B2360D | User Guide - Page 26
wireless network. • Add a printer to an existing ad hoc network. • Change the wireless settings after installation. • Install the printer on additional network computers. Installing the Wireless Setup Utility 1 Go to the Dell Support Web site at http://support.dell.com. 2 Download the latest - Dell B2360D | User Guide - Page 27
Go to the Dell Support Web site at http://support.dell.com. 2 Download the latest Wireless Setup Assistant application. 3 Double‑click the downloaded software installer package. 4 Follow the instructions on the computer screen. Launching the Wireless Setup Assistant Notes: • Make sure the printer is - Dell B2360D | User Guide - Page 28
is "Connected". For more information, see the "Verifying printer setup" section of the User's Guide. Verifying printer setup Printing a menu settings page Print a menu settings page to review the current menu settings and to verify if the printer options are installed correctly. Note: If you have - Dell B2360D | User Guide - Page 29
important information that aids network printing configuration. 1 From the printer control panel, navigate to: > Reports > > Network Setup optional print server is installed, then Print Network [x] Setup Page appears. 2 Check the first section of the network setup page and confirm that the status is - Dell B2360D | User Guide - Page 30
is Custom Type 6. • The paper type setting must be manually set for all trays. Configuring Universal paper settings The Universal paper size is a user‑defined setting that lets you print on paper sizes that are not preset in the printer menus. Notes: • The largest supported Universal size is 216 - Dell B2360D | User Guide - Page 31
from sliding out the front of the bin as it stacks. To open the paper stop, pull it so that it flips forward. Note: Close the paper stop when moving the printer to another location. Loading trays CAUTION-POTENTIAL INJURY: To reduce the risk of equipment instability, load each tray separately. Keep - Dell B2360D | User Guide - Page 32
Loading paper and specialty media 32 2 Squeeze, and then slide the width guide tab to the correct position for the size of the paper you are loading. - Dell B2360D | User Guide - Page 33
tab to the correct position for the size of the paper you are loading. 1 2 3 Notes: • For some paper sizes like letter, legal, and A4, squeeze and slide the length guide tab backward to accommodate their length. • If you are loading A6-size paper in the standard tray, then squeeze and then slide - Dell B2360D | User Guide - Page 34
the paper. Straighten the edges on a level surface. 5 Load the paper stack. Notes: • Load with the printable side facedown when using recycled or preprinted paper. • Load prepunched paper with tray. • Make sure the paper is below the maximum paper fill indicator located on the side of the width - Dell B2360D | User Guide - Page 35
Loading paper and specialty media 35 6 Insert the tray. 7 From the printer control panel, set the paper size and type in the Paper menu to match the paper loaded in the tray. Note: Set the correct paper size and type to avoid paper jams and print quality problems. - Dell B2360D | User Guide - Page 36
and specialty media 36 Loading the multipurpose feeder Use the multipurpose feeder when printing on different paper sizes and types or specialty media, such as card stock, transparencies, and envelopes. You can also use it for single‑page print jobs on letterhead. 1 - Dell B2360D | User Guide - Page 37
2 Squeeze the tab on the left width guide, and then move the guides for the paper you are loading. 3 Prepare the paper or specialty media for loading. • Flex sheets of paper back and forth to loosen them, and then fan them. Do not fold or crease the paper. Straighten the edges on a level surface - Dell B2360D | User Guide - Page 38
side faceup and the top edge entering the printer first. For more information on loading transparencies, see the packaging that the transparencies came in. • Load letterhead faceup with the top edge entering the printer first. For two‑sided (duplex) printing, load letterhead facedown with the bottom - Dell B2360D | User Guide - Page 39
type for any trays are the same, the printer will link those trays. When one linked tray becomes empty, paper will feed from the next linked tray. It is recommended to give all unique paper, such as letterhead and different colored plain papers, a different custom type name so that the trays they - Dell B2360D | User Guide - Page 40
settings on the computer (Windows only) Access the Custom menu using the Local Printer Settings Utility. Configuring a custom paper type Using the Embedded Web Server 1 Open a Web browser, and then type the printer IP address in the address field. Notes: • Print a network setup page or menu settings - Dell B2360D | User Guide - Page 41
Depending on your operating system, access the Custom menu using the Local Printer Settings Utility or Printer Settings. Assigning a custom paper type Using the Embedded Web Server 1 Open a Web browser, and then type the printer IP address in the address field. Notes: • Print a network setup page or - Dell B2360D | User Guide - Page 42
g/m2 (24 lb) or heavier paper. Note: Two‑sided printing is supported only for 60-90‑g/m2 (16-24‑lb) bond paper. Curl Curl is the tendency for paper to curl at its edges. Excessive curl can cause paper feeding problems. Curl can occur after the paper passes through the printer, where it is exposed to - Dell B2360D | User Guide - Page 43
of stability resulting in fewer paper feeding problems and better print quality. Paper containing fibers such as cotton can negatively affect paper handling. Unacceptable paper The following paper types are not recommended for use with the printer: • Chemically treated papers used to make copies - Dell B2360D | User Guide - Page 44
and specialty media guide 44 Use papers printed with heat‑resistant inks designed for use in xerographic copiers. The ink must be able to withstand temperatures up to 230°C (446°F) without melting or releasing hazardous emissions. Use inks that are not affected by the resin in toner. Inks that are - Dell B2360D | User Guide - Page 45
buying large quantities. Note: Use only paper label sheets. Vinyl, pharmacy, and two‑sided labels are not supported. When printing on labels: • Use labels designed specifically for laser printers. Check with the manufacturer or vendor to verify that: - The labels can withstand temperatures up to 240 - Dell B2360D | User Guide - Page 46
specifically for laser printers. Transparencies must be able to withstand temperatures up to 185°C (365°F) without melting, discoloring, offsetting, or releasing hazardous emissions. Note: If the transparency weight is set to Heavy and the transparency texture is set to Rough in the Paper menu, then - Dell B2360D | User Guide - Page 47
, see the Card Stock & Label Guide. Supported paper sizes Note: For an unlisted paper size, select the closest larger listed size. For information on card stock and labels, see the Card Stock & Label Guide. Paper size Standard tray Optional 550‑sheet Multipurpose feeder Duplex mode tray A4 210 - Dell B2360D | User Guide - Page 48
supports 60-120‑g/m2 (16-32‑lb) paper weights. The multipurpose feeder supports 60-163‑g/m2 (16-43‑lb) paper weights. Paper type Plain paper 250‑ or 550‑sheet tray Multipurpose feeder Duplex mode Card stock X X Transparencies X Recycled Glossy paper Paper labels1 X X X X Vinyl labels - Dell B2360D | User Guide - Page 49
and specialty media guide 49 Paper type Letterhead 250‑ or 550‑sheet tray Multipurpose feeder Duplex mode Preprinted Colored Paper Light Paper Heavy Paper2 Rough/Cotton X 1 One‑sided paper labels designed for laser printers are supported for occasional use. It is recommended to print - Dell B2360D | User Guide - Page 50
necessary. Note: To print on a specific paper type, adjust the paper type setting to match the paper loaded, or select the appropriate tray or feeder. 3 Click Print. Adjusting toner darkness Using the Embedded Web Server 1 Open a Web browser, and then type the printer IP address in the address field - Dell B2360D | User Guide - Page 51
you are using a proxy server, then temporarily disable it to load the Web page correctly. 2 Click Settings > Print Settings > Quality Menu > Toner Darkness. 3 Adjust the toner darkness setting. 4 Click Submit. Using the printer settings on the computer Depending on your operating system, adjust the - Dell B2360D | User Guide - Page 52
folder. a Click , or click Start and then click Run. b In the Start Search or Run dialog, type control printers. c Press Enter, or click OK. 2 Double‑click the printer icon. 3 Select the print job you want to cancel. 4 Click Delete. For Macintosh users 1 From the Apple Menu, navigate to either - Dell B2360D | User Guide - Page 53
Network [x]. 3 The menu items in this menu appear only in network printers or printers connected to print servers. Paper menu Default Source menu Use Default Source Tray [x] MP Feeder Manual Paper Manual Envelope To Set a default paper source for all print jobs. Notes: • Tray 1 (standard tray) is - Dell B2360D | User Guide - Page 54
, the print job continues using the linked tray. • The A6 paper size is supported only in Tray 1 and the multipurpose feeder. Tray [x] Type Plain Paper Transparency Recycled Labels Bond Letterhead Preprinted Colored Paper Light Paper Heavy Paper Rough/Cotton Custom Type [x] Specify the type of - Dell B2360D | User Guide - Page 55
multipurpose feeder does not automatically detect paper size. Make sure to set the paper size value. MP Feeder Type Plain Paper Card Stock Transparency Recycled Labels Bond Envelope Rough Envelope Letterhead Preprinted Colored Paper Light Paper Heavy Paper Rough/Cotton Custom Type [x] Specify the - Dell B2360D | User Guide - Page 56
Transparency Recycled Labels Bond Letterhead Preprinted Colored Paper Light Paper Heavy Paper Rough/Cotton Custom Type [x] Specify the paper type being manually loaded. Notes: • Plain Paper is the factory default setting. • From the Paper menu, set Configure MP to "Manual" for Manual Paper Type to - Dell B2360D | User Guide - Page 57
Manual First To Determine when the printer selects paper from the multipurpose feeder. Notes: • Cassette is the factory default setting. Cassette configures the multipurpose feeder as the default paper source. • Manual appear only if card stock is supported. Specify the relative texture of the - Dell B2360D | User Guide - Page 58
Understanding the printer menus 58 Use Labels Texture Smooth Normal Rough Bond Texture Smooth Normal Rough Envelope Texture Smooth Normal Rough Rough Envelope Texture Rough Letterhead Texture Smooth Normal Rough Preprinted Texture Smooth Normal Rough Colored Texture Smooth Normal Rough Light - Dell B2360D | User Guide - Page 59
Understanding the printer menus 59 Paper Weight menu Use Plain Weight Light Normal Heavy Card Stock Weight Light Normal Heavy Transparency Weight Light Normal Heavy Recycled Weight Light Normal Heavy Labels Weight Light Normal Heavy Bond Weight Light Normal Heavy Envelope Weight Light Normal Heavy - Dell B2360D | User Guide - Page 60
and set two‑sided printing for all print jobs that specify Preprinted as the paper type. Colored Loading Duplex Off Determine and set two‑sided printing for all print jobs that specify Colored as the paper type. Notes: • Duplex sets two‑sided printing as the default for all print jobs unless one - Dell B2360D | User Guide - Page 61
Determine and set two‑sided printing for all print jobs that specify Custom [x] as the paper type. Note: Custom [x] Loading is available only if the custom type is supported. Notes: • Duplex sets two‑sided printing as the default for all print jobs unless one‑sided printing is set from Printing - Dell B2360D | User Guide - Page 62
appears only when the longest edge is shorter than the maximum width supported in the tray. To Print a report containing information about the paper loaded in trays, installed memory, total page count, alarms, timeouts, printer control panel language, TCP/IP address, status of supplies, status of - Dell B2360D | User Guide - Page 63
asset information, such as serial number and model name. Network/Ports menu The menus in this section only appear in network printers or printers connected to print servers. Active NIC menu Use Active NIC Auto [list of available network cards] To Notes: • Auto is the factory default setting - Dell B2360D | User Guide - Page 64
is the factory default setting. • The value can be changed in 1‑KB increments. • The maximum size allowed depends on the amount of memory in the printer, the size of the other link buffers, and whether Resource Save is set to On or Off. • To increase the maximum size range for the - Dell B2360D | User Guide - Page 65
: This menu is available only in network printers or printers connected to print servers. Use To Set or change the current TCP/IP address. Note: Manually setting the IP address sets the "Enable DHCP" and "Enable RARP" to Off on systems that support BOOTP and RARP. Netmask Gateway View or change - Dell B2360D | User Guide - Page 66
using File Transfer Protocol. Note: Yes is the factory default setting. Enable the built-in Web server (Embedded Web Server). When enabled, the printer can be monitored and managed remotely using a Web browser. Note: Yes is the factory default setting. View or change the current WINS server address - Dell B2360D | User Guide - Page 67
. View Address* View the current IPv6 addresses. View Router Address* View the current router address. Enable DHCPv6 On Off Enable DHCPv6 in the printer. Note: On is the factory default setting. * These settings can be changed only from the Embedded Web Server. Wireless menu Note: This menu - Dell B2360D | User Guide - Page 68
Understanding the printer menus 68 Use To Activate Yes No Enable or disable AppleTalk support. Note: Yes is the factory default setting. SmartSwitch On Off NPA Mode On Off Auto To Set the printer to automatically switch to PCL emulation when a print job received through a USB port requires it - Dell B2360D | User Guide - Page 69
increments. • The maximum size allowed depends on the amount of memory in the printer, the size of the other link buffers, and whether Resource Save is set to external print server. Note: This menu is available only when the printer is attached to an external print server through the USB port. SMTP - Dell B2360D | User Guide - Page 70
Delete now Do not delete To Let an authorized user export the audit log. Notes: • To export the audit log from the printer control panel, connect a flash drive to the printer. • You can also download the audit log from the Embedded Web Server, and then save it on your computer. Specify whether - Dell B2360D | User Guide - Page 71
end times associated with the printer Time Zone setting. Note: On is the factory default setting. Enable Network Time Protocol, which synchronizes the clocks of devices on a network. Notes: • On is the factory default setting. • Enable NTP is automatically set to Off if you manually set the date and - Dell B2360D | User Guide - Page 72
Show Supply Estimates Show estimates Do not show estimates Eco-Mode Off Energy Energy/Paper Paper 72 To Set the language of the text appearing on the printer display. Note: Not all languages are available for all printers, and you may need to install special hardware for those languages to appear - Dell B2360D | User Guide - Page 73
Understanding the printer menus Use Run Initial setup Yes No Paper Sizes US Metric Timeouts Sleep Mode Disabled 1-120 min Timeouts country or region selection in the initial setup wizard. Set the amount of time the printer waits after a job is printed before it goes into a reduced power state. Notes - Dell B2360D | User Guide - Page 74
the print job. Notes: • "90 sec" is the factory default setting. • When the timer expires, any partially printed page still in the printer is printed, and then the printer checks to see if any new print jobs are waiting. • Print Timeout is available only when using PCL emulation. This setting has no - Dell B2360D | User Guide - Page 75
default settings. Notes: • Do Not Restore is the factory default setting. Do Not Restore retains the user‑defined settings. • Restore Now sets all printer settings to the factory default settings except Network/Ports menu settings. All downloads stored in the RAM are deleted. Downloads stored in the - Dell B2360D | User Guide - Page 76
area. Notes: • Normal is the factory default setting. When attempting to print data on the non‑printable area defined by the Normal setting, the printer clips the image at the boundary. • Whole Page allows the image to be moved into the non‑printable area defined by the Normal setting. This - Dell B2360D | User Guide - Page 77
Understanding the printer menus 77 Finishing menu Use Sides (Duplex) 1 sided 2 sided Duplex Binding Long Edge Short Edge Copies 1-999 Blank Pages Do when inserting blank pages in a document. Specify the paper source for separator sheets. Note: Tray 1 (standard tray) is the factory default setting. - Dell B2360D | User Guide - Page 78
Off Fonts Horizontally Vertically Both directions Isolated Toner Darkness 1-10 To Print multiple‑page images on one side of a paper. Notes: • Off is the factory the factory default setting. The printer chooses between portrait and landscape. Print a border when using Paper Saver. Note: None is - Dell B2360D | User Guide - Page 79
the printed output either by lightening or darkening it. You can conserve toner by lightening the output. Note: 0 is the factory default setting. isolating the source of a print job problem. Notes: • When activated, all data sent to the printer is printed in hexadecimal and character representation - Dell B2360D | User Guide - Page 80
Understanding the printer menus 80 XPS menu Use Print Error Pages Off On PostScript menu Use Print PS Error factory default setting. Courier 10 shows the font name, font ID, and the storage location in the printer. The font source abbreviation is R for Resident, F for Flash, and D for Download. - Dell B2360D | User Guide - Page 81
Symbol sets support the different languages or specific program, such as math symbols for scientific text. Only the supported symbol sets , Paper Size, and Orientation settings. Select the Paper Size and Orientation you want before setting Lines per Page. Set the printer to print on A4‑size paper. - Dell B2360D | User Guide - Page 82
Understanding the printer menus 82 Use PCL Emulation Settings Auto CR after LF On Off PCL Emulation Settings Auto LF after CR On Off Tray Renumber Assign MP Feeder Off None 0-199 Assign Tray [x] Off None 0-199 Assign Manual Paper Off None 0-199 Assign Manual Env Off None 0-199 Tray Renumber View - Dell B2360D | User Guide - Page 83
the amount of paper and toner you use when printing. You can: Use both sides of the paper If your printer model supports duplex printing, you can of the document to check its content and format for accuracy. Avoid paper jams Carefully select and load paper to avoid paper jams. For more information - Dell B2360D | User Guide - Page 84
a short delay before the first page is printed. • The printer enters Sleep mode after one minute of inactivity. Energy/Paper Use all the settings associated with Energy and Paper modes. Paper • Enable the automatic two‑sided (duplex) printing feature. • Turn off print log features. 2 Press - Dell B2360D | User Guide - Page 85
waits after a print job is processed before it goes into a reduced power state. Using the Embedded Web Server 1 Open a Web browser, and then type the printer IP address in the address field. Notes: • Print a network setup page or menu settings page, and then locate the IP address in the TCP/IP - Dell B2360D | User Guide - Page 86
(Windows only) • Access the Schedule Power Modes menu using the Local Printer Settings Utility. Recycling Recycling Dell products To return Dell products for recycling: 1 Visit our Web site at www.dell.com/recycle. 2 Select your country or region. 3 Follow the instructions on the computer screen. - Dell B2360D | User Guide - Page 87
following circumstances: • The printer is being decommissioned. • The printer is being moved to a different department or location. • The printer is being serviced by someone from outside your organization. • The printer is being removed from your premises for service. • The printer is being sold to - Dell B2360D | User Guide - Page 88
printer. Erasing non‑volatile memory 1 Turn off the printer. 2 From the printer control panel, hold down and the right arrow button while turning the printer then press . The printer will restart several printer will perform a power‑on reset, and then return to normal operating mode. Finding printer - Dell B2360D | User Guide - Page 89
of the printer, unplug the power cord from the electrical outlet and disconnect all cables from the printer before proceeding. 2 Remove paper from the damage to the exterior of the printer. 5 Make sure all areas of the printer are dry before sending a new print job. Checking the status of parts and - Dell B2360D | User Guide - Page 90
1 Click or Start. 2 Click All Programs or Programs, and then select the printer program folder from the list. 3 Select your printer, and then navigate to: Dell Printer Home > Maintenance > Order supplies 4 From the Order Printer Supplies dialog, do any of the following: • Click Order Online to order - Dell B2360D | User Guide - Page 91
80% • Salty air • Corrosive gases • Heavy dust Replacing supplies Replacing the toner cartridge 1 Press the button on the right side of the printer, and then open the front door. 2 Pull the toner cartridge out using the handle. 3 Unpack the toner cartridge, and then remove all packing materials. - Dell B2360D | User Guide - Page 92
Insert the toner cartridge into the printer by aligning the side rails of the cartridge with the arrows on the side rails inside the printer. Warning-Potential Damage: Do not expose the imaging unit to direct light for more than 10 minutes. Extended exposure to light may cause print quality problems - Dell B2360D | User Guide - Page 93
Maintaining the printer 93 Replacing the imaging unit 1 Press the button on the right side of the printer, and then open the front door. 2 Pull the toner cartridge out using the handle. 3 Lift the blue handle, and then pull the imaging unit out of the printer. - Dell B2360D | User Guide - Page 94
than 10 minutes. Extended exposure to light may cause print quality problems. Warning-Potential Damage: Do not touch the photoconductor drum. Doing so may affect the print quality of future print jobs. 6 Insert the imaging unit into the printer by aligning the arrows on the side rails of the imaging - Dell B2360D | User Guide - Page 95
95 7 Insert the toner cartridge into the printer by aligning the side rails of the cartridge with the arrows on the side rails inside the printer. 8 Close the front door. Moving the printer Before moving the printer CAUTION-POTENTIAL INJURY: Before moving the printer, follow these guidelines to - Dell B2360D | User Guide - Page 96
precautions: • Any cart used to move the printer must have a surface able to support the full footprint of the printer. • Any cart used to move the hardware options must have a surface able to support the dimensions of the hardware options. • Keep the printer in an upright position. • Avoid severe - Dell B2360D | User Guide - Page 97
XP or later. • Make sure bidirectional communication support is in place so the printer and computer can communicate. Disabling Status Messenger 1 click the Supplies Ordering Utility link. Checking the virtual display 1 Open a Web browser, and then type the printer IP address in the address field. - Dell B2360D | User Guide - Page 98
. The virtual display works as an actual display would work on a printer control panel. Viewing reports You can view some reports from the Embedded the selectable alerts. Notes: • Selectable alerts can be set on the toner cartridge and imaging unit. • All selectable alerts can be set for nearly low - Dell B2360D | User Guide - Page 99
Modifying confidential print settings Note: This feature is available only in network printers or printers connected to print servers. 1 Open a Web browser, and then type the printer IP address in the address field. Notes: • View the printer IP address in the TCP/IP section in the Network/Ports menu - Dell B2360D | User Guide - Page 100
, create a Personal Identification Number (PIN), and then assign the PIN to each menu. 1 Open a Web browser, and then type the printer IP address in the address field. Notes: • View the printer IP address in the TCP/IP section in the Network/Ports menu. The IP address appears as four sets of numbers - Dell B2360D | User Guide - Page 101
Managing the printer 101 If you try to access a PIN‑protected menu from the printer control panel, the printer will require you to enter the PIN. Note: After you enter the last digit of the PIN, make sure to press three seconds. on the printer control panel for more than - Dell B2360D | User Guide - Page 102
while the printer is printing. Load it before printing, or wait for a prompt to load it. • Do not load too much paper. Make sure the stack height is below the maximum paper fill indicator. • Do not slide the paper into the tray. Load paper as shown in the illustration. • Make sure the guides in the - Dell B2360D | User Guide - Page 103
paper sizes, weights, or types in the same tray. • Make sure the paper size and type are set correctly on the computer or printer control panel. • Store paper been cleared. Check your printed output stack for discarded pages. • When Jam Recovery is set to On or Auto, the printer reprints jammed pages - Dell B2360D | User Guide - Page 104
. 6 Front door Jam, front door. [20y.xx] Open the front door, and then remove the toner cartridge, imaging unit, and jammed paper. Jam, front door [20y.xx] CAUTION-HOT SURFACE: The inside of the printer might be hot. To reduce the risk of injury from a hot component, allow the surface to cool - Dell B2360D | User Guide - Page 105
Clearing jams 105 2 Pull the toner cartridge out using the handle. 3 Lift the blue handle, and then pull out the imaging unit from the printer. Warning-Potential Damage: Do not touch the photoconductor drum. Doing so than 10 minutes. Extended exposure to light can cause print quality problems. - Dell B2360D | User Guide - Page 106
Clearing jams 106 5 Lift the blue flap in front of the printer. 6 Firmly grasp the jammed paper on each side, and then gently pull it out. Note: Make sure all paper fragments are removed. 7 Insert the imaging unit by aligning the arrows on the side rails of the unit with the arrows on the - Dell B2360D | User Guide - Page 107
Clearing jams 107 8 Insert the toner cartridge by aligning the side rails of the cartridge with the arrows on the side rails inside the printer, and then insert the cartridge into the printer. 9 Close the front door. 10 From the printer control panel, press to clear the message and continue - Dell B2360D | User Guide - Page 108
and then gently pull it out. Note: Make sure all paper fragments are removed. 4 Close the rear and front doors. 5 From the printer control panel, press to clear the message and continue printing. Jam, standard bin [20y.xx] 1 Firmly grasp the jammed paper on each side, and then gently pull it out - Dell B2360D | User Guide - Page 109
panel, press to clear the message and continue printing. Jam, pull tray 1. Push down blue flap. [23y.xx] CAUTION-HOT SURFACE: The inside of the printer might be hot. To reduce the risk of injury from a hot component, allow the surface to cool before touching it. 1 Pull the tray out completely. - Dell B2360D | User Guide - Page 110
in the duplex area, then open the rear door, and then gently remove the jammed paper. Make sure all paper fragments are removed. 3 Firmly grasp the jammed paper on each side, and then gently pull it out. Note: Make sure all paper fragments are removed. 4 Insert the tray. 5 From the printer control - Dell B2360D | User Guide - Page 111
Jam, tray [x] [24y.xx] 1 Pull out the tray completely. 2 Firmly grasp the jammed paper on each side, and then gently pull it out. Note: Make sure all paper fragments are removed. 3 Insert the tray. 4 From the printer control panel, press to clear the message and continue printing. Jam, MP feeder - Dell B2360D | User Guide - Page 112
, and then fan them. Do not fold or crease the paper. Straighten the edges on a level surface. 3 Reload paper into the multipurpose feeder. Note: Make sure the paper guide lightly rests against the edge of the paper. 4 From the printer control panel, press to clear the message and continue printing. - Dell B2360D | User Guide - Page 113
Menu > > Format Flash > > Yes > Cartridge, imaging unit mismatch [41.xy] 1 Check if the toner cartridge and imaging unit are both MICR or non-MICR supplies. Note: For the list of supported supplies, contact the place where you purchased the printer. 2 Change the toner cartridge or imaging unit so - Dell B2360D | User Guide - Page 114
Troubleshooting 114 Cartridge very low, [x] estimated pages remain [88.xy] You may need to replace a toner cartridge very soon. For more information, see the "Replacing supplies" section of the User's Guide. If necessary, press on the printer control panel to clear the message and continue - Dell B2360D | User Guide - Page 115
Troubleshooting 115 Close front door Close the front door of the printer. Flash memory full [52] Try one or more of the following: • From the printer From the printer control panel printer is powered off or restarted. Flash printer the printer control printer control panel to clear the message and Imaging printer - Dell B2360D | User Guide - Page 116
Troubleshooting 116 If necessary, press on the printer control panel to clear the message and continue printing. Insert tray [x] Insert the indicated tray into the printer. Load [paper source] with [custom type name] [orientation] Try one or more of the following: • Load the tray or feeder with - Dell B2360D | User Guide - Page 117
Troubleshooting 117 Load [paper source] with [paper type] [paper size] [orientation] Try one or more of the following: • Load the tray or feeder with the correct size and type of paper. • From the printer control panel, press to clear the message and continue printing. Note: If the printer finds a - Dell B2360D | User Guide - Page 118
Troubleshooting 118 Load MP feeder with [paper type] [paper size] [orientation] Try one or more of the following: • Load the feeder with the correct size and type of paper. • From the printer control panel, press to clear the message and continue printing. Note: If no paper is loaded in the feeder - Dell B2360D | User Guide - Page 119
contact technical support. Non‑Dell [supply type], see User's Guide [33.xy] Note: The supply type can either be a toner cartridge or imaging unit. The printer has detected a non‑Dell supply or part installed in the printer. Your Dell printer is designed to function best with genuine Dell supplies - Dell B2360D | User Guide - Page 120
data received through the USB port. • From the printer control panel, set USB Buffer to Auto. Replace cartridge, 0 estimated pages remain [88.xy] Replace the toner cartridge to clear the message and continue printing. For more information, see the instruction sheet that came with the supply or see - Dell B2360D | User Guide - Page 121
] Remove the toner cartridge, and then install a supported one to clear the message and continue printing. For more information, see the instruction sheet that came with the supply or see the "Replacing supplies" section of the User's Guide. Note: If you do not have a replacement cartridge, then see - Dell B2360D | User Guide - Page 122
Troubleshooting 122 Basic printer problems The printer is not responding Action Step 1 Make sure the printer is turned on. Yes Go to step 2. No Turn on the printer. Is the printer turned on? Step 2 Check if the printer is in Sleep mode or Hibernate mode. Is the printer in Sleep mode or - Dell B2360D | User Guide - Page 123
? Step 11 Check the installed printer driver. Go to step 12. Install the correct printer driver. Is the correct printer driver installed? Step 12 Turn off the printer, then wait for about 10 seconds, and then turn the printer back on. The problem is solved. Contact technical support. Is the - Dell B2360D | User Guide - Page 124
available options in the printer driver" on page 22. Manually add the internal option in the printer driver. Is the internal option available in the printer driver? Step 5 a Check if the internal option is selected. The problem is solved. Contact technical support. Note: From the application - Dell B2360D | User Guide - Page 125
Troubleshooting 125 Tray problems Action Yes No Step 1 The problem is solved. Go to step 2. a Open the tray and do one or more of the following: • Check for paper jams or misfeeds. • Check if the paper size indicators on the paper guides are aligned with the paper size indicators on the - Dell B2360D | User Guide - Page 126
Troubleshooting 126 Paper feed problems Paper frequently jams Action Yes Step 1 Go to step 2. a Pull out the tray, and then do one or more of the following: • Make sure paper lies flat in the tray. • Check if the paper size indicators on the paper guides are aligned with the paper size - Dell B2360D | User Guide - Page 127
Troubleshooting 127 Jammed pages are not reprinted Action a Turn on jam recovery. 1 From the printer control panel, navigate to: Yes No The problem is solved. Contact technical support. > Settings > > General Settings > > Print Recovery > >Jam Recovery > 2 Press the arrow buttons until On or - Dell B2360D | User Guide - Page 128
" on page 21. Note: For more information, visit http://support.dell.com. b Resend the print job. The problem is solved. Contact technical support. Do the jobs print? Printing slows down Notes: • When printing using narrow paper, the printer prints at a reduced speed to prevent damage to the - Dell B2360D | User Guide - Page 129
Step 1 a Check if you are printing on paper that is supported by the tray. b Resend the print job. Yes No The problem is solved. Go to step 2. Did the job print from the correct tray or on the correct paper? Step 2 The problem is solved. a From the Paper menu on the printer control panel, set - Dell B2360D | User Guide - Page 130
tray or on the correct paper? Step 4 a Check if the trays are not linked. b Resend the print job. The problem is solved. Contact technical support. Did the job print from the correct tray or on the correct paper? Incorrect characters print Action Step 1 Make sure the printer is not in Hex Trace - Dell B2360D | User Guide - Page 131
depending on your printer model, Yes No The problem is solved. Go to step 2. select or Submit. c Resend the print job. Did the file print correctly? Step 2 a Check the original file for manual page breaks. b Resend the print job. The problem is solved. Contact technical support. Did the file - Dell B2360D | User Guide - Page 132
Troubleshooting 132 Print quality problems Characters have jagged or uneven edges Action Yes Step 1 Go to step 2. a Print a font sample list to check if the fonts you are using are supported by the printer. 1 From the printer control panel, navigate to: > Reports > > Print Fonts > 2 Press - Dell B2360D | User Guide - Page 133
and then the cartridge. b Resend the print job. Is the printer still printing blank pages? Step 3 Replace the imaging unit, and then resend the print job. Contact technical support. Is the printer still printing blank pages? No The problem is solved. The problem is solved. The problem is solved - Dell B2360D | User Guide - Page 134
Troubleshooting 134 Action Yes Step 1 Go to step 2. a Move the width and length guides in the tray to the correct positions for the paper loaded. b Resend the print job. Is the page or image clipped? Step 2 Go to step 3. From the printer control panel, set the paper size and type in the - Dell B2360D | User Guide - Page 135
to match the paper type and weight specified in the tray settings. The problem is solved. The problem is solved. Gray background on prints Leading edge ABCDE ABCDE ABCDE Trailing edge Action Step 1 a From the Quality Menu on the printer control panel, decrease the toner darkness. Note: 8 is - Dell B2360D | User Guide - Page 136
support. Incorrect margins on prints ABCD ABCD ABCD Action Yes No Step 1 The problem is solved. a Move the width and length guides in the tray to the correct positions for the paper size loaded. b Resend the print job. Go to step 2. Are the margins correct? Step 2 From the printer - Dell B2360D | User Guide - Page 137
from Printing Preferences or from the Print dialog. b Resend the print job. Yes No The problem is solved. Contact technical support. Are the margins correct? Paper curl Action Yes Step 1 Go to step 2. Move the width and length guides in the tray to the correct positions for the size of the - Dell B2360D | User Guide - Page 138
in the Paper menu to match the paper loaded in the tray. Go to step 6. The problem is solved. Do print irregularities still appear? Step 6 Replace the imaging unit, and then resend the print job. Do print irregularities still appear? Contact technical support or your Dell printer dealer. The - Dell B2360D | User Guide - Page 139
note of the distance, and then contact technical support or your Dell printer dealer. The problem is solved. Print is too dark Action Yes Step 1 Go to step 2. a From the Quality menu on the printer control panel, reduce the toner darkness. Note: 8 is the factory default setting. b Resend - Dell B2360D | User Guide - Page 140
Troubleshooting 140 Action Yes Step 2 Go to step 3. a From the printer control panel, set the paper type, texture and weight in the Paper menu to match the paper loaded in the tray. b Resend the print job. Is the tray set to the type, texture, and weight of the paper loaded? Step 3 Go to - Dell B2360D | User Guide - Page 141
Troubleshooting 141 Print is too light Action Yes Step 1 Go to step 2. a From the Quality menu on the printer control panel, increase the toner darkness. Note: 8 is the factory default setting. b Resend the print job. No The problem is solved. Is the print still too light? Step 2 Go to - Dell B2360D | User Guide - Page 142
1 Go to step 2. a Move the width and length guides in the tray to the correct positions for the size of the paper loaded. b Resend the print job. Is the print still skewed? Step 2 a Check if you are printing on a paper that is supported by the tray. b Resend the print job. Contact technical - Dell B2360D | User Guide - Page 143
unit, and then the cartridge. b Resend the print job. Is the printer printing solid black pages? Step 2 Replace the imaging unit, and then resend the print job. Contact technical support. Is the printer printing solid black pages? No The problem is solved. The problem is solved. Transparency - Dell B2360D | User Guide - Page 144
, and then the cartridge. b Resend the print job. Do streaked horizontal lines appear on prints? Step 5 Replace the imaging unit, and then resend the print job. Contact technical support. Do streaked horizontal lines appear on prints? No The problem is solved. Change the paper type and weight - Dell B2360D | User Guide - Page 145
exposure to light may cause print quality problems. 2 Install the imaging unit, and then the cartridge. b Resend the print job. Do streaked vertical lines appear on prints? 145 No The problem is solved. Do one or more of the following: • Specify the paper texture, type, and weight from the tray - Dell B2360D | User Guide - Page 146
Troubleshooting Action Step 5 Replace the imaging unit, and then resend the print job. Do streaked vertical lines appear on prints? Horizontal voids appear on prints Leading edge 146 Yes Contact technical support or your Dell printer dealer. No The problem is solved. Trailing edge Action Step 1 - Dell B2360D | User Guide - Page 147
4. Check if you are using a recommended type of paper. a Load the indicated tray or feeder with a recommended type of paper. b Resend the print job. The problem is solved. Do vertical voids appear on prints? Step 4 a Redistribute the toner in the imaging unit. 1 Remove the toner cartridge, and - Dell B2360D | User Guide - Page 148
resend the print job. Do toner specks appear on prints? Yes Contact technical support. No The problem is solved. Toner rubs off ABC DEF Leading edge Trailing edge Action Yes No Step 1 Go to step 2. From the Paper menu on the printer control panel, check the paper type and weight. Do the - Dell B2360D | User Guide - Page 149
may be defective. Contact your system support person for a solution, and then print another network setup page. c Open a Web browser, and then type the printer IP address. d Press Enter. Does the Embedded Web Server open? Step 4 The problem is solved. Check if the cable connections to the - Dell B2360D | User Guide - Page 150
technical support, describe the problem you are experiencing, the message on the printer display, and the troubleshooting steps you have already taken to find a solution. You need to know your printer model type and the service tag number or express service code. For more information, see the label - Dell B2360D | User Guide - Page 151
Appendix 151 Appendix Dell Technical Support Policy Technician‑assisted technical support requires the cooperation and participation of the customer in the troubleshooting process and provides for restoration of the Operating System, application software and hardware drivers to the original - Dell B2360D | User Guide - Page 152
152 Warranty and Return Policy Dell Inc. ("Dell") manufactures its hardware products from parts and components that are new or equivalent to new in accordance with industry‑standard practices. For information about the Dell warranty for your printer, refer to the Product Information Guide. - Dell B2360D | User Guide - Page 153
settings 99 configuration information wireless network 25 configurations printer 9 Configure MP menu 57 configuring multiple printers 99 supply notifications, imaging unit 98 supply notifications, toner cartridge 98 configuring custom paper types 40 configuring supply notifications 98 connecting to - Dell B2360D | User Guide - Page 154
behind rear door 107 in duplex area 109 in standard bin 108 in Tray 1 111 in Tray 2 111 Multipurpose feeder 111 L labels, paper tips 45 letterhead loading, low, no Resource Save [35] 118 menu settings loading on multiple printers 99 menu settings page printing 28 menus Active NIC 63 AppleTalk 67 - Dell B2360D | User Guide - Page 155
menu 54 paper sizes supported by the printer 47 paper stop, using 31 Paper Texture menu 57 Paper too short [34] 119 paper type setting 30 paper types duplex support 48 supported by printer 48 where to load 48 Paper Weight menu 59 parallel port 20 Parallel port disabled [56] 120 parts checking status - Dell B2360D | User Guide - Page 156
error, standard port [54] 119 Non‑Dell [supply type], see User's Guide [33.xy] 119 Paper too short [34] 119 Parallel port disabled [56] 120 Printer restart. Check last job. 120 Rear USB port disabled [56] 120 Reinstall missing or unresponsive cartridge [31.xy] 120 Reinstall missing or unresponsive - Dell B2360D | User Guide - Page 157
linking 39 loading 31 unlinking 39 troubleshooting cannot open Embedded Web Server 149 checking an unresponsive printer 122 contacting technical support 150 solving basic printer problems 122 troubleshooting, display printer display is blank 123 troubleshooting, paper feed message remains after jam - Dell B2360D | User Guide - Page 158
options in printer driver 22 USB port 20 using Wireless Setup Assistant 27 Wireless Setup Utility 26 using Hibernate mode 84 using Schedule Power Modes 86 using the Embedded Web Server 12 Utilities menu 79 V vertical voids appear 147 viewing reports 98 virtual display checking, using Embedded
-
 1
1 -
 2
2 -
 3
3 -
 4
4 -
 5
5 -
 6
6 -
 7
7 -
8
-
9
-
10
-
11
-
12
-
13
-
14
-
15
-
16
-
17
-
18
-
19
-
20
-
21
-
22
-
23
-
24
-
25
-
26
-
27
-
28
-
29
-
30
-
31
-
32
-
33
-
34
-
35
-
36
-
37
-
38
-
39
-
40
-
41
-
42
-
43
-
44
-
45
-
46
-
47
-
48
-
49
-
50
-
51
-
52
-
53
-
54
-
55
-
56
-
57
-
58
-
59
-
60
-
61
-
62
-
63
-
64
-
65
-
66
-
67
-
68
-
69
-
70
-
71
-
72
-
73
-
74
-
75
-
76
-
77
-
78
-
79
-
80
-
81
-
82
-
83
-
84
-
85
-
86
-
87
-
88
-
89
-
90
-
91
-
92
-
93
-
94
-
95
-
96
-
97
-
98
-
99
-
100
-
101
-
102
-
103
-
104
-
105
-
106
-
107
-
108
-
109
-
110
-
111
-
112
-
113
-
114
-
115
-
116
-
117
-
118
-
119
-
120
-
121
-
122
-
123
-
124
-
125
-
126
-
127
-
128
-
129
-
130
-
131
-
132
-
133
-
134
-
135
-
136
-
137
-
138
-
139
-
140
-
141
-
142
-
143
-
144
-
145
-
146
-
147
-
148
-
149
-
150
-
151
-
152
-
153
-
154
-
155
-
156
-
157
-
158
 |
 |

Dell B2360d-dn Laser Printer
User's Guide
May 2012
www.dell.com | support.dell.com
Trademarks
Information in this document is subject to change without notice.
© 2012 Dell, Inc. All rights reserved.
Reproduction of this material in any manner whatsoever without the written permission of Dell Inc. is strictly forbidden.
Trademarks used in this text:
Dell
, the
DELL
logo,
Inspiron
,
Dell Precision
,
Dimension
,
OptiPlex
,
Latitude
,
PowerEdge
,
PowerVault
,
PowerApp
, and
Dell OpenManage
are trademarks
of Dell Inc.;
Intel
,
Pentium
, and
Celeron
are registered trademarks of Intel Corporation;
Microsoft
and
Windows
are registered trademarks of Microsoft Corporation.
Other trademarks and trade names may be used in this document to refer to the entities claiming the marks and names of their products. Dell Inc. disclaims any proprietary
interest in trademarks and trade names other than its own.