Dell C1765NFW Dell Users Guide - Page 284
Automatic Dialing, Speed Dialing, Storing a Number for Speed Dialing, Sending a Fax Using a Speed Dial
 |
View all Dell C1765NFW manuals
Add to My Manuals
Save this manual to your list of manuals |
Page 284 highlights
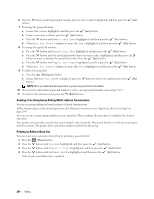
NOTE: For information on how to enter the fax number of the remote machine, see "Sending a Fax Manually" on page 275 or "Sending a Fax Automatically" on page 274. 5 Press the (Start) button. Automatic Dialing Speed Dialing You can store up to 99 frequently dialed numbers in speed dial locations (01- 99). When the speed dial job specified in the delayed fax or redial exists, you cannot change the speed dial number from the operator panel or Dell Printer Configuration Web Tool. Storing a Number for Speed Dialing 1 Press the (Menu) button. 2 Press the button until System is highlighted, and then press the (Set) button. 3 Press the button until Admin Menu is highlighted, and then press the (Set) button. 4 Press the button until Phone Book is highlighted, and then press the (Set) button. 5 Ensure that Speed Dial is highlighted, and then press the (Set) button. 6 Press the button until the desired speed dial number between 01 and 99 is highlighted, and then press the (Set) button. 7 Ensure that Name is highlighted, and then press the (Set) button. 8 Enter the name, and then press the (Set) button. 9 Ensure that Phone Number is highlighted, and then press the (Set) button. 10 Enter the number you want to store using the numeric keypad, and then press the (Set) button. To insert a pause between numbers, press the (Redial/Pause) button. "-" appears on the display. 11 Ensure that Apply Settings is highlighted, and then press the (Set) button. 12 When Are You Sure? is displayed, ensure that Yes is highlighted, and then press the 13 To store more fax numbers, repeat steps 6 to 12. (Set) button. 14 To return to the previous screen, press the (Back) button. Sending a Fax Using a Speed Dial 1 Load the document(s) face up with top edge in first into the ADF. OR Place a single document face down on the document glass, and close the document cover. For details about loading a document, see "Loading an Original Document on the ADF" on page 272. 2 To enter the speed dial number do either of the following after pressing the (Fax) button: • Ensure that Fax to is highlighted, and then press the (Set) button. Press the Dial is highlighted, and then press the (Set) button. • Press the (Speed Dial) button. button until Speed 3 Enter the speed dial number between 01 and 99 using the numeric keypad, and then press the (Set) button. The corresponding entry's name briefly displays. To confirm the name again, press the (Set) button. 4 Adjust the document resolution to suit your fax needs. For more information, see "Resolution" on page 273. 282 Faxing
-
 1
1 -
2
-
3
-
4
-
5
-
6
-
7
-
8
-
9
-
10
-
11
-
12
-
13
-
14
-
15
-
16
-
17
-
18
-
19
-
20
-
21
-
22
-
23
-
24
-
25
-
26
-
27
-
28
-
29
-
30
-
31
-
32
-
33
-
34
-
35
-
36
-
37
-
38
-
39
-
40
-
41
-
42
-
43
-
44
-
45
-
46
-
47
-
48
-
49
-
50
-
51
-
52
-
53
-
54
-
55
-
56
-
57
-
58
-
59
-
60
-
61
-
62
-
63
-
64
-
65
-
66
-
67
-
68
-
69
-
70
-
71
-
72
-
73
-
74
-
75
-
76
-
77
-
78
-
79
-
80
-
81
-
82
-
83
-
84
-
85
-
86
-
87
-
88
-
89
-
90
-
91
-
92
-
93
-
94
-
95
-
96
-
97
-
98
-
99
-
100
-
101
-
102
-
103
-
104
-
105
-
106
-
107
-
108
-
109
-
110
-
111
-
112
-
113
-
114
-
115
-
116
-
117
-
118
-
119
-
120
-
121
-
122
-
123
-
124
-
125
-
126
-
127
-
128
-
129
-
130
-
131
-
132
-
133
-
134
-
135
-
136
-
137
-
138
-
139
-
140
-
141
-
142
-
143
-
144
-
145
-
146
-
147
-
148
-
149
-
150
-
151
-
152
-
153
-
154
-
155
-
156
-
157
-
158
-
159
-
160
-
161
-
162
-
163
-
164
-
165
-
166
-
167
-
168
-
169
-
170
-
171
-
172
-
173
-
174
-
175
-
176
-
177
-
178
-
179
-
180
-
181
-
182
-
183
-
184
-
185
-
186
-
187
-
188
-
189
-
190
-
191
-
192
-
193
-
194
-
195
-
196
-
197
-
198
-
199
-
200
-
201
-
202
-
203
-
204
-
205
-
206
-
207
-
208
-
209
-
210
-
211
-
212
-
213
-
214
-
215
-
216
-
217
-
218
-
219
-
220
-
221
-
222
-
223
-
224
-
225
-
226
-
227
-
228
-
229
-
230
-
231
-
232
-
233
-
234
-
235
-
236
-
237
-
238
-
239
-
240
-
241
-
242
-
243
-
244
-
245
-
246
-
247
-
248
-
249
-
250
-
251
-
252
-
253
-
254
-
255
-
256
-
257
-
258
-
259
-
260
-
261
-
262
-
263
-
264
-
265
-
266
-
267
-
268
-
269
-
270
-
271
-
272
-
273
-
274
-
275
-
276
-
277
-
278
-
 279
279 -
 280
280 -
 281
281 -
 282
282 -
 283
283 -
 284
284 -
 285
285 -
 286
286 -
 287
287 -
 288
288 -
 289
289 -
290
-
291
-
292
-
293
-
294
-
295
-
296
-
297
-
298
-
299
-
300
-
301
-
302
-
303
-
304
-
305
-
306
-
307
-
308
-
309
-
310
-
311
-
312
-
313
-
314
-
315
-
316
-
317
-
318
-
319
-
320
-
321
-
322
-
323
-
324
-
325
-
326
-
327
-
328
-
329
-
330
-
331
-
332
-
333
-
334
-
335
-
336
-
337
-
338
-
339
-
340
-
341
-
342
-
343
-
344
-
345
-
346
-
347
-
348
-
349
-
350
-
351
-
352
-
353
-
354
-
355
-
356
-
357
-
358
-
359
-
360
-
361
-
362
-
363
-
364
-
365
-
366
-
367
-
368
-
369
-
370
-
371
-
372
-
373
-
374
-
375
-
376
 |
 |