Dell C1765NFW Dell Users Guide - Page 77
For Windows Vista, Windows Vista 64-bit Edition, Windows Server 2008
 |
View all Dell C1765NFW manuals
Add to My Manuals
Save this manual to your list of manuals |
Page 77 highlights
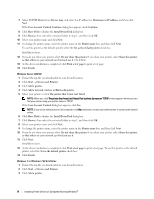
For Windows 7: 1 Click Start → Control Panel. 2 Select User Accounts and Family Safety. 3 Click User Accounts. 4 Click Change User Account Control Settings. 5 Move the slider to the bottom, and then click OK. 6 Click Yes in User Account Control dialog box. 7 Restart the computer. Enable Network Discovery and File Sharing for all Public Networks NOTE: This step is required when you use Windows Vista, Windows Vista 64-bit Edition, Windows 7, Windows 7 64-bit Edition, Windows 8, Windows 8 64-bit Edition, Windows Server 2008, Windows Server 2008 64-bit Edition, Windows Server 2008 R2, and Windows Server 2012 for the server computer. For Windows 7, Windows 7 64-bit Edition, Windows Server 2008 R2: 1 Click Start → Control Panel → Network and Internet → Network and Sharing Center → Change advanced sharing settings. 2 To allow your computer to be found on the network, and to allow other computers on the network to share the files and folders on your computer, click Turn on network discovery. 3 Click Save changes. 4 If you see the User Account Control dialog box, click Yes. For Windows Vista, Windows Vista 64-bit Edition, Windows Server 2008, Windows Server 2008 64-bit Edition: 1 Click Start → Network. 2 Right-click Network and select Properties. The Network an Sharing Center screen appears. 3 Click the down arrow button next to either Network discovery. 4 To allow your computer to be found on the network, and to allow other computers on the network to share the files and folders on your computer, click Turn on network discovery. 5 Click Apply. 6 If the User Account Control dialog box appears, click Continue. Disable Simple File Sharing NOTE: This step is required for Windows XP, and Windows XP 64-bit Edition. 1 Click Start → Control Panel. 2 Select Appearance and Themes. 3 Select Folder Options. 4 On the View tab, clear the Use simple file sharing (Recommended) check box, and then click OK. 5 Click Start → Control Panel. 6 Select Performance and Maintenance. 7 Select Administrative Tools. 8 Double-click Local Security Policy. 9 Click Local Policies → Security Options. 10 Right-click Network access: Sharing and security model for local accounts and select Properties. Installing Printer Drivers on Computers Running Windows® 75
-
 1
1 -
2
-
3
-
4
-
5
-
6
-
7
-
8
-
9
-
10
-
11
-
12
-
13
-
14
-
15
-
16
-
17
-
18
-
19
-
20
-
21
-
22
-
23
-
24
-
25
-
26
-
27
-
28
-
29
-
30
-
31
-
32
-
33
-
34
-
35
-
36
-
37
-
38
-
39
-
40
-
41
-
42
-
43
-
44
-
45
-
46
-
47
-
48
-
49
-
50
-
51
-
52
-
53
-
54
-
55
-
56
-
57
-
58
-
59
-
60
-
61
-
62
-
63
-
64
-
65
-
66
-
67
-
68
-
69
-
70
-
71
-
 72
72 -
 73
73 -
 74
74 -
 75
75 -
 76
76 -
 77
77 -
 78
78 -
 79
79 -
 80
80 -
 81
81 -
 82
82 -
83
-
84
-
85
-
86
-
87
-
88
-
89
-
90
-
91
-
92
-
93
-
94
-
95
-
96
-
97
-
98
-
99
-
100
-
101
-
102
-
103
-
104
-
105
-
106
-
107
-
108
-
109
-
110
-
111
-
112
-
113
-
114
-
115
-
116
-
117
-
118
-
119
-
120
-
121
-
122
-
123
-
124
-
125
-
126
-
127
-
128
-
129
-
130
-
131
-
132
-
133
-
134
-
135
-
136
-
137
-
138
-
139
-
140
-
141
-
142
-
143
-
144
-
145
-
146
-
147
-
148
-
149
-
150
-
151
-
152
-
153
-
154
-
155
-
156
-
157
-
158
-
159
-
160
-
161
-
162
-
163
-
164
-
165
-
166
-
167
-
168
-
169
-
170
-
171
-
172
-
173
-
174
-
175
-
176
-
177
-
178
-
179
-
180
-
181
-
182
-
183
-
184
-
185
-
186
-
187
-
188
-
189
-
190
-
191
-
192
-
193
-
194
-
195
-
196
-
197
-
198
-
199
-
200
-
201
-
202
-
203
-
204
-
205
-
206
-
207
-
208
-
209
-
210
-
211
-
212
-
213
-
214
-
215
-
216
-
217
-
218
-
219
-
220
-
221
-
222
-
223
-
224
-
225
-
226
-
227
-
228
-
229
-
230
-
231
-
232
-
233
-
234
-
235
-
236
-
237
-
238
-
239
-
240
-
241
-
242
-
243
-
244
-
245
-
246
-
247
-
248
-
249
-
250
-
251
-
252
-
253
-
254
-
255
-
256
-
257
-
258
-
259
-
260
-
261
-
262
-
263
-
264
-
265
-
266
-
267
-
268
-
269
-
270
-
271
-
272
-
273
-
274
-
275
-
276
-
277
-
278
-
279
-
280
-
281
-
282
-
283
-
284
-
285
-
286
-
287
-
288
-
289
-
290
-
291
-
292
-
293
-
294
-
295
-
296
-
297
-
298
-
299
-
300
-
301
-
302
-
303
-
304
-
305
-
306
-
307
-
308
-
309
-
310
-
311
-
312
-
313
-
314
-
315
-
316
-
317
-
318
-
319
-
320
-
321
-
322
-
323
-
324
-
325
-
326
-
327
-
328
-
329
-
330
-
331
-
332
-
333
-
334
-
335
-
336
-
337
-
338
-
339
-
340
-
341
-
342
-
343
-
344
-
345
-
346
-
347
-
348
-
349
-
350
-
351
-
352
-
353
-
354
-
355
-
356
-
357
-
358
-
359
-
360
-
361
-
362
-
363
-
364
-
365
-
366
-
367
-
368
-
369
-
370
-
371
-
372
-
373
-
374
-
375
-
376
 |
 |