Dell Dimension 2400 Owner's Manual - Page 57
the computer.
 |
View all Dell Dimension 2400 manuals
Add to My Manuals
Save this manual to your list of manuals |
Page 57 highlights
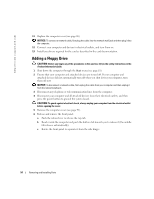
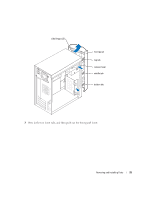
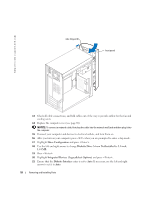
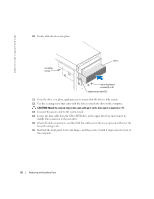
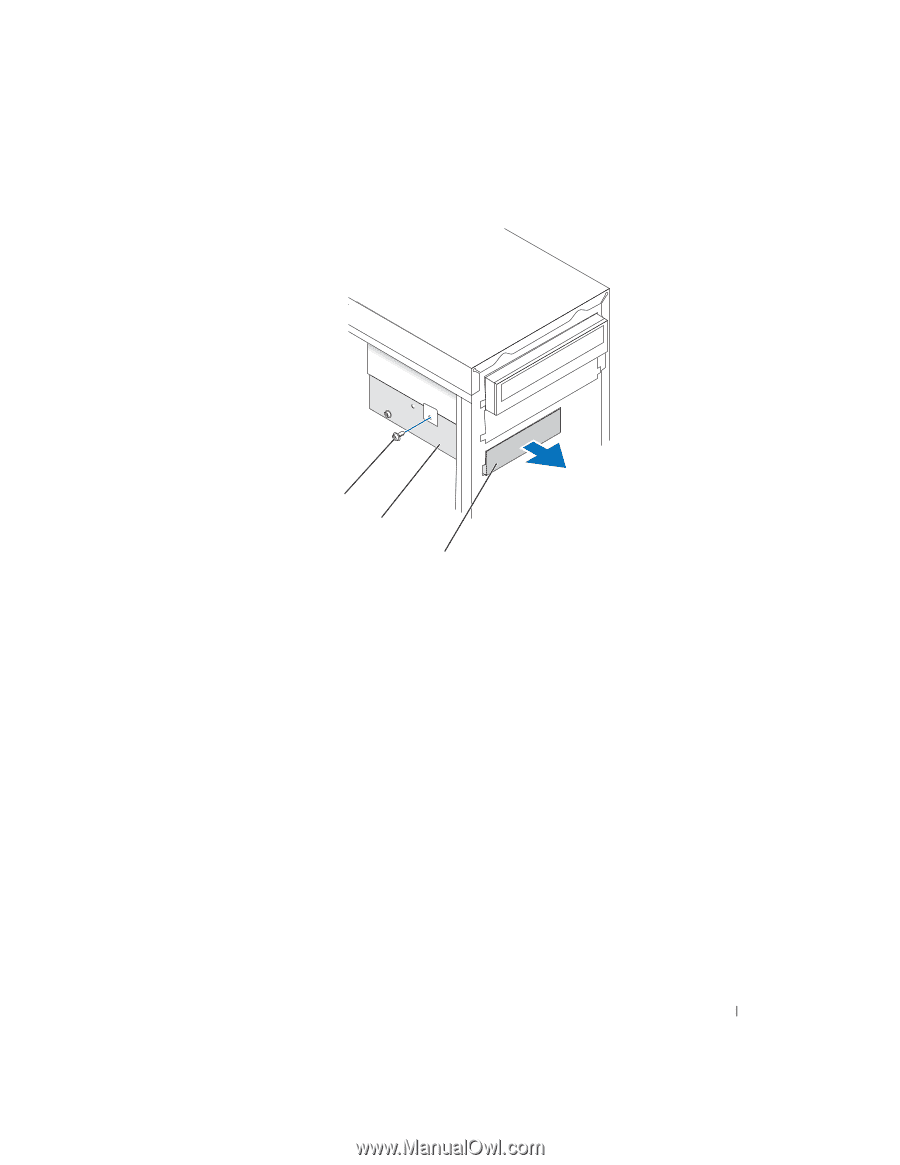
top bracket screw drive bracket floppy drive 11 Secure the floppy drive bracket with the top bracket screw that came with your drive. 12 Reattach the front panel to the side hinges, and then rotate it until it snaps onto the front of the computer. Removing and Installing Parts 57
-
 1
1 -
2
-
3
-
4
-
5
-
6
-
7
-
8
-
9
-
10
-
11
-
12
-
13
-
14
-
15
-
16
-
17
-
18
-
19
-
20
-
21
-
22
-
23
-
24
-
25
-
26
-
27
-
28
-
29
-
30
-
31
-
32
-
33
-
34
-
35
-
36
-
37
-
38
-
39
-
40
-
41
-
42
-
43
-
44
-
45
-
46
-
47
-
48
-
49
-
50
-
51
-
 52
52 -
 53
53 -
 54
54 -
 55
55 -
 56
56 -
 57
57 -
 58
58 -
 59
59 -
 60
60 -
 61
61 -
 62
62 -
63
-
64
-
65
-
66
-
67
-
68
-
69
-
70
-
71
-
72
-
73
-
74
-
75
-
76
-
77
-
78
-
79
-
80
-
81
-
82
-
83
-
84
-
85
-
86
-
87
-
88
-
89
-
90
-
91
-
92
-
93
-
94
-
95
-
96
-
97
-
98
-
99
-
100
 |
 |
Removing and Installing Parts
57
11
Secure the floppy drive bracket with the top bracket screw that came with your drive.
12
Reattach the front panel to the side hinges, and then rotate it until it snaps onto the front of
the computer.
top bracket screw
drive bracket
floppy drive