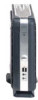
Dell Dimension 4590T Desktop Manual
Dell Dimension 4590T Manual
 |
View all Dell Dimension 4590T manuals
Add to My Manuals
Save this manual to your list of manuals |
Dell Dimension 4590T manual content summary:
- Dell Dimension 4590T | Desktop Manual - Page 1
- Dell Dimension 4590T | Desktop Manual - Page 2
- Dell Dimension 4590T | Desktop Manual - Page 3
ALIENWARE DESKTOP MANUAL - Dell Dimension 4590T | Desktop Manual - Page 4
to hardware or loss of data and tells you how to avoid the problem. WARNING: A WARNING indicates a potential for property damage, personal injury, or without the prior written permission of Dell Inc. is strictly prohibited. Trademarks used in this manual: Alienware®, AlienFX®, and the AlienHead - Dell Dimension 4590T | Desktop Manual - Page 5
Drive(s 39 Removing and Replacing Expansion Card(s 42 CHAPTER 5: TROUBLESHOOTING 45 Basic Hints and Tips 46 Backup and General Maintenance 46 Diagnostic Tools 47 CHAPTER 6: SYSTEM RECOVERY 55 AlienRespawn 56 Dell DataSafe Online Backup (Optional 57 CHAPTER 7: SPECIFICATIONS 59 APPENDIX - Dell Dimension 4590T | Desktop Manual - Page 6
4 - Dell Dimension 4590T | Desktop Manual - Page 7
Dear Valued Alienware Customer, Welcome to the Alienware family. We are thrilled to include you among the growing number of savvy high-performance computer users. The Alienware technicians who have crafted your computer have made certain that your high-performance computer is properly optimized and - Dell Dimension 4590T | Desktop Manual - Page 8
6 - Dell Dimension 4590T | Desktop Manual - Page 9
CHAPTER 1: SETTING UP YOUR DESKTOP CHAPTER 1: SETTING UP YOUR DESKTOP CHAPTER 1: SETTING UP YOUR DESKTOP 7 - Dell Dimension 4590T | Desktop Manual - Page 10
Read all safety and setup instructions before connecting your new desktop. shipment. Report any missing components to customer service within 5 days of receiving the shipment. Anything to complete certain tasks. As always, our technical support staff is available to assist you. Placing Your Desktop - Dell Dimension 4590T | Desktop Manual - Page 11
card slot on your computer. You can purchase the DVI-to-VGA adapter, HDMI-to-DVI adapter, and additional HDMI or DVI cables at www.dell.com. Use the appropriate cable based on the connectors available on your computer and display. See the following table to identify the connectors on your - Dell Dimension 4590T | Desktop Manual - Page 12
Connect the Keyboard and Mouse Connect the Network Cable (Optional) 10 CHAPTER 1: SETTING UP YOUR DESKTOP - Dell Dimension 4590T | Desktop Manual - Page 13
Connect the Power Cable Press the Power Button WARNING: The power connectors and power strips vary among countries. Press the power button on the top of the computer. Using an incompatible cable or improperly connecting the cable to a power strip or electrical outlet may cause fire or equipment - Dell Dimension 4590T | Desktop Manual - Page 14
download and install the latest BIOS and drivers for your computer available at support.dell.com. NOTE: For more information on the operating system and features, see support.dell connection, contact your ISP or cellular telephone service for setup instructions. 12 CHAPTER 1: SETTING UP YOUR DESKTOP - Dell Dimension 4590T | Desktop Manual - Page 15
connected in the past, the Internet Service Provider (ISP) might have a service outage. Contact your ISP to check the service status, or try connecting again Help me choose or contact your ISP. 4. Follow the instructions on the screen and use the setup information provided by your ISP to complete - Dell Dimension 4590T | Desktop Manual - Page 16
14 CHAPTER 1: SETTING UP YOUR DESKTOP - Dell Dimension 4590T | Desktop Manual - Page 17
CHAPTER 2: GETTING TO KNOW YOUR DESKTOP CHAPTER 2: GETTING TO KNOW YOUR DESKTOP This chapter provides information about your new desktop to familiarize you with its various features, and to get you up and running quickly. CHAPTER 2: GETTING TO KNOW YOUR DESKTOP 15 - Dell Dimension 4590T | Desktop Manual - Page 18
off. 2 Optical drive - Plays or records CDs, DVDs, and Blu-ray Discs. 6 3 Optical-drive bay - Can support additional optical drive. 4 Media Card Reader/Optical-drive bay - Can support an optional Media Card Reader or an additional optical drive. 5 Drive panel - Covers the optical drive(s) or - Dell Dimension 4590T | Desktop Manual - Page 19
Back View Features 1 2 3 4 5 67 1 Security cable slot - Attaches a commercially available security cable to the computer. NOTE: Before you buy a security cable, ensure that it fits into the security cable slot on your computer. 2 Latch - Closes or opens the security cable slot and locks or unlocks - Dell Dimension 4590T | Desktop Manual - Page 20
Back Light Button Press the back light button to turn on the light to view the back panel connectors. This light automatically turns off after a few seconds. 18 CHAPTER 2: GETTING TO KNOW YOUR DESKTOP - Dell Dimension 4590T | Desktop Manual - Page 21
your computer to a network or broadband device. 7 IEEE 1394 connector - Connects to high-speed serial multimedia devices such as digital video cameras. 8 Coaxial S/PDIF connector - Connects to amplifiers, speakers, or TVs for digital audio output through coaxial digital cables. This format - Dell Dimension 4590T | Desktop Manual - Page 22
Your Alienware desktop has five integrated audio out connectors and one audio in connector. The audio out connectors deliver quality sound and support 7.1 surround audio. You can connect the audio input connector from a home stereo or speaker system for a heightened gaming and media experience. NOTE - Dell Dimension 4590T | Desktop Manual - Page 23
Top View Features Accessing the Top Panel Connectors 1 Press the top panel downwards to access the top panel connectors. 1 Top panel CHAPTER 2: GETTING TO KNOW YOUR DESKTOP 21 - Dell Dimension 4590T | Desktop Manual - Page 24
Top Panel Connectors 5 4 123 22 CHAPTER 2: GETTING TO KNOW YOUR DESKTOP 1 Headphone connector - Connects to headphones. NOTE: To connect to a powered speaker or sound system, use the audio out connector or one of the S/PDIF connectors at the back of your computer. 2 Microphone connector - - Dell Dimension 4590T | Desktop Manual - Page 25
CHAPTER 4: USING YOUR DESKTOP CHAPTER 3: USING YOUR DESKTOP CHAPTER 3: USING YOUR DESKTOP 23 - Dell Dimension 4590T | Desktop Manual - Page 26
Center gives you access to Alienware's exclusive software and is a continuously upgradable control panel. As Alienware releases new programs, they download directly into the Command Center allowing you to build a library of system management, optimization, and customization tools. To access the - Dell Dimension 4590T | Desktop Manual - Page 27
RAID Level 0 CAUTION: RAID level 0 provides no redundancy. Therefore, a failure of one drive results in the loss of all data. Perform regular backups to protect your data. RAID level 0 uses data striping to provide a high data access rate. Data striping writes consecutive segments, or stripes, of - Dell Dimension 4590T | Desktop Manual - Page 28
performance in resource intensive applications including gaming and multimedia development. System Setup The System Setup options allow you to: CAUTION: Technical support verifies the full functionality of the computer at the factory configured settings. Alienware does not provide technical - Dell Dimension 4590T | Desktop Manual - Page 29
exactly as listed. NOTE: For the updated system setup information, see the Service Manual at support.dell.com/manuals. Main BIOS Information Product Information Build Date Product Name BIOS Version Service Tag Asset Tag Memory Information Total Memory Memory Available Memory Technology Displays - Dell Dimension 4590T | Desktop Manual - Page 30
Main CPU Information CPU Type CPU ID CPU Speed Cache L2 Cache L3 Displays the processor type. Displays the processor identification code. Displays the processor speed. Displays the processor L2 cache size. Displays the processor L3 cache size. Advanced - Standard CMOS Features System Date (mm:dd: - Dell Dimension 4590T | Desktop Manual - Page 31
Advanced - CPU Configuration Hyper-threading Technology If disabled only one thread per enabled core is active. XD Bit Capability Enable XD Bit Capability to allow the processor to distinguish between the bits of code that can be executed and the ones that cannot be executed. Intel(R) Speedstep - Dell Dimension 4590T | Desktop Manual - Page 32
Version number. Number of ICC Profiles: Displays the number of ICC Profiles supported on your computer. Current ICC Profile Index: Displays the current ICC Profile Index Rate Displays the Command Rate (editable in Manual Mode). tCL Displays the Column Address Strobe Latency (editable in - Dell Dimension 4590T | Desktop Manual - Page 33
Submenu tRCD Displays timing of RAS to CAS delay (editable in Manual Mode). tRP Displays timing of RAS Precharge (editable in Manual Mode). tRAS Displays timing of Row Address Strobe (editable in Manual Mode). tRFC Displays timing of Refresh to Archive/Refresh cycle time (editable - Dell Dimension 4590T | Desktop Manual - Page 34
Overvoltage Configuration Submenu DDR3 Memory Voltage Adjusts the DDR3 Memory Voltage. Dynamic CPU VCore Offset Allows you to change the Processor Core Voltage Offset value. Adjust DDR_VREF_DQ_A Adjusts the DDR3 Data VREF - Channel A. Adjust DDR_VREF_DQ_B Adjusts the DDR3 Data VREF - Channel - Dell Dimension 4590T | Desktop Manual - Page 35
for your desktop at www.dell.com or www.alienware.com. NOTE: See the Service Manual at support.dell.com/manuals for installation instructions of all serviceable components. Parts purchased from Dell and Alienware ship with specific replacement instructions. CHAPTER 4: INSTALLING ADDITIONAL OR - Dell Dimension 4590T | Desktop Manual - Page 36
procedures in this section may require the following tools: • Small flat-blade screwdriver • Phillips screwdriver • BIOS executable update program available at support.dell.com Turning Off Your Desktop CAUTION: To avoid losing data, save and close all open files and exit all open programs before - Dell Dimension 4590T | Desktop Manual - Page 37
a component such as a processor by its edges, not by its pins. CAUTION: Only a certified service technician should perform repairs on your desktop. Damage due to servicing that is not authorized by Dell is not covered by your warranty. CAUTION: To avoid electrostatic discharge, ground yourself by - Dell Dimension 4590T | Desktop Manual - Page 38
the Side Panel CAUTION: Before removing the side panel, disconnect the power cable from your desktop. To remove the side panel: 1. Follow the instructions in "Before You Begin" on page 34. 1 NOTE: Ensure that you remove the security cable from the security cable slot (if applicable). 2. Slide - Dell Dimension 4590T | Desktop Manual - Page 39
1 4 1 memory module(s) 3 optical drives (3) 2 graphics cards (2) 4 hard drives (4) Removing and Replacing Memory Module(s) To remove the memory module(s): 1. Follow the instructions in "Before You Begin" on page 34. 2. Remove the side panel (see "Removing and Replacing the Side Panel" on page 36 - Dell Dimension 4590T | Desktop Manual - Page 40
To replace memory module(s): 1. Follow the instructions in "Before You Begin" on page 34. 2. Align the notch on the bottom of the memory module with the tab on the memory module connector. - Dell Dimension 4590T | Desktop Manual - Page 41
connect the SATA 3.0 (6Gb/s) compatible hard drive(s) to the SATA 3.0 (6Gb/s) port(s) on the system board. To remove the hard drive(s): 1. Follow the instructions in "Before You Begin" on page 34. 2. Remove the side panel (see "Removing and Replacing the Side Panel" on page 36). 3. Disconnect the - Dell Dimension 4590T | Desktop Manual - Page 42
1 2 2 1 1 power cable 2 data cable 4. Press the release tabs together and slide the hard drive out of the hard drive cage. 40 CHAPTER 4: INSTALLING ADDITIONAL OR REPLACEMENT COMPONENTS 1 hard drive 2 release tabs (2) 5. Remove the hard drive out of the hard-drive bracket (if applicable). - Dell Dimension 4590T | Desktop Manual - Page 43
To replace a hard drive: 1. Follow the instructions in "Before You Begin" on page 34. 1 2. See the documentation that shipped with your new hard drive to verify that it is configured for your - Dell Dimension 4590T | Desktop Manual - Page 44
Removing and Replacing Expansion Card(s) To remove a card: 1. Follow the instructions in "Before You Begin" on page 34. 2. Remove the side panel (see "Removing and Replacing the Side Panel" on page 36). 3. Press the shroud button - Dell Dimension 4590T | Desktop Manual - Page 45
To replace a card: 1. Follow the instructions in "Before You Begin" on page 34. 2. Remove the filler bracket to create a card-slot opening (if applicable). 3. Align the card with the slot on - Dell Dimension 4590T | Desktop Manual - Page 46
44 CHAPTER 4: INSTALLING ADDITIONAL OR REPLACEMENT COMPONENTS - Dell Dimension 4590T | Desktop Manual - Page 47
CHAPTER 6: TROUBLESHOOTING CHAPTER 5: TROUBLESHOOTING CHAPTER 5: TROUBLESHOOTING 45 - Dell Dimension 4590T | Desktop Manual - Page 48
your computer. Things to check before troubleshooting: • Ensure that the power cable any computer components were added or removed before the problem began, check to see if you performed the removal error message prior to calling Alienware Technical Support to aid in diagnosing and resolving your - Dell Dimension 4590T | Desktop Manual - Page 49
to continue if you are experiencing memory issue, otherwise press to finish PSA testing. When you press , the following message appears on the screen. "Booting Dell Diagnostic Utility Partition. Press any key to continue." 5. Select Exit to reboot your computer. CHAPTER 5: TROUBLESHOOTING 47 - Dell Dimension 4590T | Desktop Manual - Page 50
DVD contains drivers for your computer. You can also download the latest drivers and software for your computer from support.dell.com. Review NOTE: Write down any error codes and problem descriptions exactly as they appear and follow the instructions on the screen. 7. After all tests TROUBLESHOOTING - Dell Dimension 4590T | Desktop Manual - Page 51
during start‑up. The following repetitive beep codes help you troubleshoot problems with your computer. For assistance, contact Alienware (see "CONTACTING ALIENWARE" on page 65). NOTE: To replace parts, see the Service Manual at support.dell.com/manuals. Beep Code One Two Three Four Five Six Seven - Dell Dimension 4590T | Desktop Manual - Page 52
-Windows operating system environment. 1. Click Start → Control Panel→ Programs→ Run programs made for previous versions of Windows. 2. In the welcome screen, click Next. Follow the instructions on the screen. 50 CHAPTER 5: TROUBLESHOOTING - Dell Dimension 4590T | Desktop Manual - Page 53
and configured properly. • Verify that the device drivers do not conflict with the program. • If necessary, uninstall and then reinstall the program. Run the PSA Diagnostics: If all the tests run successfully, the error condition is related to a software problem. CHAPTER 5: TROUBLESHOOTING 51 - Dell Dimension 4590T | Desktop Manual - Page 54
Drive Problems Memory . If you require assistance, contact Alienware Technical Support (see "CONTACTING ALIENWARE" on page 65). Run If the User Account Control window appears, click Continue. 4. Follow the instructions on the screen. If the display is blank • The computer maybe in TROUBLESHOOTING - Dell Dimension 4590T | Desktop Manual - Page 55
• If the diagnostic light does not turn ON, there may be a problem with the computer. For further assistance, contact Alienware support (see "CONTACTING ALIENWARE" on page 65). USB Devices NOTE: For maximum connected to your computer and then restart your computer. CHAPTER 5: TROUBLESHOOTING 53 - Dell Dimension 4590T | Desktop Manual - Page 56
54 CHAPTER 5: TROUBLESHOOTING - Dell Dimension 4590T | Desktop Manual - Page 57
data backup service (see "Dell DataSafe Online Backup" on page 57). • System Drivers - You can download the latest drivers for your computer from support.dell.com. • Resource DVD - Contains drivers for your computer. You can also download the latest system drivers from support.dell.com. • System - Dell Dimension 4590T | Desktop Manual - Page 58
drivers installed after you received your computer. Create backup media of applications you need to install on your computer before using AlienRespawn. Use AlienRespawn only if System Restore did not resolve your operating system problem Options menu and follow the instructions on the screen. NOTE: - Dell Dimension 4590T | Desktop Manual - Page 59
the instructions on the screen. Dell DataSafe Online Backup (Optional) NOTE: Dell DataSafe Online Backup may not be available in all regions. NOTE: A broadband connection is recommended for fast upload/download speeds. Dell DataSafe Online is an automated backup and recovery service that helps - Dell Dimension 4590T | Desktop Manual - Page 60
58 CHAPTER 6: SYSTEM RECOVERY - Dell Dimension 4590T | Desktop Manual - Page 61
CHAPTER 8: SPECIFICATIONS CHAPTER 7: SPECIFICATIONS This chapter provides specifications of your desktop. CHAPTER 7: SPECIFICATIONS 59 - Dell Dimension 4590T | Desktop Manual - Page 62
Computer Model Alienware Aurora-R3 Dimensions Height (with top vents open) Width Depth Average weight 432 mm (17 inches) 249 bus width 64 bits Data bus bandwidth up to 6.4 GT/s RAID support (internal SATA drives only) BIOS chip (NVRAM) RAID 0 RAID 1 RAID 1+0 32 MB 60 CHAPTER 7: SPECIFICATIONS - Dell Dimension 4590T | Desktop Manual - Page 63
1866 MHz Minimum 3 GB Maximum 16 GB Memory types 2- channel DDR3 NOTE: For instructions on upgrading the memory, see "Removing and Replacing Memory Module(s)" on page 37. Back SATA hard drives NOTE: Your computer supports up to two SATA 3.0 (6Gb/s) hard drives. CHAPTER 7: SPECIFICATIONS 61 - Dell Dimension 4590T | Desktop Manual - Page 64
Express x16: Connectors Connector size two 36-pin connectors two 164 pins connectors Audio Type Controller Video Type Operating speed integrated 7.1 channel, High Definition Audio with S/PDIF support Realtek ALC892 codec up to two graphic adapters - double-width, full length PCI Express x16 x16 - Dell Dimension 4590T | Desktop Manual - Page 65
marked on the product and in the documentation before operating your computer. • Retain all safety and operating instructions. • Never use this product near water or a heat source. • Only set-up the computer on a stable work surface. • Only operate the computer using the power - Dell Dimension 4590T | Desktop Manual - Page 66
into it. • Your computer was dropped or the case was damaged. • Normal operation of the computer does not occur when the operating instructions are followed. Replacement Components or Accessories It is only advised to use replacement parts or accessories recommended by Alienware. Retain all boxes - Dell Dimension 4590T | Desktop Manual - Page 67
or Dell product catalog. Dell provides several online and telephone-based support and service options. Because availability varies by country and product, some services may not be available in your area. To contact Dell for sales, technical support, or customer service issues: 1. Visit www.dell.com - Dell Dimension 4590T | Desktop Manual - Page 68
is provided in the device(s) described in this document in accordance with the requirements of the Official Mexican Standard (NOM): Importer: Dell México S.A. de C.V. Paseo de la Reforma 2620 - Flat 11° Col. Lomas Altas 11950 México, D.F. Regulatory Regulatory Model Number Type D01M D01M003 - Dell Dimension 4590T | Desktop Manual - Page 69
- Dell Dimension 4590T | Desktop Manual - Page 70
-
 1
1 -
 2
2 -
 3
3 -
 4
4 -
 5
5 -
 6
6 -
 7
7 -
8
-
9
-
10
-
11
-
12
-
13
-
14
-
15
-
16
-
17
-
18
-
19
-
20
-
21
-
22
-
23
-
24
-
25
-
26
-
27
-
28
-
29
-
30
-
31
-
32
-
33
-
34
-
35
-
36
-
37
-
38
-
39
-
40
-
41
-
42
-
43
-
44
-
45
-
46
-
47
-
48
-
49
-
50
-
51
-
52
-
53
-
54
-
55
-
56
-
57
-
58
-
59
-
60
-
61
-
62
-
63
-
64
-
65
-
66
-
67
-
68
-
69
-
70
 |
 |
