Dell Dimension 9200 Owner's Manual - Page 121
Replacing the Computer Cover
 |
View all Dell Dimension 9200 manuals
Add to My Manuals
Save this manual to your list of manuals |
Page 121 highlights
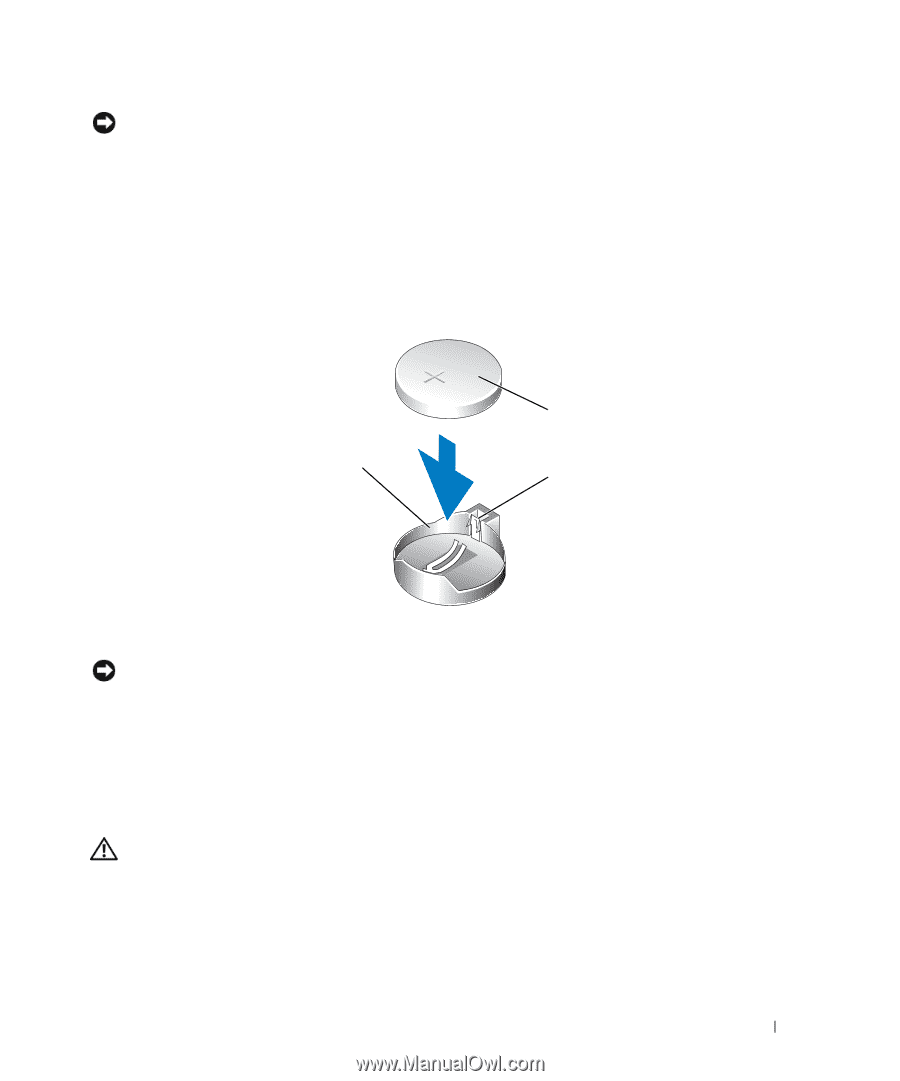
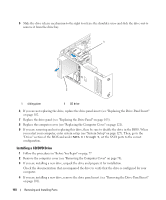
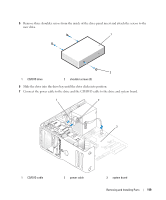
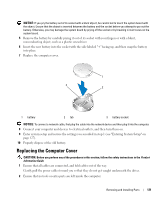
NOTICE: If you pry the battery out of its socket with a blunt object, be careful not to touch the system board with the object. Ensure that the object is inserted between the battery and the socket before you attempt to pry out the battery. Otherwise, you may damage the system board by prying off the socket or by breaking circuit traces on the system board. 5 Remove the battery by carefully prying it out of its socket with your fingers or with a blunt, nonconducting object, such as a plastic screwdriver. 6 Insert the new battery into the socket with the side labeled "+" facing up, and then snap the battery into place. 7 Replace the computer cover. 1 3 2 1 battery 2 tab 3 battery socket NOTICE: To connect a network cable, first plug the cable into the network device and then plug it into the computer. 8 Connect your computer and devices to electrical outlets, and then turn them on. 9 Enter system setup and restore the settings you recorded in step 1 (see "Entering System Setup" on page 127). 10 Properly dispose of the old battery. Replacing the Computer Cover CAUTION: Before you perform any of the procedures in this section, follow the safety instructions in the Product Information Guide. 1 Ensure that all cables are connected, and fold cables out of the way. Gently pull the power cables toward you so that they do not get caught underneath the drives. 2 Ensure that no tools or extra parts are left inside the computer. Removing and Installing Parts 121
-
 1
1 -
2
-
3
-
4
-
5
-
6
-
7
-
8
-
9
-
10
-
11
-
12
-
13
-
14
-
15
-
16
-
17
-
18
-
19
-
20
-
21
-
22
-
23
-
24
-
25
-
26
-
27
-
28
-
29
-
30
-
31
-
32
-
33
-
34
-
35
-
36
-
37
-
38
-
39
-
40
-
41
-
42
-
43
-
44
-
45
-
46
-
47
-
48
-
49
-
50
-
51
-
52
-
53
-
54
-
55
-
56
-
57
-
58
-
59
-
60
-
61
-
62
-
63
-
64
-
65
-
66
-
67
-
68
-
69
-
70
-
71
-
72
-
73
-
74
-
75
-
76
-
77
-
78
-
79
-
80
-
81
-
82
-
83
-
84
-
85
-
86
-
87
-
88
-
89
-
90
-
91
-
92
-
93
-
94
-
95
-
96
-
97
-
98
-
99
-
100
-
101
-
102
-
103
-
104
-
105
-
106
-
107
-
108
-
109
-
110
-
111
-
112
-
113
-
114
-
115
-
 116
116 -
 117
117 -
 118
118 -
 119
119 -
 120
120 -
 121
121 -
 122
122 -
 123
123 -
 124
124 -
 125
125 -
 126
126 -
127
-
128
-
129
-
130
-
131
-
132
-
133
-
134
-
135
-
136
-
137
-
138
-
139
-
140
-
141
-
142
-
143
-
144
-
145
-
146
-
147
-
148
-
149
-
150
-
151
-
152
-
153
-
154
-
155
-
156
-
157
-
158
-
159
-
160
-
161
-
162
-
163
-
164
-
165
-
166
-
167
-
168
-
169
-
170
-
171
-
172
 |
 |