Dell Force10 S25N-S50N Dell Force10 S50N and S50V Systems Quick Start Guide
Dell Force10 S25N-S50N Manual
 |
View all Dell Force10 S25N-S50N manuals
Add to My Manuals
Save this manual to your list of manuals |
Dell Force10 S25N-S50N manual content summary:
- Dell Force10 S25N-S50N | Dell Force10 S50N and S50V Systems Quick Start Guide - Page 1
Dell Force10 S50N and S50V Systems Quick Start Guide Regulatory Model: S50N/S50V - Dell Force10 S25N-S50N | Dell Force10 S50N and S50V Systems Quick Start Guide - Page 2
- Dell Force10 S25N-S50N | Dell Force10 S50N and S50V Systems Quick Start Guide - Page 3
Dell Force10 S50N and S50V Systems Quick Start Guide Regulatory Model: S50N/S50V - Dell Force10 S25N-S50N | Dell Force10 S50N and S50V Systems Quick Start Guide - Page 4
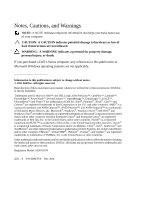
instructions are not followed. WARNING: A WARNING indicates a potential for property damage, personal injury, or death. If you purchased a Dell © 2011 Dell Inc. All Dell Inc. is strictly forbidden. Trademarks used in this text: Dell™, the DELL logo, Dell Dell Inc. disclaims any proprietary interest in trademarks - Dell Force10 S25N-S50N | Dell Force10 S50N and S50V Systems Quick Start Guide - Page 5
to the following documents: Documentation Hardware installation and power-up instructions Software configuration Command line interface Latest updates S50N/S50V Installing S50N and S50V Systems FTOS Configuration Guide FTOS Command Line Reference Guide Release Notes for the S-Series About this - Dell Force10 S25N-S50N | Dell Force10 S50N and S50V Systems Quick Start Guide - Page 6
4 About this Guide - Dell Force10 S25N-S50N | Dell Force10 S50N and S50V Systems Quick Start Guide - Page 7
chassis, Dell Force10 recommends that you complete the installation procedures in the order presented below. NOTE: Unless stated otherwise, the installation instructions below apply to both the S50N and S50V chassis. Always handle the system and its components with care. Avoid dropping the switch or - Dell Force10 S25N-S50N | Dell Force10 S50N and S50V Systems Quick Start Guide - Page 8
1 Dell Force10 recommends that one person hold the chassis in place while a second person attaches the brackets to the posts. 2 Attach the bracket "ears" to the rack or cabinet posts, using two screws for each bracket. Ensure the screws are tightened firmly. Attach a Ground Cable to the S50N - Dell Force10 S25N-S50N | Dell Force10 S50N and S50V Systems Quick Start Guide - Page 9
S50N guide for information related to optional module installation. SFP and XFP transceivers can be inserted or removed while the switch is running. CAUTION: Before connecting a transceiver to a source, check the receive power of the transceiver with an optical power meter. Generally, Dell Force10 - Dell Force10 S25N-S50N | Dell Force10 S50N and S50V Systems Quick Start Guide - Page 10
details on Dell Force10 supported optics, refer to http://www.force10networks.com/products/specifications.asp Power Up Sequence Supply Power and Power Up the System There is no power switch. Connecting the switch to either an AC or DC power source starts the switch. The S50V and S50N switches have - Dell Force10 S25N-S50N | Dell Force10 S50N and S50V Systems Quick Start Guide - Page 11
accessible. AC Power For the S50V and S50N, to use AC only, connect the supplied AC power cord first to the switch (receptacle on the right as you face and the power source, the chassis is powered-up; there is no on/off switch. DC Power To connect the chassis to the DC power source, follow the steps - Dell Force10 S25N-S50N | Dell Force10 S50N and S50V Systems Quick Start Guide - Page 12
Power Supplies On both the S50N and S50V, either the AC or DC power supplies alone are sufficient to power the switch. When both AC and DC power Ventilation is side-to-side, with six fans on the left side of the switch as you face the PSU side. The fan speed increases when the temperature reaches - Dell Force10 S25N-S50N | Dell Force10 S50N and S50V Systems Quick Start Guide - Page 13
100 to 240 VAC, 50/60Hz Maximum current draw 6.5 A @ 115 VAC 3.25 A @ 200/240 VAC 6.5 A @ 115 VAC 3.25 A @ 200/240 VAC Maximum power consumption S50N: 156W S50N-DC: 136 W S50V: 146W Maximum PoE power 320W for PoE using either AC 320W for PoE using either AC or DC inputs or DC inputs - Dell Force10 S25N-S50N | Dell Force10 S50N and S50V Systems Quick Start Guide - Page 14
-DC Specifications Nominal input voltage -48V to -54V Maximum current draw S50N-DC: 3.6 A at -48 VDC Maximum power consumption S50N: 102W S50N-DC: 136W S50V Specifications -48V to -54V S50V: 11.5 A @ -48VDC S50V: 470W (790W using current-sharing AC and DC inputs) Installing Power Supplies The - Dell Force10 S25N-S50N | Dell Force10 S50N and S50V Systems Quick Start Guide - Page 15
2 Installing the Software Navigating CLI Modes The FTOS prompt changes to indicate the CLI mode. You must move linearly through the command modes, with the exception of the end command which takes you directly to EXEC Privilege mode; the exit command moves you up one command mode level. Console - Dell Force10 S25N-S50N | Dell Force10 S50N and S50V Systems Quick Start Guide - Page 16
of the RJ-45 cable that will connect to your terminal. 3 Set your initial console terminal settings to match the default console settings on the switch. 9600 baud rate No parity 8 data bits 1 stop bit No flow control (console port only) After establishing a connection, you can modify the settings to - Dell Force10 S25N-S50N | Dell Force10 S50N and S50V Systems Quick Start Guide - Page 17
power up for the first time (except for the default hostname, which is Force10). You must configure the system using the CLI. Configure Layer 2 (Data 2 data transmissions through an individual interface. The user cannot configure switching or Layer 2 protocols such as the spanning tree protocol on - Dell Force10 S25N-S50N | Dell Force10 S50N and S50V Systems Quick Start Guide - Page 18
a new host name. hostname name Command Mode CONFIGURATION Access the System Remotely You can configure the system to be accessed remotely by Telnet. The S50N and S50V chassis do not have a dedicated management port. Configure any port on the chassis to be the port through which you manage the - Dell Force10 S25N-S50N | Dell Force10 S50N and S50V Systems Quick Start Guide - Page 19
using a DES encryption method. • enable secret is stored in the running/startup configuration in using a stronger, MD5 encryption method. Dell Force10 recommends using the enable secret password. Task Command Syntax Create a password to enable [password | secret] [level level] access EXEC - Dell Force10 S25N-S50N | Dell Force10 S50N and S50V Systems Quick Start Guide - Page 20
Assign Interfaces to a VLAN A port may either be an untagged member of a single VLAN, or a tagged member of perhaps multiple VLANs. • Untagged Ports - ports that do not append an 802.1Q VLAN tag to frames on egress, and do not accept tagged frames on ingress (tagged frames are dropped). Untagged - Dell Force10 S25N-S50N | Dell Force10 S50N and S50V Systems Quick Start Guide - Page 21
Connecting the Chassis to the Network Once you have completed the hardware installation and software configuration, you can connect to your company network by following your company's cabling requirements. Installing the Software 19 - Dell Force10 S25N-S50N | Dell Force10 S50N and S50V Systems Quick Start Guide - Page 22
20 Installing the Software - Dell Force10 S25N-S50N | Dell Force10 S50N and S50V Systems Quick Start Guide - Page 23
- Dell Force10 S25N-S50N | Dell Force10 S50N and S50V Systems Quick Start Guide - Page 24
Printed in the U.S.A. www.dell.com | support.dell.com
-
 1
1 -
 2
2 -
 3
3 -
 4
4 -
 5
5 -
 6
6 -
 7
7 -
8
-
9
-
10
-
11
-
12
-
13
-
14
-
15
-
16
-
17
-
18
-
19
-
20
-
21
-
22
-
23
-
24
 |
 |
Dell Force10
S50N and S50V Systems
Quick Start Guide
Regulatory Model: S50N/S50V