Dell Inspiron 530S Owner's Manual - Page 88
Dell Diagnostics, When to Use the Dell Diagnostics, Starting the Dell Diagnostics From Your Hard Drive
 |
View all Dell Inspiron 530S manuals
Add to My Manuals
Save this manual to your list of manuals |
Page 88 highlights
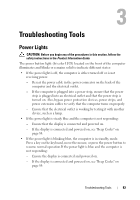
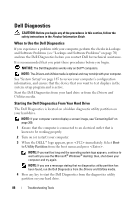
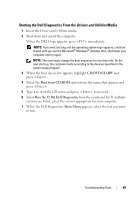
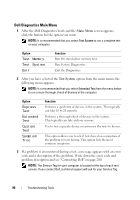
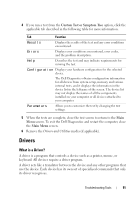
Dell Diagnostics CAUTION: Before you begin any of the procedures in this section, follow the safety instructions in the Product Information Guide. When to Use the Dell Diagnostics If you experience a problem with your computer, perform the checks in Lockups and Software Problems (see "Lockups and Software Problems" on page 70) and run the Dell Diagnostics before you contact Dell for technical assistance. It is recommended that you print these procedures before you begin. NOTICE: The Dell Diagnostics works only on Dell™ computers. NOTE: The Drivers and Utilities media is optional and may not ship with your computer. See "System Setup" on page 185 to review your computer's configuration information, and ensure that the device that you want to test displays in the system setup program and is active. Start the Dell Diagnostics from your hard drive or from the Drivers and Utilities media. Starting the Dell Diagnostics From Your Hard Drive The Dell Diagnostics is located on a hidden diagnostic utility partition on your hard drive. NOTE: If your computer cannot display a screen image, see "Contacting Dell" on page 200. 1 Ensure that the computer is connected to an electrical outlet that is known to be working properly. 2 Turn on (or restart) your computer. 3 When the DELL™ logo appears, press immediately. Select Boot to Utility Partition from the boot menu and press . NOTE: If you wait too long and the operating system logo appears, continue to wait until you see the Microsoft® Windows® desktop; then, shut down your computer and try again. NOTE: If you see a message stating that no diagnostics utility partition has been found, run the Dell Diagnostics from the Drivers and Utilities media. 4 Press any key to start the Dell Diagnostics from the diagnostics utility partition on your hard drive. 88 Troubleshooting Tools
-
 1
1 -
2
-
3
-
4
-
5
-
6
-
7
-
8
-
9
-
10
-
11
-
12
-
13
-
14
-
15
-
16
-
17
-
18
-
19
-
20
-
21
-
22
-
23
-
24
-
25
-
26
-
27
-
28
-
29
-
30
-
31
-
32
-
33
-
34
-
35
-
36
-
37
-
38
-
39
-
40
-
41
-
42
-
43
-
44
-
45
-
46
-
47
-
48
-
49
-
50
-
51
-
52
-
53
-
54
-
55
-
56
-
57
-
58
-
59
-
60
-
61
-
62
-
63
-
64
-
65
-
66
-
67
-
68
-
69
-
70
-
71
-
72
-
73
-
74
-
75
-
76
-
77
-
78
-
79
-
80
-
81
-
82
-
 83
83 -
 84
84 -
 85
85 -
 86
86 -
 87
87 -
 88
88 -
 89
89 -
 90
90 -
 91
91 -
 92
92 -
 93
93 -
94
-
95
-
96
-
97
-
98
-
99
-
100
-
101
-
102
-
103
-
104
-
105
-
106
-
107
-
108
-
109
-
110
-
111
-
112
-
113
-
114
-
115
-
116
-
117
-
118
-
119
-
120
-
121
-
122
-
123
-
124
-
125
-
126
-
127
-
128
-
129
-
130
-
131
-
132
-
133
-
134
-
135
-
136
-
137
-
138
-
139
-
140
-
141
-
142
-
143
-
144
-
145
-
146
-
147
-
148
-
149
-
150
-
151
-
152
-
153
-
154
-
155
-
156
-
157
-
158
-
159
-
160
-
161
-
162
-
163
-
164
-
165
-
166
-
167
-
168
-
169
-
170
-
171
-
172
-
173
-
174
-
175
-
176
-
177
-
178
-
179
-
180
-
181
-
182
-
183
-
184
-
185
-
186
-
187
-
188
-
189
-
190
-
191
-
192
-
193
-
194
-
195
-
196
-
197
-
198
-
199
-
200
-
201
-
202
-
203
-
204
-
205
-
206
-
207
-
208
-
209
-
210
-
211
-
212
-
213
-
214
-
215
-
216
-
217
-
218
-
219
-
220
-
221
-
222
 |
 |