Dell Latitude E6400 XFR Service Manual
Dell Latitude E6400 XFR Manual
 |
View all Dell Latitude E6400 XFR manuals
Add to My Manuals
Save this manual to your list of manuals |
Dell Latitude E6400 XFR manual content summary:
- Dell Latitude E6400 XFR | Service Manual - Page 1
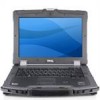
Dell™ Latitude™ E6400 XFR Service Manual Modell: 27VHF www.dell.com | support.dell.com - Dell Latitude E6400 XFR | Service Manual - Page 2
Dell™ Latitude™ E6400 XFR Service Manual Notes, Notices, and Cautions NOTE: A NOTE indicates important information that helps you make better use of your computer. NOTICE: A NOTICE indicates either potential damage to hardware or loss of data and tells you how to avoid the problem. CAUTION: A - Dell Latitude E6400 XFR | Service Manual - Page 3
Latitude™ E6400 XFR Service Manual Table of Contents 1 TROUBLESHOOTING...7 1.1 TROUBLESHOOTING TOOLS ...7 1.1.1 Diagnostic Lights...7 1.1.2 Hardware Troubleshooter ...8 1.1.3 Dell Diagnostics ...8 1.1.4 Error Messages ...12 1.2 SOLVING PROBLEMS...12 1.2.1 Battery Problems ...13 1.2.2 Drive Problems - Dell Latitude E6400 XFR | Service Manual - Page 4
Dell™ Latitude™ E6400 XFR Service Manual 9.2 REPLACING THE RF PASSTHRU BOARD ...31 10 FAN ASSEMBLY ...32 10.1 REMOVING THE FAN ASSEMBLY ...32 10.2 REPLACING THE FAN ASSEMBLY ...33 11 PROCESSOR HEATSINK ASSEMBLY...33 11.1 REMOVING THE PROCESSOR HEATSINK ASSEMBLY ...33 11.2 REPLACING THE PROCESSOR - Dell Latitude E6400 XFR | Service Manual - Page 5
Dell™ Latitude™ E6400 XFR Service Manual 23 SMARTCARD ASSEMBLY ...50 23.1 REMOVING THE SMARTCARD ASSEMBLY ...50 23.2 REPLACING THE SMARTCARD ASSEMBLY ...51 24 HARD DRIVE...52 24.1 REMOVING THE HARD DRIVE...52 24.2 REPLACING THE HARD DRIVE ...53 25 MODULAR DRIVE...53 25.1 REMOVING THE MODULAR DRIVE - Dell Latitude E6400 XFR | Service Manual - Page 6
Dell™ Latitude™ E6400 XFR Service Manual 36.1 REMOVING THE HANDLE...65 36.2 REPLACING THE HANDLE ...65 37 DOORS ...66 37.1 REMOVING MEDIA BAY DOOR ...66 37.2 REPLACING MEDIA BAY DOOR...66 37.3 REMOVING THE AV DOOR...67 37.4 REPLACING THE AV DOOR ...67 37.5 REMOVING THE AV PANEL COVER ...68 37.6 - Dell Latitude E6400 XFR | Service Manual - Page 7
Dell™ Latitude™ E6400 XFR Service Manual 1 Troubleshooting 1.1 Troubleshooting Tools 1.1.1 Diagnostic Lights CAUTION: Before you begin any of the procedures in this section, follow the safety instructions that shipped with your computer. Your computer has three keyboard status lights located - Dell Latitude E6400 XFR | Service Manual - Page 8
Dell™ Latitude™ E6400 XFR Service Manual System board failure has occurred. Contact Dell Support. A possible processor failure Reseat the processor (see Processor Module). has occurred. If the problem persists, contact Dell Support. A possible graphics card/video failure has occurred. A - Dell Latitude E6400 XFR | Service Manual - Page 9
Dell™ Latitude™ E6400 XFR Service Manual Starting the Dell Diagnostics From Your Hard Drive Before running the Dell Diagnostics, enter system setup to review your computer's configuration information, and ensure that the device you want to test is displayed in system setup and is active. For more - Dell Latitude E6400 XFR | Service Manual - Page 10
Latitude™ E6400 XFR Service Manual 1. Insert the Drivers and Utilities media into the optical drive. 2. Restart your computer. 3. When the DELL logo appears, press immediately. NOTE: Keyboard failure may result when a key is held down for extended periods of time. To avoid possible keyboard - Dell Latitude E6400 XFR | Service Manual - Page 11
Dell™ Latitude™ E6400 XFR Service Manual thirty minutes or more to complete. problem description exactly as it appears and follow the instructions on the screen. If you cannot resolve the problem, contact Dell Support. NOTE: When contacting Dell Support, have your Service Tag ready. The Service - Dell Latitude E6400 XFR | Service Manual - Page 12
Dell™ Latitude™ E6400 XFR Service Manual 1.1.4 Error Messages CAUTION: Before you begin any of the procedures in this section, follow the safety instructions that shipped with your computer. If the error message is not listed, see the documentation for the operating system or the program that was - Dell Latitude E6400 XFR | Service Manual - Page 13
Dell™ Latitude™ E6400 XFR Service Manual 1.2.1 Battery Problems CAUTION: There is a danger of a new battery exploding if it is incorrectly installed. Replace the battery only with the same or equivalent type recommended by the manufacturer. Discard used batteries according to the manufacturer's - Dell Latitude E6400 XFR | Service Manual - Page 14
Dell™ Latitude™ E6400 XFR Service Manual Hard Drive Problems RUN CHECK DISK - Windows XP: 1. Click Start and click My Computer. 2. Right-click Local Disk C:. 3. Click Properties→ Tools→ Check Now. 4. Click Scan for and attempt recovery of bad sectors and click Start. Windows Vista: 1. Click Start - Dell Latitude E6400 XFR | Service Manual - Page 15
Dell™ Latitude™ E6400 XFR Service Manual The computer stops responding NOTICE: You may lose data if you are unable to perform an operating system shutdown. TURN THE COMPUTER OFF - If you are unable to get a response by pressing a key on your keyboard or moving your mouse, press and hold the power - Dell Latitude E6400 XFR | Service Manual - Page 16
Dell™ Latitude™ E6400 XFR Service Manual SAVE AND CLOSE ANY OPEN FILES OR PROGRAMS AND SHUT DOWN YOUR COMPUTER THROUGH THE START MENU 1.2.5 Memory Problems CAUTION: Before you begin any of the procedures in this section, follow the safety instructions that shipped with your computer. IF YOU RECEIVE - Dell Latitude E6400 XFR | Service Manual - Page 17
Dell™ Latitude™ E6400 XFR Service Manual ELIMINATE POSSIBLE INTERFERENCE - Turn off nearby fans, fluorescent lights, or halogen lamps to check for interference. RUN THE HARDWARE TROUBLESHOOTER - See Hardware Troubleshooter. No Sound From Headphones CHECK THE HEADPHONE CABLE CONNECTION - Ensure that - Dell Latitude E6400 XFR | Service Manual - Page 18
Dell™ Latitude™ E6400 XFR Service Manual Accessing the Dell Support Utility Access the Dell Support Utility from the icon on the taskbar or from the Start menu. If the Dell Support icon does not appear in your taskbar: 1. Click Start→ All Programs→ Dell Support→ Dell Support Settings. 2. Ensure - Dell Latitude E6400 XFR | Service Manual - Page 19
Dell™ Latitude™ E6400 XFR Service Manual NOTICE: Only a certified service technician should perform repairs on your computer. Damage due to servicing that is not authorized by Dell is not covered by your warranty. NOTICE: To avoid electrostatic discharge, ground yourself by using a wrist grounding - Dell Latitude E6400 XFR | Service Manual - Page 20
Dell™ Latitude™ E6400 XFR Service Manual 9. Disconnect any external devices and remove any installed cards before working on your computer: To remove any installed cards, such as an ExpressCard Card, see the Dell™ Technology Guide on your computer or at support.dell.com. To undock from a docking - Dell Latitude E6400 XFR | Service Manual - Page 21
Dell™ Latitude™ E6400 XFR Service Manual 3 Screw Chart S. Screw no p/n 1 Screw Image Used Assy p/n 21010‐01 Description SCR,PHH,PNH,M2X3,STL, BLK OXD,NYLOK ASSY,DOOR,BTRY,BLK,CYN Qty/ - Dell Latitude E6400 XFR | Service Manual - Page 22
Dell™ Latitude™ E6400 XFR Service Manual SCR 4 SCR,CAPTIVE,PHH,PNH,M2.5X 9.85,STL,NKL PL ASSY,GASKET,KEYBOARD, 40057 BRKT, CYN 2 2 6 21381 SCR,THRM,STL 21034‐00 this section, follow the safety instructions that shipped with your computer. 4.1 Removing the Bottom Access Panel 1. Follow - Dell Latitude E6400 XFR | Service Manual - Page 23
Dell™ Latitude™ E6400 XFR Service Manual NOTE: No snaps are used to attach the bottom access panel to the base. There is a gasket attached to the perimeter of the bottom access panel, and this gasket might provide some resistance during removal. 3 2 1 1 M2.5 x 5mm screws (21) 2 Bottom of computer - Dell Latitude E6400 XFR | Service Manual - Page 24
Dell™ Latitude™ E6400 XFR Service Manual 4 20 21 5 1 2 6 3 7 14 8 19 17 18 16 15 13 12 11 9 10 2. Follow the procedures in After Working on Your Computer. 5 WLAN/WiMax Card CAUTION: Before you begin any of the procedures in this section, follow the safety instructions that shipped - Dell Latitude E6400 XFR | Service Manual - Page 25
Dell™ Latitude™ E6400 XFR Service Manual 1 WLAN/WiMax card 2 Card connector 5.2 Replacing the WLAN/WiMax Card NOTICE: , connect the black antenna cable to the black triangle, and connect the gray antenna cable to the gray triangle. 5. Replace the Bottom Access Panel (see Replacing the Bottom Access - Dell Latitude E6400 XFR | Service Manual - Page 26
Dell™ Latitude™ E6400 XFR Service Manual 6 WWAN Card CAUTION: Before you begin any of the procedures in this section, follow the safety instructions that shipped with your computer. NOTICE: Insert a WWAN card or FCM only into the slot shown in the picture below. 6.1 Removing a WWAN Card 1. Follow - Dell Latitude E6400 XFR | Service Manual - Page 27
Dell™ Latitude™ E6400 XFR Service Manual 1. Slide the card into the connector labeled WWAN/FCM. 2. Press the card down and hold it in place. 3. Replace the M2 x 3-mm screw. 4. Connect the white antenna cable to the connector labeled "main" (white triangle), and connect the black antenna cable to the - Dell Latitude E6400 XFR | Service Manual - Page 28
Dell™ Latitude™ E6400 XFR Service Manual 7.2 Replacing a WPAN (UWB/BT) Card NOTICE: The connectors are keyed to ensure correct insertion. If you feel resistance, check the connectors on the card and on - Dell Latitude E6400 XFR | Service Manual - Page 29
Dell™ Latitude™ E6400 XFR Service Manual 1 M2 x 3-mm screw 2 Card connector 3 FCM 8.2 Removing a FCM from the WPAN/UWB/FCM Slot 1. Follow the procedures in Working on Your Computer. 2. Remove the bottom access panel (see Removing the Bottom Access Panel). 3. Remove . 3. Replace the M2 x 3-mm - Dell Latitude E6400 XFR | Service Manual - Page 30
Dell™ Latitude™ E6400 XFR Service Manual 3 2 4 1 1 FCM/WWAN Card 2 Gray/black antenna cable 3 Gray/white antenna cable 4 Holder by module 5. Replace the bottom access panel (see Replacing the Bottom Access Panel). 6. Follow the procedures in After Working on Your Computer. Page 30 - Dell Latitude E6400 XFR | Service Manual - Page 31
Dell™ Latitude™ E6400 XFR Service Manual 9 RF Passthru Board 9.1 Removing the RF Passthru Board CAUTION: Before you begin any of the procedures in this section, follow the safety instructions that shipped with your computer. 1. Follow the procedures in Before Working on Your Computer. 2. Remove the - Dell Latitude E6400 XFR | Service Manual - Page 32
Dell™ Latitude™ E6400 XFR Service Manual 3. Connect the antenna connections to the RF Passthru board. J5 J4 J2 J1 J3 J1 Black - WLAN (to WLAN card) J2 Black/Red Sleeve - GPS (to GPS card) J3 Black/Grey Sleeve - WWAN (to WWAN card) J4 Black - WLAN (from LCD panel antenna) J5 Black/Grey - WWAN ( - Dell Latitude E6400 XFR | Service Manual - Page 33
Dell™ Latitude™ E6400 XFR Service Manual 4. Disconnect the fan cable from the system board. 2 1 5. Lift the fan straight up to remove it. 1 Fan 2 Fan cable 10.2 Replacing the Fan Assembly CAUTION: Before you begin any of the procedures in this section, follow the safety instructions that - Dell Latitude E6400 XFR | Service Manual - Page 34
Dell™ Latitude™ E6400 XFR Service Manual 1 3 2 1 Captive screws (4) 2 Radiator 3 Processor plate 11.2 Replacing the Processor Heatsink Assembly CAUTION: Before you begin any of the procedures in this section, follow the safety instructions that shipped with your computer. 1. Place the radiator into - Dell Latitude E6400 XFR | Service Manual - Page 35
Dell™ Latitude™ E6400 XFR Service Manual 1 1 Processor module NOTICE: To avoid damage to the processor module, hold the screwdriver so that it is perpendicular to the processor when turning the cam screw. 3. To loosen the ZIF socket, use a small, flat-blade screwdriver and rotate the ZIF-socket cam - Dell Latitude E6400 XFR | Service Manual - Page 36
Dell™ Latitude™ E6400 XFR Service Manual NOTE: If a new processor is installed, you will receive a new thermal grease kit along with a tech sheet to illustrate proper installation. 1. Align the pin-1 corner of the processor with the pin-1 corner of the ZIF socket, and then insert the processor. NOTE - Dell Latitude E6400 XFR | Service Manual - Page 37
Dell™ Latitude™ E6400 XFR Service Manual 13.1 Removing a Memory Module CAUTION: Before you begin any of the procedures in this section, follow the safety instructions that shipped with your computer. NOTICE: If two memory modules are installed, you must remove the top memory module first to access - Dell Latitude E6400 XFR | Service Manual - Page 38
Dell™ Latitude™ E6400 XFR Service Manual 1 Tab 2 Notch 3. Replace the bottom access panel (see Replacing the Bottom Access Panel). 4. Follow the procedures in After Working on Your Computer. As the computer boots, it detects the additional memory and automatically updates the system configuration - Dell Latitude E6400 XFR | Service Manual - Page 39
Dell™ Latitude™ E6400 XFR Service Manual CAUTION: Before you begin any of the procedures in this section, follow the safety instructions that shipped with your computer. 1. Connect the coin-cell battery cable to the system board. 2. Insert the coin-cell battery into the computer: If you are - Dell Latitude E6400 XFR | Service Manual - Page 40
Dell™ Latitude™ E6400 XFR Service Manual 5. While Replacing the LED Cover CAUTION: Before you begin any of the procedures in this section, follow the safety instructions Removing the Palm Rest Overlay CAUTION: Before you begin any of the procedures in this section, follow the safety instructions - Dell Latitude E6400 XFR | Service Manual - Page 41
Dell™ Latitude™ E6400 XFR Service Manual 3. After the middle is separated from the palm rest, peel the overlay from middle to left. 4. With the left half of the overlay removed, begin to work your way from middle to right. 16.2 Replacing the Palm Rest Overlay CAUTION: Before you begin any of the - Dell Latitude E6400 XFR | Service Manual - Page 42
Dell™ Latitude™ E6400 XFR Service Manual 2 1 5. Remove the keyboard bracket. 1 Keyboard bracket 2 Pull tab NOTICE: The key caps on the keyboard are fragile, easily dislodged, and time-consuming to replace. Exercise care when removing and handling the keyboard. 6. Using the pull tab, gently lift - Dell Latitude E6400 XFR | Service Manual - Page 43
Dell™ Latitude™ E6400 XFR Service Manual 3 1 4 2 1. USB cable 3. GPS Module 2. GPS passthru antenna 4. GPS antenna 4. Detach the black and red RF Passthru antenna cable and the grey GPS antenna cable. 5. Using a scribe, gently detach the GPS card at the upper right corner of the card. 6. Using - Dell Latitude E6400 XFR | Service Manual - Page 44
Dell™ Latitude™ E6400 XFR Service Manual 1 1 M2 x 3-mm screws (2) 4. Slide each cable cover up to remove. 19.2 Replacing the LCD Cable Channel Covers 1. Remove the bottom access panel (see Removing the Bottom Access Panel). 2. Slide the cable covers on while holding the LCD wires taught. 3. Replace - Dell Latitude E6400 XFR | Service Manual - Page 45
Dell™ Latitude™ E6400 XFR Service Manual 2 1 4 3 1 LVDS connector & cable 2 WPAN cable 3 WLAN cable 4 WWAN cable 5. Disconnect the LVDS cable from the motherboard. 6. Disconnect the antenna cables from the top side connectors (J4 & J5) of the RF Passthru board. J5 J4 J4 Black - WLAN (from - Dell Latitude E6400 XFR | Service Manual - Page 46
Dell™ Latitude™ E6400 XFR Service Manual On the LVDS connector, rotate the blue pull-tab used to disconnect the cable from the system board to wrap the cable-side of the connector when routing through the chassis bridge. 8. Remove the three M2.5 x 8-mm screws from each hinge. 9. Turn the computer - Dell Latitude E6400 XFR | Service Manual - Page 47
Dell™ Latitude™ E6400 XFR Service Manual 7. instructions in Before Working on Your Computer. 2. Remove the bottom access panel (see Removing the Bottom Access Panel). 3. Remove the display assembly (see Removing the Display Assembly). 4. Remove the keyboard (see Removing the Keyboard). 5. Remove - Dell Latitude E6400 XFR | Service Manual - Page 48
Dell™ Latitude™ E6400 XFR Service Manual 6. Disconnect the finger motherboard between the fan and the fan connector. 12. Turn the computer topside and remove the sixteen M2.5 x 8-mm screws on the top of the palm rest. NOTE: There are four snap hooks located in front of the mouse touchpad as part - Dell Latitude E6400 XFR | Service Manual - Page 49
Latitude™ E6400 XFR Service Manual 21.2 Replacing the Palm Rest CAUTION: Before you begin any of the procedures in this section, follow the safety instructions that shipped with your computer. NOTE: If this is a new palm rest, remove the two cable access panels, the GPS access panel and the keyboard - Dell Latitude E6400 XFR | Service Manual - Page 50
Dell™ Latitude™ E6400 XFR Service Manual CAUTION: Before you begin any of the procedures in this section, follow the safety instructions that shipped with your computer. 1. Follow the procedures in Before Working on Your Computer. 2. Remove the bottom access panel, LCD cable channel covers, display - Dell Latitude E6400 XFR | Service Manual - Page 51
Dell™ Latitude™ E6400 XFR Service Manual 2. Remove the bottom access panel, LCD cable channel covers, display assembly, LED cover, palm rest overlay, keyboard and palm rest (see Removing the Palm Rest). 3. Remove the hard drive (see Removing the Hard Drive). 4. With the hard drive door open, - Dell Latitude E6400 XFR | Service Manual - Page 52
Dell™ Latitude™ E6400 XFR Service Manual 24 Hard Drive NOTE: Dell does not guarantee compatibility or provide support for hard drives obtained from sources other than Dell. 24.1 Removing the Hard Drive CAUTION: Before you begin any of the procedures in this section, follow the safety instructions - Dell Latitude E6400 XFR | Service Manual - Page 53
Dell™ Latitude™ E6400 XFR Service Manual 24.2 Replacing the Hard Drive CAUTION: Before you begin any of the procedures in this section, follow the safety instructions that shipped with your computer. NOTICE: Hard drives are extremely fragile. Exercise care when handling the hard drive. NOTICE: Use - Dell Latitude E6400 XFR | Service Manual - Page 54
Dell™ Latitude™ E6400 XFR Service Manual NOTE: The security screw on the modular drive is optional and may not be installed on your computer. 1. Slide the drive in the modular bay. 2. Close the modular (XBay) disk drive door by rotating it up until it clicks into its locked position. 3. Follow the - Dell Latitude E6400 XFR | Service Manual - Page 55
Dell™ Latitude™ E6400 XFR Service Manual 1 3 2 1 M2.5 x 5-mm screws (8) 2 M2 x 3-mm screws (2) 3 1394 connector NOTE: Smartcard assembly removed to clarify screw locations and pinpoint system board connectors. The smartcard assembly should not be removed for system board or base assembly replacement - Dell Latitude E6400 XFR | Service Manual - Page 56
Dell™ Latitude™ E6400 XFR Service Manual 1 JSC1 Smartcard connector 5 JBIO1 BIO reader connector 2 JTP1 Touchpad connector 6 J1394 1394 cable connector 3 JSNIF1 Wi-Fi sniffer connector 7 Multi-mode HD video connector 4 JSPK1 Speaker connector 26.2 Replacing the System Board Assembly CAUTION: - Dell Latitude E6400 XFR | Service Manual - Page 57
™ Latitude™ E6400 XFR Service Manual 20. Replace the display assembly, LCD cable channel covers and bottom access panel (see Replacing the Display Assembly). 21. Follow the procedures in After Working On Your Computer. 22. At first power on, the AMT provisioning menu appears. See the instructions in - Dell Latitude E6400 XFR | Service Manual - Page 58
Dell™ Latitude™ E6400 XFR Service Manual instructions that shipped with your computer. 1. Insert the card Replace the system board (see Replacing the System Board). 28 1394 Card 28.1 Removing the 1394 Card CAUTION: Before you begin any of the procedures in this section, follow the safety instructions - Dell Latitude E6400 XFR | Service Manual - Page 59
Dell™ Latitude™ E6400 XFR Service Manual 28.2 Replacing the 1394 Card CAUTION: Before you begin any of the procedures in this section, follow the safety instructions that shipped with your computer. 1. Insert the 1394 card at a 45-degree angle to fit the connector into the base assembly. Use the - Dell Latitude E6400 XFR | Service Manual - Page 60
Dell™ Latitude™ E6400 XFR Service Manual 3. Route the SIM extension cable and reconnect the SIM extension board into the original SIM slot located in the battery bay. 4. Install the Wi-Fi sniffer cable to the system board. 5. Replace the palm rest, keyboard, palm rest overlay, led cover, display - Dell Latitude E6400 XFR | Service Manual - Page 61
Dell™ Latitude™ E6400 XFR Service Manual 1 1 M2.5 x 5-mm screws (2) 30.2 Replacing the Wi-Fi Sniffer Card 1. Align the sniffer card with its bracket and secure it using the 2 M2.5 x 5-mm screws. 2. Connect the Wi-Fi sniffer cable to the motherboard. 3. Reseat the RJ-11 cable and replace the modem - Dell Latitude E6400 XFR | Service Manual - Page 62
Dell™ Latitude™ E6400 XFR Service Manual 8. Remove the I/O card. 31.2 Replacing the I/O Card 1. Replace the I/O card. 2. Replace the sniffer card bracket. 3. Replace the sniffer card (see Replacing the Wi-Fi Sniffer Card). 4. Replace the M2.5 x 5-mm screw from the I/O card. 5. Replace the RJ-11 - Dell Latitude E6400 XFR | Service Manual - Page 63
Dell™ Latitude™ E6400 XFR Service Manual 3 M2.5 x 5-mm screw 4 Modem connector 33 DC Power Cable 33.1 Removing the DC Power Cable CAUTION: Before you begin any of the procedures in this section, follow the safety instructions that shipped with your computer. 1. Follow the instructions in Before - Dell Latitude E6400 XFR | Service Manual - Page 64
Dell™ Latitude™ E6400 XFR Service Manual 1. Replace the modem (see Replacing the Modem). 2. Replace the system board (see Replacing the System Board Assembly). 3. Follow the procedures in After Working on Your Computer. 35 Stylus 35.1 Removing the Stylus 1. Follow the procedures in Before Working on - Dell Latitude E6400 XFR | Service Manual - Page 65
Dell™ Latitude™ E6400 XFR Service Manual 36.1 Removing the Handle CAUTION: Before you begin any of the procedures in this section, follow the safety instructions that shipped with your computer. 1. Follow the procedures in Before Working on Your Computer. 2. Remove the six M2.5 x 8-mm screws from - Dell Latitude E6400 XFR | Service Manual - Page 66
Dell™ Latitude™ E6400 XFR Service Manual NOTICE: Image above has palm rest removed to show tab socket close-up. During installation, verify handle pinions are inserted into the tab sockets properly during reassembly. 2. Replace the four M2.5 x 8-mm bottom retaining screws. 3. Replace the six M2.5 x - Dell Latitude E6400 XFR | Service Manual - Page 67
Dell™ Latitude™ E6400 XFR Service Manual 2. Insert the three M3 x 3-mm screws and fit securely. 3. Follow the procedures in After Working on Your Computer. 37.3 Removing the AV Door Parts Location 1 2 1 Door 2 M3 x 3 mm (2) 1. Follow the procedures in Before Working on Your Computer. 2. Open - Dell Latitude E6400 XFR | Service Manual - Page 68
Dell™ Latitude™ E6400 XFR Service Manual 37.5 Removing the AV Panel Cover 1. Follow the procedures in unable to power on the wireless circuit. It is advised to check these options as soon as possible. See Replacing the Wi-Fi Sniffer Card for details. 37.7 Removing the RJ11 Door Parts Location - Dell Latitude E6400 XFR | Service Manual - Page 69
Dell™ Latitude™ E6400 XFR Service Manual 1 2 1 Door 2 M2.5 x 5-mm (2) 1. Follow the procedures in Before Working on Your Computer. 2. Open the door to relieve hinge pressure. 3. Remove the two M2.5 x 5-mm screws from the bottom of the base assembly 37.8 Replacing the RJ11 Door 1. Insert door hinge - Dell Latitude E6400 XFR | Service Manual - Page 70
Dell™ Latitude™ E6400 XFR Service Manual 37.10 Replacing the Battery Door 1. Insert door hinge onto assembly and align the hinge divots. 2. Replace the four M3 x 3-mm screws. 3. Follow the procedures in After Working on Your Computer. 37.11 Removing the Power Door Parts Location 1 2 1 Door 2 M2 - Dell Latitude E6400 XFR | Service Manual - Page 71
Dell™ Latitude™ E6400 XFR Service Manual 37.12 Replacing the Power Door 1. Insert door hinge onto assembly and align the hinge divots. 2. Replace the two M2.5 x 5-mm screws. 3. Follow the procedures in After Working on Your Computer. 37.13 Removing the VGA Door Parts Location 1 2 1 Door 2 M3 x - Dell Latitude E6400 XFR | Service Manual - Page 72
Dell™ Latitude™ E6400 XFR Service Manual 37.14 Replacing the VGA Door 1. Insert door hinge onto assembly and align the hinge divots. 2. Replace the two M3 x 3-mm screws. 3. Follow the procedures in After Working on Your Computer. 37.15 1. 2. Removing the VGA Panel Cover Follow the procedures in - Dell Latitude E6400 XFR | Service Manual - Page 73
Dell™ Latitude™ E6400 XFR Service Manual 1 2 1 Door 2 M3 x3 mm (2) 1. Follow the procedures in Before Working on Your Computer. 2. Open the door to relieve hinge pressure. 3. Remove the two M3 x 3-mm screws from the bottom of the base assembly 37.18 Replacing the HDD Door 1. Insert door hinge onto - Dell Latitude E6400 XFR | Service Manual - Page 74
™ Latitude™ E6400 XFR Service Manual 2 1 1 Door 2 M2.5 x 5-mm (2) 1. Follow the procedures in Before Working on Your Computer. 2. Open the door to relieve hinge pressure. 3. Remove the handle (see Removing the Handle) 4. Remove the two M2.5 x 5-mm screws from the base assembly 37.20 Replacing
-
 1
1 -
 2
2 -
 3
3 -
 4
4 -
 5
5 -
 6
6 -
 7
7 -
8
-
9
-
10
-
11
-
12
-
13
-
14
-
15
-
16
-
17
-
18
-
19
-
20
-
21
-
22
-
23
-
24
-
25
-
26
-
27
-
28
-
29
-
30
-
31
-
32
-
33
-
34
-
35
-
36
-
37
-
38
-
39
-
40
-
41
-
42
-
43
-
44
-
45
-
46
-
47
-
48
-
49
-
50
-
51
-
52
-
53
-
54
-
55
-
56
-
57
-
58
-
59
-
60
-
61
-
62
-
63
-
64
-
65
-
66
-
67
-
68
-
69
-
70
-
71
-
72
-
73
-
74
 |
 |

www.dell.com
|
support.dell.com
Dell™ Latitude™ E6400 XFR
Service Manual
Modell: 27VHF