Dell P513W User's Guide
Dell P513W Manual
 |
View all Dell P513W manuals
Add to My Manuals
Save this manual to your list of manuals |
Dell P513W manual content summary:
- Dell P513W | User's Guide - Page 1
Dell P513w Series User's Guide August 2010 Machine type(s): 4443 Model(s): 7dw, 3dw www.dell.com | support.dell.com - Dell P513W | User's Guide - Page 2
...17 Using the printer software 19 Minimum system requirements...19 Using the Windows printer software...19 Using the Macintosh printer software...21 Finding and installing optional software...22 Updating the printer software (Windows only)...23 Reinstalling the printer software...23 Loading paper - Dell P513W | User's Guide - Page 3
Scanning documents into an editing application 56 Scanning directly to e-mail using the printer software 57 Scanning to a PDF...58 Scanning FAQ...59 Canceling scan jobs...59 Networking 60 Installing the printer on a wireless network...60 Advanced wireless setup...65 Networking FAQ...71 Contents 3 - Dell P513W | User's Guide - Page 4
you troubleshoot...86 Using the Service Center to solve printer problems 86 If Troubleshooting does not solve your problem...86 Setup troubleshooting...86 Jams and misfeeds troubleshooting...93 Print troubleshooting...95 Copy and scan troubleshooting...97 Memory card troubleshooting...99 Wireless - Dell P513W | User's Guide - Page 5
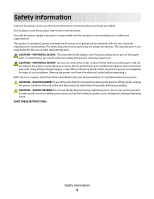
cover has protruding ribs as part of the paper path. To avoid injury, use caution when accessing this area for clearing a paper jam. CAUTION-POTENTIAL INJURY: Do for signs of such problems. Remove the power cord from the electrical outlet before inspecting it. Refer service or repairs, other than - Dell P513W | User's Guide - Page 6
to print multiple pages on one sheet. You can print up to 8 page images on one side of a sheet of paper. • Print on both sides of the paper. Duplexing lets you print on both sides of the paper manually or automatically (depending on your printer model). • Preview print jobs before printing. Use the - Dell P513W | User's Guide - Page 7
up and configuring the printer on a network, depending on your printer model • Caring for and maintaining the printer • Troubleshooting and solving problems User's Guide The User's Guide is available on the installation software CD. For updates, check our Web site at support.dell.com. About your - Dell P513W | User's Guide - Page 8
support so that they may serve you faster: • Service Tag • Express Service Code Note: The Service Tag and Express Service Code appear on labels located on your printer. • Software and Drivers-Certified drivers for your printer and Installation software CD installers for Dell printer software - Dell P513W | User's Guide - Page 9
Understanding the parts of the printer Use the To 1 Paper support Load paper. 2 Wi-Fi indicator Check wireless status. 3 Card reader light Check card reader status. The light blinks to indicate that a memory card is being accessed. 4 Memory card slot Insert a memory card. 5 - Dell P513W | User's Guide - Page 10
and copy photos and documents. 3 Security slot Install an anti-theft cable on your printer. 4 Power supply with port Connect the printer to a power source. 5 Duplex unit • Print on both sides of a sheet of paper. • Remove paper jams. 6 USB port Connect the printer to a computer using a USB - Dell P513W | User's Guide - Page 11
visit www.dell.com/recycling. 2 Available only on the Dell Web site at www.dell.com/supplies. Replacing ink cartridges Make sure you have a new ink cartridge or cartridges before you begin. 1 Turn on your printer. 2 Open the printer. Note: The printhead moves to the cartridge installation position - Dell P513W | User's Guide - Page 12
and then remove the used ink cartridge or cartridges. Warning-Potential Damage: Do not remove the old cartridges until you have the new cartridges available, or the ink remaining in the printhead may dry out and clog the nozzles. 4 Unpack the cartridges. If your ink cartridge comes with a muzzle cap - Dell P513W | User's Guide - Page 13
5 Install each cartridge. If necessary, use two hands. Note: Install the new ink cartridges immediately after removing the protective cap to avoid exposing the ink to air. 6 Close the printer. Recycling Dell products To return Dell products to Dell for recycling: 1 Click or Start. 2 Click All - Dell P513W | User's Guide - Page 14
scan documents. Access the photo menu and print photos. • Return to the previous screen. • Exit from one menu level to a higher one. Switch to color mode or black-and-white mode. Start a print, scan, or copy job, depending on which mode is selected. Using the printer control panel buttons and menus - Dell P513W | User's Guide - Page 15
-Mode to: • Print on both sides of the paper (duplex). • Change to Power Saver mode after the printer is left idle for 10 minutes. • Set screen brightness to low. 9 Cancel • Cancel a print, copy, or scan job in progress. • Exit from a menu level of the Copy, Scan, Photo, or File Print menu to the - Dell P513W | User's Guide - Page 16
return to the factory default settings when a memory card or flash drive is removed. • Layout • Colorized Effect • Photo Size • Quality To change the temporary settings into new default settings 1 From the printer control panel, press . 2 Press the up or down arrow button to scroll to Defaults, and - Dell P513W | User's Guide - Page 17
settings that are part of Eco-Mode. When Eco-Mode is enabled, the printer automatically switches to the following settings: • The printer display is dimmed. • The printer changes to Power Saver mode after ten minutes. • The printer prints on both sides of the paper (duplex) for print, copy, and fax - Dell P513W | User's Guide - Page 18
the up or down arrow button to scroll to Use Factory, and then press . 5 When prompted to set the initial settings of your printer, make your selections using the printer control panel buttons. Initial Setup Complete appears on the display. Using a button combination (if you cannot read the current - Dell P513W | User's Guide - Page 19
printer driver for this operating system is available only at support.dell.com. Note: Updated printer firmware may be available at support.dell.com. Using the Windows printer software Software installed during printer installation When you set up the printer using the installation software CD, all - Dell P513W | User's Guide - Page 20
. Dell Wireless Setup Utility (referred to as Wireless Setup Utility) • Set up the wireless printer on a wireless network. • Change the wireless settings of the printer. Note: This program is installed automatically with the printer software if the printer has wireless capability. Dell Service - Dell P513W | User's Guide - Page 21
OS Use the To Print dialog Adjust the print settings and schedule print jobs. Printer Services dialog (not available in Mac OS X version 10.5 or later) • Access the printer utility. • Troubleshoot. • Order ink or supplies. • Contact Dell. • Check the printer software version installed on - Dell P513W | User's Guide - Page 22
cartridge installation. • Print a test page. • Print an alignment page. • Clean the printhead nozzles. • Order ink or supplies. • Register the printer. • Contact technical support. Dell Wireless Setup Assistant Set up the printer on a wireless network. (referred to as Wireless Setup Assistant - Dell P513W | User's Guide - Page 23
. Reinstalling the printer software When you set up the printer using the installation software CD, all the necessary software was installed. If you encountered problems while installing, or if your printer does not appear in the Printers folder or as a printer option when you send a print job, then - Dell P513W | User's Guide - Page 24
Close all open applications. 2 Download the latest installer from the printer Web site. 3 Launch the printer installation software, and then follow the instructions on the computer screen. Using the Internet Updated printer software may be available at support.dell.com. Using the printer software 24 - Dell P513W | User's Guide - Page 25
the edges of the stack on a level surface. 2 Center the paper on the paper support. 3 Adjust the paper guides so they rest against the edges of the paper. Note: Do not force paper into the printer. The paper should be flat against the paper support, and the edges should be flush against both - Dell P513W | User's Guide - Page 26
or Photo print quality. Note: Draft mode is available but is not recommended for use with expensive paper such as heavyweight matte, labels, photo cards and glossy paper. • You remove all paper from the paper support before inserting banner paper. • You use banner paper designed for inkjet printers - Dell P513W | User's Guide - Page 27
Automatic, Normal, or Photo print quality. Note: Draft mode is available but is not recommended for use with expensive paper such as heavyweight matte, labels, photo cards and glossy paper. 25 sheets of photo/glossy paper • The print side of the paper is faceup. • The paper guides rest against the - Dell P513W | User's Guide - Page 28
set the default paper type: a Press to select Paper Setup. b Press the up or down arrow button to scroll to Paper Type, and then press . c Press the up or down arrow button to select the default paper type for the printer, and then press . • If you want to set the default photo print size: a Press - Dell P513W | User's Guide - Page 29
Loading original documents on the scanner glass 1 Open the scanner lid and place the document facedown on the scanner glass. 2 Close the scanner lid. Loading paper and original documents 29 - Dell P513W | User's Guide - Page 30
For Windows users 1 With a document open, click File > Print. 2 Click Properties, Preferences, Options, or Setup. 3 Select the print quality, the number of copies to print, the type of paper to use, and how the pages should print. 4 Click OK to close any printer software dialogs. 5 Click OK or Print - Dell P513W | User's Guide - Page 31
option is available only when you are printing multiple copies. • To prevent smudging when printing photos, remove each photo as it exits the printer, and then let it dry before stacking. For Windows users 1 With a document open, click File > Print. 2 Click Properties, Preferences, Options, or Setup - Dell P513W | User's Guide - Page 32
page. 5 Adjust other settings as needed. 6 Click OK to close any printer software dialogs. 7 Click OK or Print. For Macintosh users 1 With a document open, choose File > Page Setup. 2 From the Page Setup dialog, set the printer, paper size, and orientation. 3 Click OK. 4 From the menu bar, choose - Dell P513W | User's Guide - Page 33
the printer is using a Wireless connection (selected models only) a Press the up or down arrow button to select the file name of the document that you want to print. b Press , and then wait for the printer to connect to the network computer or to finish searching the network for available computers - Dell P513W | User's Guide - Page 34
, choose your printer. 7 Click Print. Notes: • Most envelopes use landscape orientation. • Make sure the same orientation is also selected in the application. Printing labels For Windows users 1 With a document open, click File > Print. 2 Click Properties, Preferences, Options, or Setup. Printing 34 - Dell P513W | User's Guide - Page 35
sheet. • Make sure the paper guide or paper guides rest against the edges of the label sheet. • Use full label sheets. Partial sheets (with areas exposed by missing labels) may cause labels to peel off during printing, resulting in a paper jam. Printing on custom-size paper For Windows users 1 With - Dell P513W | User's Guide - Page 36
a custom size, and then click OK. 5 From the Paper Size pop-up menu, choose the custom size you created, and then click OK. 6 From the menu bar, choose File > Print. 7 From the printer pop-up menu, choose your printer. 8 Click Print. Working with photos Using a memory card or flash drive with the - Dell P513W | User's Guide - Page 37
network adapter, any connector, the memory device, or the printer in the areas shown while actively printing to choose which memory device to use. Supported memory cards and file types Memory M) Printing photos using the printer control panel 1 Load photo paper. 2 From the printer control panel - Dell P513W | User's Guide - Page 38
color or black-and-white print. When you select color or black-only printing, the light near your choice comes on. 9 Press . Note: For best results, allow the prints to dry at least 24 hours before stacking, displaying, or storing. Editing photos using the printer control panel 1 Load photo paper - Dell P513W | User's Guide - Page 39
insert the memory device. Follow the instructions on the computer screen to transfer the photos to the computer or to print. If the printer is using a Wireless connection (selected models only) a Press the up or down arrow button to scroll to Share Media on Network, and then press . b Press the up - Dell P513W | User's Guide - Page 40
Printing photos from a PictBridge-enabled digital camera PictBridge is a technology available in most digital cameras that lets you print directly from your digital camera without using a computer. 1 Insert one end of the USB cable into the camera. Note: Use only the USB cable that came with the - Dell P513W | User's Guide - Page 41
menu. b Press the arrow buttons to select the paper size, paper type, photo size, and layout of the photos that you want to print. Press each time you make a selection. Note: The printer will use the default print settings unless you change the print settings from the camera. 5 See the documentation - Dell P513W | User's Guide - Page 42
unit, available only on select printer models, supports A4- and letter-size paper. If you purchased a model without automatic duplex, or if you need to print duplex using other paper sizes, then see the instructions for printing on both sides of the paper (duplexing) manually. For Windows users - Dell P513W | User's Guide - Page 43
printer software dialogs. 6 Click OK or Print. To return to single-sided printing, navigate to: Advanced tab > 2-Sided Printing area > select Off For Macintosh users 1 With a document open, choose File > Page Setup. 2 From the Page Setup dialog, set the printer, paper 10 Click Print. Printing 43 - Dell P513W | User's Guide - Page 44
the ink to dry completely, select Extended. 5 Click OK. Printing on both sides of the paper (duplexing) manually For Windows users 1 With a document open, click File > Print. 2 Click Properties, Preferences, Options, or Setup. 3 Navigate to: Advanced tab > 2-Sided Printing area > select Manual Note - Dell P513W | User's Guide - Page 45
choose File > Page Setup. 2 From the Page Setup dialog, set the printer, paper size, and orientation. 3 Click OK. 4 From the menu bar, choose File > Print. 5 From the Printer pop-up menu, choose your printer. 6 From the print options pop-up menu, choose Paper Handling. 7 From the Print or "Pages to - Dell P513W | User's Guide - Page 46
Draft or Quick Print. It uses less ink and is ideal for printing text-only documents. If you need to print photos or other high-quality documents, then you can select a different mode from the Print dialog before sending the print job. To change the default print mode: For Windows users 1 Click , or - Dell P513W | User's Guide - Page 47
, Draft or Quick Print, Normal, Photo or Best. Note: Printing using Quick Print uses less ink and is ideal for printing text documents. Pausing print jobs For Windows users 1 Click , or click Start and then click Run. 2 In the Start Search or Run box, type control printers. 3 Press Enter, or - Dell P513W | User's Guide - Page 48
Resume. • If you want to resume all print jobs in the queue, then click Resume Printer or Start Jobs. Canceling print jobs To cancel a print job from the printer control panel, press . To cancel a print job from the computer, do the following: For Windows users 1 Click , or click Start and then - Dell P513W | User's Guide - Page 49
documents. Note: The ADF is available only on selected models. If you purchased a printer without an ADF, then load original documents or photos on the scanner glass. Use the scanner glass for single pages, small items (such as postcards or photos), transparencies, photo paper, or thin media (such - Dell P513W | User's Guide - Page 50
will reduce or enlarge the document or photo as necessary to print a borderless copy on the paper size that you selected. For best results with this resize setting, use photo paper and set the paper type to Photo, or let the printer automatically detect the paper type. 6 Press . Note: After the copy - Dell P513W | User's Guide - Page 51
darker. 6 Press . Collating copies using the printer control panel If you print multiple copies of a document, then you can choose to print each copy as a set (collated) or to print the copies as groups of pages (not collated). Collated Not collated 1 Load paper. 2 Load an original document - Dell P513W | User's Guide - Page 52
The automatic duplex unit, available only on selected printer models, supports letter- and A4-size paper. If you purchased a model without automatic duplex, or if you need to make duplex copies using other paper sizes, then see the instructions for making a duplex copy manually. Note: You cannot - Dell P513W | User's Guide - Page 53
the instructions on the display. Making a duplex copy manually 1 Load paper. 2 Load an original document faceup into the ADF or facedown on the scanner glass. 3 From the printer control panel, press . 4 Press the left or right arrow button to select the number of copies, and then press the Color - Dell P513W | User's Guide - Page 54
documents. Note: The ADF is available only on selected models. If you purchased a printer without an ADF, then load original documents or photos on the scanner glass. Use the scanner glass for single pages, small items (such as postcards or photos), transparencies, photo paper, or thin media (such - Dell P513W | User's Guide - Page 55
pages and save them as one file. 6 Press to start scanning. The scan is complete when a message appears on the printer control panel indicating that the file you scanned has been saved. Scanning photos into an editing application For Windows users 1 Load a photo or photos. 2 Click or Start. 3 Click - Dell P513W | User's Guide - Page 56
desktop, double-click the printer program folder. 3 Double-click the printer Center to open the All-In-One Center. 4 From the "What is being scanned?" area of the All-In-One Center, select Photo. 5 From the "How will the scanned image be used?" pop-up menu, choose To be printed or To be viewed on - Dell P513W | User's Guide - Page 57
directly to e-mail using the printer software For Windows users 1 Load an original document. 2 Click or Start. 3 Click All Programs or Programs, and then select the printer program folder from the list. 4 Navigate to: Printer Home > select your printer > E-mail 5 Select Photo, Document, or PDF - Dell P513W | User's Guide - Page 58
From the Finder desktop, double-click the printer program folder. 3 Double-click the printer Center to open the All-In-One Center. 4 From the "What is being scanned?" area of the All-In-One Center, select a document type. 5 From the "How will the scanned image be used?" menu, choose To be viewed on - Dell P513W | User's Guide - Page 59
one. To learn how PINs get assigned to network computers, see the Help for the printer software associated with your operating system. What is an application list, and how do I update it? When you scan a file, you can choose which application to use to open it on your computer. The printer downloads - Dell P513W | User's Guide - Page 60
The printer supports three wireless security options: no security, WEP, and WPA/WPA2. No Security It is not recommended to use no security at all on a home wireless network. Using no security means that anyone within range of your wireless network can use your network resources-including Internet - Dell P513W | User's Guide - Page 61
Print Setup Page. The network setup page prints. Information you will need to set up the printer on a wireless network To set up the printer for wireless printing, you need to know: • The name of your wireless network, which is also known as the SSID (Service Set Identifier) • If encryption was used - Dell P513W | User's Guide - Page 62
set up and working properly. • The computer you are using is connected to the same wireless network where you want to set up the printer. For Windows users 1 Close all open software programs. 2 Insert the installation software CD. If the Welcome screen does not appear after a minute, then launch the - Dell P513W | User's Guide - Page 63
. 2 Download the latest installer from the printer Web site. 3 Launch the printer installation software, and then follow the instructions on the computer screen. Interpreting the colors of the Wi-Fi indicator light The colors of the Wi-Fi indicator light show the network status of the printer. • Off - Dell P513W | User's Guide - Page 64
key for your wireless network, then use the key you created. 4 Follow the instructions on the computer screen. Assigning a static IP address The printer will be assigned an IP address automatically through DHCP on most wireless networks. 1 Complete the wireless setup, allowing the printer to receive - Dell P513W | User's Guide - Page 65
The printer can communicate on only one wireless network at a time. Configuring the printer for an ad hoc wireless network will keep it from working on any other wireless network, either ad hoc or infrastructure. In Windows Vista or later 1 Click > Control Panel > Network and Internet > Network and - Dell P513W | User's Guide - Page 66
and any remaining windows. 5 Insert the installation software CD, and follow the instructions for wireless installation. Note: Do not connect the installation or network cables until instructed to do so by the setup software. 6 When the available networks are displayed, provide the network name and - Dell P513W | User's Guide - Page 67
for wireless installation. Note: Do not connect the installation or network cables until instructed to do so by the setup software. 21 When the available networks are displayed, provide the network name and the security information you created. The installer will configure the printer for use with - Dell P513W | User's Guide - Page 68
Setup (WPS), it is easy to add computers or printers to your wireless network because the SSID and WPA passphrase are automatically detected and configured for you. 1 Make sure your access point (wireless router) supports WPS. 2 Insert the installation software CD and follow the instructions - Dell P513W | User's Guide - Page 69
on troubleshooting-specific connection types if you encounter difficulties during configuration. Switching to a wireless connection 1 Close all open applications. 2 Download the latest installer from the printer Web site. 3 Double-click Dell Extras > Dell Setup Assistant. 4 Follow the instructions - Dell P513W | User's Guide - Page 70
the computers to share the printer: a Make all computers printing to the printer accessible through Network Neighborhood by enabling File and Print Sharing. See the Windows documentation for instructions on enabling File and Print Sharing. b Install the printer software on all computers that will - Dell P513W | User's Guide - Page 71
network that use Mac OS X version 10.4 or later use any printer connected to your Macintosh computer. • Sharing your printer with Windows users-Let Windows computers on the network use any printer connected to your Macintosh computer. 4 Follow the instructions on the computer screen. Note: Windows - Dell P513W | User's Guide - Page 72
SSID using either of these methods, then contact your system support person. What is a network? A network is a collection of devices such as computers, printers, Ethernet hubs, access points, and routers connected together for communication through cables or through a wireless connection. A network - Dell P513W | User's Guide - Page 73
your system support person. - If you are using a proxy printers in the following diagrams represent printers with internal print servers built into them so that they can communicate over a network. Wireless network examples Scenario 1: Mixed wired and wireless connections on a network with Internet - Dell P513W | User's Guide - Page 74
network using a wireless access point or wireless router. • The wireless access point connects the network to the Internet through a DSL or cable modem. Scenario 3: Wireless network with no Internet access • Computers and printers connect to the network using a wireless access point. • The network - Dell P513W | User's Guide - Page 75
can connect to only one wireless network at a time. If you access the Internet over a wireless connection, you will lose Internet access if you are connected to an ad hoc network. Why do I need an installation cable? When setting up the printer on your wireless network, the printer will need to - Dell P513W | User's Guide - Page 76
the back of the printer. 3 Continue following the on-screen instructions. How are infrastructure and ad hoc networks different? Wireless networks can operate in one of two modes: infrastructure or ad hoc. In infrastructure mode, all devices on a wireless network communicate with each other through - Dell P513W | User's Guide - Page 77
communicate over a network is poor wireless signal quality. If the signal is too weak, too distorted, or blocked by an object, it cannot carry information between the access point and the printer. To determine if the printer is receiving a strong signal from the access point, print a network setup - Dell P513W | User's Guide - Page 78
communications problems. Place your access point as high in the room as possible to avoid signal absorption. How can I make sure my computer and printer are connected to the same wireless network? If the printer is not on the same wireless network as the computer, then you will not be able to print - Dell P513W | User's Guide - Page 79
, then the computer and the printer are connected to the same wireless network. If the SSIDs are not the same, then run the utility again to set up the printer on the wireless network used by the computer. For Macintosh users with an AirPort base station In Mac OS X version 10.5 or later 1 From the - Dell P513W | User's Guide - Page 80
same time? Yes, the printer supports a simultaneous USB and network connection. The printer can be configured in the following ways: • Locally attached (connected to a computer using a USB cable) • Wireless network • Wireless network and locally attached simultaneously What is a MAC address? A Media - Dell P513W | User's Guide - Page 81
to add a printer to your network, then the MAC address of the printer must be included in the MAC filter list. What is an IP address? An IP address is a unique number used by devices (such as a wireless printer, computer, or wireless access point) on an IP network to locate and communicate with each - Dell P513W | User's Guide - Page 82
, the computer sends all print jobs across the network to the printer using this address. If the IP address is not automatically assigned, you will be asked during wireless setup to manually enter an address and other network information after selecting your printer from the available list. What is - Dell P513W | User's Guide - Page 83
. 3 Press again to select Check Ink Levels. Using the printer software For Windows users 1 Click or Start. 2 Click All Programs or Programs, and then select the printer program folder from the list. 3 Select Printer Home. 4 Choose your printer from the printer drop-down list. 5 From the Maintenance - Dell P513W | User's Guide - Page 84
. 4 Press the up or down arrow button to scroll to Align Printer, and the press . An alignment page prints. Note: Do not remove the alignment page until printing is finished. Using the printer software For Windows users 1 Load plain paper. 2 Click or Start. 3 Click All Programs or Programs, and then - Dell P513W | User's Guide - Page 85
page prints. Using the printer software For Windows users 1 Click or Start. 2 Click All Programs or Programs, and then select the printer program folder from the list. 3 Select Printer Home. 4 Select your printer from the printer drop-down list. 5 From the Maintenance tab, click Clean Cartridges - Dell P513W | User's Guide - Page 86
, print server, or other network access point. • Check the printer for error messages, and resolve any errors. • Check for paper jam messages, and clear any jams. • Check the ink cartridges, and install new cartridges if necessary. • Use the Service Center to locate and solve the problem (Windows - Dell P513W | User's Guide - Page 87
" on page 92 • "Cannot print through USB" on page 92 Incorrect language appears on the display If the "Before you troubleshoot" checklist does not solve the problem, then try one or more of the following: CHANGE THE LANGUAGE USING THE PRINTER MENUS 1 From the printer control panel, press . 2 Press - Dell P513W | User's Guide - Page 88
REMOVE AND REINSERT THE PRINTHEAD 1 Open the printer and lift the latch. 2 Remove the printhead. Warning-Potential Damage: Do not touch the printhead ink filter or the printhead nozzles. 3 Wipe the contacts using a clean, lint-free cloth. • On the printhead Troubleshooting 88 - Dell P513W | User's Guide - Page 89
-Potential Damage: Do not touch the printhead ink filter or the printhead nozzles. 4 Reinsert the printhead, and then close the latch until it clicks. 5 Close the printer. Note: If removing and reinserting the printhead does not resolve the error, then contact customer support. Troubleshooting 89 - Dell P513W | User's Guide - Page 90
then turn on the printer. Print job does not print or is missing pages If the "Before you troubleshoot" checklist does not solve the problem, then try one or more of the following: MAKE SURE THE INK CARTRIDGES ARE INSERTED CORRECTLY 1 Turn the printer on, and then open the printer. 2 Make sure the - Dell P513W | User's Guide - Page 91
continue to have problems, then try another USB port on the computer. You may have connected to a defective port. REMOVE AND REINSTALL THE PRINTER SOFTWARE Printer is printing blank pages Blank pages may be caused by improperly installed ink cartridges. REINSTALL THE INK CARTRIDGES AND DEEP CLEAN - Dell P513W | User's Guide - Page 92
queue and cannot delete them to get other jobs to print, then the computer and printer may not be communicating. RESTART THE COMPUTER AND TRY AGAIN Cannot print through USB If the "Before you troubleshoot" checklist does not solve the problem, then try one or more of the following: CHECK THE USB - Dell P513W | User's Guide - Page 93
THE PRINTER SOFTWARE Jams and misfeeds troubleshooting • "Paper jam in the printer" on page 93 • "Paper jam in the paper support" on page 93 • "Paper jam in the duplex unit" on page 94 • "Paper or specialty media misfeeds" on page 95 Paper jam in the printer Note: The parts inside the printer are - Dell P513W | User's Guide - Page 94
duplex cover has protruding ribs as part of the paper path. To avoid injury, use caution when accessing this area for clearing a paper jam. 2 Firmly grasp the paper, and then gently pull it out. Note: Be careful not to tear the paper while removing it. 3 Reinsert the duplex unit. Troubleshooting 94 - Dell P513W | User's Guide - Page 95
the "Before you troubleshoot" checklist does not solve the problem, then try one or more of the following: CHECK MINIMUM PRINT SETTINGS Unless you are using the borderless feature, use these minimum print margin settings: • Left and right margins: - 6.35 mm (0.25 in.) for letter-size paper - 3.37 mm - Dell P513W | User's Guide - Page 96
you troubleshoot" checklist does not solve the problem, then try one or more of the following: CHECK THE INK LEVELS Replace low or empty ink cartridges. SELECT A HIGHER PRINT QUALITY FROM THE PRINTER SOFTWARE MAKE SURE THE INK CARTRIDGES ARE PROPERLY INSTALLED ALIGN THE PRINTHEAD Troubleshooting 96 - Dell P513W | User's Guide - Page 97
TYPE THAT MATCHES THE TYPE OF PAPER YOU ARE USING REMOVE AND REINSTALL THE PRINTER SOFTWARE Computer slows down when printing These are possible solutions. Try one of the following: IF YOU ARE USING A USB CONNECTION, THEN TRY A DIFFERENT USB CABLE IF YOU ARE ON A NETWORK, THEN RESET THE POWER OF THE - Dell P513W | User's Guide - Page 98
quality If the "Before you troubleshoot" checklist does not solve the problem, then try one or more of the following: CLEAN THE SCANNER GLASS ADJUST THE SCAN QUALITY FROM THE PRINTER SOFTWARE REVIEW THE TIPS FOR COPYING, SCANNING, AND IMPROVING PRINT QUALITY USE A CLEARER VERSION OF THE ORIGINAL - Dell P513W | User's Guide - Page 99
scan to a computer over a network If the "Before you troubleshoot" checklist does not solve the problem, then try one or more of the following: MAKE SURE THE PRINTER AND THE DESTINATION COMPUTER ARE CONNECTED TO THE SAME NETWORK MAKE SURE THE PRINTER SOFTWARE IS INSTALLED ON THE DESTINATION COMPUTER - Dell P513W | User's Guide - Page 100
memory card you are using can be used in the printer. • Make sure the memory card is not damaged. • Make sure memory card contains supported file types. Nothing happens when a memory card is inserted If the "Memory card troubleshooting checklist" does not solve the problem, then try one or more of - Dell P513W | User's Guide - Page 101
110 • "Wireless print server not installed" on page 114 • ""Communication not available" message appears when printing wirelessly" on page 114 • "Communication with printer lost when connected to Virtual Private Network (VPN)" on page 116 • "Resolving intermittent wireless communications issues" on - Dell P513W | User's Guide - Page 102
. To verify, print a network setup page. Cannot print over wireless network If you encountered problems while installing, or if your printer does not appear in the printers folder or as a printer option when sending a print job, then you can try uninstalling and reinstalling the software. Before you - Dell P513W | User's Guide - Page 103
you to press an association/registration button when adding the printer to your wireless network. If you are using one of these boxes and need more information, then see the documentation that came with your box, or contact your Internet Service Provider (ISP). MOVE YOUR ACCESS POINT AWAY FROM OTHER - Dell P513W | User's Guide - Page 104
SECURITY SETTINGS • If you are using MAC (Media Access Control) address filtering to limit access to your wireless network, then you must add the printer MAC address to the list of addresses allowed to connect to the access point. • If you set the access point to issue a limited number of IP - Dell P513W | User's Guide - Page 105
the SSID and the WEP key or WPA passphrase in a safe place for future reference. MAKE SURE YOUR OS IS COMPATIBLE WITH WIRELESS PRINTING THROUGH AIRPORT (MACINTOSH ONLY) The printer supports wireless printing only through AirPort base stations for Mac OS X version 10.5 or later. Troubleshooting 105 - Dell P513W | User's Guide - Page 106
If you have any doubts, look for an updated version of the printer software on our Web site. For more information, see "Installing the printer software" in the User's Guide. You can access the User's Guide from the link at the bottom of the installation screen. RECONNECT THE POWER SUPPLY 1 Turn off - Dell P513W | User's Guide - Page 107
, and the wireless network is working, but the printer will not print wirelessly, then a firewall could be the problem. If there is a firewall (other than the Windows firewall) on the computer, try one or more of the following: • Update the firewall using the most recent update available from the - Dell P513W | User's Guide - Page 108
be correct, but the printer does not print, then try one or more of the following: ALLOW THE WIRELESS INSTALLATION TO COMPLETE Do not attempt to print, remove the installation CD, or detach the installation cable until you see the Wireless Setup Successful screen. ENABLE THE PRINTER Confirm that the - Dell P513W | User's Guide - Page 109
for your wireless access point (wireless router) to learn how to set a network name. If you set a new network name, you must reset the printer and computer SSID to the same network name. CHECK SECURITY KEYS If you are using WEP security A valid WEP key is: • Exactly 10 or 26 hexadecimal - Dell P513W | User's Guide - Page 110
point and wireless network adapters. If you are having trouble printing, then try placing the computer and printer no more than 100 feet apart. You can find the signal strength of the network on the network setup page. CHECK YOUR WEP KEY OR WPA PASSPHRASE If your access point is using WEP security - Dell P513W | User's Guide - Page 111
then see the documentation that came with the wireless network, or contact the person who set up your wireless network. CHECK THE MAC ADDRESS If your network uses MAC address filtering, then make sure that you include the MAC address of the printer in the MAC address filter list. This will allow the - Dell P513W | User's Guide - Page 112
nothing is displayed. You can use Network Diagnostics to help resolve the problem. MAKE SURE YOUR COMPUTER CAN COMMUNICATE WITH THE PRINTER For Windows users 1 Obtain the printer IP address. a From the printer, print a network setup page. For more information, see the User's Guide. b In the TCP/IP - Dell P513W | User's Guide - Page 113
. • You may need to change the settings of your printer. Run the Wireless Setup Utility again. For Macintosh users 1 Obtain the printer IP address. a From the printer, print a network setup page. For more information, see the User's Guide. b In the TCP/IP section, look for Address. 2 From the Finder - Dell P513W | User's Guide - Page 114
appears when printing wirelessly Try one or more of the following: MAKE SURE YOUR COMPUTER AND PRINTER HAVE VALID IP ADDRESSES FOR THE NETWORK If you are using a laptop and have power-saving settings enabled, then you may see the "Communication not available" message on your computer screen when you - Dell P513W | User's Guide - Page 115
to: About This Mac > More Info 2 From the Contents pane, choose Network. 3 If you are connected over a wireless network, choose AirPort from the Active Services list. The Router entry is typically the access point. Locating the printer IP address • From the printer, print a network setup page. In - Dell P513W | User's Guide - Page 116
VPNS WHEN ATTEMPTING TO USE THE WIRELESS NETWORK Most Virtual Private Networks (VPNs) allow computers to communicate with only the VPN and no other network at the same time. Disconnect from the VPN before installing the driver on the computer or before running the wireless setup on the computer. To - Dell P513W | User's Guide - Page 117
ON Wait one minute for the printer and computer to reestablish the connection. This can sometimes refresh network connections and resolve connectivity issues. ELIMINATE NETWORK CONGESTION If a wireless network is too busy, then the computer and printer may have difficulty communicating with each - Dell P513W | User's Guide - Page 118
CHECK FOR WIRELESS NETWORK ADAPTER UPDATES If you are having trouble printing from one particular computer, then check the Web site of the manufacturer of the wireless network adapter card in that computer. It is possible that there is an updated driver available that could resolve the issue. CHANGE - Dell P513W | User's Guide - Page 119
Notices Product information Product name: Dell P513w Machine type: 4443 Model(s): 7dw, 3dw Edition notice August 2010 software and documentation developed exclusively at private expense. Licensing notices The following documents can be viewed from the installation software CD. Directory CD:\ - Dell P513W | User's Guide - Page 120
when the equipment is operated in a residential installation. This equipment generates, uses, and can radiate radio frequency energy and, if not installed and used in accordance with the instructions, may cause harmful interference to radio communications. However, there is no guarantee that - Dell P513W | User's Guide - Page 121
F) 1-60° C (34-140° F) Product disposal Do not dispose of the printer or supplies in the same manner as normal household waste. Consult your local authorities Watts) 17.01 10.31 Scanning The product is scanning hard-copy documents. 9.37 Ready The product is waiting for a print job. 6.95 Power - Dell P513W | User's Guide - Page 122
Timeout for this product (in minutes): 10 By using the configuration menus, the Power Saver Timeout sum of each mode's energy usage. European Community (EC) directives conformity This product is in to the requirements of the Directives is available upon request from the Authorized Representative. - Dell P513W | User's Guide - Page 123
network, the telephone company may request that you disconnect the equipment until the problem is resolved. This equipment contains no user serviceable parts install an appropriate AC surge arrestor in the AC outlet to which this device is connected. An appropriate AC surge arrestor is defined as one - Dell P513W | User's Guide - Page 124
This has been identified as a major nationwide problem. It is recommended that the customer install an appropriate AC surge arrestor in the AC to users of the New Zealand telephone network The following are special conditions for the Facsimile User Instructions. The grant of a telepermit for any - Dell P513W | User's Guide - Page 125
all of Telecom's network services. This equipment shall not be set up to make automatic calls to the Telecom's 111 Emergency Service. This equipment may one call attempt and the beginning of another. Using this product in Switzerland This product requires a Swiss billing tone filter to be installed - Dell P513W | User's Guide - Page 126
. Use of any other antenna is strictly prohibited per regulations of Industry Canada. To prevent radio interference to the licensed service, this device is intended to be operated indoors and away from windows to provide maximum shielding. Equipment (or its transmit antenna) that is installed - Dell P513W | User's Guide - Page 127
Pour empêcher toute interférence radio au service faisant l'objet d'une licence, cet appareil doit optimale. Si le matériel (ou son antenne d'émission) est installé à l'extérieur, il doit faire l'objet d'une licence. use within certain voltage limits and the ecodesign of energy-using products - Dell P513W | User's Guide - Page 128
and safety requirements of EN 60950. Products equipped with 2.4GHz Wireless LAN option are in conformity with the protection requirements of EC the requirements of the Directives is available upon request from the Authorized Representative. This product may be used in the countries indicated in the - Dell P513W | User's Guide - Page 129
Français Par la présente, Lexmark International, Inc. déclare que l'appareil ce produit est conforme aux exigences fondamentales et autres dispositions pertinentes de la directive 1999/5/CE. Magyar Íslenska Alulírott, Lexmark International, Inc. nyilatkozom, hogy a termék megfelel a vonatkozó - Dell P513W | User's Guide - Page 130
using Windows 65 AliceBox 63 aligning the printhead 83 appliances wireless network 77 application list downloading 59 updating 59 assigning IP address 82 B banner paper 26 bidirectional communication enabling 114 black and white scanning 59 buttons printer control panel 14 C cable installation - Dell P513W | User's Guide - Page 131
network 61 infrastructure network 76 ink conserving 6 ink cartridges ordering 11 replacing 11 ink levels checking 83 inserting a memory card or flash drive 36 installation cable 75 installing network printer 82 installing optional software 22 interference wireless network 77 internal wireless print - Dell P513W | User's Guide - Page 132
pages on one sheet 32 network setup page 61 on both sides of the paper 42, 44 photos from digital camera using DPOF 42 photos from memory device using printer software 39 photos using printer control panel 37 photos using the proof sheet 41 reverse page order 31 tips 30 two-sided 42, 44 printing in - Dell P513W | User's Guide - Page 133
shared printing 71 sharing printer in Windows 70 software Service Center 86 software did not install 90 software updates checking 23 enabling 23 software, optional finding, installing 22 SSID ad hoc 65 finding 78 locating 72 wireless network 72 streaks or lines on printed image 96 supported memory - Dell P513W | User's Guide - Page 134
91 printhead error 87 software did not install 90 troubleshooting, wireless changing wireless settings after installation (Mac) 64 changing wireless settings after installation (Windows) 64 photos do not print from memory card across wireless network 101 resolving communication problems 116 Wi-Fi
-
 1
1 -
 2
2 -
 3
3 -
 4
4 -
 5
5 -
 6
6 -
 7
7 -
8
-
9
-
10
-
11
-
12
-
13
-
14
-
15
-
16
-
17
-
18
-
19
-
20
-
21
-
22
-
23
-
24
-
25
-
26
-
27
-
28
-
29
-
30
-
31
-
32
-
33
-
34
-
35
-
36
-
37
-
38
-
39
-
40
-
41
-
42
-
43
-
44
-
45
-
46
-
47
-
48
-
49
-
50
-
51
-
52
-
53
-
54
-
55
-
56
-
57
-
58
-
59
-
60
-
61
-
62
-
63
-
64
-
65
-
66
-
67
-
68
-
69
-
70
-
71
-
72
-
73
-
74
-
75
-
76
-
77
-
78
-
79
-
80
-
81
-
82
-
83
-
84
-
85
-
86
-
87
-
88
-
89
-
90
-
91
-
92
-
93
-
94
-
95
-
96
-
97
-
98
-
99
-
100
-
101
-
102
-
103
-
104
-
105
-
106
-
107
-
108
-
109
-
110
-
111
-
112
-
113
-
114
-
115
-
116
-
117
-
118
-
119
-
120
-
121
-
122
-
123
-
124
-
125
-
126
-
127
-
128
-
129
-
130
-
131
-
132
-
133
-
134
 |
 |

Dell P513w Series User's Guide
August 2010
www.dell.com | support.dell.com
Machine type(s):
4443
Model(s):
7dw, 3dw