Dell PowerConnect W-IAP3WN Dell Instant 6.1.2.3-2.0.0.0 Quick Start Guide
Dell PowerConnect W-IAP3WN Manual
 |
View all Dell PowerConnect W-IAP3WN manuals
Add to My Manuals
Save this manual to your list of manuals |
Dell PowerConnect W-IAP3WN manual content summary:
- Dell PowerConnect W-IAP3WN | Dell Instant 6.1.2.3-2.0.0.0 Quick Start Guide - Page 1
Instant Access Point (IAP). To learn more about Dell PowerConnect W-Series Instant Access Points and for detailed configuration information, see the Dell PowerConnect W-Series Instant Access Point 6.1.2.32.0.0.0 User Guide at support.dell.com/manuals. Getting Started 1. Get an IP address-You will - Dell PowerConnect W-IAP3WN | Dell Instant 6.1.2.3-2.0.0.0 Quick Start Guide - Page 2
Figure 7 Verify the newly added wireless network Contacting Support Web Support Main Site Support Site Dell Documentation www.dell.com support.dell.com support.dell.com/manuals Dell PowerConnect W-Series Instant Access Point Quick Start Guide Note: For additional security level options, refer to
-
 1
1 -
 2
2
 |
 |
Dell PowerConnect W-Series
Instant Access Point
Quick Start Guide
This Quick Start Guide will assist you to quickly connect and configure Dell
PowerConnect W-Series Instant Access Point (IAP). To learn more about Dell
PowerConnect W-Series Instant Access Points and for detailed configuration
information, see the
Dell PowerConnect W-Series Instant Access Point 6.1.2.3-
2.0.0.0 User Guide
at
support.dell.com/manuals
.
Getting Started
1.
Get an IP address—
You will require an IP address to connect to a network. To
get an IP address from a DHCP server in your network:
a.
Connect the IAP to an intermediate gateway router or switch that has
connectivity to the DHCP server.
b.
Power on the IAP. The IAP receives an IP address provided by the switch or
router. Power the IAP either by plugging to an Ethernet cable coming from
a 802.3af Power over Ethernet (PoE) switch or device, or by connecting it to
an AC adapter.
Note:
Use the Enet0 port on W-IAP134/135 for uplink connections to a switch or
router. The Enet1 port does not provide wired connectivity.
Note:
After the IAP starts up, it will try to do DHCP if static IP configuration is not
available. If DHCP times out, a default IP within 169.254.x.y/16 subnet will be
configured on the IAP.
2.
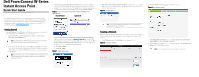
Connect to the provisioning Wi-Fi network
—Connect a wireless enabled
client to the provisioning Wi-Fi network. The provisioning network name is
instant
.
Table 1
shows how to find the
instant
wireless network using Windows
7 or Mac OS.
Click the wireless network icon and select
instant network
.
Table 1
Connect to the provisioning network in Microsoft Windows and
Apple Mac OS)
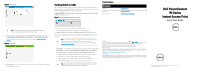
3.
Log in to the Dell PowerConnect W-Series Instant Access Point WebUI
—
Open a web browser and navigate to
instant.dell-pcw.com/
to access the Dell
Instant login screen. If you enter any other URL, you are redirected to the
Dell
PowerConnect W-Series Instant Access Point
login screen. In the login screen,
as shown in
Figure 1
, enter the following credentials:
Username -
admin
Password -
admin
Figure 1
WebUI Login Screen
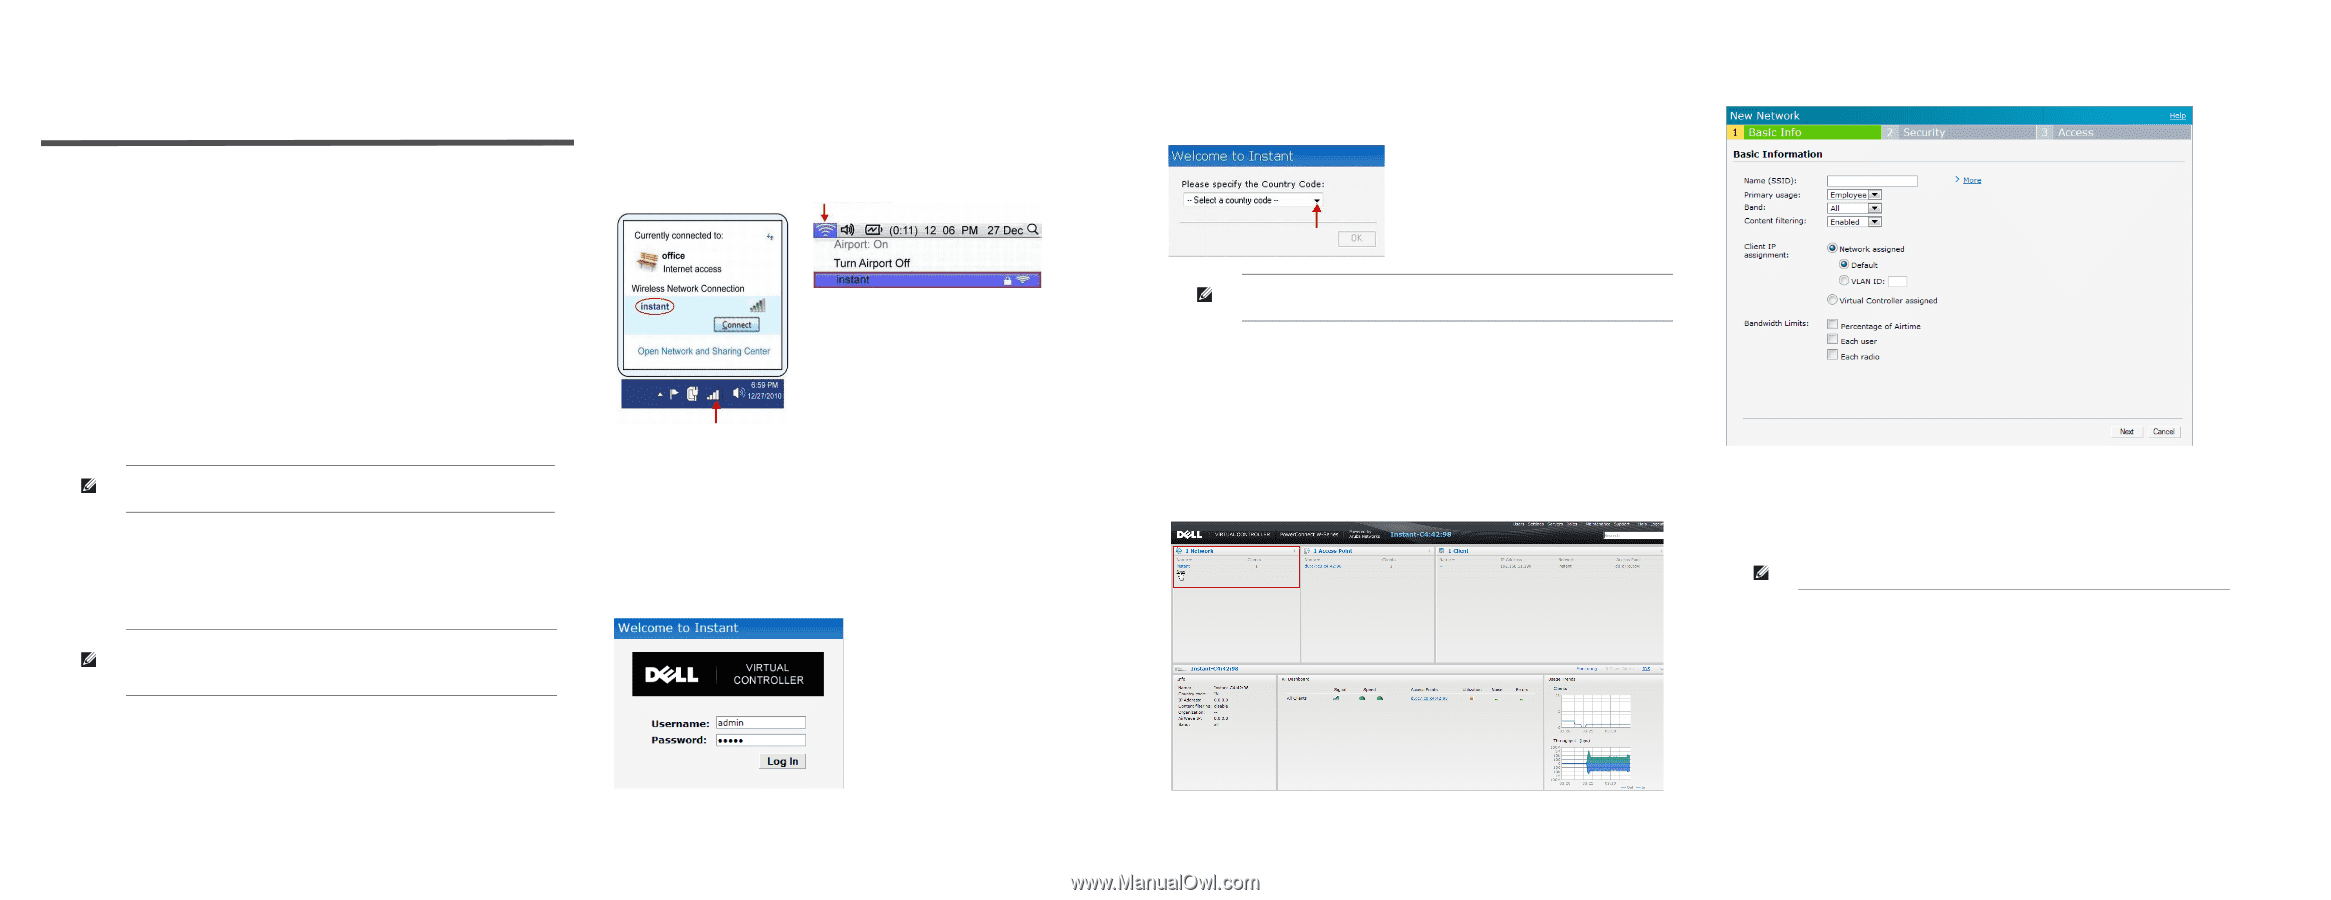
4.
Select the Country Code
—A
Country Code
box, as shown in
Figure 2
might
appear after you successfully log in to the WebUI. Select your country code
from the drop-down menu.
Figure 2
Country Code box
Creating a Network
Dell PowerConnect W-Series Instant Access Point Access Point user interface is a
standard web based interface that allows you to configure and monitor an IAP
network.
5.
In the
Network
window, click the
New
link, as shown in
Figure 3
.
Figure 3
Instant User Interface
6.
The
New Network
window appears, as shown in
Figure 4
.
Figure 4
New Network window
7.
In the
Basic Info
tab, shown in
Figure 4
, enter a name for the network in the
Name (SSID)
text box. Click
Next
to continue.
8.
In the
Security
tab, shown in
Figure 5
, enter a passphrase in the
Passphrase and
Retype
fields. Click
Next
to continue.
Apple Mac OS
Microsoft Windows
Note:
The Country Code option will not appear, and cannot be set for IAPs
designated for US, Japan, and Israel.
Note:
It is recommended that you note the passphrase for future use.