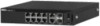
Dell PowerSwitch N1100-ON Networking N1100-ON Series Switches Getting Started
Dell PowerSwitch N1100-ON Manual
 |
View all Dell PowerSwitch N1100-ON manuals
Add to My Manuals
Save this manual to your list of manuals |
Dell PowerSwitch N1100-ON manual content summary:
- Dell PowerSwitch N1100-ON | Networking N1100-ON Series Switches Getting Started - Page 1
Dell Networking N1108T-ON/N1108P-ON/ N1108EP-ON/N1124T-ON/ N1124P-ON/N1148T-ON/ N1148P-ON Switches Getting Started Guide Guide de mise en route Guia de Noções Básicas Guía de introducción Regulatory Model: E17W and E18W Regulatory Type: E17W001/E18W001/E18W002 - Dell PowerSwitch N1100-ON | Networking N1100-ON Series Switches Getting Started - Page 2
Dell Networking N1108T-ON/N1108P-ON/ N1108EP-ON/N1124T-ON/ N1124P-ON/N1148T-ON/ N1148P-ON Switches Getting Started Guide Regulatory Models: E17W and E18W - Dell PowerSwitch N1100-ON | Networking N1100-ON Series Switches Getting Started - Page 3
switch. CAUTION: A CAUTION indicates either potential damage to hardware or loss of data and tells you how to avoid the problem Dispose batteries of according to the manufacturer's instructions. • Disposing a battery into fire, a property laws. Dell and the Dell logo are trademarks of Dell Inc. in - Dell PowerSwitch N1100-ON | Networking N1100-ON Series Switches Getting Started - Page 4
Contents 1 Introduction 5 N1100-ON Series Hardware Overview 5 Power Consumption for N1100-ON Series PoE Switches 5 Ventilation System 6 N1100-ON Series Model Summary 7 2 N1108T-ON/N1108P-ON/N1108EP-ON Installation 8 Mounting an N1108T-ON/N1108P-ON Switch Using Dell Tandem Tray 8 Mounting an - Dell PowerSwitch N1100-ON | Networking N1100-ON Series Switches Getting Started - Page 5
Source 17 AC and DC Power Connection 17 Booting the N1100-ON Series Switch 18 Performing the N1100-ON Series Initial Configuration 19 Enabling Remote Management 19 Initial Configuration Procedure 20 Example Session 21 Dell Easy Setup Wizard Console Example . . . . . 22 Next Steps 26 5 Agency - Dell PowerSwitch N1100-ON | Networking N1100-ON Series Switches Getting Started - Page 6
the Dell Networking N1100-ON Series switches, including how to install a switch and perform the initial configuration. For information about how to configure and monitor switch features, refer to the User Configuration Guide, which is available on the Dell Support website at dell.com/support. See - Dell PowerSwitch N1100-ON | Networking N1100-ON Series Switches Getting Started - Page 7
.27W 250.52W 251.25W 476.03W 472.64W 470.58W 459.37W 459.06W Ventilation System One fan cools the N1108T-ON/N1108P-ON switches, and two fans cool the N1024T-ON/N1024P-ON/N1048T-ON/N1048P-ON - Dell PowerSwitch N1100-ON | Networking N1100-ON Series Switches Getting Started - Page 8
N1100-ON Series Model Summary Table 1-2. N1100-ON Series Switch Regulatory Numbers Marketing Model Name (MMN) Description Power Supply Unit (PSU) Regulatory Regulatory Model Number Type E18W E18W002 N1148P-ON 48x1G/4x10G SFP+/12xPoE+ Port YM-2501D E18W E18W002 Getting Started Guide 7 - Dell PowerSwitch N1100-ON | Networking N1100-ON Series Switches Getting Started - Page 9
an N1108T-ON/N1108P-ON Switch Using Dell Tandem Tray The AC power connector is on the rear panel. WARNING: Read the safety information in the Safety and Regulatory Information as well as the safety information for other switches that connect to or support the switch. WARNING: Do not use rack - Dell PowerSwitch N1100-ON | Networking N1100-ON Series Switches Getting Started - Page 10
The AC power connector is on the rear panel of the N1108T-ON/N1108P-ON switches. The DC power connector for the N1108EP-ON is at the center of the rear panel. NOTE: The N1108EP- holes and tighten with a screwdriver. 3 Repeat the process on the other side of the switch. Getting Started Guide 9 - Dell PowerSwitch N1100-ON | Networking N1100-ON Series Switches Getting Started - Page 11
Figure 1-3. Install on a Two-post Rack with L-Bracket Mounting all N11xx-ON Switches on a Wall 1 Make sure that the mounting location meets the following requirements: • The surface of the wall can support the switch. • The location is ventilated to prevent heat buildup. 2 Place the supplied wall - Dell PowerSwitch N1100-ON | Networking N1100-ON Series Switches Getting Started - Page 12
where the screws to hold the switch must be prepared. 7 On the marked locations, drill the holes and place all the eight supplied anchors in the holes. 8 Insert the supplied screws into the wall-mounting bracket holes and tighten them with a screwdriver. See Figure 1-5. Getting Started Guide 11 - Dell PowerSwitch N1100-ON | Networking N1100-ON Series Switches Getting Started - Page 13
Figure 1-5. Mounting on a Wall 12 Getting Started Guide - Dell PowerSwitch N1100-ON | Networking N1100-ON Series Switches Getting Started - Page 14
safety information for other switches that connect to or support the switch. The AC power connector is on the rear panel of the switch. Installing in a Rack rack-mounting bracket on one side of the switch, ensuring that the mounting holes on the switch line up to the mounting holes in the rack - Dell PowerSwitch N1100-ON | Networking N1100-ON Series Switches Getting Started - Page 15
. Installing as a Free-standing Switch NOTE: Dell strongly recommends mounting the switch in a rack. Install the switch on a flat surface if you are not installing it in a rack. The surface must be able to support the weight of the switch and the switch cables. The switch is supplied with four self - Dell PowerSwitch N1100-ON | Networking N1100-ON Series Switches Getting Started - Page 16
Starting and Configuring the N1100-ON Series Switch The following flow chart provides an overview of the steps you use to perform the initial configuration after the switch is unpacked and mounted. Figure 1-7. Installation and Configuration Flow Chart Getting Started Guide 15 - Dell PowerSwitch N1100-ON | Networking N1100-ON Series Switches Getting Started - Page 17
an N1100-ON Series Switch to a Terminal After completing all external connections, configure the switch by connecting it to a terminal. NOTE: Read the Release Notes for this product before proceeding. You can download the Release Notes from the Dell Support website at dell.com/support. NOTE: Dell - Dell PowerSwitch N1100-ON | Networking N1100-ON Series Switches Getting Started - Page 18
console session at a time is supported. Connecting an N1100-ON Series Switch to a Power Source CAUTION: Read the safety information in the Safety and Regulatory Information manual as well as the safety information for other switches that connect to or support the switch. The N1108T-ON and N1108P-ON - Dell PowerSwitch N1100-ON | Networking N1100-ON Series Switches Getting Started - Page 19
Booting the N1100-ON Series Switch When the power is turned on with the local terminal already connected, the switch goes through a power-on self-test (POST). POST runs every time the switch is initialized and checks hardware components to determine if the switch is fully operational before - Dell PowerSwitch N1100-ON | Networking N1100-ON Series Switches Getting Started - Page 20
for in-band management. By default, all in-band ports are members of VLAN 1. The Dell Easy Setup Wizard includes prompts to configure network information for the VLAN 1 interface on the N1100-ON Series switches. You can assign a static IP address and subnet mask or enable DHCP and allow a network - Dell PowerSwitch N1100-ON | Networking N1100-ON Series Switches Getting Started - Page 21
by using the CLI, refer to the CLI Reference Guide. This Getting Started Guide shows how to use the Dell Easy Setup Wizard for initial switch configuration. The wizard sets up the following configuration on the switch: • Establishes the initial privileged user account with a valid password - Dell PowerSwitch N1100-ON | Networking N1100-ON Series Switches Getting Started - Page 22
Session This section describes a Dell Easy Setup Wizard session. The The setup wizard configures the initial values as defined above. After completing the wizard, the switch is configured as follows: • SNMPv2 is enabled and the community string is set up is in parentheses. Getting Started Guide 21 - Dell PowerSwitch N1100-ON | Networking N1100-ON Series Switches Getting Started - Page 23
associated with running an example Dell Easy Setup Wizard session, using the input values listed earlier. After the switch completes the POST and is support for your Dell products and services Dell may use the information for providing recommendations to improve your IT infrastructure. Dell - Dell PowerSwitch N1100-ON | Networking N1100-ON Series Switches Getting Started - Page 24
sending the switch's service tag Dell Easy Setup Wizard The setup wizard guides you through the initial switch configuration, and gets you up and running as quickly as possible. You can skip the setup wizard, and enter CLI mode to manually configure the switch - Dell PowerSwitch N1100-ON | Networking N1100-ON Series Switches Getting Started - Page 25
y Step 1: The system is not set up for SNMP management by default. To manage the switch using SNMP (required for Dell Network Manager) you can . Set up the initial SNMP version 2 account now. . Return later to manage from any Management Station. [0.0.0.0]: 10.1.2.100 24 Getting Started Guide - Dell PowerSwitch N1100-ON | Networking N1100-ON Series Switches Getting Started - Page 26
. To access the switch through any Management Interface you can . Set up the IP address for the Management Interface. . Set up the default gateway if IP address is manually configured on the routing interface. Step 4: IP subnet mask (A.B.C.D or /nn): 255.255.255.0 Step 5: Getting Started Guide 25 - Dell PowerSwitch N1100-ON | Networking N1100-ON Series Switches Getting Started - Page 27
• For the VLAN 1 routing interface, enter show ip interface. To access the Dell OpenManage Switch Administrator interface, enter the VLAN 1 management interface IP address into the address field of , continue to use the console port for local CLI access to the switch. 26 Getting Started Guide - Dell PowerSwitch N1100-ON | Networking N1100-ON Series Switches Getting Started - Page 28
The N1100-ON Series switches support basic switching features such as VLANs and spanning tree protocol. Use the Web-based management interface or the CLI to configure the features your network requires. For information about how to configure the switch features, refer to the User Configuration Guide - Dell PowerSwitch N1100-ON | Networking N1100-ON Series Switches Getting Started - Page 29
N1124P-ON, N1148T-ON, and N1148P-ON switches comply with the following safety and agency requirements not installed and used in accordance to the instructions, it may cause harmful interference to radio in order to meet FCC emission limits. Dell EMC is not responsible for any radio or television Guide - Dell PowerSwitch N1100-ON | Networking N1100-ON Series Switches Getting Started - Page 30
2nd Edition • EN 60950-1, 2nd Edition • EN 60825-1, 1st Edition • EN 60825-1 Safety of Laser Products-Part 1: Equipment Classification Requirements and User's Guide • EN 60825-2 Safety of Laser Products-Part 2: Safety of Optical Fibre Communication Systems • FDA Regulation 21CFR 1040.10 and 1040.11 - Dell PowerSwitch N1100-ON | Networking N1100-ON Series Switches Getting Started - Page 31
encourages owners of information technology (IT) equipment to responsibly recycle their equipment when it is no longer needed. Dell EMC offers a variety of product return programs and services in several countries to assist equipment owners in recycling their IT products. 30 Getting Started Guide - Dell PowerSwitch N1100-ON | Networking N1100-ON Series Switches Getting Started - Page 32
Barros Sierra, no 540, Piso 10, Col. Lomas de Santa Fe Delegación Álvaro Obregón, Ciudad de México. C.P. 01219 R.F.C: DME9204099R6 Dell Networking N1100-ON Series: 100V-240 VAC Dell Networking N1100-ON Series: 50-60 Hz Dell Networking N1100-ON Series: • See table 1-1 Getting Started Guide 31 - Dell PowerSwitch N1100-ON | Networking N1100-ON Series Switches Getting Started - Page 33
32 Getting Started Guide - Dell PowerSwitch N1100-ON | Networking N1100-ON Series Switches Getting Started - Page 34
Dell Networking N1108T-ON/N1108P-ON/ N1108EP-ON/N1124T-ON/ N1124P-ON/N1148T-ON/ N1148P-ON Guide de mise en route Modèles réglementaires : E17W et E18W - Dell PowerSwitch N1100-ON | Networking N1100-ON Series Switches Getting Started - Page 35
type équivalent. Mettez les batteries usagées au rebut selon les instructions du fabricant. • Jeter une batterie dans un feu, un four haute internationale sur le droit d'auteur et la propriété intellectuelle. Dell et le logo Dell sont des marques de Dell Inc. aux États-Unis et/ou dans d'autres pays - Dell PowerSwitch N1100-ON | Networking N1100-ON Series Switches Getting Started - Page 36
Série N1100-ON 37 Consommation électrique des commutateurs PoE Série N1100-ON 37 Système de ventilation 39 Résumé du modèle Série N1100-ON 39 d'un plateau tandem Dell 40 Montage d'un commutateur N1108T-ON/N1108P-ON/ N1108EP-ON sur un rack à deux montants à l'aide de grands supports en L 41 - Dell PowerSwitch N1100-ON | Networking N1100-ON Series Switches Getting Started - Page 37
-ON 50 Réalisation de la configuration initiale du Série N1100-ON 51 Activation de la gestion à distance 51 Procédure de configuration initiale 52 Exemple de session 53 Exemple de la console Assistant Dell d'installation facile 54 Étapes suivantes 58 5 Conformité avec les organismes 60 36 - Dell PowerSwitch N1100-ON | Networking N1100-ON Series Switches Getting Started - Page 38
N1100-ON, y compris leur installation et leur configuration initiale. Pour en savoir plus sur la façon de configurer et surveiller les fonctions du commutateur, reportez-vous au User Configuration Guide (Guide de configuration utilisateur), qui est disponible sur le site Web du support de Dell dell - Dell PowerSwitch N1100-ON | Networking N1100-ON Series Switches Getting Started - Page 39
Tableau1-1. Consommation électrique des commutateurs PoE Série N1100-ON Modèle Tension d'entrée Configuration du bloc d'alimentation Consommation maximale de courant constant (A) V/50 Hz PSU principal 2,14 A 459,37 W 240 V/50 Hz PSU principal 1,97 A 459,06 W 38 Guide de mise en route - Dell PowerSwitch N1100-ON | Networking N1100-ON Series Switches Getting Started - Page 40
pas équipé d'un ventilateur. Résumé du modèle Série N1100-ON Tableau1-2. Numéros réglementaires du commutateur Série N1100-ON Nom de Description commercialisation du modèle (MMN) Bloc Num N1148P-ON Port 48 x 1 G/4 x 10 G SFP+/ 12 x PoE+ YM-2501D E18W E18W002 Guide de mise en route 39 - Dell PowerSwitch N1100-ON | Networking N1100-ON Series Switches Getting Started - Page 41
d'un commutateur N1108T-ON/N1108P-ON à l'aide d'un plateau tandem Dell Le connecteur d'alimentation CA se trouve sur le panneau arrière. AVERTISSEMENT kit de plateau tandem Dell (Dell Tandem Tray Kit), comme illustré dans la Figure 1-1. Figure 1-1. Dell Tandem Tray Kit 40 Guide de mise en route - Dell PowerSwitch N1100-ON | Networking N1100-ON Series Switches Getting Started - Page 42
de montage en rack fourni sur un côté du commutateur, en alignant bien les orifices de montage du commutateur avec ceux situés sur le support de montage en rack. Voir l'élément 1 dans la Figure 1-2. Figure 1-2. Installation à l'aide d'un kit de grands supports en L Guide de mise en route 41 - Dell PowerSwitch N1100-ON | Networking N1100-ON Series Switches Getting Started - Page 43
vis du haut. Voir la Figure 1-3. Figure 1-3. Installation sur un rack à deux montants avec des supports en L Montage mural pour tous les commutateurs N11xx-ON 1 Assurez-vous que l'emplacement de l'installation est ventilé afin d'éviter une augmentation de la température. 42 Guide de mise en route - Dell PowerSwitch N1100-ON | Networking N1100-ON Series Switches Getting Started - Page 44
avec ceux situés sur le support de montage mural. 3 Insérez les vis fournies dans les orifices du support de montage mural et serrez-les tournevis. Voir la Figure 1-4. Figure 1-4. Insertion des supports de montage 4 Répétez le processus pour le support de montage mural situé de l'autre côté du - Dell PowerSwitch N1100-ON | Networking N1100-ON Series Switches Getting Started - Page 45
les emplacements que vous avez marqués et insérez les huit chevilles fournies dans les trous. 8 Insérez les vis fournies dans les orifices des supports de montage mural et serrez-les avec un tournevis. Voir la Figure 1-5. Figure 1-5. Montage mural 44 Guide de mise en route - Dell PowerSwitch N1100-ON | Networking N1100-ON Series Switches Getting Started - Page 46
. 1 Placez sur un côté du commutateur le support de fixation en rack qui est fourni, en alignant bien les orifices de montage du commutateur avec ceux situés sur le support de montage en rack. La Figure 1-6 montre où monter les supports. Figure 1-6. Fixation des supports Guide de mise en route 45 - Dell PowerSwitch N1100-ON | Networking N1100-ON Series Switches Getting Started - Page 47
en tant que commutateur autonome REMARQUE: Dell recommande vivement de monter le commutateur un rack. La surface doit être capable de supporter le poids du commutateur et de ses câbles. Guide (Guide de configuration utilisateur) et au CLI Reference Guide (Guide de référence de l'interface CLI). 46 - Dell PowerSwitch N1100-ON | Networking N1100-ON Series Switches Getting Started - Page 48
et configuration des commutateurs Série N1100-ON Le diagramme qui suit donne une vue générale de la procédure à suivre pour effectuer la configuration initiale une fois que le commutateur a été déballé et monté. Figure 1-7. Diagramme du flux d'installation et de configuration Guide de mise en route - Dell PowerSwitch N1100-ON | Networking N1100-ON Series Switches Getting Started - Page 49
télécharger les notes de mise à jour à partir du site web du support de Dell dell.com/ support. REMARQUE: Dell vous recommande de vous procurer la version la plus récente de la documentation flux sur aucun. e Définissez le mode d'émulation de terminal sur VT100. 48 Guide de mise en route - Dell PowerSwitch N1100-ON | Networking N1100-ON Series Switches Getting Started - Page 50
sur le port de console du commutateur. Le port de console du Dell Networking est situé sur le côté droit du panneau avant et est session de console USB à la fois est possible. Série N1100-ONConnexion d'un commutateur à une source d'alimentation PRÉCAUTION: Prenez terre. Guide de mise en route 49 - Dell PowerSwitch N1100-ON | Networking N1100-ON Series Switches Getting Started - Page 51
Démarrage du commutateur Série N1100-ON Lorsque le système est mis sous tension alors que le terminal local est déjà connecté, le commutateur de passe. Pour plus d'informations sur les fonctions du menu Boot (Amorçage), reportez-vous au CLI Reference Guide (Guide de référence de l'interface CLI). 50 - Dell PowerSwitch N1100-ON | Networking N1100-ON Series Switches Getting Started - Page 52
intrabande. Par défaut, tous les ports intrabande sont membres du VLAN 1. L'Assistant Dell d'installation facile inclut des invites pour configurer les informations du réseau pour l'interface du VLAN 1 sur les commutateurs Série N1100-ON. Vous pouvez attribuer une adresse IP statique et un masque de - Dell PowerSwitch N1100-ON | Networking N1100-ON Series Switches Getting Started - Page 53
les valeurs par défaut. REMARQUE: Si vous n'exécutez pas l'Assistant Dell d'installation facile ou si vous ne répondez pas dans les 60 secondes à vous au Guide de référence de l'interface CLI. Ce Getting Started Guide (Guide de mise en route) explique comment utiliser l'Assistant Dell d'installation - Dell PowerSwitch N1100-ON | Networking N1100-ON Series Switches Getting Started - Page 54
Exemple de session Cette section décrit une session Assistant Dell d'installation facile. Les valeurs suivantes sont utilisées dans la session : • La chaîne de communauté SNMP définies, la valeur acceptée est la valeur par défaut. Le texte d'aide est entre parenthèses. Guide de mise en route 53 - Dell PowerSwitch N1100-ON | Networking N1100-ON Series Switches Getting Started - Page 55
and/or email address) which would be used to provide technical support for your Dell products and services Dell may use the information for providing recommendations to improve your IT infrastructure. Dell SupportAssist also collects and stores machine diagnostic information, which may include - Dell PowerSwitch N1100-ON | Networking N1100-ON Series Switches Getting Started - Page 56
sending the switch's service tag Dell Easy Setup Wizard The setup wizard guides you through the initial switch configuration, and gets you up and running as quickly as possible. You can skip the setup wizard, and enter CLI mode to manually configure the switch - Dell PowerSwitch N1100-ON | Networking N1100-ON Series Switches Getting Started - Page 57
Step 1: The system is not set up for SNMP management by default. To manage the switch using SNMP (required for Dell Network Manager) you can . Set up the initial SNMP version 2 account now. . Return (0.0.0.0) to manage from any Management Station. [0.0.0.0]: 10.1.2.100 56 Guide de mise en route - Dell PowerSwitch N1100-ON | Networking N1100-ON Series Switches Getting Started - Page 58
. To access the switch through any Management Interface you can . Set up the IP address for the Management Interface. . Set up the default gateway if IP address is manually configured on the routing interface. Step the IP subnet mask (A.B.C.D or /nn): 255.255.255.0 Step 5: Guide de mise en route 57 - Dell PowerSwitch N1100-ON | Networking N1100-ON Series Switches Getting Started - Page 59
interface de routage VLAN 1, entrez show ip interface. Pour accéder à l'interface d'administrateur de commutateur Dell OpenManage, entrez l'adresse IP de l'interface de gestion VLAN 1 dans le champ d'adresse d'un de ligne de commande locale pour accéder au commutateur. 58 Guide de mise en route - Dell PowerSwitch N1100-ON | Networking N1100-ON Series Switches Getting Started - Page 60
Les commutateurs Série N1100-ON prennent en charge les fonctions de commutation de base telles que -vous au User Configuration Guide (Guide de configuration utilisateur) ou au CLI Reference Guide (Guide de référence de l'interface CLI) disponibles sur le site dell.com/support. Guide de mise en route - Dell PowerSwitch N1100-ON | Networking N1100-ON Series Switches Getting Started - Page 61
S'il n'est pas installé et utilisé conformément aux instructions, cet équipement peut causer des interférences nuisibles aux communications afin de respecter les limites d'émissions établies par la FCC. Dell EMC n'est pas responsable des interférences nuisibles à la réception Guide de mise en route - Dell PowerSwitch N1100-ON | Networking N1100-ON Series Switches Getting Started - Page 62
édition • EN 60825-1, 1re édition • EN 60825-1 Sécurité des appareils à laser - Partie 1 : classification des matériels, prescriptions et guide de l'utilisateur • EN 60825-2 Sécurité des appareils à laser - Partie 2 : sécurité des systèmes de télécommunication par fibres optiques • Réglementations - Dell PowerSwitch N1100-ON | Networking N1100-ON Series Switches Getting Started - Page 63
propriétaires d'équipement informatique à recycler de manière responsable leur matériel lorsqu'il n'est plus utilisé. Dell EMC propose un large éventail de programmes et de services de retour de produits dans plusieurs pays pour aider les propriétaires à recycler leur équipement informatique. 62 - Dell PowerSwitch N1100-ON | Networking N1100-ON Series Switches Getting Started - Page 64
Switches Dell Comutadores N1108T-ON/ N1108P-ON/N1108EP-ON/ N1124T-ON/N1124P-ON/ N1148T-ON/N1148P-ON Guia de Noções Básicas Modelos normativos: E17W e E18W - Dell PowerSwitch N1100-ON | Networking N1100-ON Series Switches Getting Started - Page 65
os direitos reservados. Este produto é protegido por leis de direitos autorais e de propriedade intelectual internacionais e dos EUA. Dell e o logotipo Dell são marcas comerciais da Dell Inc. nos Estados Unidos e/ou em outras jurisdições. Todas as outras marcas e os nomes aqui mencionados podem ser - Dell PowerSwitch N1100-ON | Networking N1100-ON Series Switches Getting Started - Page 66
67 Consumo de energia de comutadores PoE Série N1100-ON 67 Sistema de ventilação 68 Resumo do modelo Série N1100-ON 69 2 Instalação do N1108T-ON/N1108P-ON/ N1108EP-ON 70 Montar um comutador N1108T-ON/N1108P-ON usando a bandeja em série Dell 70 Montar um N1108T-ON/N1108P-ON/N1108EP-ON em - Dell PowerSwitch N1100-ON | Networking N1100-ON Series Switches Getting Started - Page 67
ONConectar um comutador a uma fonte de alimentação 79 Conexão de alimentação CA e CC 79 Inicializar o comutador Série N1100-ON 80 Executar a configuração inicial do Série N1100-ON . . 81 Habilitar o gerenciamento remoto 81 Procedimento de configuração inicial 82 Sessão de exemplo 83 Exemplo do - Dell PowerSwitch N1100-ON | Networking N1100-ON Series Switches Getting Started - Page 68
Switches Dell Série N1100-ON, inclusive a forma de instalar o comutador e executar a configuração inicial. Para obter informações sobre como configurar e monitorar os recursos do comutador, consulte o Guia de configuração usuário, que está disponível no site de suporte da Dell em dell.com/support - Dell PowerSwitch N1100-ON | Networking N1100-ON Series Switches Getting Started - Page 69
Modelo Tensão de entrada N1108EP-ON 100V/60Hz 110V/60Hz 120V/60Hz 220V/50Hz 240V/50Hz N1124P-ON 100V/60Hz 110V/60Hz 120V/60Hz 220V/50Hz 240V/50Hz N1148P-ON 100V/60Hz 110V/60Hz 120V/60Hz 220V/50Hz 240V/50Hz Configuração de fonte Consumo de Potência de alimentação corrente contínua contínua - Dell PowerSwitch N1100-ON | Networking N1100-ON Series Switches Getting Started - Page 70
-ON Tabela 1-2. Números normativos de comutador Série N1100-ON Nome do Descrição modelo de comercialização (MMN) Fonte de alimentação (PSU) Número de modelo normativo (RMN) N1108T-ON 10 portas SFP de 1G/2 portas - Dell PowerSwitch N1100-ON | Networking N1100-ON Series Switches Getting Started - Page 71
um comutador N1108T-ON/N1108P-ON usando a bandeja em série Dell O conector de alimentação CA está no painel traseiro. ADVERTÊNCIA N1108T-ON/N1108P-ON no kit da bandeja em série Dell, conforme exibido na Figura 1-1. Figura 1-1. Kit de bandeja em série Dell 2 Insira o comutador no rack de 48,26 cm ( - Dell PowerSwitch N1100-ON | Networking N1100-ON Series Switches Getting Started - Page 72
3 Fixe o kit no rack com parafusos de rack ou porcas gaiola e parafusos de porca gaiola com arruelas (dependendo do tipo de rack que você possui). Aperte os parafusos na parte inferior antes de apertar os parafusos na parte superior. Montar um N1108T-ON/N1108P-ON/N1108EP-ON em um rack de dois postes - Dell PowerSwitch N1100-ON | Networking N1100-ON Series Switches Getting Started - Page 73
3 Repita o processo no outro lado do comutador. 4 Insira o comutador e o conjunto do trilho no rack pela parte frontal do rack. Certifique-se de que os orifícios de montagem em rack no comutador estejam alinhados com os orifícios de montagem no rack. 5 Prenda o comutador ao rack com os parafusos do - Dell PowerSwitch N1100-ON | Networking N1100-ON Series Switches Getting Started - Page 74
3 Insira os parafusos fornecidos nos orifícios do suporte de montagem em parede e aperte-os com uma chave de fenda. Consulte Figura 1-4. Figura 1-4. Inserir suportes de montagem 4 Repita o processo para instalar o suporte de montagem em parede no outro lado do comutador. 5 Coloque o comutador na - Dell PowerSwitch N1100-ON | Networking N1100-ON Series Switches Getting Started - Page 75
Figura 1-5. Montagem em uma parede 74 Guia de Noções Básicas - Dell PowerSwitch N1100-ON | Networking N1100-ON Series Switches Getting Started - Page 76
Instalação dos modelos N1124T-ON/ N1124P-ON/N1148T-ON/ N1148P-ON Montagem em rack dos comutadores N1124T-ON/ N1124P-ON/ N1148T-ON/ N1148P-ON ADVERTÊNCIA: Leia as informações de segurança em Informações sobre segurança e regulamentações, bem como as informações de segurança para outros comutadores - Dell PowerSwitch N1100-ON | Networking N1100-ON Series Switches Getting Started - Page 77
pré-rosqueados do rack. NOTA: Certifique-se de que os orifícios de ventilação não estejam obstruídos. Como instalar como um comutador autônomo NOTA: A Dell recomenda montar o comutador em um rack. Instale o comutador em uma superfície plana se não for instalá-lo em um rack. A superfície deve ser - Dell PowerSwitch N1100-ON | Networking N1100-ON Series Switches Getting Started - Page 78
Iniciar e configurar o comutador Série N1100-ON O fluxograma a seguir fornece uma visão geral das etapas que você usa para fazer a configuração inicial depois que o comutador é desembalado e montado. Figura 1-7. Fluxograma de instalação e configuração Guia de Noções Básicas 77 - Dell PowerSwitch N1100-ON | Networking N1100-ON Series Switches Getting Started - Page 79
Série N1100-ON em um terminal Após completar todas as conexões externas, configure o comutador conectando a um terminal. NOTA: Antes de continuar, leia as Notas de versão do produto. Você pode fazer o download das Notas de versão no site de suporte da Dell em dell.com/support. NOTA: A Dell recomenda - Dell PowerSwitch N1100-ON | Networking N1100-ON Series Switches Getting Started - Page 80
cabo diretamente à porta do console do comutador. A porta de console Switches Dell está localizada no lado direito do painel frontal e está identificada USB por vez. Série N1100-ONConectar um comutador a uma fonte de alimentação AVISO: Leia as informações de segurança no manual de Informações sobre - Dell PowerSwitch N1100-ON | Networking N1100-ON Series Switches Getting Started - Page 81
Inicializar o comutador Série N1100-ON Quando a alimentação é ativada com o terminal local já conectado, o comutador passará pelo teste automático de inicialização (POST). O POST é executado toda vez que o dispositivo é inicializado e examina - Dell PowerSwitch N1100-ON | Networking N1100-ON Series Switches Getting Started - Page 82
Executar a configuração inicial do Série N1100-ON O procedimento de configuração inicial é baseado nas suposições a seguir: • O comutador Switches Dell nunca foi configurado antes. • O comutador Switches Dell foi inicializado com sucesso. • A conexão do console foi estabelecida e o prompt Assistente - Dell PowerSwitch N1100-ON | Networking N1100-ON Series Switches Getting Started - Page 83
Referência de interface de linha de comando (CLI). Este Guia de Noções Básicas mostra como usar o Assistente de configuração fácil Dell para a configuração inicial do comutador. O assistente define a seguinte configuração no comutador: • Estabelece a conta de usuário com privilégios iniciais com uma - Dell PowerSwitch N1100-ON | Networking N1100-ON Series Switches Getting Started - Page 84
Sessão de exemplo Esta seção descreve uma sessão Assistente de configuração fácil Dell. Os valores a seguir são usados na sessão de exemplo: • A string de comunidade SNMP a ser usada é public. • O endereço IP do sistema de gerenciamento de rede (NMS) é 10.1.2. - Dell PowerSwitch N1100-ON | Networking N1100-ON Series Switches Getting Started - Page 85
and/or email address) which would be used to provide technical support for your Dell products and services Dell may use the information for providing recommendations to improve your IT infrastructure. Dell SupportAssist also collects and stores machine diagnostic information, which may include - Dell PowerSwitch N1100-ON | Networking N1100-ON Series Switches Getting Started - Page 86
sending the switch's service tag Dell Easy Setup Wizard The setup wizard guides you through the initial switch configuration, and gets you up and running as quickly as possible. You can skip the setup wizard, and enter CLI mode to manually configure the switch - Dell PowerSwitch N1100-ON | Networking N1100-ON Series Switches Getting Started - Page 87
must answer this question within 60 seconds)? [Y/N] y Step 1: The system is not set up for SNMP management by default. To manage the switch using SNMP (required for Dell Network Manager) you can . Set up the initial SNMP version 2 account now. . Return later and set up other SNMP accounts. (For more - Dell PowerSwitch N1100-ON | Networking N1100-ON Series Switches Getting Started - Page 88
. To access the switch through any Management Interface you can . Set up the IP address for the Management Interface. . Set up the default gateway if IP address is manually configured on the routing interface. Step 4: Would you like to set up the VLAN1 routing interface now? [Y/N] y Please enter - Dell PowerSwitch N1100-ON | Networking N1100-ON Series Switches Getting Started - Page 89
-up configuration file. If the information is incorrect, enter (N) to discard the configuration and restart the wizard: [Y/N] y Thank you for using the Dell Easy Setup Wizard. You will now enter CLI mode. Applying Interface configuration, please wait... Próximos passos Depois de concluir a configura - Dell PowerSwitch N1100-ON | Networking N1100-ON Series Switches Getting Started - Page 90
continue a usar a porta do console para o acesso ao CLI local ao comutador. Os comutadores Série N1100-ON oferecem suporte a recursos de comutação básicos como VLANs e protocolo de árvore de abrangência. comando (CLI) disponível no site de suporte: site dell.com/support. Guia de Noções Básicas 89 - Dell PowerSwitch N1100-ON | Networking N1100-ON Series Switches Getting Started - Page 91
ência a seu próprio custo. Cabos e conectores adequadamente blindados e aterrados devem ser usados para atender aos limites de emissão de FCC. A Dell EMC não é responsável por qualquer interferência de rádio ou televisão causada por usar outros cabos e conectores que não os recomendados ou por - Dell PowerSwitch N1100-ON | Networking N1100-ON Series Switches Getting Started - Page 92
Figura 1-8. Declaração do Ministério de Comunicação do Canadá Padrões de segurança e certificações da entidade de conformidade • IEC 62368-1, 2ª edição • CUS UL 60950-1, 2ª edição • Atende ou supera os testes de continuidade de aterramento e de Hi Pot de acordo com a UL 60950-1. • AS/NZS 60950 • - Dell PowerSwitch N1100-ON | Networking N1100-ON Series Switches Getting Started - Page 93
os proprietários de equipamentos de tecnologia da informação a reciclar seus equipamentos de maneira responsável quando eles não forem mais necessários. A Dell EMC oferece uma variedade de programas e serviços de devolução de produtos em vários países para ajudar os proprietários de equipamentos - Dell PowerSwitch N1100-ON | Networking N1100-ON Series Switches Getting Started - Page 94
Conmutadores de Dell Conmutadores N1108T-ON/ N1108P-ON/N1108EP-ON/ N1124T-ON/N1124P-ON/ N1148T-ON/N1148P-ON Guía de introducción Modelos regulatorios: E17W y E18W - Dell PowerSwitch N1100-ON | Networking N1100-ON Series Switches Getting Started - Page 95
el dispositivo, asegúrese de que la conexión a tierra de protección del enchufe o de la toma sea verificada por una persona capacitada. © 2019 Dell Inc. o de sus filiales. Todos los derechos reservados. Este producto está protegido por patentes de EE. UU. y por las leyes de propiedad intelectual - Dell PowerSwitch N1100-ON | Networking N1100-ON Series Switches Getting Started - Page 96
. 97 Consumo de energía para conmutadores PoE N1100-ON Series 97 Sistema de ventilación 99 Resumen del modelo N1100-ON Series 99 2 N1108T-ON/N1108P-ON/Instalación de N1108EP-ON 100 Montaje de un switch N1108T-ON/N1108P-ON mediante la bandeja de tándem de Dell 100 Montaje de un N1108T-ON/N1108P - Dell PowerSwitch N1100-ON | Networking N1100-ON Series Switches Getting Started - Page 97
110 Cómo realizar la configuración inicial de N1100-ON Series 111 Activación de la administración remota . . . . . 111 Procedimiento para la configuración inicial . . . 112 Ejemplo de sesión 113 Ejemplo de consola Asistente de configuración rápida de Dell 114 Próximos pasos 118 5 Cumplimiento de - Dell PowerSwitch N1100-ON | Networking N1100-ON Series Switches Getting Started - Page 98
que está disponible en el sitio web de asistencia de Dell en dell.com/support. Consulte el sitio web de asistencia técnica para obtener las y las configuraciones de hardware para el conmutadorConmutadores de Dell N1100-ON Series. NOTA: El switch N1108EP-ON usa un adaptador de alimentación externo. - Dell PowerSwitch N1100-ON | Networking N1100-ON Series Switches Getting Started - Page 99
Tabla 1-1. Consumo de energía para conmutadores PoE N1100-ON Series Modelo Voltaje de entrada Configuración de la fuente de alimentación Consumo de Potencia corriente fijo fija máxima máximo (A) (W) N1108P-ON 100 V/60 Hz PSU principal 0, - Dell PowerSwitch N1100-ON | Networking N1100-ON Series Switches Getting Started - Page 100
N1048T-ON/ N1048P-ON. Los ventiladores no son sustituibles en campo. N1108EP-ON es un switch sin ventilador. Resumen del modelo N1100-ON Series Tabla 1-2. Números reglamentarios del conmutador N1100-ON Series Nombre del modelo de marketing (MMN) Descripción Unidad de fuente de alimentación (PSU - Dell PowerSwitch N1100-ON | Networking N1100-ON Series Switches Getting Started - Page 101
PRECAUCIÓN: Cuando monte varios conmutadores en un bastidor, empiece desde abajo. 1 Fije el switch N1108T-ON/N1108P-ON en el kit de bandeja de tándem de Dell, como se muestra en Figura 1-1. Figura 1-1. Kit de bandeja Tandem Dell 2 Inserte el conmutador en el bastidor de 48,26 cm (19 pulg.), asegur - Dell PowerSwitch N1100-ON | Networking N1100-ON Series Switches Getting Started - Page 102
N1108T-ON/N1108P-ON. El conector de alimentación de CC para el N1108EP-ON se encuentra en el centro del panel posterior. NOTA: El switch N1108EP-ON usa un adaptador de alimentación externo. No hay ningún kit de montaje disponible para el adaptador de alimentación externo N1108EP-ON. Cuando instale - Dell PowerSwitch N1100-ON | Networking N1100-ON Series Switches Getting Started - Page 103
de ajustar el de la parte superior. Consulte el apartado Figura 1-3. Figura 1-3. Instale en un rack de dos postes con soporte L Montaje de todos los switches N11xx-ON en pared 1 Asegúrese de que la ubicación de montaje cumpla con los requisitos siguientes: • La superficie de la pared puede soportar - Dell PowerSwitch N1100-ON | Networking N1100-ON Series Switches Getting Started - Page 104
la pared en la ubicación donde se instalará el conmutador. 6 En la pared, marque las posiciones donde deberán ir los tornillos para sujetar el switch. 7 En las posiciones marcadas, taladre los orificios y coloque los ocho puntos de ancla enviados en los orificios. 8 Inserte los tornillos enviados en - Dell PowerSwitch N1100-ON | Networking N1100-ON Series Switches Getting Started - Page 105
Figura 1-5. Montaje en pared 104 Guía de introducción - Dell PowerSwitch N1100-ON | Networking N1100-ON Series Switches Getting Started - Page 106
Instalación de N1124T-ON/N1124PON/N1148T-ON/ N1148P-ON Montaje en bastidor de un conmutador N1124T-ON/ N1124P-ON/ N1148T-ON/ N1148P-ON AVISO: Lea la información de seguridad en Información reglamentaria y de seguridad, así como la información de seguridad para otros conmutadores que se conectan al - Dell PowerSwitch N1100-ON | Networking N1100-ON Series Switches Getting Started - Page 107
los orificios del bastidor. NOTA: Asegúrese de que los orificios de ventilación no están obstruidos. Instalación como conmutador independiente NOTA: Dell recomienda encarecidamente montar el conmutador en un bastidor. Coloque el conmutador en una superficie plana si no va a instalarlo en un bastidor - Dell PowerSwitch N1100-ON | Networking N1100-ON Series Switches Getting Started - Page 108
Inicio y configuración del conmutador N1100-ON Series El siguiente diagrama de flujo proporciona una descripción general de los pasos que debe seguir para realizar la configuración inicial una vez que el conmutador - Dell PowerSwitch N1100-ON | Networking N1100-ON Series Switches Getting Started - Page 109
-ON Series a un terminal Una vez realizadas todas las conexiones externas, configure el conmutador conectándolo a un terminal. NOTA: Lea las notas de publicación de este producto antes de continuar. Puede descargar las notas de publicación de la página web de asistencia de Dell en dell.com/support - Dell PowerSwitch N1100-ON | Networking N1100-ON Series Switches Getting Started - Page 110
de la consola del conmutador. El puerto de la consola Conmutadores de Dell se encuentra en el lado derecho del panel frontal y está etiquetado compatible. N1100-ON SeriesConexión de un conmutador a una fuente de alimentación PRECAUCIÓN: Lea la información de seguridad en el manual Información - Dell PowerSwitch N1100-ON | Networking N1100-ON Series Switches Getting Started - Page 111
Inicio del conmutador N1100-ON Series Cuando se enciende la alimentación con el terminal local ya conectado, el conmutador realiza una autoprueba de encendido (POST). La autoprueba POST se ejecuta cada - Dell PowerSwitch N1100-ON | Networking N1100-ON Series Switches Getting Started - Page 112
puertos en banda son miembros de la red VLAN 1. El Asistente de configuración rápida de Dell incluye indicadores para configurar la información de red de la interfaz VLAN 1 en los switches N1100-ON Series. Puede asignar una dirección IP estática y la máscara de subred o habilitar DHCP y habilitar un - Dell PowerSwitch N1100-ON | Networking N1100-ON Series Switches Getting Started - Page 113
de inicio vacía para volver a ejecutar Asistente de configuración rápida de Dell. Para obtener más información acerca de cómo llevar a cabo la introducción muestra cómo utilizar Asistente de configuración rápida de Dell durante la configuración inicial del conmutador. El asistente establece la - Dell PowerSwitch N1100-ON | Networking N1100-ON Series Switches Getting Started - Page 114
Ejemplo de sesión Esta sección describe una sesión Asistente de configuración rápida de Dell. Los siguientes valores se utilizan en la sesión de ejemplo: • La cadena de comunidad SNMP que se utiliza es pública. • La dirección IP del sistema - Dell PowerSwitch N1100-ON | Networking N1100-ON Series Switches Getting Started - Page 115
and/or email address) which would be used to provide technical support for your Dell products and services Dell may use the information for providing recommendations to improve your IT infrastructure. Dell SupportAssist also collects and stores machine diagnostic information, which may include - Dell PowerSwitch N1100-ON | Networking N1100-ON Series Switches Getting Started - Page 116
sending the switch's service tag Dell Easy Setup Wizard The setup wizard guides you through the initial switch configuration, and gets you up and running as quickly as possible. You can skip the setup wizard, and enter CLI mode to manually configure the switch - Dell PowerSwitch N1100-ON | Networking N1100-ON Series Switches Getting Started - Page 117
must answer this question within 60 seconds)? [Y/N] y Step 1: The system is not set up for SNMP management by default. To manage the switch using SNMP (required for Dell Network Manager) you can . Set up the initial SNMP version 2 account now. . Return later and set up other SNMP accounts. (For more - Dell PowerSwitch N1100-ON | Networking N1100-ON Series Switches Getting Started - Page 118
. To access the switch through any Management Interface you can . Set up the IP address for the Management Interface. . Set up the default gateway if IP address is manually configured on the routing interface. Step 4: Would you like to set up the VLAN1 routing interface now? [Y/N] y Please enter - Dell PowerSwitch N1100-ON | Networking N1100-ON Series Switches Getting Started - Page 119
comando: • Para la interfaz de enrutamiento VLAN 1, introduzca mostrar ip de la interfaz. Para acceder a la interfaz del administrador de conmutadores OpenManage de Dell, introduzca la dirección IP de la interfaz de administración VLAN 1 en el campo de dirección de un navegador de Internet. Para la - Dell PowerSwitch N1100-ON | Networking N1100-ON Series Switches Getting Started - Page 120
para utilizar el puerto de la consola para acceder al CLI local del conmutador. Los conmutadores N1100-ON Series admiten características de conmutación como VLAN y el protocolo de árbol de extensión. o Guía de referencia de la CLI disponibles en la web: dell.com/support. Guía de introducción 119 - Dell PowerSwitch N1100-ON | Networking N1100-ON Series Switches Getting Started - Page 121
Cumplimiento de normas de agencia Los switches N1108T-ON, N1108P-ON, N1108EP-ON, N1124T-ON, N1124P-ON, N1148T a tierra correctamente blindados para cumplir con los límites de emisión de la FCC. Dell EMC no es responsable de las interferencias de radio o televisión ocasionadas por usar conectores y - Dell PowerSwitch N1100-ON | Networking N1100-ON Series Switches Getting Started - Page 122
Figura 1-8. Declaración del departamento canadiense de comunicación Certificaciones de agencias de cumplimiento de normas y estándares de seguridad • IEC 62368-1, 2.ª edición • CUS UL 60950-1, 2.ª edición • Cumple con o supera los requisitos de UL 60950-1 de pruebas de continuidad de conexión a - Dell PowerSwitch N1100-ON | Networking N1100-ON Series Switches Getting Started - Page 123
recomienda a los propietarios de tecnología de la información (TI) que reciclen sus equipos de manera responsable cuando ya no sean necesarios. Dell EMC ofrece una variedad de programas y servicios de devolución de productos en varios países, para ayudar a los propietarios de equipos a reciclar sus - Dell PowerSwitch N1100-ON | Networking N1100-ON Series Switches Getting Started - Page 124
de Santa Fe Delegación Álvaro Obregón, Ciudad de México. C.P. 01219 R.F.C: DME9204099R6 Dell México, S.A. de C.V Av. Javier Barros Sierra, no 540, Piso 10, Col de DellN1100-ON Series: 100 V-240 V CA Conmutadores de DellN1100-ON Series: 50-60 Hz Conmutadores de DellN1100-ON Series: • Consulte la - Dell PowerSwitch N1100-ON | Networking N1100-ON Series Switches Getting Started - Page 125
124 Guía de introducción - Dell PowerSwitch N1100-ON | Networking N1100-ON Series Switches Getting Started - Page 126
Guía de introducción 125 - Dell PowerSwitch N1100-ON | Networking N1100-ON Series Switches Getting Started - Page 127
126 Guía de introducción - Dell PowerSwitch N1100-ON | Networking N1100-ON Series Switches Getting Started - Page 128
www.dell.com | dell.com/support
-
 1
1 -
 2
2 -
 3
3 -
 4
4 -
 5
5 -
 6
6 -
 7
7 -
8
-
9
-
10
-
11
-
12
-
13
-
14
-
15
-
16
-
17
-
18
-
19
-
20
-
21
-
22
-
23
-
24
-
25
-
26
-
27
-
28
-
29
-
30
-
31
-
32
-
33
-
34
-
35
-
36
-
37
-
38
-
39
-
40
-
41
-
42
-
43
-
44
-
45
-
46
-
47
-
48
-
49
-
50
-
51
-
52
-
53
-
54
-
55
-
56
-
57
-
58
-
59
-
60
-
61
-
62
-
63
-
64
-
65
-
66
-
67
-
68
-
69
-
70
-
71
-
72
-
73
-
74
-
75
-
76
-
77
-
78
-
79
-
80
-
81
-
82
-
83
-
84
-
85
-
86
-
87
-
88
-
89
-
90
-
91
-
92
-
93
-
94
-
95
-
96
-
97
-
98
-
99
-
100
-
101
-
102
-
103
-
104
-
105
-
106
-
107
-
108
-
109
-
110
-
111
-
112
-
113
-
114
-
115
-
116
-
117
-
118
-
119
-
120
-
121
-
122
-
123
-
124
-
125
-
126
-
127
-
128
 |
 |

Dell Networking
N1108T-ON/N1108P-ON/
N1108EP-ON/N1124T-ON/
N1124P-ON/N1148T-ON/
N1148P-ON Switches
Getting Started Guide
Guide de mise en route
Guia de Noções Básicas
Guía de introducción
Regulatory Model: E17W and E18W
Regulatory Type: E17W001/E18W001/E18W002