Dell PowerVault 200S Dell PowerVault 200S and 210S Storage Systems Rack I
Dell PowerVault 200S Manual
 |
View all Dell PowerVault 200S manuals
Add to My Manuals
Save this manual to your list of manuals |
Dell PowerVault 200S manual content summary:
- Dell PowerVault 200S | Dell PowerVault 200S and 210S Storage Systems Rack I - Page 1
- Dell PowerVault 200S | Dell PowerVault 200S and 210S Storage Systems Rack
I - Page 2
reserved. Reproduction in any manner whatsoever without the written permission of Dell Computer Corporation is strictly forbidden. Trademarks used in this text: Dell, the DELL logo, PowerEdge, and PowerVault are trademarks of Dell Computer Corporation. Other trademarks and trade names may be used in - Dell PowerVault 200S | Dell PowerVault 200S and 210S Storage Systems Rack
I - Page 3
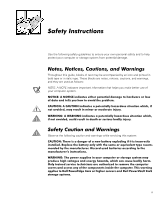
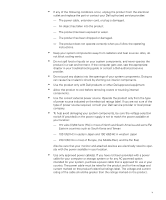
to ensure your own personal safety and to help protect your computer or storage system from potential damage. Throughout this guide, blocks of text may be accompanied by an icon and printed in bold your computer system. Observe the following caution and warnings while servicing this system: iii - Dell PowerVault 200S | Dell PowerVault 200S and 210S Storage Systems Rack
I - Page 4
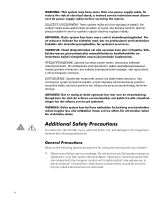
. Observe the following general precautions for using and working with your system: Observe and follow service markings. Do not service any Dell product except as explained in your Dell system documentation. Opening or removing covers that are marked with the triangular symbol with a lightning - Dell PowerVault 200S | Dell PowerVault 200S and 210S Storage Systems Rack
I - Page 5
your troubleshooting guide or contact a Dell-authorized service provider. power source required, consult your Dell service provider or local power company. To help avoid damaging your system components, be sure the voltage selection switch (if provided) on the power supply is set to match the power - Dell PowerVault 200S | Dell PowerVault 200S and 210S Storage Systems Rack
I - Page 6
storage system equipment and trained to deal with products capable of producing hazardous energy levels. When connecting or disconnecting power to hot-pluggable power supplies, if offered with your Dell product, observe the following guidelines: - Install the power supply before connecting the power - Dell PowerVault 200S | Dell PowerVault 200S and 210S Storage Systems Rack
I - Page 7
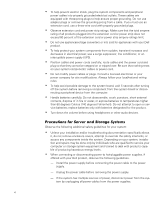
the rack meets the specifications of a Dell rack. Do not move large racks by yourself. Due to the height and weight of the rack, Dell recommends a minimum of the component into the rack. Do not overload the AC supply branch circuit that provides power to the rack. The total rack load should not - Dell PowerVault 200S | Dell PowerVault 200S and 210S Storage Systems Rack
I - Page 8
cable into the network interface controller (NIC) receptacle. Disconnect the modem cable before opening a product enclosure, touching or installing documentation. Only authorized service technicians should repair laser devices. Before you remove the computer covers, perform the following steps - Dell PowerVault 200S | Dell PowerVault 200S and 210S Storage Systems Rack
I - Page 9
3. Disconnect your computer and devices from their power sources. Also, disconnect any telephone or telecommunication lines from the computer. Doing so reduces the potential for personal injury or shock. In addition, take note - Dell PowerVault 200S | Dell PowerVault 200S and 210S Storage Systems Rack
I - Page 10
as you work. Special shelves are available (from Dell and other sources) to help you correctly position Use a chair that provides good lower back support. Keep your forearms horizontal with your wrists in your thighs level. When sitting, make sure the weight of your legs is on your feet and not on - Dell PowerVault 200S | Dell PowerVault 200S and 210S Storage Systems Rack
I - Page 11
wrists relaxed and flat arms at desk level monitor screen at or below eye level monitor and keyboard positioned directly in front of user feet flat on the floor xi - Dell PowerVault 200S | Dell PowerVault 200S and 210S Storage Systems Rack
I - Page 12
xii - Dell PowerVault 200S | Dell PowerVault 200S and 210S Storage Systems Rack
I - Page 13
Ears 1-10 Installing the Storage System in the Rack 1-11 Replacing the Doors 1-12 Support Rail Assembly to the Front Vertical Rail 1-8 Figure 1-8. Attaching the Support Rail Assembly to the Back Vertical Rail 1-9 Figure 1-9. Installing the Mounting Ears 1-10 Figure 1-10. Installing the Storage - Dell PowerVault 200S | Dell PowerVault 200S and 210S Storage Systems Rack
I - Page 14
xiv - Dell PowerVault 200S | Dell PowerVault 200S and 210S Storage Systems Rack
I - Page 15
This document provides instructions for trained service technicians installing Dell PowerVault 200S and 210S storage systems in a Dell rack. For information on the stand-alone configuration, see your Installation and Service Guide. A rack installation kit is available from Dell for installing one or - Dell PowerVault 200S | Dell PowerVault 200S and 210S Storage Systems Rack
I - Page 16
installing your PowerVault system in the rack, carefully read the safety precautions at the front of this guide and tool requirements in the following subsection. To install the rack kit in the rack, you will need a #2 Phillips-head screwdriver. 1-2 Dell PowerVault 200S and 210S Storage Systems - Dell PowerVault 200S | Dell PowerVault 200S and 210S Storage Systems Rack
I - Page 17
latch on the front door. If you have a 24-U (1 U=1.75-inches) rack cabinet, unlock and twist the handle clockwise and open the door (see Figure 1-2). support.dell.com Dell PowerVault 200S and 210S Storage Systems Rack Installation Guide 1-3 - Dell PowerVault 200S | Dell PowerVault 200S and 210S Storage Systems Rack
I - Page 18
front door of the rack. If you have a 24-U rack cabinet, perform the following steps to remove the front door (see Figure 1-4): a. With the door open, lift out and fully retract all hinge pins. b. Lift the door out carefully. 1-4 Dell PowerVault 200S and 210S Storage Systems Rack Installation Guide - Dell PowerVault 200S | Dell PowerVault 200S and 210S Storage Systems Rack
I - Page 19
hinge pin hinge insert hinge If you have a 42-U rack cabinet, perform the following steps to remove the front door (see Figure 1-5): a. One person the top hinge and then pull the door away from the rack. support.dell.com Dell PowerVault 200S and 210S Storage Systems Rack Installation Guide 1-5 - Dell PowerVault 200S | Dell PowerVault 200S and 210S Storage Systems Rack
I - Page 20
rail-mounting flanges are not already attached to the support rails, attach one flange to each of the support rails using two 10-32 x 1/2-inch pan-head screws, as shown in Figure 1-6. Do not tighten the screws at this time. 1-6 Dell PowerVault 200S and 210S Storage Systems Rack Installation Guide - Dell PowerVault 200S | Dell PowerVault 200S and 210S Storage Systems Rack
I - Page 21
per rail assembly) Do not tighten. rail-mounting flange 3. Place the flange of the support rail assembly behind the right-front vertical rail of the rack. Thread two 10-32 the surface of the vertical rail. support.dell.com Dell PowerVault 200S and 210S Storage Systems Rack Installation Guide 1-7 - Dell PowerVault 200S | Dell PowerVault 200S and 210S Storage Systems Rack
I - Page 22
through the back vertical rail of the rack and into the two holes of the adjustable rail-mounting flange (see Figure 1-8). Tighten the two screws. 1-8 Dell PowerVault 200S and 210S Storage Systems Rack Installation Guide - Dell PowerVault 200S | Dell PowerVault 200S and 210S Storage Systems Rack
I - Page 23
6. Tighten the two 10-32 x 1/2-inch pan-head screws that attach the adjustable railmounting flange to the support rail (see Figure 1-8). 7. Repeat steps 2 through 6 to install the second support rail. support.dell.com Dell PowerVault 200S and 210S Storage Systems Rack Installation Guide 1-9 - Dell PowerVault 200S | Dell PowerVault 200S and 210S Storage Systems Rack
I - Page 24
mounting ears onto the sides of the storage system, perform the following steps: 1. Locate the slot at the front-right side of the storage system. 2. Insert a mounting ear into 1 through 4 to install the left mounting ear. 1-10 Dell PowerVault 200S and 210S Storage Systems Rack Installation Guide - Dell PowerVault 200S | Dell PowerVault 200S and 210S Storage Systems Rack
I - Page 25
the rack and into the threaded holes of the mounting-bracket flange (see Figure 1-10). 3. Perform the steps for connecting your storage system to the host computer as described in your Installation and Service Guide. support.dell.com Dell PowerVault 200S and 210S Storage Systems Rack Installation - Dell PowerVault 200S | Dell PowerVault 200S and 210S Storage Systems Rack
I - Page 26
Figure 1-2). 5. Repeat steps 1 through 4 to replace the back door. To replace the 42-U rack's front and back doors, perform the following steps: 1. Lift the front door 5. Repeat steps 1 through 4 to replace the back door. 1-12 Dell PowerVault 200S and 210S Storage Systems Rack Installation Guide
-
 1
1 -
 2
2 -
 3
3 -
 4
4 -
 5
5 -
 6
6 -
 7
7 -
8
-
9
-
10
-
11
-
12
-
13
-
14
-
15
-
16
-
17
-
18
-
19
-
20
-
21
-
22
-
23
-
24
-
25
-
26
 |
 |

±±±²³´µµ²¶·¸
±
±²³³´µ¶·¸²¹º»¼³½´µ¾¿¿Àµ»Áµ¾Ã¿Àµ
À½·¹»Ä²µÀÅƽ²ÇƵ
±²³´µ¶·¸¹²ºº²¹¶»·µ
¼½¶¾¿