Dell PowerVault NX3500 Administrator's Guide - Page 115
Adding a Local Group, System Management, Authentication, Local Groups, Actions, Add Group
 |
View all Dell PowerVault NX3500 manuals
Add to My Manuals
Save this manual to your list of manuals |
Page 115 highlights
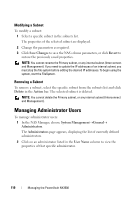
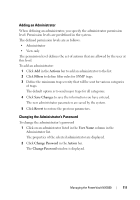
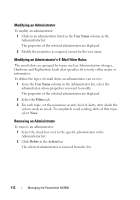
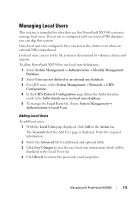
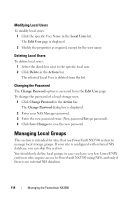
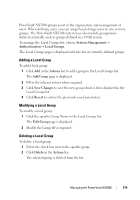
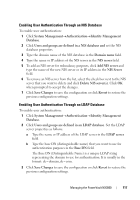
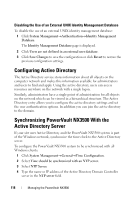
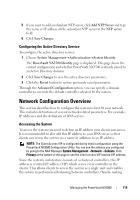
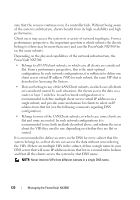
PowerVault NX3500 groups assist in the organization and management of users. When defining users, you can assign local storage users to one or more groups. The PowerVault NX3500 system may also include groups/users defined externally, such as groups defined in a UNIX system. To manage the Local Groups list, choose System Management Authentication Local Groups. The Local Groups page is displayed with the list of currently defined groups. Adding a Local Group To add a local group: 1 Click Add in the Actions bar to add a group to the Local Groups list. The Add Group page is displayed. 2 Fill in the relevant entries where required. 3 Click Save Changes to save the new group which is then displayed in the Local Groups list. 4 Click Revert to restore the previously saved parameters. Modifying a Local Group To modify a local group: 1 Click the specific Group Name in the Local Groups list. The Edit Group page is displayed. 2 Modify the Group ID as required. Deleting a Local Group To delete a local group: 1 Select the check box next to the specific group. 2 Click Delete in the Actions bar. The selected group is deleted from the list. Managing the PowerVault NX3500 115
-
 1
1 -
2
-
3
-
4
-
5
-
6
-
7
-
8
-
9
-
10
-
11
-
12
-
13
-
14
-
15
-
16
-
17
-
18
-
19
-
20
-
21
-
22
-
23
-
24
-
25
-
26
-
27
-
28
-
29
-
30
-
31
-
32
-
33
-
34
-
35
-
36
-
37
-
38
-
39
-
40
-
41
-
42
-
43
-
44
-
45
-
46
-
47
-
48
-
49
-
50
-
51
-
52
-
53
-
54
-
55
-
56
-
57
-
58
-
59
-
60
-
61
-
62
-
63
-
64
-
65
-
66
-
67
-
68
-
69
-
70
-
71
-
72
-
73
-
74
-
75
-
76
-
77
-
78
-
79
-
80
-
81
-
82
-
83
-
84
-
85
-
86
-
87
-
88
-
89
-
90
-
91
-
92
-
93
-
94
-
95
-
96
-
97
-
98
-
99
-
100
-
101
-
102
-
103
-
104
-
105
-
106
-
107
-
108
-
109
-
 110
110 -
 111
111 -
 112
112 -
 113
113 -
 114
114 -
 115
115 -
 116
116 -
 117
117 -
 118
118 -
 119
119 -
 120
120 -
121
-
122
-
123
-
124
-
125
-
126
-
127
-
128
-
129
-
130
-
131
-
132
-
133
-
134
-
135
-
136
-
137
-
138
-
139
-
140
-
141
-
142
-
143
-
144
-
145
-
146
-
147
-
148
-
149
-
150
-
151
-
152
-
153
-
154
-
155
-
156
-
157
-
158
-
159
-
160
-
161
-
162
-
163
-
164
-
165
-
166
-
167
-
168
-
169
-
170
-
171
-
172
-
173
-
174
-
175
-
176
-
177
-
178
-
179
-
180
-
181
-
182
-
183
-
184
-
185
-
186
-
187
-
188
-
189
-
190
-
191
-
192
-
193
-
194
-
195
-
196
-
197
-
198
 |
 |