Dell PowerVault NX3500 Administrator's Guide - Page 144
Removing and Replacing the PowerVault NX3500 Controller, Attaching the PowerVault NX3500 Controller
 |
View all Dell PowerVault NX3500 manuals
Add to My Manuals
Save this manual to your list of manuals |
Page 144 highlights
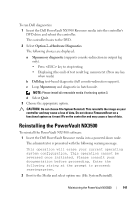
Removing and Replacing the PowerVault NX3500 Controller To remove and replace the PowerVault NX3500 controller: 1 Disconnect all cables from the back of the controller. NOTE: Label the cables by color coding them to indicate client, SAN, internal, and peer ports. 2 Remove the failed system from the rack. 3 Install the new system in the rack. 4 Connect all cables to the new system. Ensure that the network cables are placed in the proper ports. If necessary, refer to the color coding table for client, SAN, internal, and peer port connections included with this document. 5 Place the file system reinstall DVD in the drive and power on the newly replaced PowerVault NX3500 controller. 6 Select the Firmware reset option when the re-install DVD boots to the menu. This process may take some time to complete, and the system may restart numerous times until all the firmwares are updated. Completing this step ensures that the new controller firmwares are up to date. 7 After completing the Firmware reset stage, select the File System Reinstall option from the boot menu. The reinstall process takes around 20-40 minutes to complete depending on the configuration. Attaching the PowerVault NX3500 Controller Before completing this procedure, verify that the controller being attached is in standby mode and powered up. In order to attach the new controller to the cluster, complete the following steps: 1 Plug-in a USB disk-on-key to the peer controller, and create a configuration for the new controller by logging in to the CLI on the management IP address and running the following command: system maintenance controllers save-conf 144 Maintaining the PowerVault NX3500
-
 1
1 -
2
-
3
-
4
-
5
-
6
-
7
-
8
-
9
-
10
-
11
-
12
-
13
-
14
-
15
-
16
-
17
-
18
-
19
-
20
-
21
-
22
-
23
-
24
-
25
-
26
-
27
-
28
-
29
-
30
-
31
-
32
-
33
-
34
-
35
-
36
-
37
-
38
-
39
-
40
-
41
-
42
-
43
-
44
-
45
-
46
-
47
-
48
-
49
-
50
-
51
-
52
-
53
-
54
-
55
-
56
-
57
-
58
-
59
-
60
-
61
-
62
-
63
-
64
-
65
-
66
-
67
-
68
-
69
-
70
-
71
-
72
-
73
-
74
-
75
-
76
-
77
-
78
-
79
-
80
-
81
-
82
-
83
-
84
-
85
-
86
-
87
-
88
-
89
-
90
-
91
-
92
-
93
-
94
-
95
-
96
-
97
-
98
-
99
-
100
-
101
-
102
-
103
-
104
-
105
-
106
-
107
-
108
-
109
-
110
-
111
-
112
-
113
-
114
-
115
-
116
-
117
-
118
-
119
-
120
-
121
-
122
-
123
-
124
-
125
-
126
-
127
-
128
-
129
-
130
-
131
-
132
-
133
-
134
-
135
-
136
-
137
-
138
-
 139
139 -
 140
140 -
 141
141 -
 142
142 -
 143
143 -
 144
144 -
 145
145 -
 146
146 -
 147
147 -
 148
148 -
 149
149 -
150
-
151
-
152
-
153
-
154
-
155
-
156
-
157
-
158
-
159
-
160
-
161
-
162
-
163
-
164
-
165
-
166
-
167
-
168
-
169
-
170
-
171
-
172
-
173
-
174
-
175
-
176
-
177
-
178
-
179
-
180
-
181
-
182
-
183
-
184
-
185
-
186
-
187
-
188
-
189
-
190
-
191
-
192
-
193
-
194
-
195
-
196
-
197
-
198
 |
 |