Dell PowerVault NX3500 Administrator's Guide - Page 55
Completing the Certificate Import Wizard, PowerVault NAS Manager Login
 |
View all Dell PowerVault NX3500 manuals
Add to My Manuals
Save this manual to your list of manuals |
Page 55 highlights
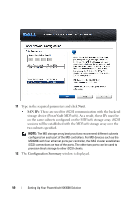
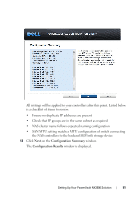
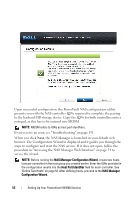
The Welcome window of the Certificate Import Wizard is displayed. 4 Click Next. The Certificate Store window is displayed. 5 Verify that Automatically select the certificate store based on the type of certificate is selected and click Next. The Completing the Certificate Import Wizard window is displayed. 6 Click Finish. A Security Warning window is displayed. 7 Click Yes. A Certificate Import Wizard message is displayed: "The import was successful". 8 Click OK. 9 Click OK in the certificate window also. 10 Access the NAS Manager. The PowerVault License file window is displayed. NOTE: This window is displayed only if the license has not been installed. 11 Browse to the License file and click Install. The PowerVault NAS Manager Login window is displayed. 12 Type the username and password and click Log in. NOTE: Use admin as the username. The default password is Stor@ge!. You have the option of changing the password later. The PowerVault NAS Manager is displayed with the Start Configuration Wizard page open. NOTE: Click System ManagementMaintenanceStart Configuration Wizard, if the Start Configuration page does not open automatically. Setting Up Your PowerVault NX3500 Solution 55
-
 1
1 -
2
-
3
-
4
-
5
-
6
-
7
-
8
-
9
-
10
-
11
-
12
-
13
-
14
-
15
-
16
-
17
-
18
-
19
-
20
-
21
-
22
-
23
-
24
-
25
-
26
-
27
-
28
-
29
-
30
-
31
-
32
-
33
-
34
-
35
-
36
-
37
-
38
-
39
-
40
-
41
-
42
-
43
-
44
-
45
-
46
-
47
-
48
-
49
-
 50
50 -
 51
51 -
 52
52 -
 53
53 -
 54
54 -
 55
55 -
 56
56 -
 57
57 -
 58
58 -
 59
59 -
 60
60 -
61
-
62
-
63
-
64
-
65
-
66
-
67
-
68
-
69
-
70
-
71
-
72
-
73
-
74
-
75
-
76
-
77
-
78
-
79
-
80
-
81
-
82
-
83
-
84
-
85
-
86
-
87
-
88
-
89
-
90
-
91
-
92
-
93
-
94
-
95
-
96
-
97
-
98
-
99
-
100
-
101
-
102
-
103
-
104
-
105
-
106
-
107
-
108
-
109
-
110
-
111
-
112
-
113
-
114
-
115
-
116
-
117
-
118
-
119
-
120
-
121
-
122
-
123
-
124
-
125
-
126
-
127
-
128
-
129
-
130
-
131
-
132
-
133
-
134
-
135
-
136
-
137
-
138
-
139
-
140
-
141
-
142
-
143
-
144
-
145
-
146
-
147
-
148
-
149
-
150
-
151
-
152
-
153
-
154
-
155
-
156
-
157
-
158
-
159
-
160
-
161
-
162
-
163
-
164
-
165
-
166
-
167
-
168
-
169
-
170
-
171
-
172
-
173
-
174
-
175
-
176
-
177
-
178
-
179
-
180
-
181
-
182
-
183
-
184
-
185
-
186
-
187
-
188
-
189
-
190
-
191
-
192
-
193
-
194
-
195
-
196
-
197
-
198
 |
 |