Dell PowerVault NX3500 Administrator's Guide - Page 83
Adding a NAS Volume, Action, Save Changes, Revert, Delete
 |
View all Dell PowerVault NX3500 manuals
Add to My Manuals
Save this manual to your list of manuals |
Page 83 highlights
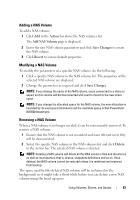
Adding a NAS Volume To add a NAS volume: 1 Click Add in the Action bar above the NAS volumes list. The Add NAS Volume page is displayed. 2 Enter the new NAS volume parameters and click Save Changes to create the NAS volume. 3 Click Revert to restore default properties. Modifying a NAS Volume To modify the parameters of a specific NAS volume, do the following: 1 Click a specific NAS volume in the NAS volume list. The properties of the selected NAS volume are displayed. 2 Change the parameters as required and click Save Changes. NOTE: If you change the name of the NAS volume, users connected to a share or export on this volume will be disconnected and need to mount to the new share name. NOTE: If you change the allocated space for the NAS volume, the new allocation is bounded by its used space (minimum) and the available space in Dell PowerVault NX3500 (maximum). Removing a NAS Volume When a NAS volume is no longer needed, it can be conveniently removed. To remove a NAS volume: 1 Ensure that the NAS volume is not mounted and warn relevant users they will be disconnected. 2 Select the specific NAS volume in the NAS volumes list and click Delete in the Action bar. The selected NAS volume is deleted. NOTE: Deleting a NAS volume will delete all the NAS volume's files and directories as well as its properties, that is, shares, snapshots definitions and so on. Once deleted, the NAS volume cannot be restored unless it is redefined and restored from backup. The space used by this deleted NAS volume will be reclaimed in the background, so it might take a short while before you can define a new NAS volume using the freed up space. Using Volumes, Shares, and Quotas 83
-
 1
1 -
2
-
3
-
4
-
5
-
6
-
7
-
8
-
9
-
10
-
11
-
12
-
13
-
14
-
15
-
16
-
17
-
18
-
19
-
20
-
21
-
22
-
23
-
24
-
25
-
26
-
27
-
28
-
29
-
30
-
31
-
32
-
33
-
34
-
35
-
36
-
37
-
38
-
39
-
40
-
41
-
42
-
43
-
44
-
45
-
46
-
47
-
48
-
49
-
50
-
51
-
52
-
53
-
54
-
55
-
56
-
57
-
58
-
59
-
60
-
61
-
62
-
63
-
64
-
65
-
66
-
67
-
68
-
69
-
70
-
71
-
72
-
73
-
74
-
75
-
76
-
77
-
 78
78 -
 79
79 -
 80
80 -
 81
81 -
 82
82 -
 83
83 -
 84
84 -
 85
85 -
 86
86 -
 87
87 -
 88
88 -
89
-
90
-
91
-
92
-
93
-
94
-
95
-
96
-
97
-
98
-
99
-
100
-
101
-
102
-
103
-
104
-
105
-
106
-
107
-
108
-
109
-
110
-
111
-
112
-
113
-
114
-
115
-
116
-
117
-
118
-
119
-
120
-
121
-
122
-
123
-
124
-
125
-
126
-
127
-
128
-
129
-
130
-
131
-
132
-
133
-
134
-
135
-
136
-
137
-
138
-
139
-
140
-
141
-
142
-
143
-
144
-
145
-
146
-
147
-
148
-
149
-
150
-
151
-
152
-
153
-
154
-
155
-
156
-
157
-
158
-
159
-
160
-
161
-
162
-
163
-
164
-
165
-
166
-
167
-
168
-
169
-
170
-
171
-
172
-
173
-
174
-
175
-
176
-
177
-
178
-
179
-
180
-
181
-
182
-
183
-
184
-
185
-
186
-
187
-
188
-
189
-
190
-
191
-
192
-
193
-
194
-
195
-
196
-
197
-
198
 |
 |