Dell PowerVault NX3500 Administrator's Guide - Page 86
General, Advanced, Files should be, checked for viruses, Antivirus, Save Changes, Revert
 |
View all Dell PowerVault NX3500 manuals
Add to My Manuals
Save this manual to your list of manuals |
Page 86 highlights
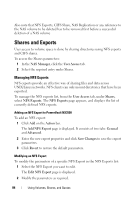
3 Click General to define general CIFS share parameters 4 Click Advanced to define advanced CIFS share parameters. 5 In the General tab, if you have selected the option Files should be checked for viruses, click Antivirus and define the antivirus policy. 6 Click Save Changes to save the share parameters or click Revert to restore default parameters. NOTE: Do not attempt to create a CIFS share using the Microsoft Management Console (MMC). Use MMC only to set share level permissions (SLPs). See "Setting Access Control Lists and Share Level Permissions on DSFS" on page 87. Modifying a CIFS Share Once you determine whether a CIFS share is a general access directory or user-based directory, you will not be able change this setting. However, you will be able to change the parameters of the general access or user-based directory settings. To modify the parameters of a specific CIFS share: 1 Click on the CIFS share that you want to edit. 2 In the Edit CIFS share page, click General to modify general CIFS share parameters. 3 Click Advanced to modify advanced CIFS share parameters. 4 In the General tab, if you have selected the option Files should be checked for viruses, click Antivirus and modify antivirus policy. 5 Click Save Changes to save the share parameters or click Revert to restore the previous parameters. 86 Using Volumes, Shares, and Quotas
-
 1
1 -
2
-
3
-
4
-
5
-
6
-
7
-
8
-
9
-
10
-
11
-
12
-
13
-
14
-
15
-
16
-
17
-
18
-
19
-
20
-
21
-
22
-
23
-
24
-
25
-
26
-
27
-
28
-
29
-
30
-
31
-
32
-
33
-
34
-
35
-
36
-
37
-
38
-
39
-
40
-
41
-
42
-
43
-
44
-
45
-
46
-
47
-
48
-
49
-
50
-
51
-
52
-
53
-
54
-
55
-
56
-
57
-
58
-
59
-
60
-
61
-
62
-
63
-
64
-
65
-
66
-
67
-
68
-
69
-
70
-
71
-
72
-
73
-
74
-
75
-
76
-
77
-
78
-
79
-
80
-
 81
81 -
 82
82 -
 83
83 -
 84
84 -
 85
85 -
 86
86 -
 87
87 -
 88
88 -
 89
89 -
 90
90 -
 91
91 -
92
-
93
-
94
-
95
-
96
-
97
-
98
-
99
-
100
-
101
-
102
-
103
-
104
-
105
-
106
-
107
-
108
-
109
-
110
-
111
-
112
-
113
-
114
-
115
-
116
-
117
-
118
-
119
-
120
-
121
-
122
-
123
-
124
-
125
-
126
-
127
-
128
-
129
-
130
-
131
-
132
-
133
-
134
-
135
-
136
-
137
-
138
-
139
-
140
-
141
-
142
-
143
-
144
-
145
-
146
-
147
-
148
-
149
-
150
-
151
-
152
-
153
-
154
-
155
-
156
-
157
-
158
-
159
-
160
-
161
-
162
-
163
-
164
-
165
-
166
-
167
-
168
-
169
-
170
-
171
-
172
-
173
-
174
-
175
-
176
-
177
-
178
-
179
-
180
-
181
-
182
-
183
-
184
-
185
-
186
-
187
-
188
-
189
-
190
-
191
-
192
-
193
-
194
-
195
-
196
-
197
-
198
 |
 |