Dell PowerVault NX3610 User Manual - Page 44
Removing A Replication Partner, NAS Replication Policies, Adding A Replication Policy
 |
View all Dell PowerVault NX3610 manuals
Add to My Manuals
Save this manual to your list of manuals |
Page 44 highlights
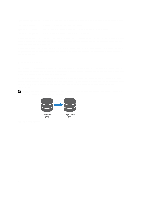
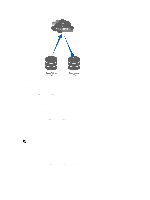
The Edit Replication Partner page is displayed. 3. In Remote NAS management VIP, change the VIP address as required. 4. In User name and Password, change the admin credentials as required. 5. Click Save Changes. Removing A Replication Partner You can remove a system's replication partner by deleting it from the replication partner list. When deleting a replication partner, ensure that both systems are up and running. If one of the systems is down or unreachable, a warning message is displayed. To delete a replication partner's configuration: 1. Select Data Protection → Replication → Replication Partners. The Replication Partners screen displays the list of existing replication partner names. 2. From the list of existing replication partners, select the appropriate replications partner and click Delete. NAS Replication Policies Replication between volumes is managed through policies. You can create a NAS replication policy, also known as attaching volumes, through the NAS Manager by: 1. Creating a trust between the source and destination systems. This requires entering the IP address of the remote system and specifying an administrator's user name and password. 2. Add the replication policy. This requires selecting the source volume, the destination volume, and specifying a periodic schedule for the replication. If the destination system has data that is not available on the source system, a warning is issued, and you are asked to approve losing this data. 3. Monitor the replication progress. Verify if the replication is running smoothly. You can delete the replication policy, thus making the destination system writable. For more information on NAS replication policies, see the Online Help. NOTE: Replication destination volumes are read only when associated with a replication policy. Adding A Replication Policy 1. Select Data Protection → Replication → NAS Replication. The NAS Replication page displays a list of existing NAS replication policies. 2. Click Add. The Add NAS Replication Policy page is displayed. 3. In Source NAS volume, enter the source NAS volume or click the Browse button and select the appropriate NAS volume. 4. From the Destination cluster list, select one of the following: - localhost to replicate the source volume in this system. - another available Dell Fluid File System replication partner. 44
-
 1
1 -
2
-
3
-
4
-
5
-
6
-
7
-
8
-
9
-
10
-
11
-
12
-
13
-
14
-
15
-
16
-
17
-
18
-
19
-
20
-
21
-
22
-
23
-
24
-
25
-
26
-
27
-
28
-
29
-
30
-
31
-
32
-
33
-
34
-
35
-
36
-
37
-
38
-
 39
39 -
 40
40 -
 41
41 -
 42
42 -
 43
43 -
 44
44 -
 45
45 -
 46
46 -
 47
47 -
 48
48 -
 49
49 -
50
-
51
-
52
-
53
-
54
-
55
-
56
-
57
-
58
-
59
-
60
-
61
-
62
-
63
-
64
-
65
-
66
-
67
-
68
-
69
-
70
-
71
-
72
-
73
-
74
-
75
-
76
-
77
-
78
-
79
-
80
-
81
-
82
-
83
-
84
-
85
-
86
-
87
-
88
-
89
-
90
-
91
-
92
-
93
-
94
-
95
-
96
-
97
-
98
-
99
-
100
-
101
-
102
-
103
-
104
-
105
-
106
-
107
-
108
-
109
-
110
-
111
-
112
-
113
-
114
-
115
-
116
-
117
 |
 |