Dell Precision R5500 User Manual
Dell Precision R5500 Manual
 |
View all Dell Precision R5500 manuals
Add to My Manuals
Save this manual to your list of manuals |
Dell Precision R5500 manual content summary:
- Dell Precision R5500 | User Manual - Page 1
1. Front And Back View 1. power button, power light 2. system identification button 3. system identification light 4. drive activity light 5. network link integrity lights (2) 6. diagnostic lights (4) 7. USB 2.0 connectors (2) 8. CD/DVD drive 9. hard drive bays (6) 10. expansion card slots 11. USB - Dell Precision R5500 | User Manual - Page 2
not order them. 1. Install the rails and the computer in the rack. See your rack installation documentation for safety instructions and instructions on installing your computer in a rack. Figure 2. Rack Installation WARNING: Additional Instructions for Rack-Mounted Systems: • Your rack kit has been - Dell Precision R5500 | User Manual - Page 3
3. Connect the keyboard or mouse (optional). Figure 4. Keyboard and Mouse Connection 4. Connect the monitor cable (optional). Figure 5. Monitor Connection 5. Connect the power cable(s). Figure 6. Power Connection 6. Bend the power cable into a loop and secure it to the power supply handle using the - Dell Precision R5500 | User Manual - Page 4
8. Turning On Power 8. Install the bezel (optional). Figure 9. Bezel Install Specifications NOTE: The following specifications are only those required by law to ship with your computer. For a complete and current listing of the specifications for your computer, go to support.dell.com. System - Dell Precision R5500 | User Manual - Page 5
Video Video type Memory Memory module connector Memory module capacity Type Minimum memory Maximum memory Drives Externally accessible: Slimline SATA optical bays 2.5 inch drive bays Internally accessible Control Lights And Diagnostic Lights Power button light: Discrete - PCI Express x16 graphics - Dell Precision R5500 | User Manual - Page 6
lights Diagnostic lights: Power Coin-cell battery Voltage Wattage blue light - flashes (front and back of chassis) when the button is pressed. Press the button again to turn it off. blue light - blinking blue light indicates that the computer is reading data from, or writing data to the hard drive - Dell Precision R5500 | User Manual - Page 7
BTU/hr NOTE: Heat dissipation is calculated by using the power supply wattage rating. Physical Height Width Depth Weight (minimum): 86.30 mm (3.40 inches) 440.60 mm computer and the regulatory compliance website at www.dell.com/ regulatory_compliance for more information on: • Safety best practices - Dell Precision R5500 | User Manual - Page 8
. Reproduction of these materials in any manner whatsoever without the written permission of Dell Inc. is strictly forbidden. Trademarks used in this text: Dell™, the DELL logo, Dell Precision™, Precision ON™, ExpressCharge™, Latitude™, Latitude ON™, OptiPlex™, Vostro™, and Wi-Fi Catcher™ are
-
 1
1 -
 2
2 -
 3
3 -
 4
4 -
 5
5 -
 6
6 -
 7
7 -
8
 |
 |

Dell Precision R5500
Setup And Features Information
About Warnings
WARNING: A WARNING indicates a potential for property damage, personal injury,
or death.
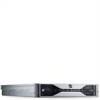
Front And Back View
Figure 1. Front And Back View
1.
power button, power light
2.
system identification button
3.
system identification light
4.
drive activity light
5.
network link integrity lights (2)
6.
diagnostic lights (4)
7.
USB 2.0 connectors (2)
8.
CD/DVD drive
9.
hard drive bays (6)
10.
expansion card slots
11.
USB 2.0 connectors (4)
12.
network adapter connector (2)
13.
network link integrity light
14.
network activity light
15.
serial connector
16.
line-out connector
17.
line-in/microphone connector
18.
system identification light
19.
system identification button
Regulatory Model: E15S
Regulatory Type: E15S001
2011 – 04