Dell Precision T7400 User's Guide - Page 135
In Microsoft Windows Explorer, go to, System Restore, c:\dell\utilities\DSR, DSRIRRemv2.exe - user manual
 |
View all Dell Precision T7400 manuals
Add to My Manuals
Save this manual to your list of manuals |
Page 135 highlights
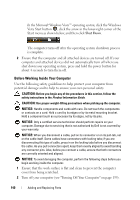
NOTE: Do not manually shut down the computer. Click Finish and let the computer completely reboot. 5 When prompted, click Yes. The computer restarts. Because the computer is restored to its original operating state, the screens that appear, such as the End User License Agreement, are the same ones that appeared the first time the computer was turned on. 6 Click Next. The System Restore screen appears and the computer restarts. 7 After the computer restarts, click OK. Removing PC Restore: NOTICE: Removing Dell PC Restore from the hard drive permanently deletes the PC Restore utility from your computer. After you have removed Dell PC Restore, you will not be able to use it to restore your computer operating system. Dell PC Restore enables you to restore your hard drive to the operating state it was in when you purchased your computer. It is recommended that you do not remove PC Restore from your computer, even to gain additional harddrive space. If you remove PC Restore from the hard drive, you cannot ever recall it, and you will never be able to use PC Restore to return your computer operating system to its original state. 1 Log on to the computer as a local administrator. 2 In Microsoft Windows Explorer, go to c:\dell\utilities\DSR. 3 Double-click the filename DSRIRRemv2.exe. NOTE: If you do not log on as a local administrator, a message appears stating that you that you must log on as administrator. Click Quit, and then log on as a local administrator. NOTE: If the partition for PC Restore does not exist on your computer hard drive, a message appears stating that the partition was not found. Click Quit; there is no partition to delete. 4 Click OK to remove the PC Restore partition on the hard drive. 5 Click Yes when a confirmation message appears. The PC Restore partition is deleted and the newly available disk space is added to the free space allocation on the hard drive. Reinstalling Software 135
-
 1
1 -
2
-
3
-
4
-
5
-
6
-
7
-
8
-
9
-
10
-
11
-
12
-
13
-
14
-
15
-
16
-
17
-
18
-
19
-
20
-
21
-
22
-
23
-
24
-
25
-
26
-
27
-
28
-
29
-
30
-
31
-
32
-
33
-
34
-
35
-
36
-
37
-
38
-
39
-
40
-
41
-
42
-
43
-
44
-
45
-
46
-
47
-
48
-
49
-
50
-
51
-
52
-
53
-
54
-
55
-
56
-
57
-
58
-
59
-
60
-
61
-
62
-
63
-
64
-
65
-
66
-
67
-
68
-
69
-
70
-
71
-
72
-
73
-
74
-
75
-
76
-
77
-
78
-
79
-
80
-
81
-
82
-
83
-
84
-
85
-
86
-
87
-
88
-
89
-
90
-
91
-
92
-
93
-
94
-
95
-
96
-
97
-
98
-
99
-
100
-
101
-
102
-
103
-
104
-
105
-
106
-
107
-
108
-
109
-
110
-
111
-
112
-
113
-
114
-
115
-
116
-
117
-
118
-
119
-
120
-
121
-
122
-
123
-
124
-
125
-
126
-
127
-
128
-
129
-
 130
130 -
 131
131 -
 132
132 -
 133
133 -
 134
134 -
 135
135 -
 136
136 -
 137
137 -
 138
138 -
 139
139 -
 140
140 -
141
-
142
-
143
-
144
-
145
-
146
-
147
-
148
-
149
-
150
-
151
-
152
-
153
-
154
-
155
-
156
-
157
-
158
-
159
-
160
-
161
-
162
-
163
-
164
-
165
-
166
-
167
-
168
-
169
-
170
-
171
-
172
-
173
-
174
-
175
-
176
-
177
-
178
-
179
-
180
-
181
-
182
-
183
-
184
-
185
-
186
-
187
-
188
-
189
-
190
-
191
-
192
-
193
-
194
-
195
-
196
-
197
-
198
-
199
-
200
-
201
-
202
-
203
-
204
-
205
-
206
-
207
-
208
-
209
-
210
-
211
-
212
-
213
-
214
-
215
-
216
-
217
-
218
-
219
-
220
-
221
-
222
-
223
-
224
-
225
-
226
-
227
-
228
-
229
-
230
-
231
-
232
-
233
-
234
-
235
-
236
-
237
-
238
-
239
-
240
-
241
-
242
-
243
-
244
-
245
-
246
-
247
-
248
-
249
-
250
-
251
-
252
-
253
-
254
-
255
-
256
-
257
-
258
-
259
-
260
-
261
-
262
-
263
-
264
-
265
-
266
-
267
-
268
-
269
-
270
-
271
-
272
-
273
-
274
-
275
-
276
-
277
-
278
-
279
-
280
-
281
-
282
-
283
-
284
-
285
-
286
-
287
-
288
-
289
-
290
-
291
-
292
-
293
-
294
-
295
-
296
-
297
-
298
-
299
-
300
-
301
-
302
-
303
-
304
-
305
-
306
-
307
 |
 |