Dell V305 All In One Inkjet Printer Dell V305 Printer User's Guide
Dell V305 All In One Inkjet Printer Manual
 |
View all Dell V305 All In One Inkjet Printer manuals
Add to My Manuals
Save this manual to your list of manuals |
Dell V305 All In One Inkjet Printer manual content summary:
- Dell V305 All In One Inkjet Printer | Dell V305 Printer User's Guide - Page 1
Dell™ V305 Printer User's Guide To order ink or supplies from Dell: 1. Double-click the icon on your desktop. 2. Visit the Dell website, or order Dell printer supplies by phone. www.dell.com/supplies For the best service, ensure that you have the Dell printer Service Tag available. Finding - Dell V305 All In One Inkjet Printer | Dell V305 Printer User's Guide - Page 2
for and maintain my printer How to troubleshoot and solve problems User's Guide NOTE: Your User's Guide is located on the Drivers and Utilities CD or on the Web at support.dell.com. Software and Drivers-Certified drivers for your printer and installers for Dell printer software Readme files-Last - Dell V305 All In One Inkjet Printer | Dell V305 Printer User's Guide - Page 3
, service call and order status, warranty, and repair information Dell Support Website-support.dell.com NOTE: Select your region or business segment to view the appropriate support site. Supplies for my printer Accessories for my printer Replacement ink and parts for my printer Dell Printer - Dell V305 All In One Inkjet Printer | Dell V305 Printer User's Guide - Page 4
Printing Preferences Using the Dell Service Center Dell Ink Management System Using Memory Card Manager Removing and Reinstalling Software Installing the Adobe® Photoshop® Album Manually Installing the Optional XPS Driver The printer software includes: Dell Imaging Toolbox- Allows you - Dell V305 All In One Inkjet Printer | Dell V305 Printer User's Guide - Page 5
ink levels. Order supplies online. To access the Dell Imaging Toolbox: 1. In Windows Vista™: a. Click ® Programs. b. Click Dell Printers. c. Click Dell V305. In Windows® XP and Windows 2000: Click Start® Programs or All Programs® Dell Printers® Dell V305. 2. Select Dell Imaging Toolbox. The Dell - Dell V305 All In One Inkjet Printer | Dell V305 Printer User's Guide - Page 6
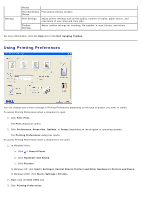
Print Settings Adjust printer settings such as the quality, number of copies, paper source, and orientation Printers. In Windows XP, click Start® Settings® Control Panel® Printers and Other Hardware® Printers and Faxes. In Windows 2000, click Start® Settings® Printers. 2. Right-click the Dell V305 - Dell V305 All In One Inkjet Printer | Dell V305 Printer User's Guide - Page 7
Program. More Options - Allows you to specify Appearance Mode and Complete-A-Print settings. You can also view the paper type that the printer detects. Maintenance Install Ink Cartridges Clean Ink Cartridges Align Ink Cartridges Print a Test Page Network Support Using the Dell Service Center - Dell V305 All In One Inkjet Printer | Dell V305 Printer User's Guide - Page 8
troubleshooting help with problems encountered while using the printer. It also contains links to printer maintenance tasks and customer support. To access the Dell Service a new ink cartridge. For more information, see Replacing Ink Cartridges. When one or both of your ink cartridges are empty, - Dell V305 All In One Inkjet Printer | Dell V305 Printer User's Guide - Page 9
tab of the Printing Preferences. The Reserve Tank dialog does not display after the low ink cartridge has been replaced. The Complete-A-Print check box is automatically reset when a new or different cartridge is installed. To adjust Complete-A-Print settings: 1. Click the Advanced tab. 2. Click More - Dell V305 All In One Inkjet Printer | Dell V305 Printer User's Guide - Page 10
can remove and reinstall the printer software. 1. In Windows Vista: a. Click ® Programs. b. Click Dell Printers. c. Click Dell V305. In Windows XP and WIndows 2000: Click Start® Programs or All Programs® Dell Printers® Dell V305. 2. Click Uninstall Dell V305. 3. Follow the instructions on the screen - Dell V305 All In One Inkjet Printer | Dell V305 Printer User's Guide - Page 11
double-click the Adobe folder. 4. Double-click Autoplay.exe. 5. Follow the instructions on your screen to complete the installation. Installing the Optional XPS Driver The XML Paper Specification (XPS) driver is an optional printer driver designed to make use of the advanced XPS color and graphics - Dell V305 All In One Inkjet Printer | Dell V305 Printer User's Guide - Page 12
files on your computer: a. Click Computer, and then double-click (C:). b. Double-click Drivers, and then double-click PRINTER. c. Double-click the folder that has your printer model number, and then double-click Drivers. d. Double-click xps, and then click Open. e. From the Install From Disk dialog - Dell V305 All In One Inkjet Printer | Dell V305 Printer User's Guide - Page 13
information, see Replacing Ink Cartridges. To order ink cartridges or paper, visit www.dell.com/supplies. Slots into which you insert a memory card containing digital photos. Identify your printer when you use support.dell.com or contact technical support. Enter the Express Service Code to direct - Dell V305 All In One Inkjet Printer | Dell V305 Printer User's Guide - Page 14
Number: Part: Description: 12 Dell Internal Network A networking device to set up your printer on a wireless network. Adapter NOTE: Your printer model may not have wireless capability and may not have this device. 13 Power connector Slot into which you plug the power cable. CAUTION: Insert - Dell V305 All In One Inkjet Printer | Dell V305 Printer User's Guide - Page 15
® Office files on a memory card or digital camera. Return to the previous menu. Access the currently displayed menu. Select a menu option. Initiate a paper feed or paper eject by holding the button for three seconds. Turn your printer on or off. NOTE: Pressing the power button does not turn off your - Dell V305 All In One Inkjet Printer | Dell V305 Printer User's Guide - Page 16
information, see your router's Operation Manual or contact your router manufacturer's helpline or your broadband service provider. The Dell™ Printer An existing wireless network The Drivers and Utilities CD that shipped with your printer A computer running one of the following operating systems - Dell V305 All In One Inkjet Printer | Dell V305 Printer User's Guide - Page 17
from one to four Dell computer: Connect the USB cable between the port on the back of the printer and the port on the back of the computer. Go to step 5. If you are using your printer with an existing computer: Go to the next step. 2. Ensure that your computer is on, and then insert the Drivers - Dell V305 All In One Inkjet Printer | Dell V305 Printer User's Guide - Page 18
Dell computer: Connect the USB cable between the port on the back of the printer and the port on the back of the computer. Go to step 5. If you are using your printer with an existing computer: Go to the next step. 2. Ensure that your computer is on, and then insert the Drivers and - Dell V305 All In One Inkjet Printer | Dell V305 Printer User's Guide - Page 19
or times out, perform step 8 to step 13 again. 14. Close the router WPS page. 15. Follow the instructions on the installation screen to complete setup. Using the Push Button Method 1. If you are using your printer with a new Dell computer: Connect the USB cable between the port on the back of the - Dell V305 All In One Inkjet Printer | Dell V305 Printer User's Guide - Page 20
your username and password. If you are not sure of the username and password, contact your router manufacturer's helpline or your Internet service provider. 8. On your printer operator panel, use the left or right arrow button button . to scroll to Setup, and then press the Select 9. Use the left - Dell V305 All In One Inkjet Printer | Dell V305 Printer User's Guide - Page 21
WPS page. 15. Follow the instructions on the installation screen to complete setup. Using Windows Vista To configure your printer on the wireless network using WPS, printer using the Wireless Setup Utility involves connecting the wireless printer to a computer by USB cable, and launching the Drivers - Dell V305 All In One Inkjet Printer | Dell V305 Printer User's Guide - Page 22
Printers® Dell V305. 2. Click Dell Wireless Setup Utility. 3. Follow the instructions on your screen to change wireless settings. The Wireless Setup Utility steps you through the configuration process. The wizard can automatically detect wireless network settings or allow you to manually enter the - Dell V305 All In One Inkjet Printer | Dell V305 Printer User's Guide - Page 23
to use is displayed, press the Start button to access its menus. Copy Mode Main Menu Copy Mode Main Menu Copy Color Copies Quality Dark Paper Setup Zoom Repeat Image Collate N-Up Original Size Original Type ID Card Copy To view or change the Copy Mode menu settings: 1. From the main - Dell V305 All In One Inkjet Printer | Dell V305 Printer User's Guide - Page 24
Setup Press the Select button , and then use the left and right Arrow buttons brightness setting. Paper Size Paper Type Zoom 50% *100% 150% 200% Custom % Fit to Page 2 x 2 Poster 3 x 3 Poster 4 x 4 Poster Repeat Image *1 Per Page 4 Per Page 9 Per Page 16 Per Page Collate * - Dell V305 All In One Inkjet Printer | Dell V305 Printer User's Guide - Page 25
, and press the Arrow button to continue. NOTE: ID Card Copy is only valid with Letter or A4 Paper. * Default factory setting Scan Mode The Scan Mode menu is only available if the printer is connected to a computer or a network adapter. Main Menu Scan Mode Main Menu Scan Color Scan To Computer - Dell V305 All In One Inkjet Printer | Dell V305 Printer User's Guide - Page 26
Mode Photo Mode is only available when a memory card is inserted into the printer, or if a USB key or a PictBridge-enabled digital camera is connected If the memory card or USB key contains both documents and photos, the printer asks which files to print. Use the left and right Arrow buttons to - Dell V305 All In One Inkjet Printer | Dell V305 Printer User's Guide - Page 27
Digital Print Order Format (DPOF) images is inserted into the printer or when a PictBridge-enabled digital camera with DPOF images is Automatic Draft Normal Photo * Default factory setting PictBridge Mode Your printer automatically switches to PictBridge mode when you connect a PictBridge-enabled - Dell V305 All In One Inkjet Printer | Dell V305 Printer User's Guide - Page 28
button to save the setting. PictBridge menu item Paper Setup Photo Size Layout Quality *Default factory setting Settings Press the Select button documents is inserted into the printer or when the printer is connected to a configured internal network adapter. The printer recognizes files that have the - Dell V305 All In One Inkjet Printer | Dell V305 Printer User's Guide - Page 29
Format) .wps (Microsoft Works) .wpd (Word Perfect) NOTE: To use the Office File Mode menus, you must connect the printer to the computer using a USB cable, and install the appropriate printer software on your computer. To view or change the Office File Mode menu settings: 1. Ensure that the - Dell V305 All In One Inkjet Printer | Dell V305 Printer User's Guide - Page 30
Printer Name The name of your printer appears on the display in this format:DellV305-service tag #. NOTE: The name appears on the printer High. *Default factory setting Setup Mode Main Menu Setup Mode Main Menu Paper Setup Device Setup Defaults Network Setup To access the Setup mode menu: 1. - Dell V305 All In One Inkjet Printer | Dell V305 Printer User's Guide - Page 31
Settings Paper Size Paper Type Language Country Power Save Clear Settings Timeout Photo Print Size Set Defaults Print Setup Page Wi-Fi Protected Setup Wireless Information TCP/IP Menu Reset Network Adapter Defaults Maintenance Mode Main Menu Maintenance Mode Main Menu Ink Levels Clean Cartridges - Dell V305 All In One Inkjet Printer | Dell V305 Printer User's Guide - Page 32
across the network through peer-to-peer sharing. Sharing the printer using your computer may slow down the speed of your computer. To share the printer: 1. Assign a "share name" to the printer. For more information, see Sharing the Printer on the Network. 2. Set up the network computers that you - Dell V305 All In One Inkjet Printer | Dell V305 Printer User's Guide - Page 33
Click ® Control Panel. 2. Click Hardware and Sound. 3. Click Printers. 4. Click Add a printer. 5. Click Add a network, wireless or Bluetooth printer. 6. To manually connect to the shared printer, click The printer I want isn't listed. 7. From the Find a printer by name or TCP/IP address dialog box - Dell V305 All In One Inkjet Printer | Dell V305 Printer User's Guide - Page 34
Support 1. Fan the paper. 2. Center the paper on the paper support. 3. Adjust the paper guides so they rest against the edges of the paper. NOTE: Do not pull on both paper guides simultaneously. When one paper guide is moved, the other adjusts accordingly. NOTE: Do not force paper into the printer - Dell V305 All In One Inkjet Printer | Dell V305 Printer User's Guide - Page 35
quality. You remove all paper from the paper support before inserting banner paper. You use banner paper designed for inkjet printers. You place a stack of banner paper on or behind the printer, and feed in the first sheet. The paper guides rest against the edges of the paper. You select A4 Banner - Dell V305 All In One Inkjet Printer | Dell V305 Printer User's Guide - Page 36
If you load one of these paper types, the printer detects the paper type and automatically adjusts the Quality/Speed settings. Paper type Plain/heavyweight matte Transparency Photo/glossy Quality/Speed settings Black and Color Cartridges Installed Photo and Color Cartridges Installed Normal - Dell V305 All In One Inkjet Printer | Dell V305 Printer User's Guide - Page 37
In Windows® XP, click Start® Control Panel® Printers and Other Hardware® Printers and Faxes. In Windows 2000, click Start® Settings® Printers. 2. Right-click the printer icon. 3. Click Printing Preferences. 4. On the Print Setup tab, select the paper type. 5. Click OK. Loading Original Documents on - Dell V305 All In One Inkjet Printer | Dell V305 Printer User's Guide - Page 38
3. Close the top cover. - Dell V305 All In One Inkjet Printer | Dell V305 Printer User's Guide - Page 39
in your Owner's Manual. Dell™ ink cartridges are available only through Dell. You can order more ink online at www.dell.com/supplies or by phone. CAUTION: It is recommended that Dell ink cartridges be used for your printer. Dell does not provide warranty coverage for problems caused by using - Dell V305 All In One Inkjet Printer | Dell V305 Printer User's Guide - Page 40
side or the metal nozzles on the bottom of the ink cartridges. 7. Insert the new ink cartridges. Make sure the black or photo ink cartridge is secure in the left ink cartridge carrier, and the color ink cartridge is secure in the right ink cartridge carrier. NOTE: For normal printing, use a black - Dell V305 All In One Inkjet Printer | Dell V305 Printer User's Guide - Page 41
2000, click Start® Settings® Printers. 3. Right-click the Dell V305 icon. 4. Click Printing Preferences. The Printing Preferences dialog box opens. 5. Click the Maintenance tab. 6. Click Align Ink Cartridges. 7. Click Print. An alignment page prints. The ink cartridges align when the page prints - Dell V305 All In One Inkjet Printer | Dell V305 Printer User's Guide - Page 42
and Faxes. In Windows 2000, click Start® Settings® Printers. 3. Right-click the Dell V305 icon. 4. Click Printing Preferences. The Printing Preferences dialog box opens. 5. Click the Maintenance tab. 6. Click Clean Ink Cartridges. The cleaning page prints. 7. If the print quality has not improved - Dell V305 All In One Inkjet Printer | Dell V305 Printer User's Guide - Page 43
ink residue that has accumulated on the paper exit tray. NOTICE: Using a damp cloth to clean the interior may cause damage to your printer. Damage to the printer caused by not following the correct instructions for cleaning will not be covered under warranty. 5. Make sure the paper support and paper - Dell V305 All In One Inkjet Printer | Dell V305 Printer User's Guide - Page 44
and printer, and make sure they are connected. 2. Load the paper. For more information, see Loading Paper into the Paper Support. Dell recommends you use a color cartridge and a photo cartridge for printing photos. 1. Turn on your computer and printer, and make sure they are connected. 2. Load paper - Dell V305 All In One Inkjet Printer | Dell V305 Printer User's Guide - Page 45
glossy paper. The printout on non-photo paper printer supports printing from a PictBridge-enabled camera. 1. Turn on your printer. 2. Insert one end of the USB cable into the camera. 3. Insert the other end of the USB cable into the PictBridge port on the front of the printer. See the instructions - Dell V305 All In One Inkjet Printer | Dell V305 Printer User's Guide - Page 46
. 2. Load the paper. For more information, see Loading Paper into the Paper Support. 3. In Windows Vista™: a. Click ® Programs. b. Click Dell Printers. c. Click Dell V305. In Windows® XP and Windows 2000: Click Start® Programs or All Programs® Dell Printers® Dell V305. 4. Select Dell Imaging Toolbox - Dell V305 All In One Inkjet Printer | Dell V305 Printer User's Guide - Page 47
. 2. Load the paper. For more information, see Loading Paper into the Paper Support. 3. In Windows Vista: a. Click ® Programs. b. Click Dell Printers. c. Click Dell V305. In Windows XP and Windows 2000: Click Start® Programs or All Programs® Dell Printers® Dell V305. 4. Select Dell Imaging Toolbox - Dell V305 All In One Inkjet Printer | Dell V305 Printer User's Guide - Page 48
. You can also visit the Dell Support website at support.dell.com. This website contains the latest documentation. Ensure that you read the documentation that came with your Bluetooth device for setup instructions. Setting up a Connection Between Your Printer and a BluetoothEnabled Device NOTE: The - Dell V305 All In One Inkjet Printer | Dell V305 Printer User's Guide - Page 49
device. 6. Configure the Bluetooth-enabled device to set up a connection to the printer. Refer to the instructions included with the device for Bluetooth connection information. NOTE: If the Bluetooth Security Level on the printer is set to High, you must enter a pass key. For more information - Dell V305 All In One Inkjet Printer | Dell V305 Printer User's Guide - Page 50
and a Bluetooth-Enabled Device. 5. Set up the Bluetooth device to print to the printer. Refer to the instructions included with the device for Bluetooth printing setup information. 6. See the instructions included with the Bluetooth device to begin printing. NOTE: If the Bluetooth Security Level on - Dell V305 All In One Inkjet Printer | Dell V305 Printer User's Guide - Page 51
Envelope, and then choose the size of the envelope from the Paper size: drop- down menu. NOTE: If you are mailing One Page on a Sheet of Paper 1. Turn on your computer and printer, and ensure that they are connected. 2. Load the paper. For more information, see Loading Paper into the Paper Support - Dell V305 All In One Inkjet Printer | Dell V305 Printer User's Guide - Page 52
drop-down list, select how many pages you want to be printed on one sheet. 7. Select the Print Page Borders check box if you want borders your computer and printer, and make sure they are connected. 2. Load the paper. For more information, see Loading Paper into the Paper Support. 3. With your - Dell V305 All In One Inkjet Printer | Dell V305 Printer User's Guide - Page 53
computer and printer, and make sure they are connected. 2. Load the paper. For more information, see Loading Paper into the Paper Support. 3. specify the number of copies to print. NOTE: You must specify more than one copy for the Collate copies check box to become active. 6. Select the Collate - Dell V305 All In One Inkjet Printer | Dell V305 Printer User's Guide - Page 54
with the front page down, one on top of the other, until the booklet is complete. 5. Bind the bundles together to complete the booklet. Duplexing a Print Job (Two-Sided Printing) Manual duplex allows you to print your document on both sides of the paper. The printer prints the odd-numbered pages of - Dell V305 All In One Inkjet Printer | Dell V305 Printer User's Guide - Page 55
® Control Panel. b. Click Hardware and Sound. c. Click Printers. In Windows® XP, click Start ® Settings® Control Panel® Printers and Other Hardware® Printers and Faxes. In Windows 2000, click Start ® Settings® Printers. 2. Right-click the Dell V305 icon. 3. Click Open. 4. Select the job you want - Dell V305 All In One Inkjet Printer | Dell V305 Printer User's Guide - Page 56
® Control Panel. b. Click Hardware and Sound. c. Click Printers. In Windows XP, click Start ® Settings® Control Panel® Printers and Other Hardware® Printers and Faxes. In Windows 2000, click Start ® Settings® Printers. 2. Right-click the Dell V305 icon. 3. Click Open. 4. Select the job you want - Dell V305 All In One Inkjet Printer | Dell V305 Printer User's Guide - Page 57
Specify layouts that you want to set as default. From the Maintenance tab: There are no print settings to set as default from the Maintenance tab. From here, you can: Install, clean, and align ink cartridges. Print a test page. Get information on sharing your printer on a network. - Dell V305 All In One Inkjet Printer | Dell V305 Printer User's Guide - Page 58
more help and to check the latest information on troubleshooting your printer, please visit http://support.dell.com/support. Setup Problems Computer Problems Verify that your printer is compatible with your computer. The printer supports Windows Vista™, Windows® XP, and Windows 2000 only. Windows - Dell V305 All In One Inkjet Printer | Dell V305 Printer User's Guide - Page 59
or All Programs® Dell Printers® Dell V305. If the printer does not appear in the list of printers, the printer software is not installed. Install the printer software. For more information, see Removing and Reinstalling Software. Correct communication problems between the printer and the computer - Dell V305 All In One Inkjet Printer | Dell V305 Printer User's Guide - Page 60
® Settings® Printers. 2. Right-click the Dell V305 icon. 3. Make sure Pause Printing is not selected. If Pause Printing is selected, click it to clear the option. Check for blinking lights on the printer. For more information, see Error Messages. Ensure you installed the ink cartridges correctly and - Dell V305 All In One Inkjet Printer | Dell V305 Printer User's Guide - Page 61
printing. For more information, see Loading Paper into the Paper Support. Remove obstructions from the carrier path or close the cartridge carrier lids, and then press the Select button . Clear paper jam then press . A paper jam exists in the printer. Clear the paper jam. For more information, see - Dell V305 All In One Inkjet Printer | Dell V305 Printer User's Guide - Page 62
troubleshooting. Press to retry. The tape was not removed from the ink cartridges before the cartridges were installed. Remove the tape from the ink cartridges. For more information, see Replacing Ink Cartridges. Cartridge Error. Consult User's One or both of the ink cartridges is invalid. Guide - Dell V305 All In One Inkjet Printer | Dell V305 Printer User's Guide - Page 63
tray while printing. Flex, fan, and straighten the paper before loading. Do not use creased, damp, or curled paper. Orient the media according to the instructions for the printer. Paper Problems Make sure you loaded the paper correctly. For more information, see Loading Paper into the Paper Support. - Dell V305 All In One Inkjet Printer | Dell V305 Printer User's Guide - Page 64
. For more information, see Clearing Paper Jams. Printing Problems Check the ink levels, and install new print cartridges if necessary. For more information, see Replacing Ink Cartridges. Ensure that you remove individual sheets from the paper exit tray. To avoid ink smudging when you are using the - Dell V305 All In One Inkjet Printer | Dell V305 Printer User's Guide - Page 65
scanned documents. 1. In Windows Vista: a. Click ® Programs. b. Click Dell Printers. c. Click Dell V305. In Windows XP or Windows 2000: Click Start® Programs or All Programs® Dell Printers® Dell V305. 2. Select Dell Imaging Toolbox. The Dell Imaging Toolbox dialog box opens. 3. From the Home screen - Dell V305 All In One Inkjet Printer | Dell V305 Printer User's Guide - Page 66
or All Programs® Dell Printers® Dell V305. If the printer does not appear in the list of printers, the printer software is not installed. Install the printer software. For more information, see Removing and Reinstalling Software. Correct communication problems between the printer and the computer - Dell V305 All In One Inkjet Printer | Dell V305 Printer User's Guide - Page 67
quality is poor. 1. In Windows Vista: a. Click ® Programs. b. Click Dell Printers. c. Click Dell V305. In Windows XP and Windows 2000: Click Start® Programs or All Programs® Dell Printers® Dell V305. 2. Select Dell Imaging Toolbox. The Dell Imaging Toolbox dialog box opens. 3. From the Home screen - Dell V305 All In One Inkjet Printer | Dell V305 Printer User's Guide - Page 68
scanned documents. 1. In Windows Vista: a. Click ® Programs. b. Click Dell Printers. c. Click Dell V305. In Windows XP or Windows 2000: Click Start® Programs or All Programs® Dell Printers® Dell V305. 2. Select Dell Imaging Toolbox. The Dell Imaging Toolbox dialog box opens. 3. From the Home screen - Dell V305 All In One Inkjet Printer | Dell V305 Printer User's Guide - Page 69
network adapter documentation for setup and usage information. Memory Card Problems Make sure that the type of memory card you are using can be used in the printer. For more information, see Printing From a Memory Card or USB Key. Insert only one memory card at a time. Insert the memory card until - Dell V305 All In One Inkjet Printer | Dell V305 Printer User's Guide - Page 70
. Make sure the printer is not connected to Ink Cartridges and Cleaning the Ink Cartridge Nozzles. For additional solutions, go to http://support.dell.com/support. General Guidelines for Selecting or Loading Print Media Attempting to print on damp, curled, wrinkled, or torn paper can cause paper - Dell V305 All In One Inkjet Printer | Dell V305 Printer User's Guide - Page 71
Files Most digital cameras use a memory card to store photos. The printer supports the following memory cards: Compact Flash Type I and II Memory Stick is being read or is transmitting data. NOTE: Do not insert more than one memory card at a time. The connector that is used for PictBridge may also - Dell V305 All In One Inkjet Printer | Dell V305 Printer User's Guide - Page 72
, see Loading Paper into the Paper Support. 3. Insert a CD or connect a flash memory device (such as a flash drive, memory card, or digital camera) to the computer, and close any Windows dialogs that appear. 4. In Windows Vista™: a. Click ® Programs. b. Click Dell Printers. c. Click Dell V305. In - Dell V305 All In One Inkjet Printer | Dell V305 Printer User's Guide - Page 73
still cameras and not modified by any application are supported. If you want to print photos stored on the paper loaded is not smaller than the size you specified in the DPOF selection. 2. Insert the memory card. The printer automatically switches to PHOTO mode. NOTE: Do not insert more than one - Dell V305 All In One Inkjet Printer | Dell V305 Printer User's Guide - Page 74
sheet prints. 6. Follow the instructions on the proof sheet to select which photos to print, and to choose a layout and paper type to use. Fill in paper. For more information, see Loading Paper into the Paper Support. NOTE: Ensure that the size of the paper you loaded in the printer matches the paper - Dell V305 All In One Inkjet Printer | Dell V305 Printer User's Guide - Page 75
Support Memory Specifications and Requirements Media Types and Sizes Cables Overview Memory Connectivity Duty cycle (average) Printer 80% 5 to 80% 5 to 100% Power Consumption and Requirements Rated AC input Rated frequency Minimum AC input Maximum AC input Maximum input current Average power - Dell V305 All In One Inkjet Printer | Dell V305 Printer User's Guide - Page 76
Mode Capabilities Your printer can scan from 72 to 19,200 dpi. Although your printer has this capability, Dell™ recommends using the paper All other media 600 x 600 dpi 300 x 600 dpi 1200 x 1200 dpi 600 x 600 dpi 4800 x 1200 dpi 1200 x 1200 dpi Operating System Support The printer supports - Dell V305 All In One Inkjet Printer | Dell V305 Printer User's Guide - Page 77
cards, index cards, postcards, or photo cards Photo/glossy or matte paper Iron-on transfers Transparencies A4 Banner Letter Banner 20 sheets 9 Envelopes: 3 7/8 x 8 7/8 inches 10 210 x 297 mm) 50 transparencies Cables Your printer uses a Universal Serial Bus (USB) cable (sold separately). - Dell V305 All In One Inkjet Printer | Dell V305 Printer User's Guide - Page 78
, and ensure that they are connected. 2. Load the paper. For more information, see Loading Paper into the Paper Support. 3. Load your original document. For more information, see Loading Original Documents on the Scanner Glass. 4. In Windows Vista™: a. Click ® Programs. b. Click Dell Printers. - Dell V305 All In One Inkjet Printer | Dell V305 Printer User's Guide - Page 79
: Click Start® Programs or All Programs® Dell Printers® Dell V305. 5. Select Dell Imaging Toolbox. The Dell Imaging Toolbox dialog box opens. 6. From . Copying Photos Using the Operator Panel 1. Turn on the printer. 2. Load the paper. 3. Load your original document. 4. From the Copy Quality submenu - Dell V305 All In One Inkjet Printer | Dell V305 Printer User's Guide - Page 80
For more information, see Loading Paper into the Paper Support. 3. Load your original photo on the scanner glass. For more information, see Loading Original Documents on the Scanner Glass. 4. In Windows Vista: a. Click ® Programs. b. Click Dell Printers. c. Click Dell V305. In Windows XP or Windows - Dell V305 All In One Inkjet Printer | Dell V305 Printer User's Guide - Page 81
customer in the troubleshooting process and provides for restoration of the Operating System, application software and hardware drivers to the original default configuration as shipped from Dell, as well as the verification of appropriate functionality of the printer and all Dellinstalled hardware - Dell V305 All In One Inkjet Printer | Dell V305 Printer User's Guide - Page 82
devices because their signals could interfere with critical aircraft instruments Regulatory Information The Dell Wireless Printer Adapter must be installed and used in strict accordance with the manufacturer's instructions as described in the user documentation that comes with the product. For - Dell V305 All In One Inkjet Printer | Dell V305 Printer User's Guide - Page 83
on), the user is encouraged to try to correct the interference by taking one or more of the following measures: Relocate this device. Increase the separation . NOTE: This Dell Wireless Printer Adapter must be installed and used in strict accordance with the manufacturer's instructions as described in - Dell V305 All In One Inkjet Printer | Dell V305 Printer User's Guide - Page 84
the left and right Arrow buttons to scroll to Scan To Computer, and then press the Select button . 5. If your printer is connected using a USB cable: a. The printer downloads the application list from the computer. Use the left and right Arrow buttons be sent. to scroll through the available - Dell V305 All In One Inkjet Printer | Dell V305 Printer User's Guide - Page 85
Scanner Glass. 3. In Windows Vista™: a. Click ® Programs. b. Click Dell Printers. c. Click Dell V305. In Windows® XP or Windows 2000: Click Start® Programs or All Programs® Dell Printers® Dell V305. 4. Select Dell Imaging Toolbox. The Dell Imaging Toolbox dialog box opens. 5. From the Home screen - Dell V305 All In One Inkjet Printer | Dell V305 Printer User's Guide - Page 86
of the scan area. 3. In Windows Vista: a. Click ® Programs. b. Click Dell Printers. c. Click Dell V305. In Windows XP and Windows 2000: Click Start® Programs or All Programs® Dell Printers® Dell V305. 4. Select Dell Imaging Toolbox. The Dell Imaging Toolbox opens. 5. From the Home screen, click Scan - Dell V305 All In One Inkjet Printer | Dell V305 Printer User's Guide - Page 87
on the Scanner Glass. 3. In Windows Vista: a. Click ® Programs. b. Click Dell Printers. c. Click Dell V305. In Windows XP and Windows 2000: Click Start® Programs or All Programs® Dell Printers® Dell V305. 4. Select Dell Imaging Toolbox. The Dell Imaging Toolbox opens. 5. From the Home screen, click - Dell V305 All In One Inkjet Printer | Dell V305 Printer User's Guide - Page 88
they are connected. 2. In Windows Vista: a. Click ® Programs. b. Click Dell Printers. c. Click Dell V305. In Windows XP and Windows 2000: Click Start® Programs or All Programs® Dell Printers® Dell V305. 3. Select Dell Imaging Toolbox. The Dell Imaging Toolbox opens. 4. From the Home screen, click - Dell V305 All In One Inkjet Printer | Dell V305 Printer User's Guide - Page 89
Scanner Glass. 3. In Windows Vista: a. Click ® Programs. b. Click Dell Printers. c. Click Dell V305. In Windows XP and Windows 2000: Click Start® Programs or All Programs® Dell Printers® Dell V305. 4. Select Dell Imaging Toolbox. The Dell Imaging Toolbox opens. 5. From the Home screen, click Scan - Dell V305 All In One Inkjet Printer | Dell V305 Printer User's Guide - Page 90
Dell Printers. c. Click Dell V305. In Windows XP and Windows 2000: Click Start® Programs or All Programs® Dell Printers® Dell V305. 2. Select Dell Imaging Toolbox. The Dell want to add, and then click E-mail. 6. If you are sending one or more photos, select a photo size. 7. Click Create E-mail to - Dell V305 All In One Inkjet Printer | Dell V305 Printer User's Guide - Page 91
scan another image: a. Do one of the following: Select Add software prepares your PDF and opens a Save dialog box. 13. Type a file name for your PDF, and select a storage location. 14. Click Save. From a Saved Item 1. In Windows Vista: a. Click ® Programs. b. Click Dell Printers. c. Click Dell V305 - Dell V305 All In One Inkjet Printer | Dell V305 Printer User's Guide - Page 92
Do one of the software prepares your PDF and opens a Save dialog box. 10. Enter a file name for your PDF, and select a storage location. 11. Click Save. Customizing Scan Settings 1. In Windows Vista: a. Click ® Programs. b. Click Dell Printers. c. Click Dell V305 paper size from the dropdown list. - Dell V305 All In One Inkjet Printer | Dell V305 Printer User's Guide - Page 93
Scan Settings Preferences 1. In Windows Vista: a. Click ® Programs. b. Click Dell Printers. c. Click Dell V305. In Windows XP and Windows 2000: Click Start® Programs or All Programs® Dell Printers® Dell V305. 2. Select Dell Imaging Toolbox. The Dell Imaging Toolbox dialog box opens. 3. From the Home - Dell V305 All In One Inkjet Printer | Dell V305 Printer User's Guide - Page 94
any rights to the Dell- or third-party-copyrighted software in this printer. Since the GNU licensed software that the Dell modifications are based upon (INCLUDING, BUT NOT LIMITED TO, PROCUREMENT OF SUBSTITUTE GOODS OR SERVICES; LOSS OF USE, DATA, OR PROFITS; OR BUSINESS INTERRUPTION) HOWEVER - Dell V305 All In One Inkjet Printer | Dell V305 Printer User's Guide - Page 95
it to your programs, too. When we speak of free software, we are referring to freedom, not price. Our General Public Licenses are designed to make sure that you have the freedom to distribute copies of free software (and charge for this service if you wish), that you receive source code or can get - Dell V305 All In One Inkjet Printer | Dell V305 Printer User's Guide - Page 96
the terms of Sections 1 and 2 above provided that you also do one of the following: a. Accompany it with the complete corresponding machine-readable source the author/donor to decide if he or she is willing to distribute software through any other system and a licensee cannot impose that choice. This - Dell V305 All In One Inkjet Printer | Dell V305 Printer User's Guide - Page 97
software which is copyrighted by the Free Software Foundation, write to the Free Software Foundation; we sometimes make exceptions for this. Our decision will be guided NECESSARY SERVICING, REPAIR OR software, we are referring to freedom of use, not price. Our General Public Licenses are designed - Dell V305 All In One Inkjet Printer | Dell V305 Printer User's Guide - Page 98
software (and charge for this service if you wish); that you receive source code or can get it if you want it; that you can change the software author's reputation will not be affected by problems that might be introduced by others. Finally, software patents pose a constant threat to the existence - Dell V305 All In One Inkjet Printer | Dell V305 Printer User's Guide - Page 99
modifications or work under the terms of Section 1 above, provided that you also meet all of these conditions: a. The modified work must itself be a software library. b. You must cause the files modified to carry prominent notices stating that you changed the files and the date of any change. c. You - Dell V305 All In One Inkjet Printer | Dell V305 Printer User's Guide - Page 100
copyright notice for the Library among them, as well as a reference directing the user to the copy of this License. Also, you must do one of these things: a. Accompany the work with the complete corresponding machine-readable source code for the Library including whatever changes were used in the - Dell V305 All In One Inkjet Printer | Dell V305 Printer User's Guide - Page 101
in detail to address new problems or concerns. Each version is software which is copyrighted by the Free Software Foundation, write to the Free Software Foundation; we sometimes make exceptions for this. Our decision will be guided THE COST OF ALL NECESSARY SERVICING, REPAIR OR CORRECTION. 16. IN
-
 1
1 -
 2
2 -
 3
3 -
 4
4 -
 5
5 -
 6
6 -
 7
7 -
8
-
9
-
10
-
11
-
12
-
13
-
14
-
15
-
16
-
17
-
18
-
19
-
20
-
21
-
22
-
23
-
24
-
25
-
26
-
27
-
28
-
29
-
30
-
31
-
32
-
33
-
34
-
35
-
36
-
37
-
38
-
39
-
40
-
41
-
42
-
43
-
44
-
45
-
46
-
47
-
48
-
49
-
50
-
51
-
52
-
53
-
54
-
55
-
56
-
57
-
58
-
59
-
60
-
61
-
62
-
63
-
64
-
65
-
66
-
67
-
68
-
69
-
70
-
71
-
72
-
73
-
74
-
75
-
76
-
77
-
78
-
79
-
80
-
81
-
82
-
83
-
84
-
85
-
86
-
87
-
88
-
89
-
90
-
91
-
92
-
93
-
94
-
95
-
96
-
97
-
98
-
99
-
100
-
101
 |
 |

Dell™ V305 Printer User's Guide
To order ink or supplies from Dell:
1. Double-click the icon on your desktop.
2. Visit the Dell website, or order Dell printer supplies by phone.
www.dell.com/supplies
For the best service, ensure that you have the Dell printer Service Tag available.
Finding Information
Understanding the Software
About Your Printer
Wireless Networking
Understanding the Operator Panel Menus
Peer-to-Peer Networking
Loading Paper and Originals
Maintenance
Printing
Troubleshooting
Printing From a Memory Card or USB Key
Specifications
Copying
Appendix
Scanning
Licensing Notice
Notes, Notices, and Cautions
Information in this document is subject to change without notice.
© 2008 Dell Inc. All rights reserved.
Reproduction in any manner whatsoever without the written permission of Dell Inc. is strictly forbidden.
Trademarks used in this text:
Dell
, the
DELL
logo, and
Dell Ink Management System
are trademarks of Dell Inc.;
Microsoft
and
Windows
are
registered trademarks of Microsoft Corporation in the United States and/or other countries.
Windows Vista
is either a trademark or a registered
trademark of Microsoft Corporation in the United States and/or other countries.
Bluetooth
is a registered trademark owned by Bluetooth SIG,
Inc. and is used by Dell Inc. under license.
Adobe
and
Photoshop
are either registered trademarks or trademarks of Adobe Systems
Incorporated in the United States and/or other countries.
Other trademarks and trade names may be used in this document to refer to either the entities claiming the marks and names or their
products. Dell Inc. disclaims any proprietary interest in trademarks and trade names other than its own.
UNITED STATES GOVERNMENT RESTRICTED RIGHTS
This software and documentation are provided with RESTRICTED RIGHTS. Use, duplication or disclosure by the Government is subject to
restrictions as set forth in subparagraph (c)(1)(ii) of the Rights in Technical Data and Computer Software clause at DFARS 252.227-7013 and
in applicable FAR provisions: Dell Inc., One Dell Way, Round Rock, Texas, 78682, USA.
Model V305-V305w
March 2008
SRV FX705
Rev. A00
NOTE:
A
NOTE
indicates important information that helps you make better use of your printer.
NOTICE:
A
NOTICE
indicates either potential damage to hardware or loss of data and tells you how to avoid the
problem.
CAUTION:
A CAUTION indicates a potential for property damage, personal injury, or death.