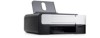
Dell V305w All In One Wireless Inkjet Printer User's Guide
Dell V305w All In One Wireless Inkjet Printer Manual
 |
View all Dell V305w All In One Wireless Inkjet Printer manuals
Add to My Manuals
Save this manual to your list of manuals |
Dell V305w All In One Wireless Inkjet Printer manual content summary:
- Dell V305w All In One Wireless Inkjet Printer | User's Guide - Page 1
How to print How to care for and maintain my printer How to contact Dell™ Owner's Manual Safety information for preparing to operate my printer Regulatory information Warranty information Product Information Guide Supported paper type and sizes How to select and store print media How to load - Dell V305w All In One Wireless Inkjet Printer | User's Guide - Page 2
to care for and maintain my printer How to troubleshoot and solve problems NOTE: Your User's Guide is located on the Drivers and Utilities CD or on the Web at support.dell.com. Software and Drivers-Certified drivers for your printer and installers for Dell printer software Readme files-Last minute - Dell V305w All In One Wireless Inkjet Printer | User's Guide - Page 3
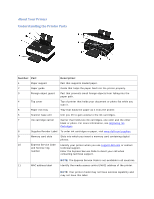
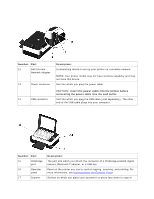
To order ink cartridges or paper, visit www.dell.com/supplies. 9 Memory card slots Slots into which you insert a memory card containing digital photos. 10 Express Service Code Identify your printer when you use support.dell.com or contact and Service Tag technical support. number Enter - Dell V305w All In One Wireless Inkjet Printer | User's Guide - Page 4
Number: Part: 12 Dell Internal Network Adapter 13 Power connector 14 USB connector Description: A networking device to set up your printer on a wireless network. NOTE: Your printer model may not have wireless capability and may not have this device. Slot into which you plug the power cable. - Dell V305w All In One Wireless Inkjet Printer | User's Guide - Page 5
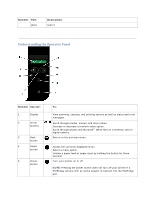
® Office files on a memory card or digital camera. Return to the previous menu. Access the currently displayed menu. Select a menu option. Initiate a paper feed or paper eject by holding the button for three seconds. Turn your printer on or off. NOTE: Pressing the power button does not turn off your - Dell V305w All In One Wireless Inkjet Printer | User's Guide - Page 6
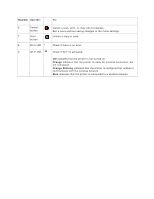
a copy or scan. Check if there is an error. Check if Wi-Fi is activated: Off indicates that the printer is not turned on. Orange indicates that the printer is ready for wireless connection, but not connected. Orange blinking indicates that the printer is configured but unable to communicate with the - Dell V305w All In One Wireless Inkjet Printer | User's Guide - Page 7
Understanding the Operator Panel Menus Copy Mode Main Menu Copy Mode Main Menu Copy Color Copies Quality Dark Paper Setup Zoom Repeat Image Collate N-Up Original Size Original Type ID Card Copy To view or change the Copy Mode menu settings: 1. From the main - Dell V305w All In One Wireless Inkjet Printer | User's Guide - Page 8
Normal Photo Dark Press the Select button , and then use the left and right Arrow buttons to adjust the brightness setting. Paper Setup Paper Size Paper Type Zoom 50% *100% 150% 200% Custom % Fit to Page 2 x 2 Poster 3 x 3 Poster 4 x 4 Poster Repeat Image *1 Per Page 4 Per Page 9 Per Page - Dell V305w All In One Wireless Inkjet Printer | User's Guide - Page 9
, and press the Arrow button to continue. NOTE: ID Card Copy is only valid with Letter or A4 Paper. * Default factory setting Scan Mode The Scan Mode menu is only available if the printer is connected to a computer or a network adapter. Main Menu Scan Mode Main Menu Scan Color Scan To Computer - Dell V305w All In One Wireless Inkjet Printer | User's Guide - Page 10
4. Use the left and right Arrow buttons to scroll through the available menu items. 5. When the setting you want appears on the display, press the Select button to save the setting. Scan menu item Scan Color Scan To Computer Scan To Network Scan To Memory Device Quality Original Size *Default - Dell V305w All In One Wireless Inkjet Printer | User's Guide - Page 11
. NOTICE: Do not remove the memory card or USB key, or touch the printer near the area of the memory card or USB key while actively reading, writing, the If the memory card or USB key contains both documents and photos, the printer asks which files to print. Use the left and right Arrow buttons to - Dell V305w All In One Wireless Inkjet Printer | User's Guide - Page 12
item Print DPOF NOTE: This menu item is only available when a memory card with Digital Print Order Format (DPOF) images is inserted into the printer or when a PictBridge-enabled digital camera with DPOF images is connected to the PictBridge port. Photo Color Auto Enhance Save To Print Images Photo - Dell V305w All In One Wireless Inkjet Printer | User's Guide - Page 13
a PictBridge-enabled camera. You can print pictures using the controls of the camera. Main Menu PictBridge Mode Main Menu Paper Setup Photo Size Layout Quality 1. When your printer changes to PictBridge mode, use the left and right Arrow buttons the heading you want appears on the display, and - Dell V305w All In One Wireless Inkjet Printer | User's Guide - Page 14
is only available when a memory card or USB key containing documents is inserted into the printer or when the printer is connected to a configured internal network adapter. The printer recognizes files that have the following file extensions: .doc (Microsoft® Word) .xls (Microsoft Excel) .ppt - Dell V305w All In One Wireless Inkjet Printer | User's Guide - Page 15
. NOTICE: Do not remove the memory card or USB key, or touch the printer near the area of the memory card or USB key while actively reading, writing, choose the file that you want to print. Bluetooth Mode Your printer automatically switches to Bluetooth mode when you insert a Bluetooth™ adapter - Dell V305w All In One Wireless Inkjet Printer | User's Guide - Page 16
Printer Name The name of your printer appears on the display in this format:DellV305-service tag #. NOTE: The name appears on the printer list of devices that connect to your computer using the Bluetooth wireless factory setting Setup Mode Main Menu Setup Mode Main Menu Paper Setup Device Setup - Dell V305w All In One Wireless Inkjet Printer | User's Guide - Page 17
Paper Type Language Country Power Save Clear Settings Timeout Photo Print Size Set Defaults Print Setup Page Wi-Fi Protected Setup Wireless Information TCP/IP Menu Reset Network Adapter Defaults Maintenance Mode Main Menu Mode Main Menu Maintenance Ink Levels Clean Cartridges Align Cartridges - Dell V305w All In One Wireless Inkjet Printer | User's Guide - Page 18
right Arrow buttons and then press the Select button . until the heading you want appears on the display, Maintenance menu item Ink Levels Clean Cartridges Align Cartridges Print Test Page Settings Press the Select Press the Select Press the Select Press the Select button. button. button. button - Dell V305w All In One Wireless Inkjet Printer | User's Guide - Page 19
Support 1. Fan the paper. 2. Center the paper on the paper support. 3. Adjust the paper guides so they rest against the edges of the paper. NOTE: Do not pull on both paper guides simultaneously. When one paper guide is moved, the other adjusts accordingly. NOTE: Do not force paper into the printer - Dell V305w All In One Wireless Inkjet Printer | User's Guide - Page 20
quality. 20 sheets of banner paper You remove all paper from the paper support before inserting banner paper. You use banner paper designed for inkjet printers. You place a stack of banner paper on or behind the printer, and feed in the first sheet. The paper guides rest against the edges of the - Dell V305w All In One Wireless Inkjet Printer | User's Guide - Page 21
Photo print quality. 25 sheets of photo/glossy paper The print side of the paper faces up. The paper guides rest against the edges of the paper. You select Automatic, Normal, or Photo print quality. 10 iron-on transfers You follow the loading instructions on the iron-on transfer packaging. The - Dell V305w All In One Wireless Inkjet Printer | User's Guide - Page 22
If you load one of these paper types, the printer detects the paper type and automatically adjusts the Quality/Speed settings. Paper type Plain/heavyweight matte Transparency Photo/glossy Quality/Speed settings Black and Color Cartridges Installed Photo and Color Cartridges Installed Normal - Dell V305w All In One Wireless Inkjet Printer | User's Guide - Page 23
type. 4. Click OK. To turn off the automatic paper type sensor for all print jobs: 1. In Windows Vista™: a. Click Control Panel. b. Click Hardware and Sound. c. Click Printers. In Windows® XP, click Start Control Panel Printers and Other Hardware Printers and Faxes. In Windows 2000, click Start - Dell V305w All In One Wireless Inkjet Printer | User's Guide - Page 24
Loading Original Documents on the Scanner Glass 1. Open the top cover. 2. Place the document face down on the scanner glass. NOTE: Ensure that the upper left corner of the front of the item aligns with the arrow on the printer. 3. 4. Close the top cover. - Dell V305w All In One Wireless Inkjet Printer | User's Guide - Page 25
Printing Printing Documents 1. Turn on your computer and printer, and make sure they are connected. 2. Load the paper. For more information, see Loading Paper into the Paper Support. 3. With your document open, click File Print. The Print dialog box opens. 4. Click Preferences, Properties, Options, - Dell V305w All In One Wireless Inkjet Printer | User's Guide - Page 26
Printing Photos Printing Photos NOTE: Dell recommends you use a color cartridge and a photo cartridge for printing photos. 1. Turn on your computer and printer, and make sure they are connected. 2. Load paper with the print side facing up. NOTE: Photo/glossy paper is recommended for printing photos. - Dell V305w All In One Wireless Inkjet Printer | User's Guide - Page 27
-Enabled Camera Your printer supports printing from a PictBridge-enabled camera. 1. Turn on your printer. 2. Insert one end of the USB cable into the camera. 3. Insert the other end of the USB cable into the PictBridge port on the front of the printer. See the instructions included with your - Dell V305w All In One Wireless Inkjet Printer | User's Guide - Page 28
From the Computer 1. Turn on your computer and printer, and ensure that they are connected. 2. Load the paper. For more information, see Loading Paper into the Paper Support. 3. In Windows Vista™: a. Click Programs. b. Click Dell Printers. c. Click Dell V305. In Windows® XP and Windows 2000: Click - Dell V305w All In One Wireless Inkjet Printer | User's Guide - Page 29
. 2. Load the paper. For more information, see Loading Paper into the Paper Support. 3. In Windows Vista: a. Click Programs. b. Click Dell Printers. c. Click Dell V305. In Windows XP and Windows 2000: Click Start Programs or All Programs Dell Printers Dell V305. 4. Select Dell Imaging Toolbox - Dell V305w All In One Wireless Inkjet Printer | User's Guide - Page 30
Select the copy quality, paper size, paper type, and the number Dell Support website at support.dell.com. This website contains the latest documentation. Ensure that you read the documentation that came with your Bluetooth device for setup instructions. Setting up a Connection Between Your Printer - Dell V305w All In One Wireless Inkjet Printer | User's Guide - Page 31
printer does not support printing files from your computer using a Bluetooth connection. You need to set up a connection between a Bluetooth-enabled device and your printer Bluetooth connection on every print job. Refer to the instructions included with the device for Bluetooth printing information. - Dell V305w All In One Wireless Inkjet Printer | User's Guide - Page 32
device. 6. Configure the Bluetooth-enabled device to set up a connection to the printer. Refer to the instructions included with the device for Bluetooth connection information. NOTE: If the Bluetooth Security Level on the printer is set to High, you must enter a pass key. For more information - Dell V305w All In One Wireless Inkjet Printer | User's Guide - Page 33
and a Bluetooth-Enabled Device. 5. Set up the Bluetooth device to print to the printer. Refer to the instructions included with the device for Bluetooth printing setup information. 6. See the instructions included with the Bluetooth device to begin printing. NOTE: If the Bluetooth Security Level on - Dell V305w All In One Wireless Inkjet Printer | User's Guide - Page 34
Printing Envelopes 1. Turn on your computer and printer, and ensure that they are connected. 2. Load the envelope On the Print Setup tab, select Envelope, and then choose the size of the envelope from the Paper size: drop-down menu. NOTE: If you are mailing within Japan, the envelope can be printed - Dell V305w All In One Wireless Inkjet Printer | User's Guide - Page 35
box closes. 11. Click OK or Print. Printing More Than One Page on a Sheet of Paper 1. Turn on your computer and printer, and ensure that they are connected. 2. Load the paper. For more information, see Loading Paper into the Paper Support. 3. With your document open, click File Print. 4. Click - Dell V305w All In One Wireless Inkjet Printer | User's Guide - Page 36
box closes. 9. Click OK or Print. Printing a Banner 1. Turn on your computer and printer, and make sure they are connected. 2. Load the paper. For more information, see Loading Paper into the Paper Support. 3. With your document open, click File Print. 4. Click Preferences, Properties, Options, or - Dell V305w All In One Wireless Inkjet Printer | User's Guide - Page 37
computer and printer, and make sure they are connected. 2. Load the paper. For more information, see Loading Paper into the Paper Support. 3. specify the number of copies to print. NOTE: You must specify more than one copy for the Collate copies check box to become active. 6. Select the Collate - Dell V305w All In One Wireless Inkjet Printer | User's Guide - Page 38
. The printed bundles are stacked, one on top of the other, keeping the correct page order. The stacked bundles can be bound to make a booklet. When printing with a heavier paper stock, select a smaller number of Sheets per bundle. 7. Click OK to close any printer software dialog boxes that are open - Dell V305w All In One Wireless Inkjet Printer | User's Guide - Page 39
with the front page down, one on top of the other, until the booklet is complete. 5. Bind the bundles together to complete the booklet. Duplexing a Print Job (TwoSided Printing) Manual duplex allows you to print your document on both sides of the paper. The printer prints the odd-numbered pages of - Dell V305w All In One Wireless Inkjet Printer | User's Guide - Page 40
a. Click Control Panel. b. Click Hardware and Sound. c. Click Printers. In Windows® XP, click Start Settings Control Panel Printers and Other Hardware Printers and Faxes. In Windows 2000, click Start Settings Printers. 2. Right-click the Dell V305 icon. 3. Click Open. 4. Select the job you - Dell V305w All In One Wireless Inkjet Printer | User's Guide - Page 41
a Wireless Network 1. In Windows Vista: a. Click Control Panel. b. Click Hardware and Sound. c. Click Printers. In Windows XP, click Start Settings Control Panel Printers and Other Hardware Printers and Faxes. In Windows 2000, click Start Settings Printers. 2. Right-click the Dell V305 - Dell V305w All In One Wireless Inkjet Printer | User's Guide - Page 42
. From the Maintenance tab: There are no print settings to set as default from the Maintenance tab. From here, you can: Install, clean, and align ink cartridges. Print a test page. Get information on sharing your printer on a network. - Dell V305w All In One Wireless Inkjet Printer | User's Guide - Page 43
is being read or is transmitting data. NOTE: Do not insert more than one memory card at a time. The connector that is used for PictBridge may also stored on it, the printer asks the user which file to print. For more information, see Photo Mode. NOTE: The printer supports FAT32 data format. Files - Dell V305w All In One Wireless Inkjet Printer | User's Guide - Page 44
the instructions on Paper into the Paper Support. 3. Insert a CD or connect a flash memory device (such as a flash drive, memory card, or digital camera) to the computer, and close any Windows dialogs that appear. 4. In Windows Vista™: a. Click Programs. b. Click Dell Printers. c. Click Dell - Dell V305w All In One Wireless Inkjet Printer | User's Guide - Page 45
the drop-down lists, select the print quality, paper size, and paper type settings you want. 12. To select multiple Photo above the Print Preview pane. Select One-Click Auto Fix, Automatic Red-Eye Reduction or USB key contains photos only, the printer automatically switches to the PHOTO mode. If - Dell V305w All In One Wireless Inkjet Printer | User's Guide - Page 46
still cameras and not modified by any application are supported. If you want to print photos stored on the paper loaded is not smaller than the size you specified in the DPOF selection. 2. Insert the memory card. The printer automatically switches to PHOTO mode. NOTE: Do not insert more than one - Dell V305w All In One Wireless Inkjet Printer | User's Guide - Page 47
Start button . The proof sheet prints. 7. Follow the instructions on the proof sheet to select which photos to print, and to choose a layout and paper type to use. Fill in the circle with the red- on the Scanner Glass. 9. Load the paper. For more information, see Loading Paper into the Paper Support. - Dell V305w All In One Wireless Inkjet Printer | User's Guide - Page 48
size of the paper you loaded in the printer matches the paper size you specified in the proof sheet. NOTE: Photo/glossy paper is recommended for press the Select button . For information on which file types are supported by your printer, see Office File Mode. 3. Use the left and right Arrow buttons - Dell V305w All In One Wireless Inkjet Printer | User's Guide - Page 49
in the current default settings. Using Your Computer 1. Turn on your computer and printer, and ensure that they are connected. 2. Load the paper. For more information, see Loading Paper into the Paper Support. 3. Load your original document. For more information, see Loading Original Documents on - Dell V305w All In One Wireless Inkjet Printer | User's Guide - Page 50
® XP or Windows 2000: Click Start Programs or All Programs Dell Printers Dell V305. 5. Select Dell Imaging Toolbox. The Dell Imaging Toolbox dialog box opens. 6. From the Home screen, click Copy Using the Operator Panel 1. Turn on the printer. 2. Load the paper. 3. Load your original document. - Dell V305w All In One Wireless Inkjet Printer | User's Guide - Page 51
For more information, see Loading Paper into the Paper Support. 3. Load your original photo on the scanner glass. For more information, see Loading Original Documents on the Scanner Glass. 4. In Windows Vista: a. Click Programs. b. Click Dell Printers. c. Click Dell V305. In Windows XP or Windows - Dell V305w All In One Wireless Inkjet Printer | User's Guide - Page 52
. 9. Click Start. The photo appears in the right pane of the Copy dialog box. 10. From the drop-down lists, select the print quality, paper size, and paper type settings that you want. 11. To select multiple prints of a photo, or to select photo sizes other than 10 x 15 cm (4 x 6 in.), select - Dell V305w All In One Wireless Inkjet Printer | User's Guide - Page 53
Use the left and right Arrow buttons Select button . to scroll to Scan To Computer, and then press the 5. If your printer is connected using a USB cable: a. The printer downloads the application list from the computer. Use the left and right Arrow buttons which your scan can be sent. to scroll - Dell V305w All In One Wireless Inkjet Printer | User's Guide - Page 54
Scanner Glass. 3. In Windows Vista™: a. Click Programs. b. Click Dell Printers. c. Click Dell V305. In Windows® XP or Windows 2000: Click Start Programs or All Programs Dell Printers Dell V305. 4. Select Dell Imaging Toolbox. The Dell Imaging Toolbox dialog box opens. 5. From the Home screen - Dell V305w All In One Wireless Inkjet Printer | User's Guide - Page 55
Support. The Dell Networking Options dialog box opens. 4. From the Dell Networking Options dialog box, click Change your PC name and PIN for network scanning. 5. Follow the instructions Click Programs. b. Click Dell Printers. c. Click Dell V305. In Windows XP and Windows 2000: Click Start - Dell V305w All In One Wireless Inkjet Printer | User's Guide - Page 56
on the Scanner Glass. 3. In Windows Vista: a. Click Programs. b. Click Dell Printers. c. Click Dell V305. In Windows XP and Windows 2000: Click Start Programs or All Programs Dell Printers Dell V305. 4. Select Dell Imaging Toolbox. The Dell Imaging Toolbox opens. 5. From the Home screen, click - Dell V305w All In One Wireless Inkjet Printer | User's Guide - Page 57
on the Scanner Glass. 3. In Windows Vista: a. Click Programs. b. Click Dell Printers. c. Click Dell V305. In Windows XP and Windows 2000: Click Start Programs or All Programs Dell Printers Dell V305. 4. Select Dell Imaging Toolbox. The Dell Imaging Toolbox opens. 5. From the Home screen, click - Dell V305w All In One Wireless Inkjet Printer | User's Guide - Page 58
V305. In Windows XP and Windows 2000: Click Start Programs or All Programs Dell Printers Dell V305. 4. Select Dell Imaging Toolbox. The Dell Imaging Toolbox opens. 5. From the Home screen, click Scan. 6. Select the Photo or Several Photos option. 7. Click Start. 8. From the right pane of the Save - Dell V305w All In One Wireless Inkjet Printer | User's Guide - Page 59
In Windows XP and Windows 2000: Click Start Programs or All Programs Dell Printers Dell V305. 3. Select Dell Imaging Toolbox. The Dell Imaging Toolbox opens. 4. From the Home screen, click Activities. 5. Click Resize a Scanned Image. 6. If you are scanning a new image: a. Click File New Scan - Dell V305w All In One Wireless Inkjet Printer | User's Guide - Page 60
Scanner Glass. 3. In Windows Vista: a. Click Programs. b. Click Dell Printers. c. Click Dell V305. In Windows XP and Windows 2000: Click Start Programs or All Programs Dell Printers Dell V305. 4. Select Dell Imaging Toolbox. The Dell Imaging Toolbox opens. 5. From the Home screen, click Scan - Dell V305w All In One Wireless Inkjet Printer | User's Guide - Page 61
want to add, and then click E-mail. 6. If you are sending one or more photos, select a photo size. 7. Click Create E-mail to Dell Printers. c. Click Dell V305. In Windows XP and Windows 2000: Click Start Programs or All Programs Dell Printers Dell V305. 3. Select Dell Imaging Toolbox. The Dell - Dell V305w All In One Wireless Inkjet Printer | User's Guide - Page 62
from the Library. 10. To add or scan another image: a. Do one of the following: Select Add New Scan, and then select Photo, Dell Printers. c. Click Dell V305. In Windows XP and Windows 2000: Click Start Programs or All Programs Dell Printers Dell V305. 2. Select Dell Imaging Toolbox. The Dell - Dell V305w All In One Wireless Inkjet Printer | User's Guide - Page 63
from the Library. 7. To add or scan another image: a. Do one of the following: Select Add New Scan, and then select Photo, Dell Printers. c. Click Dell V305. In Windows XP and Windows 2000: Click Start Programs or All Programs Dell Printers Dell V305. 2. Select Dell Imaging Toolbox. The Dell - Dell V305w All In One Wireless Inkjet Printer | User's Guide - Page 64
scanned item. Select the area to be scanned by selecting a paper size from the drop-down list. Convert the image to text with Dell Printers. c. Click Dell V305. In Windows XP and Windows 2000: Click Start Programs or All Programs Dell Printers Dell V305. 2. Select Dell Imaging Toolbox. The Dell - Dell V305w All In One Wireless Inkjet Printer | User's Guide - Page 65
Printing Preferences- Allows you to adjust printer settings. Dell Service Center- Provides step-by-step troubleshooting help, maintenance tasks, and customer support. Dell Ink Management System™- Warns you when your printer is running low on ink. Adobe® Photoshop® Album Starter Edition- Allows - Dell V305w All In One Wireless Inkjet Printer | User's Guide - Page 66
, scan, or copy. Manage photos in a digital photo album. E-mail scanned documents and photos. Check ink levels. Order supplies online. To access the Dell Imaging Toolbox: 1. In Windows Vista™: a. Click Programs. b. Click Dell Printers. c. Click Dell V305. In Windows® XP and Windows 2000: - Dell V305w All In One Wireless Inkjet Printer | User's Guide - Page 67
Dell Printers Dell V305. 2. Select Dell Imaging Toolbox. The Dell Imaging Toolbox dialog box opens. The Dell one time, and save them as individual files. Print Borderless Print photos without borders. Photos Print Settings Adjust printer settings such as the quality, number of copies, paper - Dell V305w All In One Wireless Inkjet Printer | User's Guide - Page 68
For more information, click the Help icon in the Dell Imaging Toolbox. Using Printing Preferences You can change your printer settings in Printing Preferences depending on the type of project you want to create. To access Printing Preferences when a document is open: 1. Click File Print. - Dell V305w All In One Wireless Inkjet Printer | User's Guide - Page 69
Type - Allows you to set the paper type manually, or have the printer detect the paper type automatically. Paper Size - Select the size of your paper. Print in black and white - Print your color images in black and white to save the ink in your color cartridge. NOTE: You cannot select this setting - Dell V305w All In One Wireless Inkjet Printer | User's Guide - Page 70
Tab Options Align Ink Cartridges Print a Test Page Network Support Using the Dell Service Center The Dell Service Center is a diagnostic tool that provides step-by-step troubleshooting help with problems encountered while using the printer. It also contains links to printer maintenance tasks and - Dell V305w All In One Wireless Inkjet Printer | User's Guide - Page 71
or All Programs Dell Printers Dell V305. 2. Click Dell Service Center. The Dell Service Center dialog box opens. Dell Ink Management System Each time you print a job, a printing progress screen appears, which shows the progress of the print job as well as the amount of ink remaining and the - Dell V305w All In One Wireless Inkjet Printer | User's Guide - Page 72
. To launch Memory Card Manager: 1. Insert a memory card into the memory card slot or a USB key into the PictBridge port on the front of the printer. - Dell V305w All In One Wireless Inkjet Printer | User's Guide - Page 73
WIndows 2000: Click Start Programs or All Programs Dell Printers Dell V305. 2. Click Uninstall Dell V305. 3. Follow the instructions on the screen. 4. Restart your computer. 5. Insert the Drivers and Utilities CD, and then follow the instructions on the screen. If the installation screen does not - Dell V305w All In One Wireless Inkjet Printer | User's Guide - Page 74
setup.exe. c. When the printer software installation screen appears, click Using a USB cable or Using a wireless network. d. Follow the instructions on your screen to complete the installation. Installing the Adobe® Photoshop® Album Manually 1. Insert the Drivers and Utilities CD. 2. In Windows - Dell V305w All In One Wireless Inkjet Printer | User's Guide - Page 75
XPS files are launched. Follow the instructions on the screen to finish installing the patch. To install the driver: 1. Click Control Panel. 2. Under Hardware and Sound, click Printer, and then click Add a Printer. 3. From the Add Printer dialog box, choose one of the following: If you are - Dell V305w All In One Wireless Inkjet Printer | User's Guide - Page 76
e. From the Install From Disk dialog box, click OK. Click Next on the following two dialog boxes. Wireless Networking - Dell V305w All In One Wireless Inkjet Printer | User's Guide - Page 77
only to the Dell V305w printer, which is equipped with a wireless adapter. NOTE: For more wireless information, see your router's Operation Manual or contact your router manufacturer's helpline or your broadband service provider. The Dell™ Printer An existing wireless network The Drivers and - Dell V305w All In One Wireless Inkjet Printer | User's Guide - Page 78
properly. The computer you are using is connected to the same wireless network where you want to set up the printer. 1. If you are using your printer with a new Dell computer: Connect the USB cable between the port on the back of the printer and the port on the back of the computer. Go to - Dell V305w All In One Wireless Inkjet Printer | User's Guide - Page 79
IP address. If you are unsure of the router IP address, follow the instructions for Using USB Cable to Configure the Printer on a Wireless Network (recommended for most users). NOTE: If your wireless network security is disabled, make sure to enable the security settings before proceeding with - Dell V305w All In One Wireless Inkjet Printer | User's Guide - Page 80
your username and password. If you are not sure of the username and password, contact your router manufacturer's helpline or your Internet service provider. 8. On your printer operator panel, use the left or right arrow button then press the Select button . to scroll to Setup, and 9. Use the left - Dell V305w All In One Wireless Inkjet Printer | User's Guide - Page 81
panel. Check if the printer's Wi-Fi LED turns blue. For more information, see Wi-Fi LED. Continue with step 14. If setup is not successful or times out, perform step 8 to step 13 again. 14. Close the router WPS page. 15. Follow the instructions on the installation screen to complete setup - Dell V305w All In One Wireless Inkjet Printer | User's Guide - Page 82
Dell computer: Connect the USB cable between the port on the back of the printer and the port on the back of the computer. Go to step 5. If you are using your printer with an existing computer: Go to the next step. 2. Ensure that your computer is on, and then insert the Drivers and - Dell V305w All In One Wireless Inkjet Printer | User's Guide - Page 83
panel. Check if the printer's Wi-Fi LED turns blue. For more information, see Wi-Fi LED. Continue with step 14. If setup is not successful or times out, perform step 8 to step 13 again. 14. Close the router WPS page. 15. Follow the instructions on the installation screen to complete setup - Dell V305w All In One Wireless Inkjet Printer | User's Guide - Page 84
Programs. 2. Click Dell Printers. 3. Click Dell V305. 4. Click Dell Wireless Setup Utility. 5. Follow the instructions on your screen to change wireless settings. In Windows XP and Windows 2000: 1. Click Start Programs or All Programs Dell Printers Dell V305. 2. Click Dell Wireless Setup Utility - Dell V305w All In One Wireless Inkjet Printer | User's Guide - Page 85
The Wireless Setup Utility steps you through the configuration process. The wizard can automatically detect wireless network settings or allow you to manually enter the network configuration settings. - Dell V305w All In One Wireless Inkjet Printer | User's Guide - Page 86
across the network through peer-to-peer sharing. Sharing the printer using your computer may slow down the speed of your computer. To share the printer: 1. Assign a "share name" to the printer. For more information, see Sharing the Printer on the Network. 2. Set up the network computers that you - Dell V305w All In One Wireless Inkjet Printer | User's Guide - Page 87
Click Control Panel. 2. Click Hardware and Sound. 3. Click Printers. 4. Click Add a printer. 5. Click Add a network, wireless or Bluetooth printer. 6. To manually connect to the shared printer, click The printer I want isn't listed. 7. From the Find a printer by name or TCP/IP address dialog box - Dell V305w All In One Wireless Inkjet Printer | User's Guide - Page 88
share name. To view the name of the computer that you want to share the printer with, go to the host computer. a. In Windows XP, click Start Settings Control Panel Performance and Maintenance System. In Windows 2000, click Start Settings System. b. - Dell V305w All In One Wireless Inkjet Printer | User's Guide - Page 89
in your Owner's Manual. Dell™ ink cartridges are available only through Dell. You can order more ink online at www.dell.com/supplies or by phone. CAUTION: It is recommended that Dell ink cartridges be used for your printer. Dell does not provide warranty coverage for problems caused by using - Dell V305w All In One Wireless Inkjet Printer | User's Guide - Page 90
side or the metal nozzles on the bottom of the ink cartridges. 7. Insert the new ink cartridges. Make sure the black or photo ink cartridge is secure in the left ink cartridge carrier, and the color ink cartridge is secure in the right ink cartridge carrier. NOTE: For normal printing, use a black - Dell V305w All In One Wireless Inkjet Printer | User's Guide - Page 91
Ink Cartridges Your printer automatically prompts you to align the ink cartridges when they are installed or replaced. You may also need to align ink cartridges align the ink cartridges from the operator panel: 1. Load plain paper. For more information, see Loading Paper into the Paper Support. 2. - Dell V305w All In One Wireless Inkjet Printer | User's Guide - Page 92
see Loading Paper into the Paper Support. 2. Use the left and right Arrow buttons button . to scroll to MAINTENANCE, and then press the Select 3. Use the left and right Arrow buttons Select button . to scroll to Clean Cartridges, and then press the To clean the nozzles from the printer software - Dell V305w All In One Wireless Inkjet Printer | User's Guide - Page 93
Printers. 3. Right-click the Dell V305 icon. 4. Click Printing Preferences. The Printing Preferences dialog box opens. 5. Click the Maintenance tab. 6. Click Clean Ink Cartridges all cables to the printer before proceeding. 2. Remove paper from the paper support and paper exit tray. 3. Dampen - Dell V305w All In One Wireless Inkjet Printer | User's Guide - Page 94
ink residue that has accumulated on the paper exit tray. NOTICE: Using a damp cloth to clean the interior may cause damage to your printer. Damage to the printer caused by not following the correct instructions for cleaning will not be covered under warranty. 5. Make sure the paper support and paper - Dell V305w All In One Wireless Inkjet Printer | User's Guide - Page 95
5. Use the left and right Arrow buttons button . to scroll to Use Factory, and then press the Select 6. Select the correct language and country. - Dell V305w All In One Wireless Inkjet Printer | User's Guide - Page 96
more help and to check the latest information on troubleshooting your printer, please visit http://support.dell.com/support. Setup Problems Computer Problems Verify that your printer is compatible with your computer. The printer supports Windows Vista™, Windows® XP, and Windows 2000 only. Windows - Dell V305w All In One Wireless Inkjet Printer | User's Guide - Page 97
or All Programs Dell Printers Dell V305. If the printer does not appear in the list of printers, the printer software is not installed. Install the printer software. For more information, see Removing and Reinstalling Software. Correct communication problems between the printer and the computer - Dell V305w All In One Wireless Inkjet Printer | User's Guide - Page 98
port that was originally used for the printer. Also, do not install printer drivers multiple times from the Drivers and Utilities CD. Printer Problems Ensure the printer power cable is firmly connected to the printer and the electrical outlet. Determine if the printer has been held or paused. 1. In - Dell V305w All In One Wireless Inkjet Printer | User's Guide - Page 99
ink cartridges correctly and removed the sticker and tape from each cartridge. Make sure you loaded the paper correctly. For more information, see Loading Paper into the Paper Support. Make sure the printer on troubleshooting your printer, please visit http://support.dell.com/support. Error - Dell V305w All In One Wireless Inkjet Printer | User's Guide - Page 100
Ink @ WWW.DELL.COM/SUPPLIES. Press to continue. The ink cartridge is running low on ink. Replace the ink cartridge. For more information, see Replacing Ink Cartridges. Left cartridge error. Replace Cartridge. Right cartridge error. Replace Cartridge. Install both cartridges. An ink cartridge - Dell V305w All In One Wireless Inkjet Printer | User's Guide - Page 101
Message: What it indicates: Solution: troubleshooting. Press to retry. installed. Cartridge Error. Consult User's Guide. One or both of the ink cartridges is invalid. Remove both cartridges, then install one at a time to determine which is invalid. Memory card problem. Ensure that it is not - Dell V305w All In One Wireless Inkjet Printer | User's Guide - Page 102
more information, go to http://support.dell.com/support. Clearing Paper Jams Paper jam in the paper path 1. Pull the paper firmly to remove it. If you cannot reach the paper because it is too far into the printer, lift the scanner base unit to open the printer. 2. Pull the paper out. 3. Close the - Dell V305w All In One Wireless Inkjet Printer | User's Guide - Page 103
use creased, damp, or curled paper. Orient the media according to the instructions for the printer. Paper Problems Make sure you loaded the paper correctly. For more information, see Loading Paper into the Paper Support. Use only paper recommended for your printer. For more information, see Print - Dell V305w All In One Wireless Inkjet Printer | User's Guide - Page 104
Paper Jams. Printing Problems Check the ink levels, and install new print cartridges if necessary. For more information, see Replacing Ink Cartridges. Ensure that you remove individual sheets from the paper exit tray. To avoid ink your system. Uninstall the printer software, and then reinstall it. - Dell V305w All In One Wireless Inkjet Printer | User's Guide - Page 105
Copying Problems Check for blinking lights or error messages on the printer. For more information, see Error Click Dell Printers. c. Click Dell V305. In Windows XP or Windows 2000: Click Start Programs or All Programs Dell Printers Dell V305. 2. Select Dell Imaging Toolbox. The Dell Imaging - Dell V305w All In One Wireless Inkjet Printer | User's Guide - Page 106
Original Documents on the Scanner Glass. Check paper sizes. Make sure the paper size being used matches the size you selected on the operator panel or the Dell Imaging Toolbox. Scanning Problems Check for blinking lights and error messages on the printer. For more information, see Error Messages - Dell V305w All In One Wireless Inkjet Printer | User's Guide - Page 107
or All Programs Dell Printers Dell V305. If the printer does not appear in the list of printers, the printer software is not installed. Install the printer software. For more information, see Removing and Reinstalling Software. Correct communication problems between the printer and the computer - Dell V305w All In One Wireless Inkjet Printer | User's Guide - Page 108
quality is poor. 1. In Windows Vista: a. Click Programs. b. Click Dell Printers. c. Click Dell V305. In Windows XP and Windows 2000: Click Start Programs or All Programs Dell Printers Dell V305. 2. Select Dell Imaging Toolbox. The Dell Imaging Toolbox dialog box opens. 3. From the Home screen - Dell V305w All In One Wireless Inkjet Printer | User's Guide - Page 109
scanned documents. 1. In Windows Vista: a. Click Programs. b. Click Dell Printers. c. Click Dell V305. In Windows XP or Windows 2000: Click Start Programs or All Programs Dell Printers Dell V305. 2. Select Dell Imaging Toolbox. The Dell Imaging Toolbox dialog box opens. 3. From the Home screen - Dell V305w All In One Wireless Inkjet Printer | User's Guide - Page 110
Problems Check power. Ensure that the printer power light is on. Check cable. Ensure that the power cable is connected to the printer connection. Ensure that the printer is connected to a working network Problems Make sure that the type of memory card you are using can be used in the printer - Dell V305w All In One Wireless Inkjet Printer | User's Guide - Page 111
a memory card, make sure the file format of the images is supported by the printer. Only images in JPEG and a limited set of TIFF formats can . Use the appropriate paper. For example, use Dell™ Premium Photo Paper if you are printing photos with a photo ink cartridge. Select a higher print - Dell V305w All In One Wireless Inkjet Printer | User's Guide - Page 112
or Loading Print Media Attempting to print on damp, curled, wrinkled, or torn paper can cause paper jams and poor print quality. Use only high-quality, copier-grade paper for the best print quality. Avoid paper with embossed lettering, perforations, or a texture that is too smooth or rough - Dell V305w All In One Wireless Inkjet Printer | User's Guide - Page 113
FLASH USB 2.0 high-speed 3,000 pages per month Printer: 12,000 pages Scanner: 12,000 scans Environmental 40 to 80% 5 to 80% 5 to 100% Power Consumption and Requirements Rated AC input Rated frequency Minimum AC input Maximum AC input Maximum input current Average power consumption Standby - Dell V305w All In One Wireless Inkjet Printer | User's Guide - Page 114
from 72 to 19,200 dpi. Although your printer has this capability, Dell™ recommends using the preset resolutions. Print and Glossy paper All other media 600 x 600 dpi 300 x 600 dpi 1200 x 1200 dpi 600 x 600 dpi 4800 x 1200 dpi 1200 x 1200 dpi Operating System Support The printer supports: - Dell V305w All In One Wireless Inkjet Printer | User's Guide - Page 115
Media Types and Sizes Media type: Sizes supported: Load up to: Plain paper or coated paper Letter: 8.5 x 11 inches (216 x 279 mm) A4: 8.27 x 11.69 inches (210 x 297 mm) Legal: 8.5 x 14 inches (216 x 355.6 mm) 100 sheets Banner paper A4 Banner Letter Banner 20 sheets Envelopes 9 Envelopes: - Dell V305w All In One Wireless Inkjet Printer | User's Guide - Page 116
Cables Your printer uses a Universal Serial Bus (USB) cable (sold separately). - Dell V305w All In One Wireless Inkjet Printer | User's Guide - Page 117
customer in the troubleshooting process and provides for restoration of the Operating System, application software and hardware drivers to the original default configuration as shipped from Dell, as well as the verification of appropriate functionality of the printer and all Dell-installed hardware - Dell V305w All In One Wireless Inkjet Printer | User's Guide - Page 118
to new in accordance with industry-standard practices. For information about the Dell warranty for your printer, refer to the Product Information Guide. Wireless Regulatory Information Wireless Interoperability The Dell Wireless Printer Adapter products are designed to be interoperable with any - Dell V305w All In One Wireless Inkjet Printer | User's Guide - Page 119
devices because their signals could interfere with critical aircraft instruments Regulatory Information The Dell Wireless Printer Adapter must be installed and used in strict accordance with the manufacturer's instructions as described in the user documentation that comes with the product. For - Dell V305w All In One Wireless Inkjet Printer | User's Guide - Page 120
and on), the user is encouraged to try to correct the interference by taking one or more of the following measures: Relocate this device. Increase the . NOTE: This Dell Wireless Printer Adapter must be installed and used in strict accordance with the manufacturer's instructions as described in - Dell V305w All In One Wireless Inkjet Printer | User's Guide - Page 121
any rights to the Dell- or third-party-copyrighted software in this printer. Since the GNU licensed software that the Dell modifications are based upon (INCLUDING, BUT NOT LIMITED TO, PROCUREMENT OF SUBSTITUTE GOODS OR SERVICES; LOSS OF USE, DATA, OR PROFITS; OR BUSINESS INTERRUPTION) HOWEVER - Dell V305w All In One Wireless Inkjet Printer | User's Guide - Page 122
have the freedom to distribute copies of free software (and charge for this service if you wish), that you receive source code or can get it if to know that what they have is not the original, so that any problems introduced by others will not reflect on the original authors' reputations. Finally, - Dell V305w All In One Wireless Inkjet Printer | User's Guide - Page 123
0. This License applies to any program or other work which contains a notice placed by the copyright holder saying it may be distributed under the terms of this General Public License. The "Program", below, refers to any such program or work, and a "work based on the Program" means either the - Dell V305w All In One Wireless Inkjet Printer | User's Guide - Page 124
based on it, under Section 2) in object code or executable form under the terms of Sections 1 and 2 above provided that you also do one of the following: a. Accompany it with the complete corresponding machine-readable source code, which must be distributed under the terms of Sections 1 and 2 above - Dell V305w All In One Wireless Inkjet Printer | User's Guide - Page 125
, but may differ in detail to address new problems or concerns. Each version is given a distinguishing exceptions for this. Our decision will be guided by the two goals of preserving the DEFECTIVE, YOU ASSUME THE COST OF ALL NECESSARY SERVICING, REPAIR OR CORRECTION. 12. IN NO EVENT UNLESS REQUIRED - Dell V305w All In One Wireless Inkjet Printer | User's Guide - Page 126
price. Our General Public Licenses are designed to make sure that you have the freedom to distribute copies of free software (and charge for this service if you wish); that you receive source code or can get it if you want it; that - Dell V305w All In One Wireless Inkjet Printer | User's Guide - Page 127
on, the recipients should know that what they have is not the original version, so that the original author's reputation will not be affected by problems that might be introduced by others. Finally, software patents pose a constant threat to the existence of any free program. We wish to make sure - Dell V305w All In One Wireless Inkjet Printer | User's Guide - Page 128
Although the Lesser General Public License is Less protective of the users' freedom, it does ensure that the user of a program that is linked with the Library has the freedom and the wherewithal to run that program using a modified version of the Library. The precise terms and conditions for copying - Dell V305w All In One Wireless Inkjet Printer | User's Guide - Page 129
c. You must cause the whole of the work to be licensed at no charge to all third parties under the terms of this License. d. If a facility in the modified Library refers to a function or a table of data to be supplied by an application program that uses the facility, other than as an argument passed - Dell V305w All In One Wireless Inkjet Printer | User's Guide - Page 130
copyright notice for the Library among them, as well as a reference directing the user to the copy of this License. Also, you must do one of these things: a. Accompany the work with the complete corresponding machine-readable source code for the Library including whatever changes were used in the - Dell V305w All In One Wireless Inkjet Printer | User's Guide - Page 131
materials to be distributed need not include anything that is normally distributed (in either source or binary form) with the major components (compiler, kernel, and so on) of the operating system on which the executable runs, unless that component itself accompanies the executable. It may happen - Dell V305w All In One Wireless Inkjet Printer | User's Guide - Page 132
, but may differ in detail to address new problems or concerns. Each version is given a distinguishing exceptions for this. Our decision will be guided by the two goals of preserving the DEFECTIVE, YOU ASSUME THE COST OF ALL NECESSARY SERVICING, REPAIR OR CORRECTION. 16. IN NO EVENT UNLESS REQUIRED - Dell V305w All In One Wireless Inkjet Printer | User's Guide - Page 133
1 April 1990 Lexmark International, Inc. That's all there is to it!
-
 1
1 -
 2
2 -
 3
3 -
 4
4 -
 5
5 -
 6
6 -
 7
7 -
8
-
9
-
10
-
11
-
12
-
13
-
14
-
15
-
16
-
17
-
18
-
19
-
20
-
21
-
22
-
23
-
24
-
25
-
26
-
27
-
28
-
29
-
30
-
31
-
32
-
33
-
34
-
35
-
36
-
37
-
38
-
39
-
40
-
41
-
42
-
43
-
44
-
45
-
46
-
47
-
48
-
49
-
50
-
51
-
52
-
53
-
54
-
55
-
56
-
57
-
58
-
59
-
60
-
61
-
62
-
63
-
64
-
65
-
66
-
67
-
68
-
69
-
70
-
71
-
72
-
73
-
74
-
75
-
76
-
77
-
78
-
79
-
80
-
81
-
82
-
83
-
84
-
85
-
86
-
87
-
88
-
89
-
90
-
91
-
92
-
93
-
94
-
95
-
96
-
97
-
98
-
99
-
100
-
101
-
102
-
103
-
104
-
105
-
106
-
107
-
108
-
109
-
110
-
111
-
112
-
113
-
114
-
115
-
116
-
117
-
118
-
119
-
120
-
121
-
122
-
123
-
124
-
125
-
126
-
127
-
128
-
129
-
130
-
131
-
132
-
133
 |
 |
Dell™ V305 Printer User's Guide
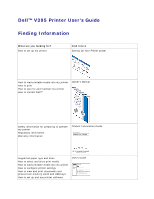
Finding Information
What are you looking for?
Find it here
How to set up my printer
Setting Up Your Printer
poster
How to load printable media into my printer
How to print
How to care for and maintain my printer
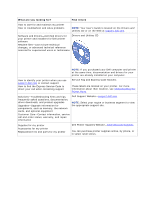
How to contact Dell™
Owner's Manual
Safety information for preparing to operate
my printer
Regulatory information
Warranty information
Product Information Guide
Supported paper type and sizes
How to select and store print media
How to load printable media into my printer
How to configure printer settings
How to view and print documents and
photos from memory cards and USB keys
How to set up and use printer software
User's Guide