Dell V313W User's Guide - Page 15
Changing temporary settings into new default settings - printer
 |
UPC - 884116016519
View all Dell V313W manuals
Add to My Manuals
Save this manual to your list of manuals |
Page 15 highlights
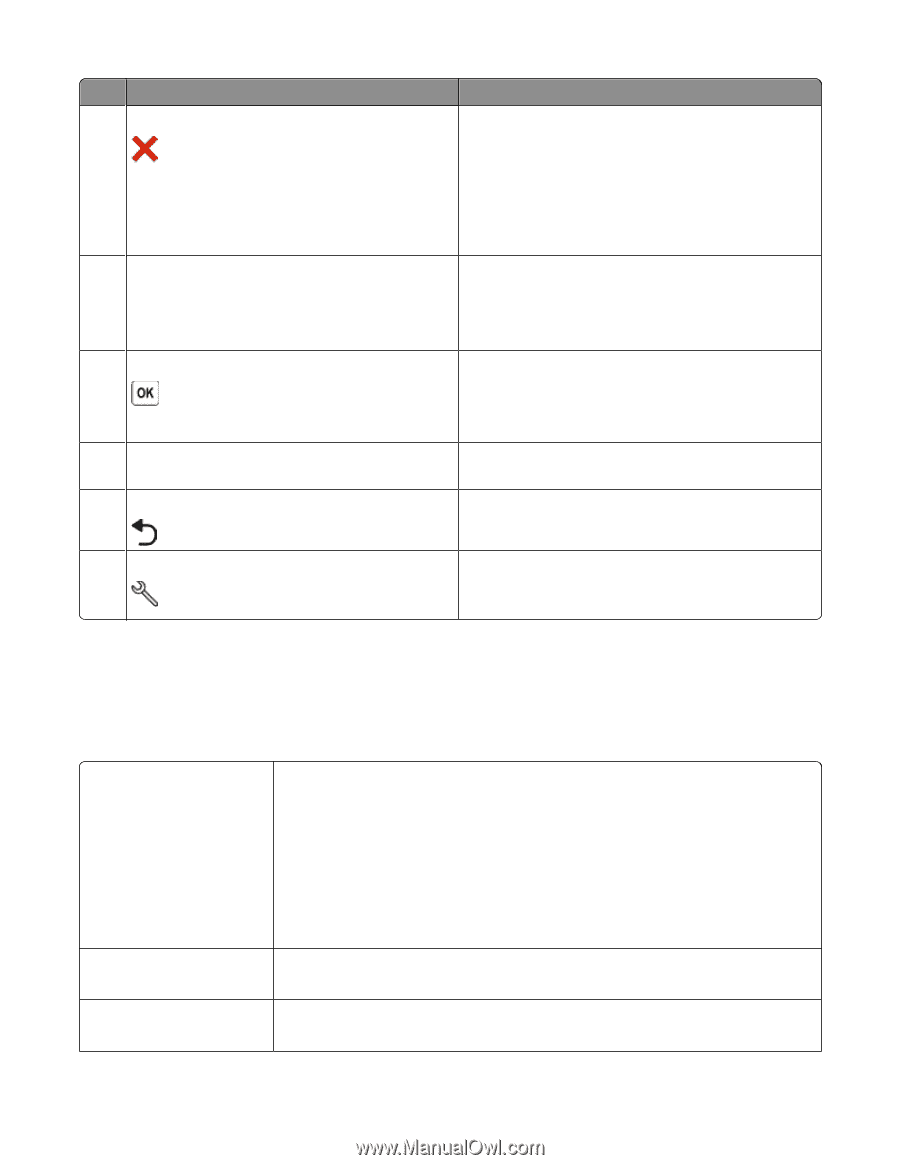
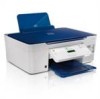
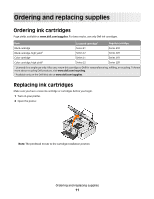
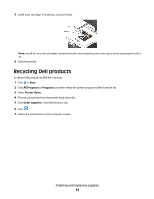
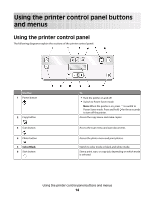
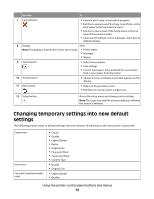
Use the: To 7 Cancel button • Cancel a print, copy, or scan job in progress. • Exit from a menu level of the Copy, Scan, Photo, or File Print menu to the top level of a menu. • Exit from a menu level of the Setup menu to the top level of the previous mode. • Clear current settings or error messages, and return to default settings. 8 Display View: Note: The display is turned off in Power Saver mode. • Printer status • Messages • Menus 9 Select button • Select menu options. • Save settings. • Feed or eject paper. Press and hold for 3 seconds to feed or eject paper from the printer. 10 Arrow buttons • Choose a menu or submenu item that appears on the display. 11 Back button • Return to the previous screen. • Exit from one menu level to a higher one. 12 Setup button Access the setup menu and change printer settings. Note: The Copy, Scan and Photo button lights are off when this button is selected. Changing temporary settings into new default settings The following menus revert to default settings after two minutes of inactivity or after the printer is turned off: Copy menu Scan menu Fax menu (selected models only) • Copies • Quality • Lighter/Darker • Resize • Original Size • Pages per Sheet • Copies per Sheet • Content Type • Quality • Original Size • Lighter/Darker • Quality Using the printer control panel buttons and menus 15
-
 1
1 -
2
-
3
-
4
-
5
-
6
-
7
-
8
-
9
-
 10
10 -
 11
11 -
 12
12 -
 13
13 -
 14
14 -
 15
15 -
 16
16 -
 17
17 -
 18
18 -
 19
19 -
 20
20 -
21
-
22
-
23
-
24
-
25
-
26
-
27
-
28
-
29
-
30
-
31
-
32
-
33
-
34
-
35
-
36
-
37
-
38
-
39
-
40
-
41
-
42
-
43
-
44
-
45
-
46
-
47
-
48
-
49
-
50
-
51
-
52
-
53
-
54
-
55
-
56
-
57
-
58
-
59
-
60
-
61
-
62
-
63
-
64
-
65
-
66
-
67
-
68
-
69
-
70
-
71
-
72
-
73
-
74
-
75
-
76
-
77
-
78
-
79
-
80
-
81
-
82
-
83
-
84
-
85
-
86
-
87
-
88
-
89
-
90
-
91
-
92
-
93
-
94
-
95
-
96
-
97
-
98
-
99
-
100
-
101
-
102
-
103
-
104
-
105
-
106
-
107
-
108
-
109
-
110
-
111
-
112
-
113
-
114
-
115
-
116
-
117
-
118
-
119
-
120
-
121
-
122
-
123
-
124
-
125
-
126
-
127
-
128
-
129
-
130
-
131
-
132
-
133
-
134
-
135
 |
 |