Dell V313W User's Guide - Page 43
Printing on both sides of the paper (duplexing) - printer manual
 |
UPC - 884116016519
View all Dell V313W manuals
Add to My Manuals
Save this manual to your list of manuals |
Page 43 highlights
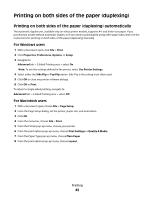
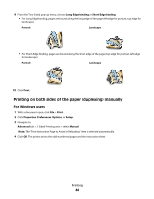
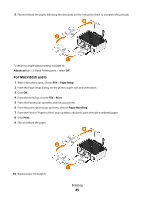
Printing on both sides of the paper (duplexing) Printing on both sides of the paper (duplexing) automatically The automatic duplex unit, available only on select printer models, supports A4- and letter-size paper. If you purchased a model without automatic duplex, or if you need to print duplex using other paper sizes, then see the instructions for printing on both sides of the paper (duplexing) manually. For Windows users 1 With a document open, click File > Print. 2 Click Properties, Preferences, Options, or Setup. 3 Navigate to: Advanced tab > 2-Sided Printing area > select On Note: To use the settings defined in the printer, select Use Printer Settings. 4 Select either the Side Flip or Top Flip option. Side Flip is the setting most often used. 5 Click OK to close any printer software dialogs. 6 Click OK or Print. To return to single-sided printing, navigate to: Advanced tab > 2-Sided Printing area > select Off For Macintosh users 1 With a document open, choose File > Page Setup. 2 From the Page Setup dialog, set the printer, paper size, and orientation. 3 Click OK. 4 From the menu bar, choose File > Print. 5 From the Printer pop-up menu, choose your printer. 6 From the print options pop-up menu, choose Print Settings or Quality & Media. 7 From the Paper Type pop-up menu, choose Plain Paper. 8 From the print options pop-up menu, choose Layout. Printing 43
-
 1
1 -
2
-
3
-
4
-
5
-
6
-
7
-
8
-
9
-
10
-
11
-
12
-
13
-
14
-
15
-
16
-
17
-
18
-
19
-
20
-
21
-
22
-
23
-
24
-
25
-
26
-
27
-
28
-
29
-
30
-
31
-
32
-
33
-
34
-
35
-
36
-
37
-
 38
38 -
 39
39 -
 40
40 -
 41
41 -
 42
42 -
 43
43 -
 44
44 -
 45
45 -
 46
46 -
 47
47 -
 48
48 -
49
-
50
-
51
-
52
-
53
-
54
-
55
-
56
-
57
-
58
-
59
-
60
-
61
-
62
-
63
-
64
-
65
-
66
-
67
-
68
-
69
-
70
-
71
-
72
-
73
-
74
-
75
-
76
-
77
-
78
-
79
-
80
-
81
-
82
-
83
-
84
-
85
-
86
-
87
-
88
-
89
-
90
-
91
-
92
-
93
-
94
-
95
-
96
-
97
-
98
-
99
-
100
-
101
-
102
-
103
-
104
-
105
-
106
-
107
-
108
-
109
-
110
-
111
-
112
-
113
-
114
-
115
-
116
-
117
-
118
-
119
-
120
-
121
-
122
-
123
-
124
-
125
-
126
-
127
-
128
-
129
-
130
-
131
-
132
-
133
-
134
-
135
 |
 |