Dell V525W User Manual - Page 103
Sharing a printer in a Macintosh environment, Networking FAQ, What is Wi-Fi Protected Setup?
 |
View all Dell V525W manuals
Add to My Manuals
Save this manual to your list of manuals |
Page 103 highlights
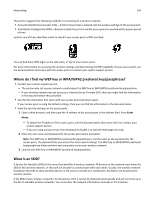
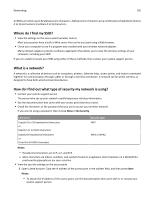
Networking 103 3 Locate the printer from the remote computer: Note: The remote computer is the one that is not attached to the printer. a Open the printers folder: 1 Click , or click Start and then click Run. 2 In the Start Search or Run box, type control printers. 3 Press Enter, or click OK. b Right‑click the name of your printer. c Click Properties or Printer properties. d Click Ports > Add Port > Local Port > New Port. e Type the Universal Naming Convention (UNC) Port Name, which consists of the server name and the distinctive printer name that was specified in step 2 on page 102. The name should be in the form \\server\printer. f Click OK. g Click Close on the Printer Ports dialog. h Make sure the new port is selected on the Ports tab, and then click Apply. i Click OK. Sharing a printer in a Macintosh environment 1 From the Finder, choose Help > Mac Help. 2 In the Search field, type sharing the printer on a network, and then press return. 3 Select only one of the following: • Sharing your printer with Mac OS X users-Let other Macintosh computers on the network that use Mac OS X version 10.4 or later use any printer connected to your Macintosh computer. • Sharing your printer with Windows users-Let Windows computers on the network use any printer connected to your Macintosh computer. 4 Follow the instructions on the computer screen. Note: Windows users should see the Windows documentation for information on adding a network printer connected to a Macintosh computer. Networking FAQ What is Wi‑Fi Protected Setup? Wi‑Fi Protected Setup (WPS) is a simple and secure configuration that allows you to establish a wireless home network and enable network security without requiring prior knowledge of Wi‑Fi technology. It is no longer necessary to configure the network name (SSID) and WEP key or WPA passphrase for network devices. Note: WPS supports only networks that communicate through access points (wireless routers).
-
 1
1 -
2
-
3
-
4
-
5
-
6
-
7
-
8
-
9
-
10
-
11
-
12
-
13
-
14
-
15
-
16
-
17
-
18
-
19
-
20
-
21
-
22
-
23
-
24
-
25
-
26
-
27
-
28
-
29
-
30
-
31
-
32
-
33
-
34
-
35
-
36
-
37
-
38
-
39
-
40
-
41
-
42
-
43
-
44
-
45
-
46
-
47
-
48
-
49
-
50
-
51
-
52
-
53
-
54
-
55
-
56
-
57
-
58
-
59
-
60
-
61
-
62
-
63
-
64
-
65
-
66
-
67
-
68
-
69
-
70
-
71
-
72
-
73
-
74
-
75
-
76
-
77
-
78
-
79
-
80
-
81
-
82
-
83
-
84
-
85
-
86
-
87
-
88
-
89
-
90
-
91
-
92
-
93
-
94
-
95
-
96
-
97
-
 98
98 -
 99
99 -
 100
100 -
 101
101 -
 102
102 -
 103
103 -
 104
104 -
 105
105 -
 106
106 -
 107
107 -
 108
108 -
109
-
110
-
111
-
112
-
113
-
114
-
115
-
116
-
117
-
118
-
119
-
120
-
121
-
122
-
123
-
124
-
125
-
126
-
127
-
128
-
129
-
130
-
131
-
132
-
133
-
134
-
135
-
136
-
137
-
138
-
139
-
140
-
141
-
142
-
143
-
144
-
145
-
146
-
147
-
148
-
149
-
150
-
151
-
152
-
153
-
154
-
155
-
156
-
157
-
158
-
159
-
160
-
161
-
162
-
163
-
164
-
165
-
166
-
167
-
168
-
169
-
170
-
171
-
172
-
173
-
174
-
175
-
176
-
177
 |
 |