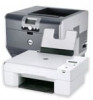
Dell V525W User Manual - Page 97
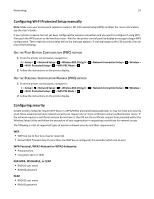
Configuring Wi-Fi Protected Setup manually, Use the Push Button Configuration (PBC) method
 |
View all Dell V525W manuals
Add to My Manuals
Save this manual to your list of manuals |
Page 97 highlights
Networking 97 Configuring Wi‑Fi Protected Setup manually Note: Make sure your access point (wireless router) is Wi‑Fi Protected Setup (WPS) certified. For more information, see the User's Guide. If your printer or device has not yet been configured for wireless connection and you want to configure it using WPS, then push the WPS button on the wireless router. Wait for the printer control panel to display a message to begin WPS configuration. There might be a short delay before the message appears. If nothing happens after 30 seconds, then do one of the following: USE THE PUSH BUTTON CONFIGURATION (PBC) METHOD 1 From the printer control panel, navigate to: > Setup > > Network Setup > > Wireless 802.11b/g/n > > Wi‑Fi Protected Setup > > WPS PBC Mode > 2 Follow the instructions on the printer display. > Network Connection Setup > > Wireless > USE THE PERSONAL IDENTIFICATION NUMBER (PIN) METHOD 1 From the printer control panel, navigate to: > Setup > > Network Setup > > Wireless 802.11b/g/n > > Wi‑Fi Protected Setup > > WPS PIN Mode > 2 Follow the instructions on the printer display. > Network Connection Setup > > Wireless > Configuring security Simple wireless networks require WEP keys or a WPA/WPA2 preshared key/passphrase, or may not have any security at all. More‑advanced wireless network security can require one or more certificates and an authentication server. If the network requires a certificate and you do not have it, then fill out the certificate request form provided within the Wireless Setup Utility and follow the procedure of your organization in requesting a certificate for network access. The following is a list of supported types of wireless network security and their requirements: WEP • WEP key (up to four keys may be required) • Default WEP Transmit Key (if more than one WEP key is configured, this specifies which one to use) WPA Personal, WPA2‑Personal or WPA2‑Enterprise • Preshared key • Encryption (AES or TKIP) EAP‑MD5, MSCHAPv2, or LEAP • RADIUS user name • RADIUS password PEAP • RADIUS user name • RADIUS password
-
 1
1 -
2
-
3
-
4
-
5
-
6
-
7
-
8
-
9
-
10
-
11
-
12
-
13
-
14
-
15
-
16
-
17
-
18
-
19
-
20
-
21
-
22
-
23
-
24
-
25
-
26
-
27
-
28
-
29
-
30
-
31
-
32
-
33
-
34
-
35
-
36
-
37
-
38
-
39
-
40
-
41
-
42
-
43
-
44
-
45
-
46
-
47
-
48
-
49
-
50
-
51
-
52
-
53
-
54
-
55
-
56
-
57
-
58
-
59
-
60
-
61
-
62
-
63
-
64
-
65
-
66
-
67
-
68
-
69
-
70
-
71
-
72
-
73
-
74
-
75
-
76
-
77
-
78
-
79
-
80
-
81
-
82
-
83
-
84
-
85
-
86
-
87
-
88
-
89
-
90
-
91
-
 92
92 -
 93
93 -
 94
94 -
 95
95 -
 96
96 -
 97
97 -
 98
98 -
 99
99 -
 100
100 -
 101
101 -
 102
102 -
103
-
104
-
105
-
106
-
107
-
108
-
109
-
110
-
111
-
112
-
113
-
114
-
115
-
116
-
117
-
118
-
119
-
120
-
121
-
122
-
123
-
124
-
125
-
126
-
127
-
128
-
129
-
130
-
131
-
132
-
133
-
134
-
135
-
136
-
137
-
138
-
139
-
140
-
141
-
142
-
143
-
144
-
145
-
146
-
147
-
148
-
149
-
150
-
151
-
152
-
153
-
154
-
155
-
156
-
157
-
158
-
159
-
160
-
161
-
162
-
163
-
164
-
165
-
166
-
167
-
168
-
169
-
170
-
171
-
172
-
173
-
174
-
175
-
176
-
177
 |
 |