Dell V715W User's Guide - Page 40
Printing photos from a digital camera using DPOF, Scan Proof Sheet, Memory Card Detected, Print Photos - does not print color
 |
UPC - 884116016564
View all Dell V715W manuals
Add to My Manuals
Save this manual to your list of manuals |
Page 40 highlights
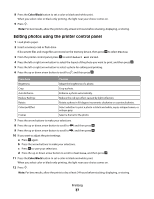
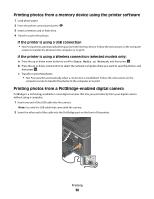
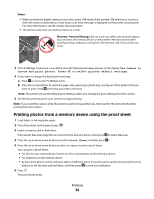
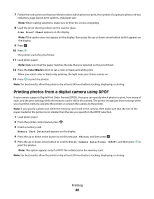
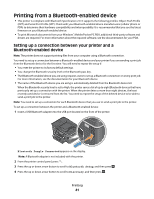
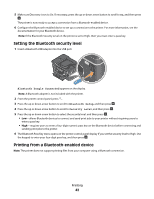
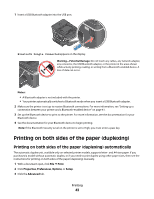
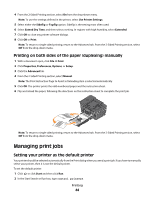
7 Follow the instructions on the proof sheet to select which photos to print, the number of copies per photo, red-eye reduction, page layout, print options, and paper size. Note: When making selections, make sure to fill in the circles completely. 8 Load the proof sheet facedown on the scanner glass. Scan Proof Sheet appears on the display. Note: If this option does not appear on the display, then press the up or down arrow button until it appears on the display. 9 Press . 10 Press . The printer scans the proof sheet. 11 Load photo paper. Note: Make sure that the paper matches the size that you selected on the proof sheet. 12 Press the Color/Black button to set a color or black-and-white print. When you select color or black-only printing, the light near your choice comes on. 13 Press to print the photos. Note: For best results, allow the prints to dry at least 24 hours before stacking, displaying, or storing. Printing photos from a digital camera using DPOF If your camera supports Digital Print Order Format (DPOF), then you can specify which photos to print, how many of each, and the print settings while the memory card is still in the camera. The printer recognizes these settings when you insert the memory card into the printer or connect the camera to the printer. Note: If you specify a photo size while the memory card is still in the camera, then make sure that the size of the paper loaded in the printer is not smaller than the size you specify in the DPOF selection. 1 Load photo paper. 2 From the printer control panel, press . 3 Insert a memory card. Memory Card Detected appears on the display. 4 Press the up or down arrow button to scroll to Print Photos, and then press . 5 Press the up or down arrow button to scroll to Print Camera Selections (DPOF), and then press to print the photos. Note: This option appears only if a DPOF file is detected in the memory card. Note: For best results, allow the prints to dry at least 24 hours before stacking, displaying, or storing. Printing 40
-
 1
1 -
2
-
3
-
4
-
5
-
6
-
7
-
8
-
9
-
10
-
11
-
12
-
13
-
14
-
15
-
16
-
17
-
18
-
19
-
20
-
21
-
22
-
23
-
24
-
25
-
26
-
27
-
28
-
29
-
30
-
31
-
32
-
33
-
34
-
 35
35 -
 36
36 -
 37
37 -
 38
38 -
 39
39 -
 40
40 -
 41
41 -
 42
42 -
 43
43 -
 44
44 -
 45
45 -
46
-
47
-
48
-
49
-
50
-
51
-
52
-
53
-
54
-
55
-
56
-
57
-
58
-
59
-
60
-
61
-
62
-
63
-
64
-
65
-
66
-
67
-
68
-
69
-
70
-
71
-
72
-
73
-
74
-
75
-
76
-
77
-
78
-
79
-
80
-
81
-
82
-
83
-
84
-
85
-
86
-
87
-
88
-
89
-
90
-
91
-
92
-
93
-
94
-
95
-
96
-
97
-
98
-
99
-
100
-
101
-
102
-
103
-
104
-
105
-
106
-
107
-
108
-
109
-
110
-
111
-
112
-
113
-
114
-
115
-
116
-
117
-
118
-
119
-
120
-
121
-
122
-
123
-
124
-
125
-
126
-
127
-
128
-
129
-
130
-
131
-
132
-
133
-
134
-
135
-
136
-
137
-
138
-
139
-
140
-
141
-
142
-
143
-
144
-
145
-
146
-
147
-
148
-
149
-
150
 |
 |