Dell Venue Pro User's Guide - Page 29
To set the time and date, menu. Touch
 |
View all Dell Venue Pro manuals
Add to My Manuals
Save this manual to your list of manuals |
Page 29 highlights
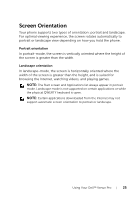
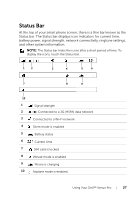
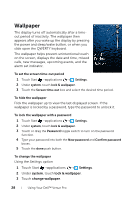
4 Flick to view a picture collection such as all or Wallpapers. Touch the desired collection. 5 Touch the thumbnail view of a picture to display the picture. 6 Pan the picture using the cropping frame to decide which portion of the picture you would like to use as the wallpaper. You can also enlarge the picture using the stretch or zoom-in gesture, then pan a desired area to crop as the wallpaper. NOTE: The cropping tool is not available for the Wallpapers pictures in their original size. 7 Touch the crop button Using the Pictures option to set the picture as wallpaper. 1 Touch Start →applications → Pictures. 2 Flick to view a picture collection such as all or Wallpapers. Touch the desired collection. 3 Touch the thumbnail view of a picture to display the picture. 4 Touch or touch and hold the picture to view the context menu. Touch use as wallpaper. 5 Pan the picture using the cropping frame to decide which portion of the picture you would like to use as the wallpaper. You can also enlarge the picture using the stretch or zoom-in gesture, then pan a desired area to crop as the wallpaper. NOTE: The cropping tool is not available for the Wallpapers pictures in their original size. 6 Touch the crop button to set the picture as wallpaper. To set the time and date 1 Touch Start →applications → Settings. 2 Under system, touch date & time. 3 To set the date and time automatically according to the carrier network, touch or flick the Set automatically toggle switch to enable the function. Using Your Dell™ Venue Pro 29
-
 1
1 -
2
-
3
-
4
-
5
-
6
-
7
-
8
-
9
-
10
-
11
-
12
-
13
-
14
-
15
-
16
-
17
-
18
-
19
-
20
-
21
-
22
-
23
-
 24
24 -
 25
25 -
 26
26 -
 27
27 -
 28
28 -
 29
29 -
 30
30 -
 31
31 -
 32
32 -
 33
33 -
 34
34 -
35
-
36
-
37
-
38
-
39
-
40
-
41
-
42
-
43
-
44
-
45
-
46
-
47
-
48
-
49
-
50
-
51
-
52
-
53
-
54
-
55
-
56
-
57
-
58
-
59
-
60
-
61
-
62
-
63
-
64
-
65
-
66
-
67
-
68
-
69
-
70
-
71
-
72
-
73
-
74
-
75
-
76
-
77
-
78
-
79
-
80
-
81
-
82
-
83
-
84
-
85
-
86
-
87
-
88
-
89
-
90
-
91
-
92
-
93
-
94
-
95
-
96
-
97
-
98
-
99
-
100
-
101
-
102
-
103
-
104
-
105
-
106
-
107
 |
 |