Dell Vostro Small Desktop 3252 Dell Vostro 3252 Owners Manual
Dell Vostro Small Desktop 3252 Manual
 |
View all Dell Vostro Small Desktop 3252 manuals
Add to My Manuals
Save this manual to your list of manuals |
Dell Vostro Small Desktop 3252 manual content summary:
- Dell Vostro Small Desktop 3252 | Dell Vostro 3252 Owners Manual - Page 1
Dell Vostro 3252 Owner's Manual Regulatory Model: D14S Regulatory Type: D14S001 - Dell Vostro Small Desktop 3252 | Dell Vostro 3252 Owners Manual - Page 2
use of your computer. CAUTION: A CAUTION indicates either potential damage to hardware or loss of data and tells you how to avoid the problem. WARNING: A WARNING indicates a potential for property damage, personal injury, or death. Copyright © 2015 Dell Inc. All rights reserved. This product is - Dell Vostro Small Desktop 3252 | Dell Vostro 3252 Owners Manual - Page 3
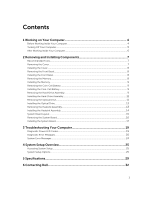
Assembly...13 Installing the Heatsink Assembly...14 System Board Layout...15 Removing the System Board...16 Installing the System Board...17 3 Troubleshooting Your Computer 19 Diagnostic Power LED Codes...19 Diagnostic Error Messages...20 System Error Messages...24 4 System Setup Overview 25 - Dell Vostro Small Desktop 3252 | Dell Vostro 3252 Owners Manual - Page 4
only perform troubleshooting and simple repairs as authorized in your product documentation, or as directed by the online or telephone service and support team. Damage due to servicing that is not authorized by Dell is not covered by your warranty. Read and follow the safety instructions that came - Dell Vostro Small Desktop 3252 | Dell Vostro 3252 Owners Manual - Page 5
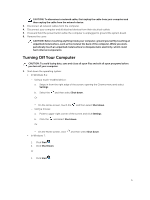
CAUTION: To disconnect a network cable, first unplug the cable from your computer and then unplug the cable from the network device. 3. Disconnect all network cables from the computer. 4. Disconnect your computer and all attached devices from their electrical outlets. 5. Press and hold the power - Dell Vostro Small Desktop 3252 | Dell Vostro 3252 Owners Manual - Page 6
2. Click the arrow in the lower-right corner of the Start menu as shown below, and then click Shut Down . 2. Ensure that the computer and all attached devices are turned off. If your computer and attached devices did not automatically turn off when you shut down your operating system, press and - Dell Vostro Small Desktop 3252 | Dell Vostro 3252 Owners Manual - Page 7
2 Removing and Installing Components This section provides detailed information on how to remove or install the components from your computer. Recommended Tools The procedures in this document may require the following tools: • Small flat-blade screwdriver • Phillips screwdriver • Small plastic - Dell Vostro Small Desktop 3252 | Dell Vostro 3252 Owners Manual - Page 8
Installing the Cover 1. Slide the cover from the back of the computer, until the latches snap-in. 2. Tighten the screws to secure the cover. 3. Follow the procedures in After Working Inside Your Computer Removing the Front Bezel 1. Follow the procedures in Before Working Inside Your Computer. 2. - Dell Vostro Small Desktop 3252 | Dell Vostro 3252 Owners Manual - Page 9
3. Pry the securing clips away from the memory module until it pops up. Remove the memory module from its socket on the system board. Figure 3. Installing the Memory 1. Align the notch on the memory card with the tab in the memory connector. 2. Insert the memory module into the memory socket and - Dell Vostro Small Desktop 3252 | Dell Vostro 3252 Owners Manual - Page 10
a. cover b. front bezel 3. Disconnect the power and the data cable from the hard drive. Figure 5. 4. Follow the steps to remove the hard-drive assembly: a. Remove the screws that secure the hard drive to the drive bay [1]. b. Lift the drive bay handle [2] and slide it from the drive bay [3]. Figure - Dell Vostro Small Desktop 3252 | Dell Vostro 3252 Owners Manual - Page 11
Figure 7. NOTE: Remove the hard-drive bracket only if you are replacing with a new hard drive. Otherwise, if hard drive removal is only a pre-requisite to remove other components, then ignore Step 5. Installing the Hard-Drive Assembly 1. Slide the hard drive into the bracket. 2. Tighten the screws - Dell Vostro Small Desktop 3252 | Dell Vostro 3252 Owners Manual - Page 12
Figure 8. 4. Follow the steps to remove the optical drive: a. Press the blue tab to loosen the optical drive [1]. b. Slide the optical drive [2] and lift it up to remove it from the chassis [3]. Figure 9. 5. Follow the steps to remove the bracket from the optical drive. a. Remove the screws that - Dell Vostro Small Desktop 3252 | Dell Vostro 3252 Owners Manual - Page 13
Figure 10. NOTE: Remove the optical-drive bracket only if you are replacing with a new optical drive. Otherwise, if optical drive removal is only a pre-requisite to remove other components, then ignore Step 5 and Step 6 Installing the Optical Drive 1. Slide the optical drive into the drive bay until - Dell Vostro Small Desktop 3252 | Dell Vostro 3252 Owners Manual - Page 14
Figure 11. Installing the Heatsink Assembly 1. Place the heatsink assembly in the slot by aligning with the screw holes. 2. Tighten the screws to secure the heatsink assembly to the system board. 3. Connect the heatsink assembly cable to the system board. 4. Install: a. optical drive b. hard-drive - Dell Vostro Small Desktop 3252 | Dell Vostro 3252 Owners Manual - Page 15
System Board Layout Figure 12. 1. NGFF connector 2. Light bar connector 3. SATA power connector 4. SATA connector 5. SATA connector 6. Coin-cell battery 7. DC-In jack 8. Network & USB 2.0 connectors (2) 9. USB 2.0 connectors (2) 10. HDMI connector 11. VGA connector 12. Line-in, line-out and - Dell Vostro Small Desktop 3252 | Dell Vostro 3252 Owners Manual - Page 16
16. SD card connector 17. Headset jack 18. USB 3.0 connector 19. USB 3.0 connector Removing the System Board 1. Follow the procedures in Before Working Inside Your Computer. 2. Remove: a. cover b. front bezel c. hard-drive assembly d. optical-drive assembly e. coin-cell battery f. heatsink assembly - Dell Vostro Small Desktop 3252 | Dell Vostro 3252 Owners Manual - Page 17
Figure 14. 5. Follow the steps to remove the system board: a. Remove the screws that secure system board to the chassis [1]. b. Lift the system board from the chassis. Figure 15. Installing the System Board 1. Insert the system board and ensure that ports are aligned to the holes on the back panel. - Dell Vostro Small Desktop 3252 | Dell Vostro 3252 Owners Manual - Page 18
a. heatsink assembly b. WLAN card c. coin-cell battery d. optical-drive assembly e. hard-drive assembly f. front bezel g. cover 6. Follow the procedures in After Working Inside Your Computer 18 - Dell Vostro Small Desktop 3252 | Dell Vostro 3252 Owners Manual - Page 19
operation of the computer. Diagnostic Power LED Codes Power LED Light Status Off Steady / Blinking Amber Blinking White Light Steady White Possible Cause Troubleshooting Steps The computer is either turned off • or is not receiving power or in Hibernation mode. • • Re-seat the power cable in - Dell Vostro Small Desktop 3252 | Dell Vostro 3252 Owners Manual - Page 20
Power LED Light Status Possible Cause Troubleshooting Steps • If the display is connected and turned on, listen for a beep code. Diagnostic Error Messages Error Messages AUXILIARY DEVICE FAILURE BAD COMMAND OR FILE - Dell Vostro Small Desktop 3252 | Dell Vostro 3252 Owners Manual - Page 21
hard drive, and boot the computer from an optical drive. Then, shut down the computer, reinstall the hard drive, and restart the computer. If the problem persists, try another drive. Run the Hard Disk Drive tests in the Dell Diagnostics. HARD-DISK DRIVE READ FAILURE The hard drive may be defective - Dell Vostro Small Desktop 3252 | Dell Vostro 3252 Owners Manual - Page 22
Error Messages KEYBOARD CONTROLLER FAILURE KEYBOARD DATA LINE FAILURE KEYBOARD STUCK KEY FAILURE LICENSED CONTENT IS NOT ACCESSIBLE IN MEDIADIRECT MEMORY ADDRESS LINE FAILURE AT ADDRESS, READ VALUE EXPECTING VALUE MEMORY ALLOCATION ERROR MEMORY DOUBLE WORD LOGIC FAILURE AT ADDRESS, READ VALUE - Dell Vostro Small Desktop 3252 | Dell Vostro 3252 Owners Manual - Page 23
file structure on the hard drive. See Windows Help and Support for instructions (click Start > Help and Support). If a large number of sectors are defective, back up computer to an electrical outlet to charge the battery. If the problem persists, try to restore the data by entering the system setup - Dell Vostro Small Desktop 3252 | Dell Vostro 3252 Owners Manual - Page 24
Alert! Previous attempts at booting this system have failed at checkpoint [nnnn]. For help in resolving this problem, please note this checkpoint and contact Dell Technical Support The computer failed to complete the boot routine three consecutive times for the same error. CMOS checksum error - Dell Vostro Small Desktop 3252 | Dell Vostro 3252 Owners Manual - Page 25
the desktop. Then, shut down or restart your computer and try again. System Setup Options Table 1. - Main System Time System Date BIOS Version Product Name Service Tag Asset Tag CPU Type CPU Speed CPU ID CPU Cache Displays the system time. Allows you to reset the time on the computer's internal - Dell Vostro Small Desktop 3252 | Dell Vostro 3252 Owners Manual - Page 26
SATA 0 SATA 1 AC Adapter Type System Memory Memory Speed Table 2. - Advanced Intel (R) SpeedStep (TM) Virtualization Integrated NIC SATA Operation Adapter Warnings Internal WLAN Optical Device USB Configuration Power Options Displays the model number and capacity of the hard drive. Displays the - Dell Vostro Small Desktop 3252 | Dell Vostro 3252 Owners Manual - Page 27
SMART Settings Table 3. - Security Unlock Setup Status Admin Password Status System Password Status HDD Password Status Asset Tag Admin Password HDD Password Password Change Password Bypass Secure Boot Mode HDD Protection Table 4. - Boot Boot List Option Auto Power On Mode: Allows you to select the - Dell Vostro Small Desktop 3252 | Dell Vostro 3252 Owners Manual - Page 28
Secure Boot Legacy Option ROMs Boot Option Priorities Table 5. - Exit Save Changes and Reset File Browser Add Boot Option and File Browser Del Boot Option are enabled Allows you to enable or disable the Secure Boot control. Default: Enabled Allows you to load the legacy option ROMs. Default: - Dell Vostro Small Desktop 3252 | Dell Vostro 3252 Owners Manual - Page 29
only those required by law to ship with your computer. For more information about the configuration of your computer, go to Help and Support in your Windows operating system and select the option to view information about your computer. Table 6. - Processor Type • Intel Pentium • Intel Celeron - Dell Vostro Small Desktop 3252 | Dell Vostro 3252 Owners Manual - Page 30
white light indicates poweron state. • blinking white light - solid white light indicates sleep state of the computer; steady / blinking amber light indicates a problem with the system board. white light - blinking white light indicates that the computer is reading data from, or writing data to the - Dell Vostro Small Desktop 3252 | Dell Vostro 3252 Owners Manual - Page 31
NOTE: Heat dissipation is calculated by using the power supply wattage rating. Table 17. - Physical Dimensions of Chassis Height Width Depth Weight (Minimum) Table 18. - Environmental Specifications Temperature Operating Storage Relative humidity Altitude Operating Storage Airborne contaminant - Dell Vostro Small Desktop 3252 | Dell Vostro 3252 Owners Manual - Page 32
may not be available in your area. To contact Dell for sales, technical support, or customer service issues: 1. Visit dell.com/support. 2. Select your support category. 3. Verify your country or region in the Choose a Country/Region drop-down menu at the top of page. 4. Select the appropriate
-
 1
1 -
 2
2 -
 3
3 -
 4
4 -
 5
5 -
 6
6 -
 7
7 -
8
-
9
-
10
-
11
-
12
-
13
-
14
-
15
-
16
-
17
-
18
-
19
-
20
-
21
-
22
-
23
-
24
-
25
-
26
-
27
-
28
-
29
-
30
-
31
-
32
 |
 |

Dell Vostro 3252
Owner's Manual
Regulatory Model: D14S
Regulatory Type: D14S001