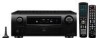
Denon 4310CI Owners Manual
Denon 4310CI - AVR AV Network Receiver Manual
 |
UPC - 883795001014
View all Denon 4310CI manuals
Add to My Manuals
Save this manual to your list of manuals |
Denon 4310CI manual content summary:
- Denon 4310CI | Owners Manual - Page 1
DENON AV SURROUND RECEIVER AVR-4310CI Owner's Manual IGUI Graphical User Interface Use this manual in combination with the operating guide displayed on the GUI screen. GUI Menu Operation (re- page 26) GUI Menu Map (warpage 25) Language (warpage 45) Remote Control Unit Operations ([Erpage 89) - Denon 4310CI | Owners Manual - Page 2
. A The exclamation point within an equilateral triangle is intended to alert the user to the presence of important operating and maintenance (servicing) instructions in the literature accompanying the appliance. WARNING: TO REDUCE THE RISK OF FIRE OR ELECTRIC SHOCK, DO NOT EXPOSE THIS APPLIANCE TO - Denon 4310CI | Owners Manual - Page 3
Name: AV Surround Receiver Model Number: AVR-4310C1 This instructions contained in this manual, meets FCC requirements. Modification not expressly approved by DENON following measures: • Reorient or relocate the receiving antenna. • Increase the separation between the equipment and receiver. - Denon 4310CI | Owners Manual - Page 4
Adjust) 73 Make the Optimal Speaker Settings, and Correct the Room Adjusting the Sound (Audio Adjust) 73 Acoustics (Audyssey Auto Setup) 28 Adjusting the Picture Quality (Picture Adjust) 77 Making Detailed Settings (Manual Setup) 34 Making the Input Settings (Source Select) 46 Important - Denon 4310CI | Owners Manual - Page 5
Switching the Multi-zone Input Source to the Same Input Source as Used in the MAIN ZONE 98 Setting the Zone for Which the Sub Remote Control Unit is Used (ZONE SELECT LOCK Mode) 98 Setting the Remote ID 98 Resetting the Settings 98 Other Information 99 Troubleshooting 108 Restoring All - Denon 4310CI | Owners Manual - Page 6
Control Unit n addition to the AVR-4310O, the included main remote control unit (RC-1116) can also be used to operate the equipment listed below. DENON system components E?) Non-DENON system components • To operate component products other than DENON, you must set the preset code page 90 "Presetting - Denon 4310CI | Owners Manual - Page 7
@Remote control sensor (3) ®SOURCESELECT knob (27) ®SOURCE button (27) ®TUNING PRESET button (58, 59, 61) e ZONE 2/3 / REC SELECT button (80, 87) @VIDEO SELECT button (48) @ Headphones jack ZONE2 ON/OFF button eZONE3 ON/OFF button ©INPUT MODE button e ›) ®MENU button Cursor buttons (AV - Denon 4310CI | Owners Manual - Page 8
playing using DENON LINK connections. SBR ©HDMI indicator This lights when playing using HDMI connections. Tuner reception mode indicators These light according to the reception conditions when the input source is set to "HD Radio". • STEREO In the FM mode, these light when receiving analog stereo - Denon 4310CI | Owners Manual - Page 9
Radio 'EM NEI AM. nn COAX. 754 • - LCOP ANT FRONT, CENTER, SURR,BACK, AMP ASSIGN 6-16(2 SURROUND MORE F-16Q r9 DC APO • ••• STRAIGHT CABLE 1 2 • REMOTE CONTROj TRIGGER OUT ['LAX CONTROL writ-•ar• SPEAKERS • Digital audio connectors (24) (24) (19, 20) (23) (21) (18) (15 19) ® DENON - Denon 4310CI | Owners Manual - Page 10
Remote Control Unit Operations on the AVR-4310CI c. Main Remote Control Unit (RC-1116) 0 Signal transmission indicator Operations on 9 devices other that the AVR-4310CI • Preset the remote C..O.N.TROL RL SElul DENON RC-1116 0 Device select buttons (89) ©Zone indicators / MACRO indicator - Denon 4310CI | Owners Manual - Page 11
Input source select buttons (97) 0 SHIFT button (57 - 59, 97) ©CHANNEL button (97) 0 MENU button (88, 97) 0 Cursor buttons (AV< >) (97) 0 SEARCH button (70, 97) ()REPEAT button (70, 97) IDRANDOM button go Remote control signal transmitter (70, 97) (3) ZONE SELECT button (98) ®Zone - Denon 4310CI | Owners Manual - Page 12
are completed, certain settings must be made on the receiver. Make the settings indicated "IIIMIMMIlirrial for the individual items. NOTE • Do not plug in the power cord until all connections have been completed. • When making connections, also refer to the operating instructions of the other - Denon 4310CI | Owners Manual - Page 13
Conversion Function) The AVR-4310CI has 4 different types of video input/output terminal (HDMI, Component video, S-Video, Video). Use the terminals according to the devices to be connected. This function automatically converts various formats of video signals input to the AVR-4310C1 into the format - Denon 4310CI | Owners Manual - Page 14
Installing / Settftlhe$peakers M1;;=ELE •The AVR-4310CI is compat ble with various types of surround playback. • Decide on the surround modes to be played on the AVR-4310C1 before making connections and settings. le Determine the Speaker Layout Below we introduce examples of speaker layouts. Refer - Denon 4310CI | Owners Manual - Page 15
Back" (er page 35) to "1spkr". Normal Not connected X Set "Surround Back" (Crpage 351 to "None". MALI ,_()r IE (7.1) I (6.1) (5.1) ZONE2 L ch ZONE2 speaker ZONE (MONO) R ch r ZONE3 speaker j (5.1) I (1) Bi-Amp Front Speakers * For connections, see "About Bi-amp Connections" (page 13 - Denon 4310CI | Owners Manual - Page 16
page 12). -- - - - - - "Set t"h- e- "Amp Assi.gn" Connecting the Speaker cable and input cable are problems with the surrounding ventilation and connections, in the event of the protection circuit becoming activated, due to thinking that the AVR-4310CI has failed, please contact DENON Service - Denon 4310CI | Owners Manual - Page 17
Licensing LLC. Connections The AVR-4310C1 allows connection of inputs from up to 6 HDMI devices and output to 2 monitors. DVD player HDMI OUT U. (HD player HDMI OUT n Satellite receiver 1 HDMI OUT Video cassette , recorder HDMI OUT Digital video , recorder HDMI OUT O n n fl FJ Functions - Denon 4310CI | Owners Manual - Page 18
4310C1 is connected to other devices with HDMI cables, also connect the AVR-4310CI and TV using an HDMI cable. • When a device supporting Deep Color signal transfer is connected, use a cable compatible with HDMI version 1.3a. • Video signals are not output if the input video signals do not match the - Denon 4310CI | Owners Manual - Page 19
connect the iPod you are using directly to the USB port of the AVR-4310C1 (Cr page 21 "USB Port"). Set this to change the input signal to which the input source is assigned. "Input Assign" (O- page 46) • The AVR-4310CI is compatible with record players with an MM cartridge. When you connect to - Denon 4310CI | Owners Manual - Page 20
For instructions on HDMI connections, see "Connecting Devices Equipped with HDMI Terminals" on page 14. Digital video 0 - 1 Set this to change the input signal to which the input source is assigned. "Input Assign" (Cr page 46) NOTE • To record video signals through the AVR-4310CI, use the same - Denon 4310CI | Owners Manual - Page 21
to the XM Mini-Tuner and Home Dock (includes home antenna, each sold separately) and subscribing to the XM service. • Plug the XM Mini-Tuner and Home Dock into the XM connector on the rear panel. • Position the Home Dock antenna near a south-facing window to receive the best signal. For details, see - Denon 4310CI | Owners Manual - Page 22
a window or outside. Area 5 : Put the antenna outside and point it straight up. The antenna cannot be used indoors. Blacl, White U) 3,\ 43 O Ground AM outdoor antenna 49 i.?; .5) AIMEEZCOMI When connecting digital of the SiriusConnect Home Tuner, perform the setting "Digital". "Input Assign - Denon 4310CI | Owners Manual - Page 23
metal parts of the panel. • • (0, \ • 10 0 O IO -612111=131 When connecting by use of DENON LINK, set "Digital" to "D.LINK". "Input Assign" (Cr page 47) II 0 0 0 -11211231=2111 Set this to change the input signal to which the input source is assigned. "Input Assign" (e 'page 46) 20 - Denon 4310CI | Owners Manual - Page 24
the external input (EXT. IN) terminal, set "Input Mode" (page 49) to "EXT. IN". "EXT. IN" can also be selected with INPUT MODE on the main unit. • In the initial status, USB memory devices can be used by connecting them to the USB port on the front panel. • To connect an iPod to the AVR-4310C1 - Denon 4310CI | Owners Manual - Page 25
) or RF remote receiver (RC-7001RCI, sold separately), two-way communication is enabled. The AVR-4310CI's status information as well as iPod and Internet audio music files can be browsed watching the RF Remote Controller's display. For details, refer to the operating instructions of the respective - Denon 4310CI | Owners Manual - Page 26
OS : Windows® XP Service Pack2 or later, Windows Vista • Software (Prepare one of the following.) • Windows Media AVR-4310C1. • If you have an Internet provider contract for a line on which network settings are made manually, make the settings at "Network Connecting" (I2F page 391. • With the AVR - Denon 4310CI | Owners Manual - Page 27
the Main Remote Control Unit"). I Press [POWER ON] or . V The power indicator flashes green and the power turns on. ^ISO press [INPUT SOURCE eci "1 -] c.)r. ^VICK ceT when in standby mode, the power turns on. When [INPUT SOURCE SELECT] has been pressed, the input source set with the - Denon 4310CI | Owners Manual - Page 28
about receiver settings, input •-\ signals, etc. LI Status u Auto Surround Li Audio Input Signal Mode HDMI Information u Quick Select Li Preset Channel Manual Setup (0 - page 34) Make detailed settings for various parameters. LI Speaker Setup u HDMI Setup Audio Setup Li Network Setup =I Zone - Denon 4310CI | Owners Manual - Page 29
: Guide text for the currently selected setup item ul [Example 2] Audyssey Auto Setup screen (with illustration) *8 AUDYSSEY AUTO SETUP DENON '7'77 7 17rrparati.on1 10 • 1 `2 3 4 5 6. *9 Connect the speakers and place them according. *11 to the recommendations in the manual . i Set the - Denon 4310CI | Owners Manual - Page 30
is highlighted. 4- • Use the device selection buttons on the main remote control unit to set the device to be operated beforehand. • When using with an iPod connected directly to the AVR-4310CI's USB pot, select "USB/iPod" for the input source. • Input sources that are not going to be used can be - Denon 4310CI | Owners Manual - Page 31
Set the Channels You will not Use (Channel Skip) (crpage 30) Perform Audyssey Auto Setup (page 30) mportant information Audyssey MultEQ® XT automatically measures the acoustica problems in the listening environment to create the best audio experience for your home theater. Ui When Using the Front - Denon 4310CI | Owners Manual - Page 32
. Change the TV input to AVR-4310C1 input. 3 Turn on the AVR-4310CI power. It page DENON 1 2 3 4 5 5 Connect the speakers and place them accord, o the recommendations in the manual. set the follow, items neaessam. Amp Channel Skip NOTE • Do not hold the microphone in your hand during measurements - Denon 4310CI | Owners Manual - Page 33
, measuring at the main listening position starts again. NOTE Since "Amp Assign" of AVR-4310CI is set to "ZONE2" by default, audio is not output from the surround back speakers. When using the surround back speakers with MAIN ZONE, change the "Amp Assign" setting to "Normal". Main remote control - Denon 4310CI | Owners Manual - Page 34
that the speakers are not connected properly. Turn the AVR-4310CI off, check the speaker connections and repeat the measurement process from the beginning. Turn the AVR-4310Cl off, check the speaker connections and repeat the measurement process from the beginning. • If you change a speaker position - Denon 4310CI | Owners Manual - Page 35
AVR-4310C1. • Check the speaker connections. fisrtw • Too much noise in the room for accurate • Either turn off any device generating noise or 1 :LI SIP DENON measurements connection is correct, press AV to select "Skip", then press ENTER. Main remote control operation buttons SEARCH - Denon 4310CI | Owners Manual - Page 36
ENTER. Ell AUDYSSEY AUTO SETUP DENON 1 2434 5 6 The outtwoolar measurement result of each speaker is displayed. * When you selected "EQ Check" in step 2, press AV measurement result (value calculated at the start by MultEiO XT) even when you have changed each setting manually. 33 Main remote - Denon 4310CI | Owners Manual - Page 37
audio. • Since "Amp Assign" of AVR-4310CI is set to "ZONE2" by default, audio is not output from the surround back speakers. When using the surround back speakers with MAIN ZONE, change the "Amp Assign" setting to "Normal". Speaker Configuration Front : Set the front speaker size. Select speaker - Denon 4310CI | Owners Manual - Page 38
the distance. position to speakers. • 1ft / 0.1ft Measure beforehand the • 0.1m / 0.01m distance from the listening Default : Reset all distance settings to factory default. position to each speaker. • Yes : Reset to the defaults. • No : Do not reset to the defaults. When you select "Default - Denon 4310CI | Owners Manual - Page 39
"Adjust the Volume of the Different Speakers"). Default : Reset all channel level settings to factory default. • Yes : Reset to the defaults. • No : Do not reset to the defaults. Making Detailed Settings {Manual Setup) Setting items Setting contents Crossover Frequency 40Hz / 60Hz / 80Hz / 90Hz - Denon 4310CI | Owners Manual - Page 40
from the AVR- • OFF : Do not use HDMI control function 4310CI and the AVR-4310CI can be controlled from external devices. fr When a device that is not compatible with the HDMI control function is connected, set "Control" to "OFF". NOTE ,0' • Please consult the operating instructions for each - Denon 4310CI | Owners Manual - Page 41
multi-channel signals ® Multi-channel signals other than Dolby Digital and DTS (PCM, DSD, etc.) • When playing in the PURE DIRECT, the surround mode does not change even if the input signal is changed. See overleaf > Main remote control operation buttons SEARCH :Displaying the menu ENu Cancel the - Denon 4310CI | Owners Manual - Page 42
Home Network Make settings for wired (LAN)"). LAN, 2. Turn on the AVR-4310CI (11Fpage 24 "Turning the Power On"). AVR- Service Provider) or the store from which you purchased your computer. • When you want to cancel the setting during IP address input, press RETURN. See overleaT> 39 Main remote - Denon 4310CI | Owners Manual - Page 43
Friendly Name Edit : The Friendly Name is the name AVR-4310CI displayed on the network. Up to 63 characters can be input. The default Friendly Name on first use is "DENON:IAVR-4310CII". The types of characters that can be input are as shown below. [Lower case characters] abcdefghijklmnopqrstuvwxyz - Denon 4310CI | Owners Manual - Page 44
to page 44 for more information on "Firmware Update") itte Making the Multi-zone Settings (Zone Setup) 1GUil Default settings are underlined. • Press RETURN to erase the notification message. Upgrade Notification : Display a notification message on the AVR- Set the audio to playback with multi - Denon 4310CI | Owners Manual - Page 45
the background when playback is stopped, etc. • Picture : Set the background to a picture (DENON logo). • Black : Set the background to black. • Gray : Set the background to gray. • Blue : Set the background to blue. See overleaf > Main remote control operation buttons SEARCH :Displaying the menu - Denon 4310CI | Owners Manual - Page 46
title of want to change, then press N or ENTER. each zone to one you prefer. 2. Use < N to set the cursor to the character you want to change. 3. Use AV to change the character, then press ENTER. • Up to 10 characters can be input. • You can change the character type when you press [SEARCH - Denon 4310CI | Owners Manual - Page 47
XT • Input Mode • Dynamic EQ • When canceling the setting, set "Setup Lock" to "OFF". Maintenance Mode NOTE Used when receiving Only use this function if so instructed by a DENON serviceperson Or maintenance from a DENON installer. service engineer or custom installer. Firmware Update Check - Denon 4310CI | Owners Manual - Page 48
procedure to be completed. Once updating/upgrade starts, normal operations on the AVR-4310C1 cannot be performed until updating/upgrading is completed. Furthermore, updating/upgrading the firmware may reset the backup data for the parameters, etc., set for the AVR-4310C1. • The following backup data - Denon 4310CI | Owners Manual - Page 49
the Settings to Play Still Pictures (Still Picture) raP'page 51 Automatically Presetting Radio Stations (Auto Preset) tai- page 51 Setting Preset Channels so that They are not Displayed When Tuning (Preset Skip) tar page 51 Ch • HUMI € Default button C2) Input Source ® HDMI input S 1 (43 Digital - Denon 4310CI | Owners Manual - Page 50
LINK" is set when the AVR-4310Cl is connected by DENON LINK to a DENON Blu-ray disc / DVD player (I 'page 20 "Components Equipped with a DENON LINK Connector"). None : Do not assign a digital input terminal to the selected input source. See overleaf > 47 Main remote control SEARCH :Displaying - Denon 4310CI | Owners Manual - Page 51
If control dock for iPod is not connected to the AVR-4310CI, assignment of the "iPod dock" is disabled, and you can use it as a standard input source, Default Yes : Reset to the defaults. Reset all settings to factory No : Do not reset to the defaults. default. 41. If you select "Default" and - Denon 4310CI | Owners Manual - Page 52
40" • This can be set when "i/p Scaler" is set to anything other than "OFF". • When "i/p Scaler" is set to "Analog & HDMI", the resolution of both the analog video input signal and HDMI input signal can be set. • To watch 1080p/24Hz pictures, use a TV that supports 1080p/24Hz video signals. • When - Denon 4310CI | Owners Manual - Page 53
- +12dB 10dB) 4- The analog input level and digital input level can be adjusted independently for input sources for which "HDMI" or "Digital" is assigned at "Input Assign" )t page 47). Changing the Input Source's Display Name (Rename) IGUII Setting items Setting contents Rename 1. Press > or - Denon 4310CI | Owners Manual - Page 54
set when the input source is NET/USB Setting items Setting contents Slide Show ON : Display still picture images in a slide show. Make slide show settings. OFF : Display only the selected still picture image. Interval 5s - 60s (5s) Set the playback time per image. 51 Main remote control - Denon 4310CI | Owners Manual - Page 55
be set when the input source is SIRIUS • For any channel, set the radio reception limits. Setting items Setting contents Lock Setting Set the channel reception limits. 1. Press AV to select "Lock Setting", and then press D or ENTER. radio 2. Pressing AV< D, input the password (4 digits number - Denon 4310CI | Owners Manual - Page 56
16 "Control Dock for iPod"). CD Set the iPod® in the DENON control dock for iPod. 2 Turn the AVR-4310CI power on. (ri page 24 "Turning the Power On") 3 Press [SOURCE SELECT] to display the GUI Source Select menu, then select " F3 " (¢C' page 27). The input source switches to the source to which - Denon 4310CI | Owners Manual - Page 57
on the main unit's display. Disp ay mode Browse mode Remote mode Playable files Audio file Picture file Movie file Active buttons Main remote control unit (AVR-4310CI) iPod® O X O *1 O X O O *2 O *2 O O *1 : When using an ASD-11R DENON control dock for iPod. *2 : Video may not be output - Denon 4310CI | Owners Manual - Page 58
Remote mode is not supported on 5th generation iPods or (Pod nanos. Disp ay mode I Browse mode Remote mode j Audio file 0 0 Playable files Picture file X X Movie file X X* Main remote Active control unit 0 0 buttons (AVR-4310CI) iPod® X 0 * Only the sound is played. 6 Use AV - Denon 4310CI | Owners Manual - Page 59
pages (B page 70) • The Remote mode is not supported on 5th generation iPods or iPod nanos menus are displayed can be set at "GUI" - "iPod" (OF' page 43). Press AV > to return to the home docks or SIRIUS tuners (each sold separately) are required to receive the SIRIUS or XM satellite radio service - Denon 4310CI | Owners Manual - Page 60
AV [SOURCE SELECT] (MAIN mode) [SAT TU] (MAIN mode) Listening to XM Satellite Radio When operating XM with the AVR-4310C1 via the main remote control unit or sub remote control unit, use [SAT TU]. Before operating, set 71) Zi Adjusting the Sound and Picture Quality (erpage 73) The strength of - Denon 4310CI | Owners Manual - Page 61
the channel automatically switches to the one whose number has been input. Listening to SIRIUS Satellite Radio When operating SIRIUS with the AVR-4310C1 via the main remote control unit or sub remote control unit, use [SAT TU]. Before operating, set to [SAT TU] operating mode. [SAT Tilj of [SOURCE - Denon 4310CI | Owners Manual - Page 62
manual Button located on both the main unit and the remote control unit Button only on the main unit Button only on the remote control unit BUTTON [BUTTON] ENTER AV ] on the sub-remote unit. 4 Press [MEMO] again to complete the setting. To preset other - Denon 4310CI | Owners Manual - Page 63
number has been input. 3 Press ENTER to set that channel. Reception switches to the selected channel. • "UPDATING" is displayed while the encording code is being updated. • "SIRIUS UPDATING" is displayed when updating SIRIUS tuner firmware. • Refer to "Troubleshooting" - "SIRIUS Satellite Radio - Denon 4310CI | Owners Manual - Page 64
manual Button located on both the main unit and the remote control unit Button only on the main unit Button only on the remote < is pressed, the immediately preceding input is cancelled. 3 When setting is completed, press ENTER. The preset signal weakens while receiving a digital broadcast (while " - Denon 4310CI | Owners Manual - Page 65
is only played when using Windows Media Player ver. 11. a Slide Show Function Still picture (JPEG) files stored in folders on a media server can be played as slide shows. The time for which each picture is displayed can be set. When still picture (JPEG) files are played on the AVR-4310C1, they are - Denon 4310CI | Owners Manual - Page 66
Audio, US evices Symbols used to indicate buttons in this manual Button located on both the main unit and the remote control unit Button only on the main unit Button only on the remote control unit BUTTON > [BUTTON] ENTER AV.< I> [.ELNET/USB] [A - G] [MEMO] ENTER Ei . CD - Denon 4310CI | Owners Manual - Page 67
streamed DENON 1 Press [MEMO] while the Internet radio station you want to register is playing. to be interrupted. on • "Server rut" or "Connection Down" is displayed if the station is busy or not broadcasting. 2 Press AV to select "Favorites", then press ENTER. • On the AVR-4310CI be set at - Denon 4310CI | Owners Manual - Page 68
set the files as server contents. For details, see the operating instructions of your server software. • Depending on the size of the still picture using a server supporting transcoding, such as Windows Media Player Ver , the media server's database is updated and it may no longer be possible - Denon 4310CI | Owners Manual - Page 69
via the AVR-4310CI's USB port using a USB cable. • The AVR-4310C1 is not compatible with the iPod shuffle. Listening to Napster 1 Playback preparation. EG Check the network environment, then turn on the AVR4310CI's power (32rpage 23 "Connecting to a Home Network (LAN)"). CD If settings are required - Denon 4310CI | Owners Manual - Page 70
used to indicate buttons in this manual Button located on both the main unit and the remote control unit Button only on the main unit Button only on the remote control unit > BUTTON > [BUTTON] AV > ENTER RETURN [„a.NET/USB] [SEARCH] ENTER ?"44 (;) AV > RETURN [SOURCE SELECT] Enter - Denon 4310CI | Owners Manual - Page 71
89 "Operating the Main Remote Control Unit"). 4 Use AV to select "Sign in your account", then press ENTER or D. Rhapsody DENON 5tarta:30edaykr4al SI•11. to your account 5 Enter Username and Password. 7:Rhapsody Account Sign In Username Password DENON OK 6 After inputting the "Username" and - Denon 4310CI | Owners Manual - Page 72
manual Button located on both the main unit and the remote control unit Button only on the main unit Button only on the remote control unit ) BUTTON ) [BUTTON] AV default setting is "Mode3". • The time (default : 30 sec) for which the GUI menus are displayed can be set at - Denon 4310CI | Owners Manual - Page 73
setting (er page 42) is "Absolute" [Adjustable range] 0.O-99,0 * The adjustable range depends on the input signal, the channel level settings [00.111] on the sub remote control unit. Press again to resume unsorted list." is displayed. *To cancel, press AV or [SEARCH]. During playback, either press A - Denon 4310CI | Owners Manual - Page 74
playback mode. Set "Front Height" to "ON" (Cpage 741. The modes that can be selected depend on the input source being played. u Surround Playback of Multi-channel Sources (Dolby Digital, DTS, etc.) In the case of standard playback of multi channel sources, the AVR-4310CI recognizes the format - Denon 4310CI | Owners Manual - Page 75
from the front left and input signal. 2 Press DIRECT/STEREO to select the "STEREO". Playing in a DENON Input signal Analog signal / PCM (2ch) / Dolby Digital source / DIRECT DTS source / Other 2-channel digital as set by the audio parameters and speaker settings, output when HDMI signals are - Denon 4310CI | Owners Manual - Page 76
High : These set the compression level. 73 Main remote control SEARCH : Digital sources : "0dB" • DTS movie sources : "0dB" • DTS music sources : "-10dB" Center Image : Assign center channel signal to front left and right channels for wider sound. • 0.0 - 1.0 (0.3) Panorama : Assign front - Denon 4310CI | Owners Manual - Page 77
the Front height channel is played back without decoding in PLIlz mode, using the input signal. AFDM (Auto flag detect mode) : Detects the source's surround back channel signal and sets the optimum surround mode automatically. • OFF : Do not set. • ON : Set. [Example] Playing Dolby Digital software - Denon 4310CI | Owners Manual - Page 78
have changed without Setup was run. increasing the number of speakers measured, only %wow" lights. • If "Dynamic EQ" or "Dynamic Volume" is set to "ON" when "MultEQ XT" is set to either "OFF" or "Manual": "MultEQ XT" is automatically set to "Audyssey'.' • You can also press [MULTEQ XI] to - Denon 4310CI | Owners Manual - Page 79
seamless and enveloping home theater experience. much louder and softer respectively than average sounds. • Day : Low setting provides the least adjustments to the loudest and softest of sounds. See overleaf > Can be set when "Dynamic Volume is set to "ON". Main remote control operation buttons - Denon 4310CI | Owners Manual - Page 80
Can be set when the "MultEQ XT" setting (oaT'page 75) is "Manual EQ". Curve picture Enhancer +12 Emphasize picture contours. • "DNR" and "Enhancer" are each effective with HDMI output. • The value set at "Picture Adjust" is stored in the memory individually for each input source. 77 Main remote - Denon 4310CI | Owners Manual - Page 81
• Interface / Supported resol. HDMI input/output signals and monitor. Auto Surround Analog/PCM 2ch / Digital 2ch / Digital 5.1ch / Multi ch AUTO Mode if Shows information about auto This can be displayed when "Auto Surround Mode" is set to "ON". surround mode settings. Main remote control - Denon 4310CI | Owners Manual - Page 82
with the compatible Blu-ray disc player. • Set the Blu-ray disc player's "HDMI Control" setting to "ON", the "DENON LINK" setting to "4th". For instructions on operation, refer to the Blu-ray disc player's manual. • When a BD is played with the input mode set to "Auto", playback is performed in the - Denon 4310CI | Owners Manual - Page 83
switching. u When playing the player, the AVR-4310CI input function switches to the function of that player. 3 Switch the television input to the HDMI connected to the AVR-4310C1. Switch the AVR-4310C1 input to the HDMI input 4 source and check if the picture from the player is ok. 5 When you turn - Denon 4310CI | Owners Manual - Page 84
in this manual Button located on both the main unit and the remote control unit Button only on the main unit Button only on the remote control unit BUTTON [BUTTON] ENTER QUICK SELECT [= MAIN] -M R,,R.H. [PARTY] [SLEEP] QUICK SELECT AV [CHANNEL LEVEL] 0 ENTER Setting the Power - Denon 4310CI | Owners Manual - Page 85
The Quick Select function can be set separately for the different zones (ataT' page 88 "Quick Select Function"). NOTE Input sources stored with the quick select Radio, Media Server or iPod DIRECT) can be played on multiple DENON products equipped with the Party Mode function and connected in a - Denon 4310CI | Owners Manual - Page 86
mobile terminal conforming to the DLNA (Digital Living Network Alliance) standard. • Server) AVR-4310CI Streaming Wireless LANcompatible router 1O - 0. Streaming Computer AVR-4310C1's input source automatically switches to "NET/USB". Also, when the "Network Standby" setting (O- page 40) is set - Denon 4310CI | Owners Manual - Page 87
Control Function) You can operate the AVR-4310C1 using a browser. 1 Switch "ON" the "Network Standby" setting (a page 40). 2 Check the AVR-4310CI's IP address with "Network Information" (r?"' page 41). SI. .NETWORK INFO DENON DHCP IP Address Mac Address DENON [AVR-431 0CI] ON :1-9271Z,$.176 - Denon 4310CI | Owners Manual - Page 88
screen DENON (ZONE CONTROL >J NET AUDIO 'USE ( MAIN ZONE) QUICK SELECT (CHANNEL VOLUME> [NET AUDIO; USE [Pod Dock :ON [AVR-1310.6,11 Various Memory Functions Personal Memory Plus Function This function sets the settings (input mode, surround mode, HDMI output mode, MultEQ XT, Dynamic EQ, Dynamic - Denon 4310CI | Owners Manual - Page 89
-4310C1's ZONE2 video output terminal are played by the ZONE2 TV. MAIN ZONE AVR-4310C1 VIDEO ZONE2 VIDEO IN NOTE It is not possible to output video signals input to the HDMI or component terminals to ZONE2. Amp Assign mode setting (cr page 34) and the audio signals that are output Connecting - Denon 4310CI | Owners Manual - Page 90
only on the main unit Button only on the remote control unit o BUTTON [BUTTON] Playback The operating procedure is the same for "Cl) Zone Playback by Speaker Output" and "Ct Zone Playback by Audio Output (PRE OUT)". ♦ Turn on the AVR-4310CI's power. I la page 24 "Turning the Power On - Denon 4310CI | Owners Manual - Page 91
settings for multi-zone. / Set the items below to the settings you want to save. I CD Input Source ('page 87) ® Volume Level (rt" ---page 87) 2 In the zone also canceled when the AVR-4310Cl is set to the standby mode or the ZONE2 or ZONE3 power is turned off. For ZONE2, the "Zone Setup" can be made - Denon 4310CI | Owners Manual - Page 92
the "MAIN", "SAT TU", "DTU", "iPod" and "NET/USB" modes, when the remote ID is set, the AVR-4310C1 can be used independently even in an environment containing multiple DENON amplifiers. Vrpage 93 "Setting the Remote ID") Signal transmission indicator [DEVICE ; cc_=r1•=, I SELECTOR] I [MI MAIN - Denon 4310CI | Owners Manual - Page 93
remote to the component's operating instructions. 3 Press [0 - 9] and input the 5-digit number of the brand (cue) 10- Playback -NI lib-10- Manual search (fast-reverse/fast-forward) 11 Still/Pause off * 2 Buttons Buttons MENU/ SEARCH (Popup) Menu AV< I> ENTER SETUP/RSTR RTN CH +, - 0 - - Denon 4310CI | Owners Manual - Page 94
SAT/CBLDHVDDp/ VCCR/ ' *1 10-*II 0-0.- II • ON OFF Auto search (cue) Playback Manual search (fast-reverse/fast-forward) Still/Pause Stop Power on * 2 Power off * 2 Buttons MENU/ SEARCH Menu/guide AV< 1> Cursor ENTER Enter SETUP/RSTR RESTORER RTN Return CH +,- Switch channels (up/down - Denon 4310CI | Owners Manual - Page 95
(Press and release) (Press and hold) AV< > ENTER SETUP/RSTR RTN • iPod 1-track/All-track repeat play 1-track/album shuffle play Auto search (cue) Playback Manual search (fast-reverse/fast-forward) Still/Pause Stop Page search mode Browse / Remote mode switching Cursor Enter RESTORER Return XIVI - Denon 4310CI | Owners Manual - Page 96
selection Switching picture Direct play Setting the Remote ID When using multiple DENON AV receivers in the same room, make this setting so that only the desired AV receiver operates. 1 Press [MAIN] to light the "MAIN" zone - 9] to input the 5-digit number corresponding to the remote ID to be - Denon 4310CI | Owners Manual - Page 97
frog the Ma e Contr it Learning Function If your AV devices are of a brand other than DENON or if they canno be operated with the preset memory function, their remote control signals can be transfered to stored in the AVR-4310C1's main remote control unit. 1 Press and hold in [RC SETUP] for - Denon 4310CI | Owners Manual - Page 98
ong the Main Remote Control Unit Signal transmission indicator .... [DEVICE 0 SELECTOR] I 'i,74A.r47? [I= MAIN] 7-1:# CI E.= to the TV mode, the DVD mode operations can be performed while in the TV mode. Setting the Time the Backlight Stays Lit 1 Press and hold in [RC SETUP] for at least - Denon 4310CI | Owners Manual - Page 99
the [MAIN] Device Select button is pressed, only the set zone can be operated with the main remote control unit. 1Press and hold in [RC SETUP] transmission indicator flashes twice. 3 Press [DEVICE SELECTOR] for the device you want to reset (TV or SAT/CBL). 4 Press and hold in [RC SETUP] for at least - Denon 4310CI | Owners Manual - Page 100
zone, so you can use it to control the AVR-4310C1 from other rooms. • The operations listed below can be performed with the sub remote control unit. • Switching the input [T[U•]N,INGAV] • [REPEAT] [RANDOM] [M. ZONE CALL] [VOLUME +, -] [MEMORY] [ENTER] AV [RETURN] [ALL MUSIC/ FAVORITES] [USB - Denon 4310CI | Owners Manual - Page 101
light. 3 Use the tip of a pen to press [ADVANCED SETUP]. The multi-zone indicator turns off. Setting the Remote ID When using multiple DENON AV receivers in the same room, make this setting so that no AV receiver other than the desired one operates. 1While pressing [MENU], press [ADVANCED SETUP - Denon 4310CI | Owners Manual - Page 102
theater. Dolby Digital Dolby Digital Dolby Digital is a multi-channel digital signal format developed by Dolby Laboratories. A total of 5.1-channels are played: 3 front home entertainment. Dolby Pro Logic llz, with front height channels is also an ideal alternative for households that cannot support - Denon 4310CI | Owners Manual - Page 103
optimum performance for every listener in a large listening area. Based on several room measurements, MultEQ XT calculates an equalization solution that corrects for both time and frequency response problems in the listening area and also performs a fully automated surround system setup. Audyssey - Denon 4310CI | Owners Manual - Page 104
clock of the AV amplifier connected by DENON LINK to achieve HDMI signal transfer with little jitter when playing BD. AL24 Processing Plus AL24 Processing for All Channels DENON has further developed its proprietary AL24 Processing, an analog waveform reproduction technology, to support the 192 kHz - Denon 4310CI | Owners Manual - Page 105
(KW'page 73). NOTE3 : This parameter is availabe when the "Front Height" is set to "ON" or "DSX" is set to "ON" (KY'page 74, 76). NOTE4 : This parameter is availabe when the "DSX" is set to "ON" (r 'page 76(. NOTE: *1: When playing Dolby Digital and DTS signals. *2 : When playing Dolby TrueHD signal - Denon 4310CI | Owners Manual - Page 106
are shown in parentheses) Surround Mode Delay Time Subwoofer Front Height PRO LOGIC II/Tlx MUSIC mode only NEO:6 DOLBY PRO LOGIC Ilx X x DOLBY PRO LOGIC II x x DTS NEO:6 x x DOLBY DIGITAL X x DOLBY DIGITAL Plus X x DOLBY TrueHD x x DTS SURROUND X x DTS 96/24 x x DTS-HD - Denon 4310CI | Owners Manual - Page 107
back speaker setup is set to "lspkr" or "None *3: This mode is not available when the front height speaker setup is set to "None" DOLBY DIGITAL MULTI CH PCM DOLBY DIGITAL EX (With Flag) DOLBY DIGITAL ID( (With no Flag) DOLBY DOLBY DOLBY DIGITAL DIGITAL DIGITAL 5.1/5/4ch) (4/3ch) 12th) PCM - Denon 4310CI | Owners Manual - Page 108
DIGITAL DOLBY DIGITAL EX (With Flag) DOLBY DIGITAL DOLBY DIGITAL EX (With no Flag) DOLBY DIGITAL (5.1/5/4ch) DOLBY DIGITAL (4/3ch) DOLBY DIGITAL the surround back speaker setup is set to "1spkr" or "None": *3: This mode is not available when the front height speaker setup is set to "None' x X - Denon 4310CI | Owners Manual - Page 109
WMA (Windows Media Audio)/ MP3 / MPEG-4 AAC / FLAC DTS-HD Master Audio DTS-HD High Resolution Audio DTS EXPRESS DTS DTS ES DTS ES (WD.iSthCFRlTag) MTRX (With Flag) DTS (5.1ch) Input signals DOLBYPius DTS 96/24 DOLBY TrueHD DOLBY DIGITAL DOLBY DIGITAL EX 'With Flag) DOLBY DIGITAL DOLBY - Denon 4310CI | Owners Manual - Page 110
HDMI OFF OFF T- O X O O O OFF I O O C O 1 I 0 : Video signal input present x : No video signal input *1 : When no HDMI monitor is connected or the HDMI monitors power is not on MAIN ZONE the picture indicated in I. x ( ) : Only the picture in 1 is output. x : Neither the picture nor - Denon 4310CI | Owners Manual - Page 111
termination treatments etc, please reconnect once again. • The AVR-4310C1 amplifier circuit has failed. Switch off the power and please contact the DENON service adviser. Page - - 13 13 [Remote Control Unit] Symptom Cause / Countermeasure Set does not work • Batteries are worn. Replace with - Denon 4310CI | Owners Manual - Page 112
iPods do not support being used connected directly to the USB port. Page 27, 48 16 21 109 [Video] Symptom Cause / Countermeasure, . No picture appears. • Check the connections of the AVR-4310CI's video output , terminals and the TV's input terminals. • Make the proper input setting for the - Denon 4310CI | Owners Manual - Page 113
the connected port do not match. Connect to the port set at "USB Select" • A USB memory device that the set cannot recognize is connected. This is not a malfunction. DENON does not guarantee that all USB memory devices will operate or receive power. • USB memory device is connected via USB hub - Denon 4310CI | Owners Manual - Page 114
receive the channel. "SUBSCRIPTION • While updating contract information. UPDATED" is displayed. "Enter Lock Code • Selected channels are locked. Please insert pass word (4 digits cannot be performed. When the microprocessor is reset, all the settings are reset to their default values. 1 Turn - Denon 4310CI | Owners Manual - Page 115
Front, Center, Surround back 6 - 16 0/ohms Surround: A or B 6 - 16 ()/ohms A + B 16 Wohms • Analog Input sensitivity / Input Digital input: Format - Digital audio interface • Phono equalizer (PHONO input - REC OUT) Input set to "OFF") u HD Radio section Receiving u Main remote control unit - Denon 4310CI | Owners Manual - Page 116
codes / Liste de codes preregles Blu-ray Disc Player D Denon 32258 Insignia 30675 Integra 32147 LG: M Magnavox 30741 306/5 Marantz 30695,30705,30770,30899 Alba 30672 Allegro 30869 Amstrad 30713 Apex Digital 30533,3067231056,31061 Arrgo 31023 B 31224 Bel Canto Design 31571 - Denon 4310CI | Owners Manual - Page 117
40032 40393, 40420 40390. 40420, 40490 40029. 40303 40303 40157 40072 40032, 40053, 40087, 40157, 40179 40036. 40490. 40868 40000 CD Recorder D Denon R RCA S Sony T Teac 42868. 43868 40053, 40420 40000, 40100, 41364 40420 Video Cassette Recorder A A-Mark 20037,20240.20278 ABS 21972 Admiral - Denon 4310CI | Owners Manual - Page 118
20618, 20636, 20739, 21337 21008. 21972. 21996 21972 21972 21972 21972 Digital (Personal) Video Recorder/ Satellite Combination B Bell ExpressVu D DirecTV 00775 00099. Mustang 10672 Curtis Mathes Daewoo Dayton Daytron Decca Dell Denon Dream Vision Dumont Durabrand Dynatech Dynes E Eaton - Denon 4310CI | Owners Manual - Page 119
Hallmark Hanseatic Harley Davidson Harman/Kardon Harsper Heathkit Helios Hewlett Packard Hikone Hitachi HP Hyundai i ICE Ima Infinity InFocus Innova Insignia Inteq ITT Nokia IX JBL JCB Jensen JIL Jinxing Johnson Jutan JVC K Kamp Kawasho KDS KEC Kennex Kenwood Kioto KLH Kloss Konka Kreisen KTV L Lark - Denon 4310CI | Owners Manual - Page 120
11904, 11911 Television/DVD Combination A Advent Akai.. 11933 11675, 30695 Apex Digital 11943 AuttiOvek 11937, 11951, 11952 Axion B Broksonic C Citizen E Emerson' 11904 11904 11904, 20593 11904 11909 11904, 11909 11911 Satellite Set Top Box A A-Mare 00345 ABsat 00123 ADB 01259, 01367 - Denon 4310CI | Owners Manual - Page 121
DVD-2500 DVD-3000 DVD-3300 Blu-Rey preset codes Codes preregles Blu-Ray DENON Model No. Modele nurnero DVD-1800BD DVD-2500BT DVD.3800BD DVD-A1UDCI 32258 [ ]*: Preset codes set upon shipment from the factory. : Les codes preregles different en fonctiom des livraison de l'usine. DVD/ NOP (.121 - Denon 4310CI | Owners Manual - Page 122
:~ - Denon 4310CI | Owners Manual - Page 123
DENON wvyw.denon corn Denon Brand Company, D&M Holdings Inc. Printed ,n Japan 541'. 10299 000D - Denon 4310CI | Owners Manual - Page 124
DENON Getting Started Connections Mise en route Connexions AVR-4310C1 TV DVD Player Lecteur DVD AN Receiver ►4 Speakers Haut-parleurs 8 Cable/Satellite Cable / Satellite NOTE : For more connection options. REMARQUE : Autres connexions. Manual • Cables are NOT included. • Les cables NE sont - Denon 4310CI | Owners Manual - Page 125
Lecteur DVD AN Receiver Recepteur AV Check Verifiez TV Cable / Satellite Cable/Satellite Best MeiHour IIIIIIP MP HDMI a .40 Component VIDEO INPUT Best NOTE There are multiple ways to connect video. Please choose the option that is best for you. (Read Instruction Manual of your TV set.) II - Denon 4310CI | Owners Manual - Page 126
, modifiez ('attribution des terminaux a utiliser HDMI I® „Y, CEP 3 (SATiCEL) COAX 7,, • 2 ISATICBL) IN ' ff St * ©©© 0 4 • 0 0 •Ir l L 0000004 O 0 S VIDEO r'sr 0 0Q99999R90 0 ,41.1,11 0 66456661k560 Digital Audio Audio numerique am-6-9 © OOOOOOOOO Manual "Input Assign" - Denon 4310CI | Owners Manual - Page 127
Left Speaker Enceintes avant gauche • FR : Front Right Speaker Enceintes avant droit o C : Center Speaker Enceinte sur votre cable. FR 0.0 SW LS• R INPUT Need more information? Avez-vous besoin d'autres informations? Manual 5431 10088 008D Printed in Japan www.denon.corn Denon Brand Company - Denon 4310CI | Owners Manual - Page 128
DENON Connect the AVR-4310C1 to your Network! Connectez le AVR-4310CI on connectIons or operation_ see the AVR-4310CI Owner's manual. O• ENTER OK Cursor buttons Select autres informations? 'Note that the illustrations in these instructions may differ from the actual unit for explanation purposes - Denon 4310CI | Owners Manual - Page 129
a un reseau compatible DLNA To connect your Denon product to your DLNA-compatible home network, to learn more about the TwonkyVision deals specifically with support and inquires regarding TwonkyVision. X This campaign may be ended without notice. Pour brancher votre appareil Denon a votre reseau - Denon 4310CI | Owners Manual - Page 130
- Denon 4310CI | Owners Manual - Page 131
ATL!TLEJOki WELCOME TO THE BEST RADIO ON RADIOTM 100% COMMERCIAL-FREE MUSIC Including Pop, Rock, Country, Hip-Hop, R&B, Jazz, Blues, Classical, and Latin plus legendary DJs, original MTV VJs, exclusive live performances, and channels produced by music icons LIVE PLAY-BY-PLAY & EXPERT SPORTS TALK - Denon 4310CI | Owners Manual - Page 132
- Denon 4310CI | Owners Manual - Page 133
- Denon 4310CI | Owners Manual - Page 134
DENON SERVICE NETWORK / PEftlait Argentina ICAP S.A. Av Corporation #51 Pardis Trade Centre, Chabahar Free Zone, Iran Tel: +98 21 8882 6086 718304 Fax: +7 3272 581945718438 Korea D&M Sales and Marketing Korea Ltd. Chung Jin BID : 045-5400 704 Slovenia Digital-Professional Audio SeebOckgasse 59, - Denon 4310CI | Owners Manual - Page 135
Company) 100 Corporate Drive Mahwah, NJ 07430-2041 (800) 497-8921 (888) 544-8434 Fax DENON REGIONAL SUPER SERVICE CENTERS (Repair only-No parts orders please) PYRAMID AUDIO 305 E. Braker Lane Austin,TX 78753-2746 Ontario, L3R 5B1 (905) 475-4085 (905) 475-4159 Fax WARRANTY (HOME) 00D 515 0944 804 1 - Denon 4310CI | Owners Manual - Page 136
DENON ELECTRONICS (USA), LLC DEALER. Product Category 4 A /V Controller, A /V Receiver, AM / FM Receiver AVC, AVR, DRA 2 DVD Receiver, DVD Home Theater System ADV, S 1 4 Pre-Amplifier, Digital RETURNING YOUR UNIT FOR WARRANTY SERVICE, A COPY OF THE ORIGINAL SALES SLIP MUST BE ATTACHED. d. - Denon 4310CI | Owners Manual - Page 137
Receiver, AM / FM Receiver AVC, AVR, DRA DVD Receiver, DVD Home Theater System ADV, S Pre-Amplifier, Digital instructions supplied with the product. b) Repair or attempted repair by 9 anyone not authorized by DENON YOUR UNIT FOR WARRANTY SERVICE, A COPY OF THE ORIGINAL SALES SLIP MUST BE ATTACHED - Denon 4310CI | Owners Manual - Page 138
AVR, DRA 2 Recepteur DVD, Systeme DVD Home Theater aux Etats-Un set dans d'autres pays service, it peut etre envoye a tout atelier de service officiel DENON ou chez D&M CANADA INC. (Si vous doutez que ]'atelier de $ $ service du produit et une description du probleme. Dans le cas d'un lecteur CD
-
 1
1 -
 2
2 -
 3
3 -
 4
4 -
 5
5 -
 6
6 -
 7
7 -
8
-
9
-
10
-
11
-
12
-
13
-
14
-
15
-
16
-
17
-
18
-
19
-
20
-
21
-
22
-
23
-
24
-
25
-
26
-
27
-
28
-
29
-
30
-
31
-
32
-
33
-
34
-
35
-
36
-
37
-
38
-
39
-
40
-
41
-
42
-
43
-
44
-
45
-
46
-
47
-
48
-
49
-
50
-
51
-
52
-
53
-
54
-
55
-
56
-
57
-
58
-
59
-
60
-
61
-
62
-
63
-
64
-
65
-
66
-
67
-
68
-
69
-
70
-
71
-
72
-
73
-
74
-
75
-
76
-
77
-
78
-
79
-
80
-
81
-
82
-
83
-
84
-
85
-
86
-
87
-
88
-
89
-
90
-
91
-
92
-
93
-
94
-
95
-
96
-
97
-
98
-
99
-
100
-
101
-
102
-
103
-
104
-
105
-
106
-
107
-
108
-
109
-
110
-
111
-
112
-
113
-
114
-
115
-
116
-
117
-
118
-
119
-
120
-
121
-
122
-
123
-
124
-
125
-
126
-
127
-
128
-
129
-
130
-
131
-
132
-
133
-
134
-
135
-
136
-
137
-
138
 |
 |

DENON
AV
SURROUND
RECEIVER
AVR-431
0CI
Owner's
Manual
IGUI
Graphical
User
Interface
Use
this
manual
in
combination
with
the
operating
guide
displayed
on
the
GUI
screen.
GUI
Menu
Operation
(re
-
page
26)
GUI
Menu
Map
(warpage
25)
Language
(warpage
45)
Remote
Control
Unit
Operations
([Erpage
89)