Denon AVR-1705 Owners Manual
Denon AVR-1705 Manual
 |
View all Denon AVR-1705 manuals
Add to My Manuals
Save this manual to your list of manuals |
Denon AVR-1705 manual content summary:
- Denon AVR-1705 | Owners Manual - Page 1
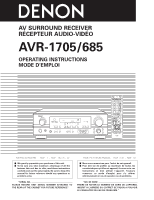
AV SURROUND RECEIVER RÉCEPTEUR AUDIO-VIDÉO AVR-1705/685 OPERATING INSTRUCTIONS MODE D'EMPLOI FOR ENGLISH READERS PAGE 2 ~ PAGE to offer, read these instructions carefully and use the set properly. Be sure to keep this manual for future reference should any questions or problems arise. "SERIAL NO. - Denon AVR-1705 | Owners Manual - Page 2
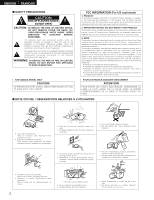
any interference received, including interference that may cause undesired operation. 2. IMPORTANT NOTICE: DO NOT MODIFY THIS PRODUCT This product, when installed as indicated in the instructions contained in this manual, meets FCC requirements. Modification not expressly approved by DENON may void - Denon AVR-1705 | Owners Manual - Page 3
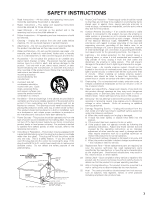
GROUND CLAMPS POWER SERVICE GROUNDING ELECTRODE SYSTEM (NEC ART 250, PART H) 13. Power-Cord Protection - Power-supply proper grounding of the mast and supporting structure, grounding of the lead-in Upon completion of any service or repairs to this product, ask the service technician to perform - Denon AVR-1705 | Owners Manual - Page 4
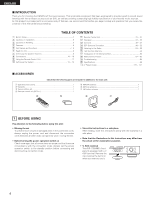
Information 57 ~ 63 ⁄9 Troubleshooting 64 ¤0 Specifications 65 List of Preset Codes 128 ~ 132 2 ACCESSORIES Check that the following parts are included in addition to the main unit: q Operating instructions 1 w Warranty 1 e Service station list 1 r Remote control unit (RC-977 1 t R6P - Denon AVR-1705 | Owners Manual - Page 5
PRE OUT jack, HEADPHONE jack and SPEAKER terminals The PRE OUT jack, HEADPHONE jack and SPEAKER terminals include a muting circuit. Because of this, the output signals are greatly reduced for several seconds after the power operation switch is turned on or input function, surround mode or any other - Denon AVR-1705 | Owners Manual - Page 6
connection, regardless of how the player and the AVR-1705/685's video input jacks are connected. 8. Component Video Switching In addition to composite video and "S" video switching, the AVR1705/685 provides 3 sets of component video (Y, PB/CB, PR/CR) inputs, and one set of component video outputs to - Denon AVR-1705 | Owners Manual - Page 7
q Power ON/STANDBY switch 19, 34, 53) w POWER indicator 19, 34) e Power switch 19, 34) r Headphone jack (PHONES 37) t INPUT MODE button 35, 38) y SPEAKER A/B INPUT mode indicators 36) @9 SIGNAL indicators 36) #0 ANALOG button 35, 38) #1 Remote control sensor (REMOTE SENSOR 17) #2 INPUT - Denon AVR-1705 | Owners Manual - Page 8
control buttons 36) MUTING button 37) SURROUND PARAMETER button 31, 32, 41) CH SELECT (channel select)/ ENTER button 18, 31, 32, 40, 42) SURROUND BACK/ RETURN button 31, 32, 45) SPEAKER select button 34) DIMMER button 37) NOTE: • The shaded buttons do not function with the AVR- 1705/685 - Denon AVR-1705 | Owners Manual - Page 9
6 READ THIS FIRST This AV Surround Receiver must be setup before use. Following these steps. Step 1 (page 9 to 16) Choose the best location to setup the Speakers and connecting the components. Step 2 (page 17) Next, insert the batteries into the remote control unit. Step 3 (page 18 to 28) Finally, - Denon AVR-1705 | Owners Manual - Page 10
the AC OUTLETS AC OUTLETS • SWITCHED (total capacity - 120 W (1 A.)) The power to these outlets is turned on and off in conjunction with the POWER switch on the main unit, and when the power is switched between on and standby from the remote control unit. No power is supplied from these outlets when - Denon AVR-1705 | Owners Manual - Page 11
input jack (VIDEO INPUT) to the VIDEO MONITOR OUT jack using a 75 Ω/ohms video coaxial pin plug cord. VIDEO IN AUDIO VIDEO DIGITAL B OUT OUT R L OUT OPTICAL of the video disc player to the digital input jack. Please refer to the instruction manual of the adapter when making connections. AUDIO - Denon AVR-1705 | Owners Manual - Page 12
instructions of the other components. • A note on the S input jacks The input selectors for the S inputs and pin jack inputs work in conjunction with each other. • Precaution when using S-jacks This unit's S-jacks (input and output) and video pin jacks (input and output) have independent circuit - Denon AVR-1705 | Owners Manual - Page 13
COMPONENT DVD IN jack using 75 Ω/ohms coaxial video pin-plug cords. instructions included with the TV or other component. The Video Conversion Function With the AVR-1705/685, the Video signal and the S-video signal which were inputted AVR-1705/685 and the VTR, or if your VTR has a TBC function, turn - Denon AVR-1705 | Owners Manual - Page 14
ENGLISH Connecting the antenna terminals FM INDOOR ANTENNA (An Accessory) DIRECTION OF BROADCASTING STATION FM ANTENNA 75 Ω/ohms COAXIAL CABLE AM OUTDOOR ANTENNA GROUND AM LOOP ANTENNA (An Accessory) AM loop antenna assembly Connect to the AM antenna terminals. 1 2 3 Remove the vinyl - Denon AVR-1705 | Owners Manual - Page 15
of 6 to 16 Ω/ohms can be connected for use as center and surround and surround back speakers. • The protector circuit may be activated if the set is played for long periods of time at high volumes when speakers with an impedance lower than the specified impedance are connected. 1. Loosen by turning - Denon AVR-1705 | Owners Manual - Page 16
around the unit and switch the power back on. If the protection circuit is activated again even though there are no problems with the wiring or the ventilation around the unit, switch off the power and contact a DENON service center. Note on speaker impedance • The protector circuit may be activated - Denon AVR-1705 | Owners Manual - Page 17
23 feet/7 meters, but this distance will shorten or operation will become difficult if there are obstacles between the remote control unit and the remote control sensor, if the remote control sensor is exposed to direct sunlight or other strong light, or if operated from an angle. • Neon signs or - Denon AVR-1705 | Owners Manual - Page 18
display. ENTER button Press this to switch the display. Also use this button to complete the setting. • System setup items and default values (set upon shipment from the factory) Speaker Configuration Delay Time System setup Input the combination of speakers in your system and their corresponding - Denon AVR-1705 | Owners Manual - Page 19
off and indicator is off. In this position, the power cannot be turned on and off from the remote control unit. 3 Turn on the power. Press the Power ON/STANDBY switch (button). (Main unit) (Remote control unit) 4 Press the SYSTEM SETUP button to enter the setting. *SYSTEM SET UP NOTE: Please - Denon AVR-1705 | Owners Manual - Page 20
Press the ENTER or (left) button (right) button (down) button to enter the settings and switch to the Speaker Distance setting. • Parameters Large...... Select this when using speakers that have sufficient performance for reproducing bass sound below the frequency set for the Crossover Frequency - Denon AVR-1705 | Owners Manual - Page 21
Select the value closest to the measured distance. Press the ENTER or (down) button to switch to the front R speaker setting. 2 Use the (left) and (right) buttons to set the distance from the front R speaker to the listening position. 7 FRONT R 12ft • The number changes in units of 1 foot each - Denon AVR-1705 | Owners Manual - Page 22
the value closest to the measured distance. Press the ENTER or (down) button to switch to the surround R speaker setting. Use the position. (left) and (right) buttons to set the distance from the surround R speakers to the listening 10 SURR.R 10ft • The number changes in units of 1 foot each - Denon AVR-1705 | Owners Manual - Page 23
to enter the setting and switch to the Crossover Frequency 2 DTS signals) and the low frequency signal range of channels set to "SMALL" in the setup speakers and "YES" is set for the subwoofer in the "Speaker Configuration" settings (see pages 19, 20). If "SMALL" is set for the front speakers - Denon AVR-1705 | Owners Manual - Page 24
speakers to adjust the level. • The level can also be adjusted directly from the remote control unit. (For details, see page 39.) 1 • Use the (left) button to switch the Test Tone mode. • Press the ENTER or (down) button to switch to the DIGITAL input speakers. • Manual: Select the speaker from - Denon AVR-1705 | Owners Manual - Page 25
channel level (manual mode). Use the (left) and (right) buttons to set the subwoofer channel level. (Initial) AUTO-SW -12dB 0dB +12dB Press the ENTER button to finish the Test Tone. (left) button (right) button Press the ENTER or (down) button to switch the DIGITAL input (COAX) setting - Denon AVR-1705 | Owners Manual - Page 26
) buttons to assign the input function connected to the COAXIAL input (COAXIAL) terminal. 16 COAX CD (Initial) CD AUX DVD TV VCR CDR • Select "OFF" if nothing is connected. (left) button (right) button Press the ENTER or (down) button to switch the optical input 1 (OPT 1) setting. OFF - Denon AVR-1705 | Owners Manual - Page 27
button (right) button (down) button to switch the input source (VCR) setting. 3 Use the ( input terminal. Cautions on the video conversion function: When the component video terminals are used to connect the AVR-1705/685 AVR-1705/685 and the VTR, or if your VTR has a TBC function, turn it on. 27 - Denon AVR-1705 | Owners Manual - Page 28
(down) button to switch the Ext. In SW Level setting. Setting the Ext. In SW Level Set the method of playback of the analog input signal connected to the up the system 1 Press the SYSTEM SETUP button to finish system set up. This completes the system setup operations. Once the system is set up - Denon AVR-1705 | Owners Manual - Page 29
11 REMOTE CONTROL UNIT Operating DENON audio components • Turn on the power of the different components before operating them. 1 Set mode switch 1 to "AUDIO". 2 Set mode switch 2 to the position for the component to be operated. (CD, CDR/MD or Tape deck) 1 3 ENGLISH 3 2 3 Operate the audio - Denon AVR-1705 | Owners Manual - Page 30
set for one component only among the following: CDR/MD, DVD/VDP and DBS/CABLE. The preset codes are as follows upon shipment from the factory and after resetting: TV, VCR HITACHI CD, TAPE DENON CDR/MD DENON (CDR) DVD/VDP DENON (DVD) DBS/CABLE ABC (CABLE) 30 - Denon AVR-1705 | Owners Manual - Page 31
. Some models cannot be operated with this remote control unit. 1. Digital video disc player (DVD) system buttons POWER : Power on/standby (ON/SOURCE) OFF : DENON DVD power off 6,7 : Manual search (forward and reverse) 2 : Stop 1 : Play 8,9 : Auto search (to beginning of track) 3 : Pause - Denon AVR-1705 | Owners Manual - Page 32
: Return •, ª, 0, 1 : Cursor up, down, left and right ENTER : Enter CHANNEL : Switch channels +, - 0~9, +10 : Channels DISPLAY : Switch display VOL +, - : Volume up/down 5. Monitor TV (TV) system buttons POWER : Power on/standby (ON/SOURCE) MENU : Menu RETURN : Return •, ª, 0, 1 : Cursor up, down - Denon AVR-1705 | Owners Manual - Page 33
is set. 1 Set mode switch 1 to "VIDEO". 3 3 2 Set mode switch 2 to the component to be registered (DBS/CABLE or TV). 4 3 Press the DVD/VDP power button and the TV power button at the same time. 1 2 • Indicator flash. 4 1 2 3 4 5 6 7 8 9 0 Input the number of the component - Denon AVR-1705 | Owners Manual - Page 34
off and indicator is off. In this position, the power cannot be turned on and off from the remote control unit. 2 Turn on the power. Press the Power ON/STANDBY switch (button). (Main unit) (Remote control unit) When pressed, the power turns on and the display lights. The sound is muted for - Denon AVR-1705 | Owners Manual - Page 35
on the remote control unit) to switch the external input. (Main unit) (Remote control unit) • Selecting the AUTO, PCM and DTS modes The mode switches as shown below each time the INPUT MODE button is pressed. AUTO PCM DTS (Main unit) (Remote control unit) 2 Input mode selection function - Denon AVR-1705 | Owners Manual - Page 36
to connect the source component to the digital input jacks (OPTICAL/COAXIAL) and set the input mode to "DTS". After starting playback [1] Adjusting the sound quality (tone) 1 The tone switches as follows each time the TONE CONTROL button is pressed. Input mode display • In the AUTO mode AUTO - Denon AVR-1705 | Owners Manual - Page 37
. Connect the headphones to the PHONES jack. The speaker output is automatically turned off when headphones are connected. PHONES ENGLISH NOTE: video select button. • Switch the program source to the component connected to the video input jacks. (Remote control unit) [5] Checking the currently - Denon AVR-1705 | Owners Manual - Page 38
OUT SUBWOOFER jack. 2 Cancelling the external input mode To cancel the external input (EXT. IN) setting, press the INPUT MODE (AUTO, PCM, DTS) or ANALOG button to switch to the desired input mode. (See page 35.) (Main unit) (Remote control unit) • When the input mode is set to the external - Denon AVR-1705 | Owners Manual - Page 39
DTS SURROUND) modes. (Main unit) 2 Press the TEST TONE button. (Remote control unit) (Remote control unit) Test tones are output from the different speakers for all the speakers. (Remote control unit) NOTE: Please make sure the "AUDIO" position of the slide switch on the remote control unit. 3 - Denon AVR-1705 | Owners Manual - Page 40
SW SL NOTE: Please make sure the "AUDIO" position of the slide switch on the remote control unit. 3 Adjust the level of the selected speaker. (Remote control unit) Default setting of channel level is 0 dB. The level of the selected speaker can be adjusted within the range of +12 to -12 dB using - Denon AVR-1705 | Owners Manual - Page 41
the mark. • For operating instructions, refer to the manuals of the respective components. 4 Select the surround parameter mode. Display 8 5, 7 4, 6 5, 7 (Main unit) (Remote control unit) To perform this operation from the remote control unit, check that the mode selector switch is set to - Denon AVR-1705 | Owners Manual - Page 42
DOLBY DIGITAL playback. • DEFAULT setting DEFAULT Y/N YES Y/N NO or or Select "Yes" to reset to the factory defaults. 8 Press the ENTER button to finish surround parameter mode. (Remote control unit) NOTE: • When making parameter settings, the display will return to the regular condition - Denon AVR-1705 | Owners Manual - Page 43
by pressing the CINEMA or MUSIC button on the remote control unit during playback in the DTS NEO:6 mode. 4, 6 5, 7 (Main unit) (Remote control unit) To perform this operation from the remote control unit, check that the mode selector switch is set to "AUDIO". 5 Select the optimum mode for - Denon AVR-1705 | Owners Manual - Page 44
YES Y/N NO or or Select "Yes" to reset to the factory defaults. (Remote control unit) NOTE: • When making parameter settings, speaker; only from the left/right speakers as a phantom image; or from all three front speakers to varying degrees. The control can be set in 8 steps from 0 to 7. DTS - Denon AVR-1705 | Owners Manual - Page 45
(Remote control unit) w Set the input mode to "AUTO" or DTS. (Main unit) (Remote control unit) 2 Select the STANDARD (Dolby/DTS Surround) mode. 32 56 2 1 (Main unit) (Remote control unit) 3 Operate the SURROUND BACK button to switch Surround Back CH ON/OFF. (Main unit) (Remote control - Denon AVR-1705 | Owners Manual - Page 46
to be adjusted, turn off the tone defeat mode. NOTE: Please make sure the "AUDIO" position of the slide switch on the remote control unit. 6 Set or Select "Yes" to reset to the factory defaults. 7 Press the ENTER button to finish surround parameter mode. (Remote control unit) NOTE: • When - Denon AVR-1705 | Owners Manual - Page 47
picture soundtracks. Select this function if the sound from the front speakers is too bright. This function only works in the Dolby Pro Logic IIx, Dolby Digital, DTS Surround and DTS or DTS sources when the peak limiter is turned off with the subwoofer peak limit level setting (system setup menu), - Denon AVR-1705 | Owners Manual - Page 48
a more realistic, powerful sound. Surround modes channel. This mode provides all speaker surround sound, but without input different sources. When the input source is switched, the modes set for that source last time it was used are automatically recalled. The surround parameters, tone control - Denon AVR-1705 | Owners Manual - Page 49
DSP surround simulation • To operate the surround mode and surround parameters from the remote control unit. 1 Select the surround mode for the input channel. 1 ENGLISH (Remote control unit) The surround mode switches in the following order each time the DSP SIMULATION button is pressed: MONO - Denon AVR-1705 | Owners Manual - Page 50
ON ON or OFF or • SURROUND BACK SPEAKER setting SB : ON ON or OFF or • DEFAULT setting DEFAULT Y/N YES NO or or Select "Yes" to reset to the factory defaults. 4 Press the ENTER button to finish surround parameter mode. (Remote control unit) NOTE: • When making parameter settings, the - Denon AVR-1705 | Owners Manual - Page 51
DTS NEO:6 JAZZ CLUB ROCK ARENA 5CH/6CH STEREO MONO MOVIE VIRTUAL SURROUND MATRIX VIDEO GAME JAZZ CLUB ROCK ARENA To select the surround mode while adjusting the surround parameters, tone defeat or tone control the parameter you want to adjust, then turn the SELECT knob to set it. NOTES: - Denon AVR-1705 | Owners Manual - Page 52
C : Signal / Adjustable E : No signal B : Turned on or off by speaker configuration setting C : Able E : Unable * Only for E E E C C C C C C C C C C C E TONE CONTROL E C (0 dB) E C (0 dB) C (0 dB) C (0 dB) EXTERNAL INPUT DOLBY PRO LOGIC II DOLBY PRO LOGIC IIx DTS NEO:6 DOLBY DIGITAL DTS SURROUND - Denon AVR-1705 | Owners Manual - Page 53
in the preset memory. 1 1 When the main unit's power operation switch turn on while pressing the set's PRESET • (+) button the the "Manual tuning" operation to tune in the station, then preset it using the manual "Preset memory" operation. • To interrupt this function, press the power operation - Denon AVR-1705 | Owners Manual - Page 54
, then stops when a station is tuned in. NOTE: • When in the auto tuning mode on the FM band, the "STEREO" indicator lights on the display when a stereo broadcast is tuned in. At open frequencies, the noise is muted and the "TUNED" and "STEREO" indicators turn off. Manual tuning 1 Set the input - Denon AVR-1705 | Owners Manual - Page 55
"Auto tuning" or "Manual tuning" operation to tune in the station to be preset in the memory. 1 Press the MEMORY button. (Remote control unit) block. (Main unit) (Remote control unit) NOTE: Please make sure the "AUDIO" position of the slide switch on the remote control unit. 2 Watching the - Denon AVR-1705 | Owners Manual - Page 56
initialization of the microprocessor is required by the following procedure. 1 Switch off the unit using the main unit's power switch. 2 Hold the following SPEAKER A button and B button, and turn the main unit's power switch. 1, 2 2 3 Check that the entire display is flashing with an interval - Denon AVR-1705 | Owners Manual - Page 57
to be played in movie theaters. In general sound is recorded to be played in movie theaters equipped with multiple surround speakers, regardless of the format (Dolby Digital, DTS, etc.). Movie theater sound field FL SW C SL FR SR Listening room sound field FL SW C FR SL SR In this - Denon AVR-1705 | Owners Manual - Page 58
channels are required to achieve a 6.1-channel system (DTS-ES, etc.). Adding these speakers, however, increases the surround effect not only with sources recorded in 6.1 channels but also with conventional 2- to 5.1-channel sources. All the DENON original surround modes (see page 48) are compatible - Denon AVR-1705 | Owners Manual - Page 59
purposes. Use these examples as guides to set up your system according to the type of speakers used and the main usage purpose. 1. DTS-ES compatible system (using surround back speakers) (1) Basic setting for primarily watching movies Front speakers Center speaker Monitor Subwoofer 60° Surround - Denon AVR-1705 | Owners Manual - Page 60
input jack. Please refer to the instruction manual of the adapter when making connection. 2 Some DVD digital outputs have the function of switching the Dolby Digital signal output method between "bit stream" and "(convert to) PCM". When playing in Dolby Digital surround on the AVR-1705/685, switch - Denon AVR-1705 | Owners Manual - Page 61
conventional Dolby Pro Logic circuits. • Dolby Pro Logic input to the AVR-1705/685, the surround mode is automatically set to Dolby Pro Logic II when the "DOLBY/DTS SURROUND" mode is selected. 2 Sources recorded in Dolby Surround are indicated with the logo mark shown below. Dolby Surround support - Denon AVR-1705 | Owners Manual - Page 62
DTS indicator on the AVR-1705/685 (see page 36) lights before turning up the master volume. 3 A DVD player with DTS-compatible digital output is required to play DTS DVDs. A DTS Digital Output logo is featured on the front panel of compatible DVD players. Recent DENON DVD player models feature DTS - Denon AVR-1705 | Owners Manual - Page 63
quality of the pictures must be restricted it is common to only include still pictures. In addition, 96 DTS or DTS-ES surround decoders ( 2). 1 A DVD player with DTS digital output capabilities (for CD/LD players, a player with digital outputs for conventional DTS CDs/LDs) and a disc recorded in DTS - Denon AVR-1705 | Owners Manual - Page 64
the power off with the remote control 34 unit after turning the POWER operation switch on. DISPLAY lit but sound not produced. • Speaker cords not securely connected. • Improper position of the audio function button. • Volume control set to minimum. • MUTING is on. • Digital signals not input - Denon AVR-1705 | Owners Manual - Page 65
(red) signal - 0.7 Vp-p, 75 Ω/ohms DC ~ 100 MHz - +0, -3 dB 2 Tuner section Receiving range: Usable sensitivity: 50 dB quieting sensitivity: S/N ratio: Total harmonic distortion: 2 General Power supply: Power consumption: Maximum external dimensions: Mass: 2 Remote control unit (RC-977) Batteries - Denon AVR-1705 | Owners Manual - Page 66
ampli-tuner A/V Surround de DENON. Ce remarquable composant a été • Déplacement de l'appareil Pour éviter des court-circuits ou des fils endommagés dans les câbles de connexion instructions peuvent varier de l'appareil actuel dans un but d'explication. • Borne V. AUX Le panneau avant du AVR1705/685 - Denon AVR-1705 | Owners Manual - Page 67
PRESET CODES / LISTE DE CODES PRÉRÉGLÉS DVD Denon Aiwa Hitachi JVC Konka Magnavox Mitsubishi Panasonic Philips Pioneer Sanyo 005, 015, 016, 017 003, 008 018 002, 019, 020 001, 021, 022 023 VDP Denon Magnavox Mitsubishi Panasonic Philips Pioneer RCA Sony 028, 029, 112 026 028 029, 030 026 028, 031 - Denon AVR-1705 | Owners Manual - Page 68
Minolta 013, 023 Mitsubishi 001, 003, 008, 013, 014, 017, 027, 029, 039, 040, 041, 045, 097 Motorola 081 Montgomery Ward 001, 002, 007, 009, 049, 063, 081, 115, 117 MTC 009, 087, 094 Multitech 007, 009, 011, 087, 090, 094 NAD 038 NEC 004, 005, 006, 018, 026, 029, 045, 061, 062, 085 - Denon AVR-1705 | Owners Manual - Page 69
ENGLISH FRANCAIS Circuit City Citizen Concerto Colortyme Contec Cony Craig 015, 017, 050, 051, 056, 078, 087, 088, 089, 131, 132, 147 Pioneer 124, 128, 142 Portland 054 Price Club 095 Proscan 040, 044, 125 Proton 035, 051, 092, 129 Pulsar 042 Quasar 036, 037, 074, 141 Radio Shack - Denon AVR-1705 | Owners Manual - Page 70
Samsung Sansui Sanyo SBR Schneider Scott Sears Sharp Siemens Signature Simpson Sony Soundesign Spectricon Squareview Supre-Macy Supreme Sylvania Symphonic Tandy Tatung Technics Teknika Tera Toshiba Universal Victor Video Concepts Viking Wards Zenith Zonda 003, 015, 034, 053, 055, 057, 094, 095, 136 - Denon AVR-1705 | Owners Manual - Page 71
*[111], 112 112 113 003, 004 007 005 006 132 TAPE Denon Aiwa Carver Harman/Kardon JVC Kenwood Magnavox Marantz Onkyo Optimus Panasonic Philips Pioneer 012 004 007 010, 011 *[ ] : Preset codes set upon shipment from the factory. *[ ] : Les codes préréglés diffèrent en fonctiom des livraison de l' - Denon AVR-1705 | Owners Manual - Page 72
MEMO: 133 - Denon AVR-1705 | Owners Manual - Page 73
MEMO: 134 - Denon AVR-1705 | Owners Manual - Page 74
MEMO: 135 - Denon AVR-1705 | Owners Manual - Page 75
16-11, YUSHIMA 3-CHOME, BUNKYO-KU, TOKYO 113-0034, JAPAN Telephone: (03) 3837-5321 Printed in China 511 4175 004
-
 1
1 -
 2
2 -
 3
3 -
 4
4 -
 5
5 -
 6
6 -
 7
7 -
8
-
9
-
10
-
11
-
12
-
13
-
14
-
15
-
16
-
17
-
18
-
19
-
20
-
21
-
22
-
23
-
24
-
25
-
26
-
27
-
28
-
29
-
30
-
31
-
32
-
33
-
34
-
35
-
36
-
37
-
38
-
39
-
40
-
41
-
42
-
43
-
44
-
45
-
46
-
47
-
48
-
49
-
50
-
51
-
52
-
53
-
54
-
55
-
56
-
57
-
58
-
59
-
60
-
61
-
62
-
63
-
64
-
65
-
66
-
67
-
68
-
69
-
70
-
71
-
72
-
73
-
74
-
75
 |
 |
2
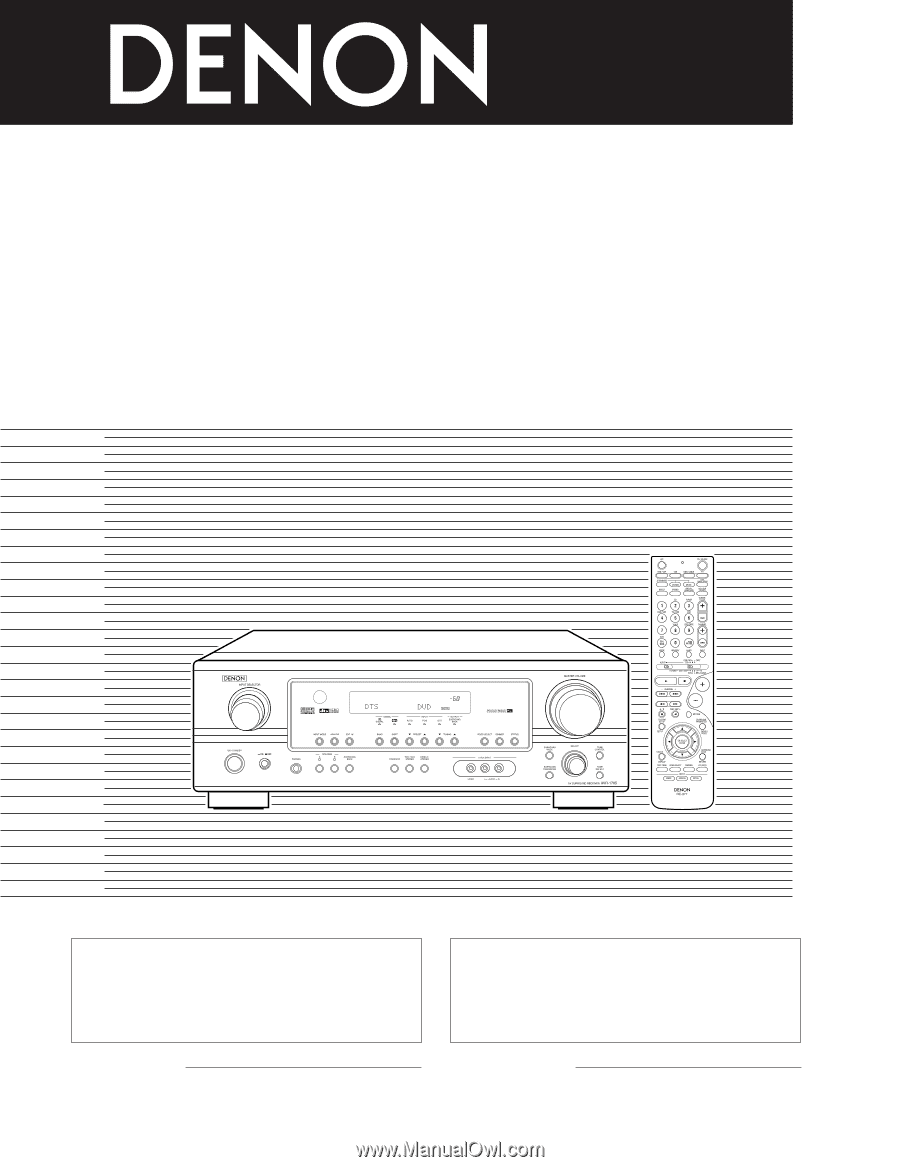
We greatly appreciate your purchase of this unit.
2
To be sure you take maximum advantage of all the
features this unit has to offer, read these instructions
carefully and use the set properly. Be sure to keep this
manual for future reference should any questions or
problems arise.
“SERIAL NO.
PLEASE RECORD UNIT SERIAL NUMBER ATTACHED TO
THE REAR OF THE CABINET FOR FUTURE REFERENCE”
“NO. DE SERIE
PRIERE DE NOTER LE NUMERO DE SERIE DE L’APPAREIL
INSCRIT A L’ARRIERE DU COFFRET DE FAÇON A POUVOIR
LE CONSULTER EN CAS DE PROBLEME.”
2
Nous vous remercions pour l’achat de cet appareil.
2
Pour être sûr de profiter au maximum de toutes les
caractéristiques qu’offre cet appareil, lire avec soin ces
instructions et bien utiliser l’appareil. Toujours
conserver ce mode d’emploi pour s’y référer
ultérieurement en cas de question ou de problème.
FOR ENGLISH READERS
PAGE
2
~
PAGE
65, 128 ~ 132
POUR LES LECTEURS FRANCAIS
PAGE
2, 66
~
PAGE
132
AV SURROUND RECEIVER
RÉCEPTEUR AUDIO-VIDÉO
AVR-1705/685
OPERATING INSTRUCTIONS
MODE D’EMPLOI