Denon AVR 1707 Owners Manual - English - Page 13
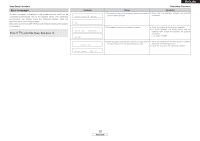
Setup, On/standby, On/source], Power, Mode Selector 1], Speaker - no sound
 |
UPC - 081757507127
View all Denon AVR 1707 manuals
Add to My Manuals
Save this manual to your list of manuals |
Page 13 highlights
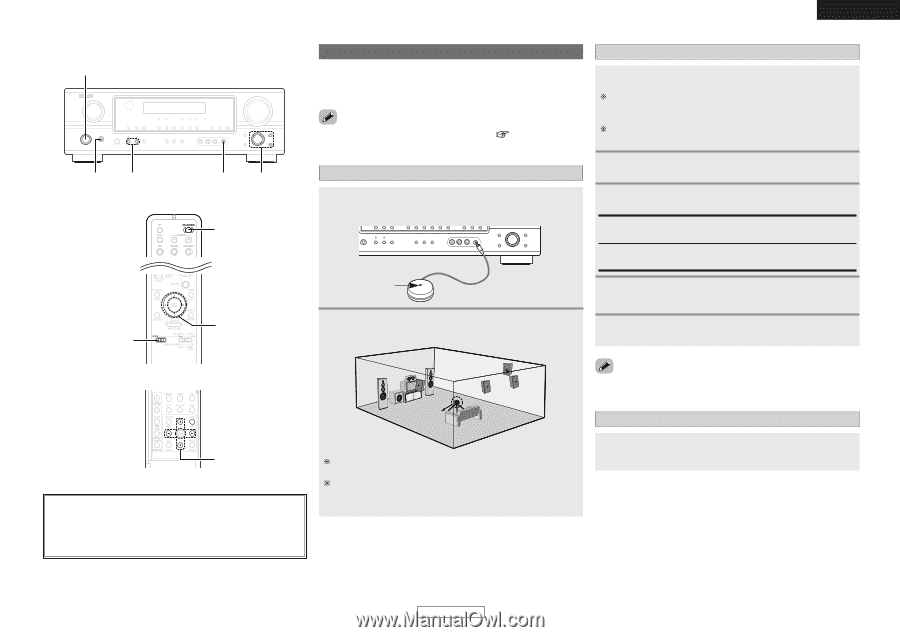
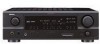
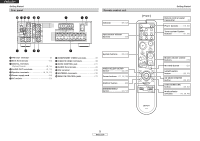
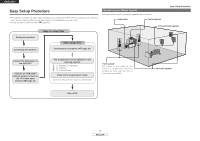
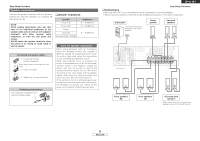
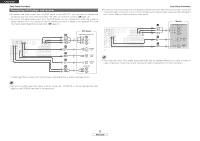
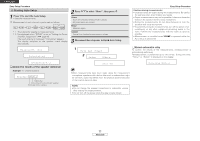
Easy Setup Procedure D H F G [ON/SOURCE] [MODE SELECTOR 1] D H F G ENGLISH Easy Setup Procedure Auto Setup w Before performing the Auto Setup procedure The AVR-1707's auto setup use the attached microphone to measure the acoustic properties in the room and automatically make the optimum settings. • To make the sound field settings manually ( page 45). 1 Turn on your subwoofer. Set the volume to halfway and set the crossover frequency to the maximum or Low pass filter off if your subwoofer can adjust the output volume and the crossover frequency. Some subwoofers have a standby mode. Be sure to turn this function off before performing the Auto Setup procedure. q Connecting a microphone 1 Connect the attached setup microphone to . 2 Turn on your monitor. 3 Press . ¢ ON: The power indicator lights red. £ OFF: The power turns off and the indicator is off. Sound receptor 2 Mount the setup microphone on a camera tripod, etc., and set with the receptor pointing towards the ceiling. 4 Press or [ON/SOURCE]. • The power indicator blinks green and the power turns on. 5 Set [MODE SELECTOR 1] to "AUDIO". D H F G About the button names in this explanation < > : Buttons on the main unit [ ] : Buttons on the remote control unit Button name only : Buttons on the main unit and remote control unit • Auto Setup mode is not displayed when using headphones. Microphone Place the setup microphone's sound receptor at the height of the ears in the listening position. It is not possible to measure properly if there are any obstacles between the speakers and microphone. Check that there are no obstacles. e Switching the front speaker Press to select the front speaker (Front A, Front B or Front A+B). 10 ENGLISH
-
 1
1 -
2
-
3
-
4
-
5
-
6
-
7
-
 8
8 -
 9
9 -
 10
10 -
 11
11 -
 12
12 -
 13
13 -
 14
14 -
 15
15 -
 16
16 -
 17
17 -
 18
18 -
19
-
20
-
21
-
22
-
23
-
24
-
25
-
26
-
27
-
28
-
29
-
30
-
31
-
32
-
33
-
34
-
35
-
36
-
37
-
38
-
39
-
40
-
41
-
42
-
43
-
44
-
45
-
46
-
47
-
48
-
49
-
50
-
51
-
52
-
53
-
54
-
55
-
56
-
57
-
58
-
59
-
60
-
61
-
62
-
63
-
64
 |
 |