Denon AVR-1912 Owners Manual - Page 17
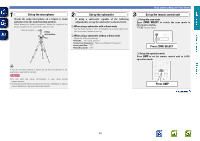
Set up the subwoofer, Set up the microphone, Set up the remote control unit, Press ZONE SELECT - zone 2
 |
UPC - 883795001984
View all Denon AVR-1912 manuals
Add to My Manuals
Save this manual to your list of manuals |
Page 17 highlights
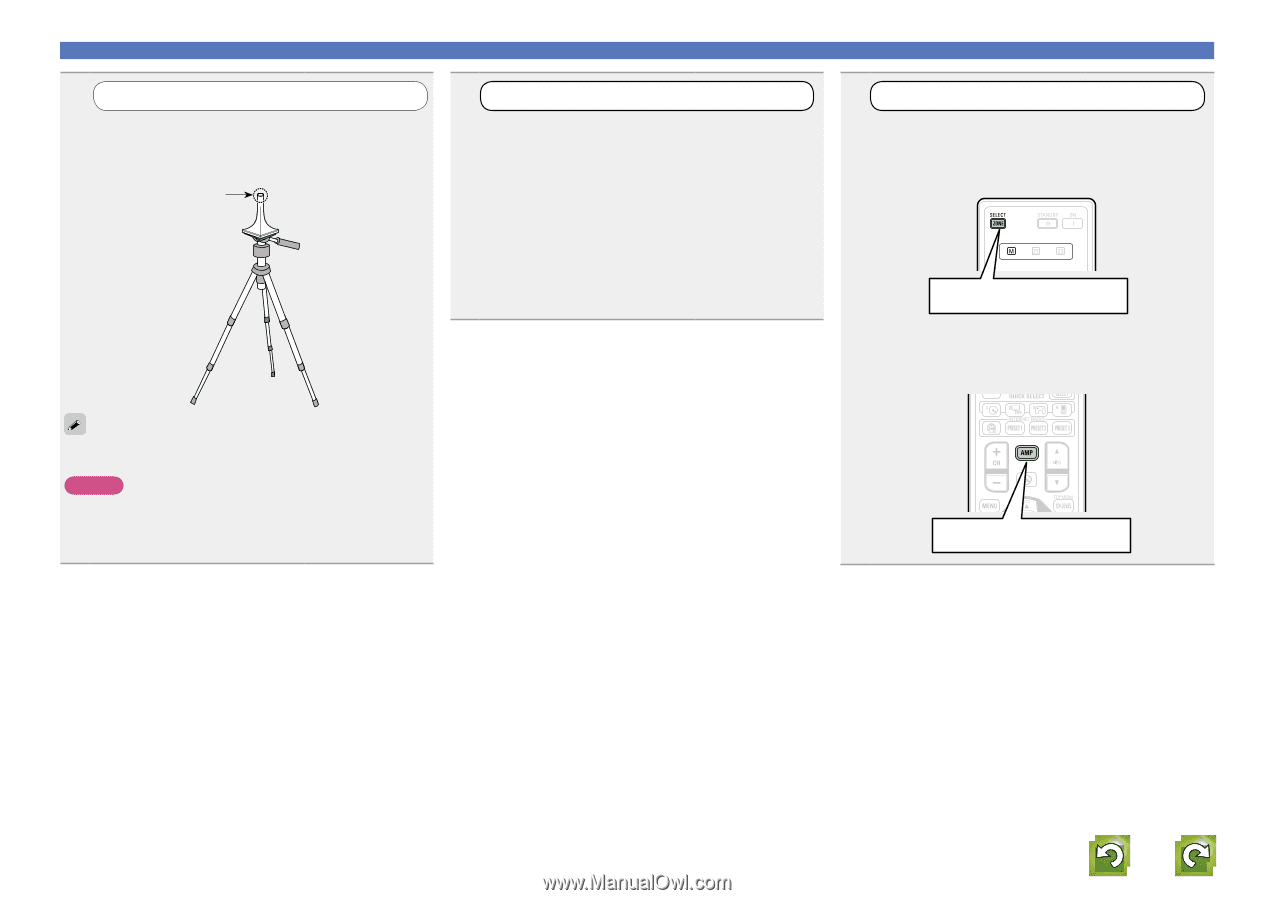
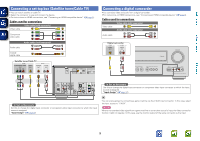
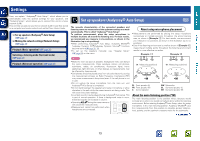
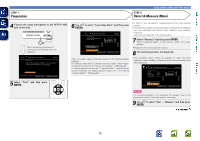
Basic version Advanced version Set up speakers (Audyssey® Auto Setup) 1 Set up the microphone Mount the setup microphone on a tripod or stand and place it in the main listening position. When placing the setup microphone, adjust the height of the sound receptor to the level of the listener's ear. Sound receptor Setup microphone 2 Set up the subwoofer If using a subwoofer capable of the following adjustments, set up the subwoofer as shown below. nn When using a subwoofer with a direct mode Set the direct mode to "On" and disable the volume adjustment and crossover frequency setting. nn When using a subwoofer without a direct mode Make the following settings: • Volume : "12 o'clock position" • Crossover frequency : "Maximum/Highest Frequency" • Low pass filter : "Off" • Standby mode : "Off" 3 Set up the remote control unit nn Set up the zone mode Press ZONE SELECT to switch the zone mode to J (MAIN ZONE). The J indicator lights. Press ZONE SELECT nn Set up the operation mode Press AMP to set the remote control unit to AMP- operation mode. If you do not have a tripod or stand, set up the microphone on, for example, a seat without a back. NOTE • Do not hold the setup microphone in your hand during measurements. • Avoid placing the setup microphone close to a seat back or wall as sound reflections may give inaccurate results. Press AMP vSee overleaf Information 14
-
 1
1 -
2
-
3
-
4
-
5
-
6
-
7
-
8
-
9
-
10
-
11
-
 12
12 -
 13
13 -
 14
14 -
 15
15 -
 16
16 -
 17
17 -
 18
18 -
 19
19 -
 20
20 -
 21
21 -
 22
22 -
23
-
24
-
25
-
26
-
27
-
28
-
29
-
30
-
31
-
32
-
33
-
34
-
35
-
36
-
37
-
38
-
39
-
40
-
41
-
42
-
43
-
44
-
45
-
46
-
47
-
48
-
49
-
50
-
51
-
52
-
53
-
54
-
55
-
56
-
57
-
58
-
59
-
60
-
61
-
62
-
63
-
64
-
65
-
66
-
67
-
68
-
69
-
70
-
71
-
72
-
73
-
74
-
75
-
76
-
77
-
78
-
79
-
80
-
81
-
82
-
83
-
84
-
85
-
86
-
87
-
88
-
89
-
90
-
91
-
92
-
93
-
94
-
95
-
96
-
97
-
98
-
99
-
100
-
101
-
102
-
103
-
104
-
105
-
106
-
107
-
108
-
109
-
110
-
111
-
112
-
113
-
114
-
115
-
116
-
117
-
118
-
119
-
120
-
121
-
122
-
123
-
124
-
125
-
126
-
127
-
128
-
129
-
130
-
131
-
132
-
133
 |
 |