Denon AVR 2807 Owners Manual - English - Page 51
Setting the Digital In Assignment, Setting the EXT. IN Subwoofer Level, Setting the iPod Assignment - ext in no audio hdmi
 |
UPC - 081757507059
View all Denon AVR 2807 manuals
Add to My Manuals
Save this manual to your list of manuals |
Page 51 highlights
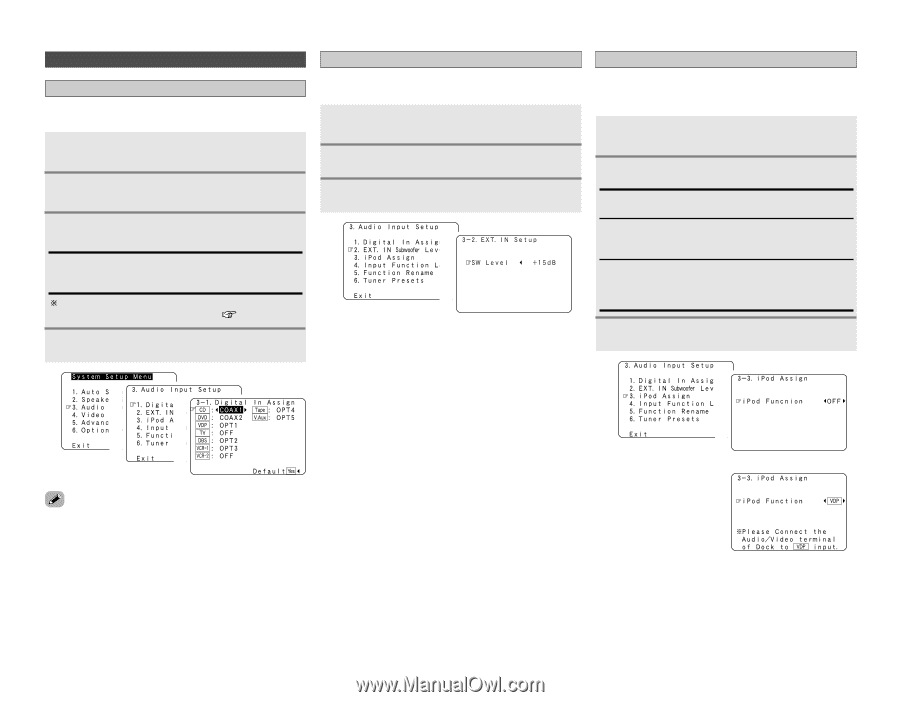
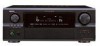
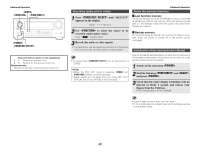
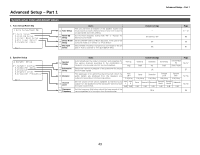
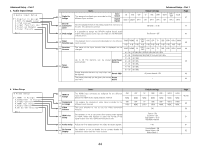
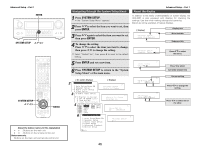
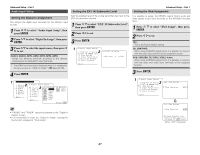
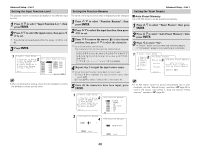
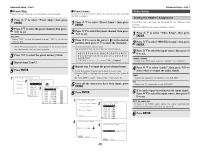
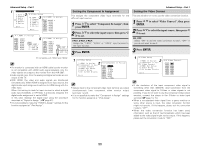
Advanced Setup - Part 1 Audio Input Setup Setting the EXT. IN Subwoofer Level Advanced Setup - Part 1 Setting the iPod Assignment Setting the Digital In Assignment This assigns the digital input terminals for the different input sources. 1 Press D H to select "Audio Input Setup", then press ENTER. 2 Press D H to select "Digital In Assign", then press ENTER. 3 Press D H to select the input source, then press F G to set. COAX1, COAX2, OPT1, OPT2, OPT3, OPT4, OPT5: Assign the different terminals according to the devices connected to the AVR-2807's input terminals. The HDMI input terminal is displayed when it is assigned to the input source at "HDMI In Assign" ( page 49, 50). 4 Press ENTER. 1 2 3 Sets the playback level of the analog signal that was input to the EXT. IN subwoofer terminal. 1 Press D H to select "EXT. IN Subwoofer Level", then press ENTER. 2 Press F G to set. 3 Press ENTER. 1 2 It is possible to assign the DENON original Dock's audio and video signals to any input terminals on the AVR-2807 and play them. 1 Press D H to select "iPod Assign", then press ENTER. 2 Press F G to set. OFF: This is the factory default setting. CD, CDR/TAPE: When using a DENON original Dock, it is possible to connect with the audio input terminal of the assigned function. DVD, VDP, DBS, TV, VCR-1, VCR-2, V.Aux: When using a DENON original Dock, it is possible to connect with the audio and video input terminals of the assigned function. 3 Press ENTER. 1 2 h • "PHONO" and "TUNER" cannot be selected on the "Digital In Assign" screen. • It is not possible to make the "Digital In Assign" settings for the function assigned at "iPod Assign". (When "VDP" is selected) 47
-
 1
1 -
2
-
3
-
4
-
5
-
6
-
7
-
8
-
9
-
10
-
11
-
12
-
13
-
14
-
15
-
16
-
17
-
18
-
19
-
20
-
21
-
22
-
23
-
24
-
25
-
26
-
27
-
28
-
29
-
30
-
31
-
32
-
33
-
34
-
35
-
36
-
37
-
38
-
39
-
40
-
41
-
42
-
43
-
44
-
45
-
 46
46 -
 47
47 -
 48
48 -
 49
49 -
 50
50 -
 51
51 -
 52
52 -
 53
53 -
 54
54 -
 55
55 -
 56
56 -
57
-
58
-
59
-
60
-
61
-
62
-
63
-
64
-
65
-
66
-
67
-
68
-
69
-
70
-
71
-
72
-
73
-
74
-
75
-
76
-
77
-
78
-
79
-
80
-
81
-
82
-
83
-
84
-
85
-
86
-
87
-
88
 |
 |