Denon AVR1910 Owners Manual - English - Page 31
Making the HDMI settings HDMI Setup - avr 1910 zone 2 setup
 |
UPC - 083795000899
View all Denon AVR1910 manuals
Add to My Manuals
Save this manual to your list of manuals |
Page 31 highlights
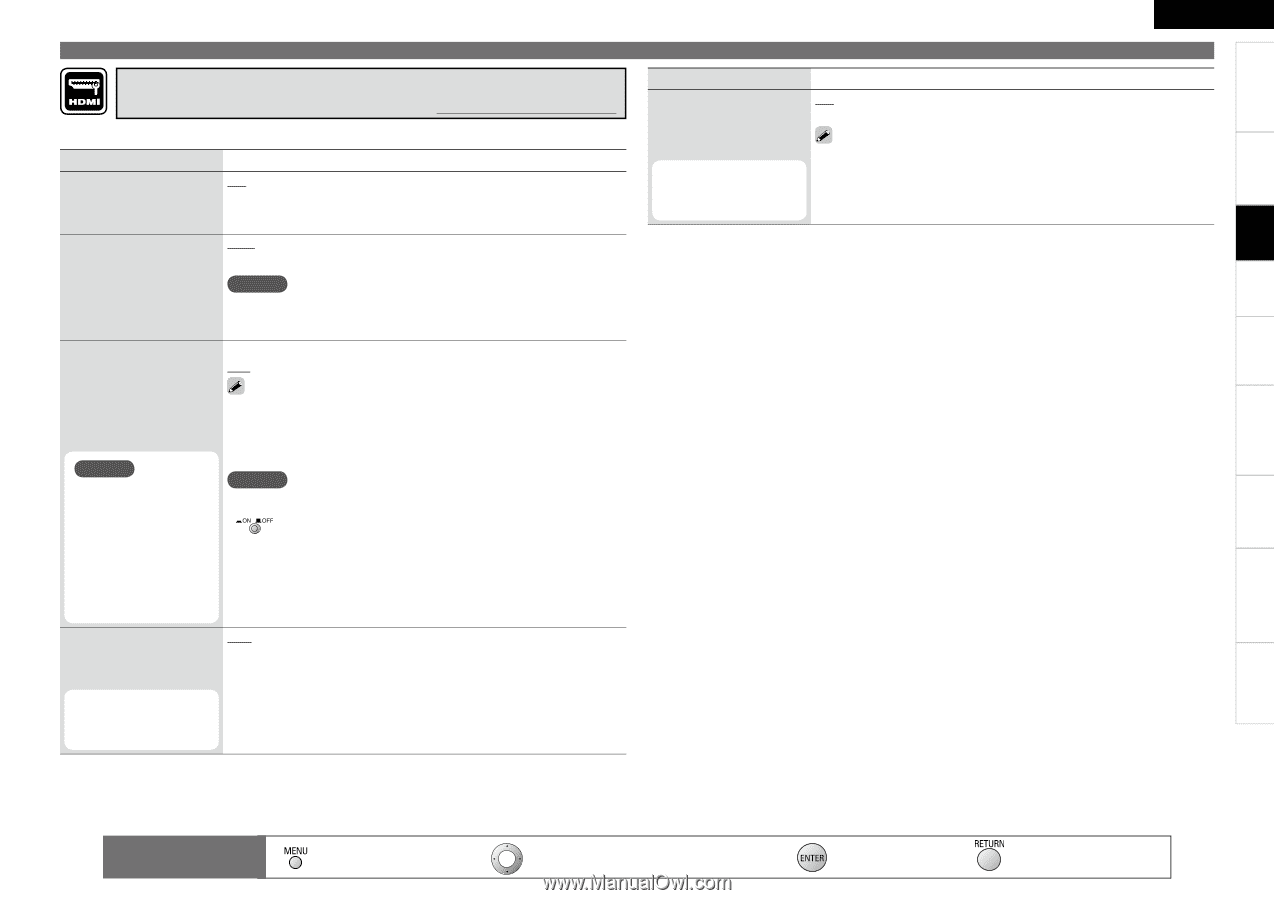
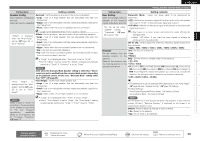
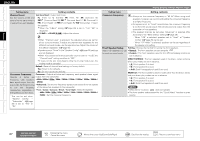
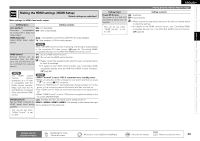
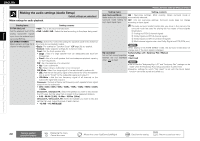
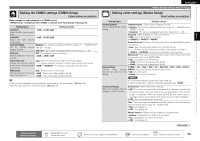
Getting Started Connections Settings Playback Multi-Zone Remote Control Information Troubleshooting Specifications Making the HDMI settings (HDMI Setup) Default settings are underlined. Make settings for HDMI video/audio output. Setting items Setting contents Auto Lip Sync ON : Compensated. Automatic compensation OFF : Not compensated. for timing shift in audio and video output. HDMI Audio Out Amp : Use speakers connected to AVR-1910 for audio playback. Select HDMI audio output TV : Use speakers of TV for audio playback. device. NOTE When the HDMI control function is operating, the setting of audio playback in the connected TV takes priority (vpage 49 "Controlling HDMI- compatible devices from the AVR-1910 (HDMI Control Function)"). HDMI Control ON : Use the HDMI control function. External devices can be OFF : Do not use the HDMI control function. controlled from the AVR1910 and the AVR-1910 can be controlled from external • Please consult the operating instructions for each connected device to check the settings. devices. • For details on the HDMI control function, see "Controlling HDMI- compatible devices from the AVR-1910 (HDMI Control Function)" (vpage 49). NOTE The HDMI control function controls operations of a TV that is compatible with the NOTE • When "Control" is set to "ON", it consumes more standby power. • When not using this unit for a long period, we recommend that you press to turn off (jOFF) the power. HDMI control function. • When the "HDMI Control" setting has been changed, always turn off the Make sure that the TV power to the connecting devices afterwards and then turn back on. and HDMI are connected • The "HDMI Control" does not work when the power to the equipment is when you perform HDMI off. control. • When "HDMI Control" is set to "ON", power is supplied constantly to the AC outlet (UNSWITCHED). Standby Source Last : Standby with last used input source during power on. Set the HDMI connector for HDMI1 / HDMI2 / HDMI3 / HDMI4 : The standby mode is set at the input HDMI signal input during source assigned to the respective. standby. This can be set when "HDMI Control" is set to "ON". ENGLISH Making detailed settings (Manual Setup) Setting items Setting contents Power Off Control ON:Switched. The power of the AVR-1910 OFF:Not switched. and external device turn off together. • Please consult the operating instructions for each connected device to check the settings. This can be set when • For details on the HDMI control function, see "Controlling HDMI- "HDMI Control" is set to "ON". compatible devices from the AVR-1910 (HDMI Control Function)" (vpage 49). Remote control operation buttons Displaying the menu : Cancel the menu : Moves the cursor (Up/Down/Left/Right) : Decision the setting : Return to previous menu 28
-
 1
1 -
2
-
3
-
4
-
5
-
6
-
7
-
8
-
9
-
10
-
11
-
12
-
13
-
14
-
15
-
16
-
17
-
18
-
19
-
20
-
21
-
22
-
23
-
24
-
25
-
 26
26 -
 27
27 -
 28
28 -
 29
29 -
 30
30 -
 31
31 -
 32
32 -
 33
33 -
 34
34 -
 35
35 -
 36
36 -
37
-
38
-
39
-
40
-
41
-
42
-
43
-
44
-
45
-
46
-
47
-
48
-
49
-
50
-
51
-
52
-
53
-
54
-
55
-
56
-
57
-
58
-
59
-
60
-
61
-
62
-
63
-
64
-
65
-
66
-
67
-
68
-
69
-
70
-
71
-
72
 |
 |