Dynex DX-37L200A12 User Manual (English) - Page 19
Turning on your TV for the first - tv manual
 |
View all Dynex DX-37L200A12 manuals
Add to My Manuals
Save this manual to your list of manuals |
Page 19 highlights
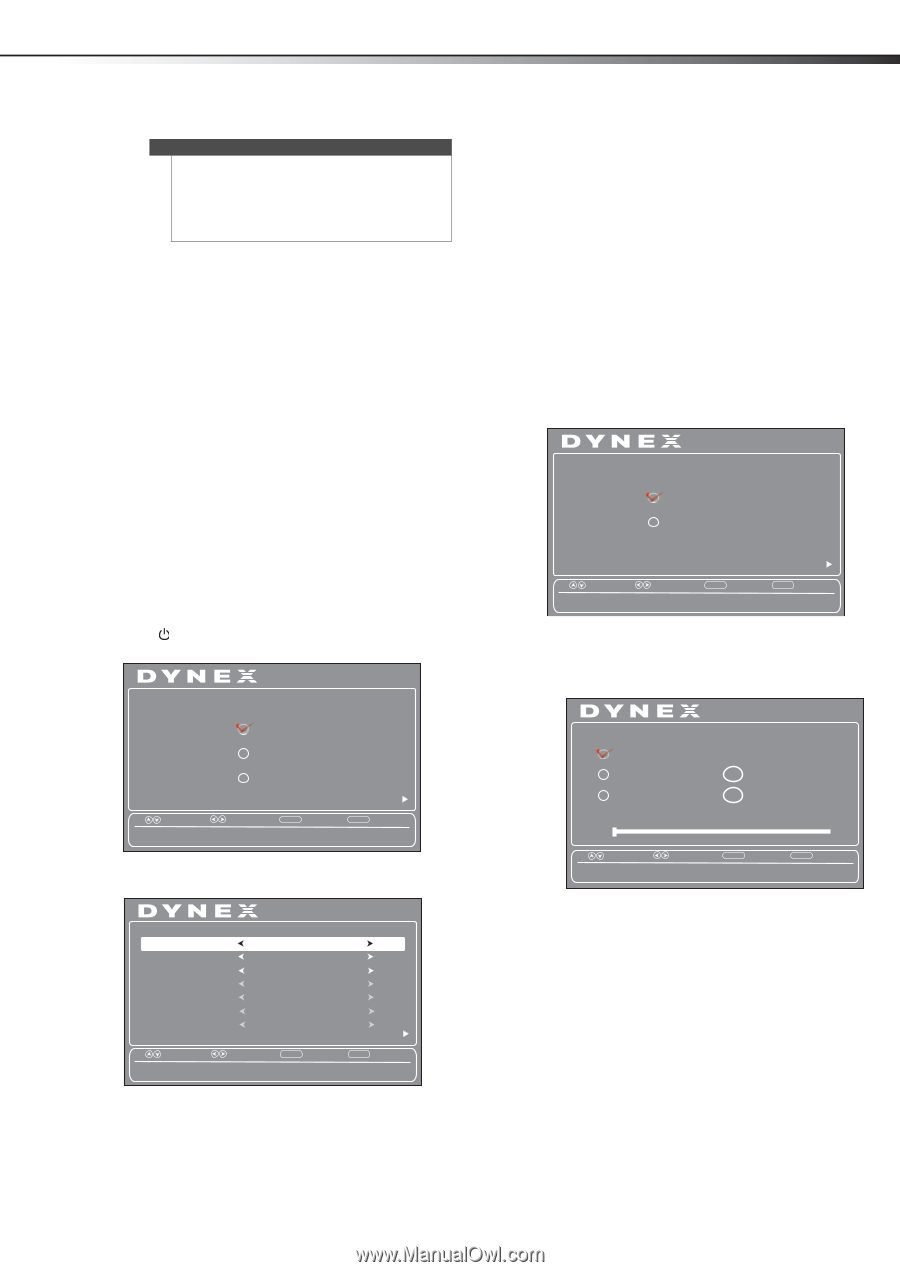
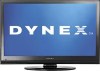
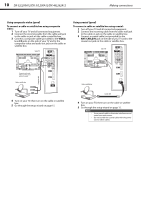
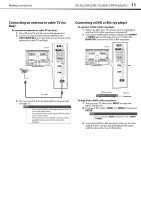
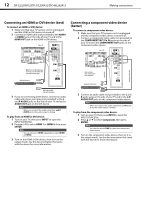
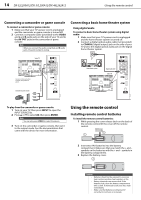
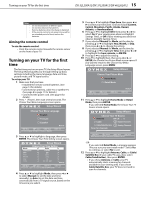
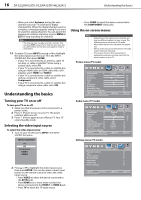
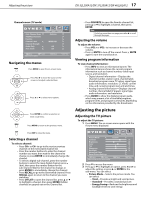
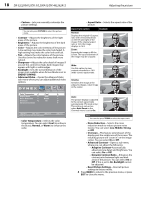
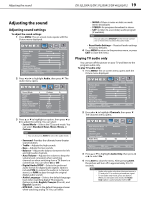
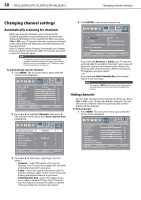
Turning on your TV for the first time DX-32L200A12/DX-37L200A12/DX-46L262A12 15 Notes Do not mix batteries of different types. Do not mix old and new batteries. Remove batteries when the charge is depleted. If the remote control is not going to be used for an extended period of time, remove the batteries. Aiming the remote control To aim the remote control: • Point the remote control towards the remote sensor on the front of your TV. Turning on your TV for the first time The first time you turn on your TV, the Setup Wizard opens. The Setup Wizard guides you through setting up basic settings including the menu language, date and time, picture mode, and TV signal source. To set up your TV: 1 Make sure that you have: • Installed the remote control batteries. (See page 14 for details). • Connected an antenna, cable TV, or satellite TV. (See page 8 to page 11 for details.) • Connected the power cord. (See page 8 for details.) 2 Press (Power), then wait several seconds. The Choose Your Menu Language screen opens. Setup Wizard Choose Your Menu Language English Français Español Next Move Select MENU Back Set menu language to English, Français, or Español. EXIT Exit 3 Press or to highlight a language, then press ENTER. The Choose Your Time Setting screen opens. Setup Wizard Choose Your Time Setting Mode Auto Time Zone Pacific DST Year Month Off 2011 July Day Time 15 09 : 05 AM Next Move Select MENU Back EXIT Exit If Automatic, options are automatically set by TV source. 4 Press or to highlight Mode, then press or to select Manual (to set the date and time manually), or Auto (to set the date and time automatically from a TV signal source, based on the time zone you select). 5 Press or to highlight Time Zone, then press or to select your time zone. Choices include Eastern, Central, Mountain, Pacific, Alaska, Hawaii, Atlantic, or Newfoundland. 6 Press or to highlight DST, then press or to select On (if your viewing area observes Daylight Savings Time), or Off (if your viewing area does not observe Daylight Savings Time). 7 If you selected Manual for Mode, set the date by pressing or to highlight Year, Month, or Day, then press or to change the setting. 8 If you selected Manual for Mode, set the time by pressing or to highlight Time, then press or to highlight the hour, minute, or AM/PM. 9 Press or to adjust the setting. 10 Press to highlight Next, then press or , or ENTER, the Choose Your Picture Mode screen opens. If you want to return to the Choose Your Menu Language screen, press MENU. Setup Wizard Choose Your Picture Mode Home Mode Retail Mode Move Select Reduces total power consumption. MENU Back Next EXIT Exit 11 Press or to highlight Home Mode or Retail Mode, then press ENTER. If you selected Home Mode, the Choose Your TV Source screen opens. Setup Wizard Choose Your TV Source Antenna RF CH : 0 Cable 0 Digital Channels Cable/Satellite Box 0 Analog Channels Scan for channels Move Select MENU Back EXIT Exit Select Antenna if using an antenna for standard or HD TV. -OR- If you selected Retail Mode, a message appears "Are you sure you want retail mode?" Select Yes to continue, or select No to exit. 12 Press or to highlight Antenna, Cable, or Cable/ Satellite Box (if your cable TV uses a box, select Cable/Satellite Box), then press ENTER. • If you chose Antenna or Cable, your TV automatically starts scanning for channels available in your viewing area. If you chose Cable/Satellite box, your TV does not need to scan for channels.
-
 1
1 -
2
-
3
-
4
-
5
-
6
-
7
-
8
-
9
-
10
-
11
-
12
-
13
-
 14
14 -
 15
15 -
 16
16 -
 17
17 -
 18
18 -
 19
19 -
 20
20 -
 21
21 -
 22
22 -
 23
23 -
 24
24 -
25
-
26
-
27
-
28
-
29
-
30
-
31
-
32
-
33
-
34
-
35
-
36
-
37
-
38
-
39
-
40
-
41
-
42
-
43
-
44
 |
 |