Dynex DX-40L260A12 User Manual (English)
Dynex DX-40L260A12 Manual
 |
View all Dynex DX-40L260A12 manuals
Add to My Manuals
Save this manual to your list of manuals |
Dynex DX-40L260A12 manual content summary:
- Dynex DX-40L260A12 | User Manual (English) - Page 1
32"/ 40" LCD TV DX-32L221A12/ DX-40L260A12 USER GUIDE - Dynex DX-40L260A12 | User Manual (English) - Page 2
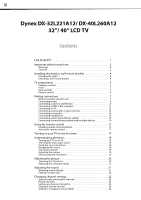
DX-32L221A12/ DX-40L260A12 32"/ 40" LCD TV Contents CHILD SAFETY 1 Important safety instructions 2 Warnings 2 Cautions 2 Installing the stand or wall-mount bracket 4 Installing the stand 4 Installing a wall-mount bracket 4 TV components 5 Package contents 5 Front 5 Back and Side 5 Remote - Dynex DX-40L260A12 | User Manual (English) - Page 3
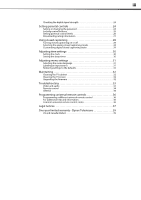
an input source 31 Restoring settings to the defaults 32 Maintaining 32 Cleaning the TV cabinet 32 Cleaning the TV screen 32 Upgrading the firmware 32 Troubleshooting 33 Video and audio 33 Remote control 34 General 34 Programming universal remote controls 36 Programming a different - Dynex DX-40L260A12 | User Manual (English) - Page 4
iv - Dynex DX-40L260A12 | User Manual (English) - Page 5
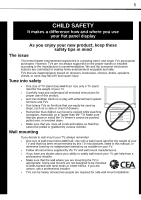
One size of wall mount does not fit all. Use only a wall mount rated for the weight of your TV and that has been recommended by this TV manufacturer, listed in this manual, or otherwise listed by an independent laboratory as suitable for your TV. • Follow all instructions supplied by the TV and wall - Dynex DX-40L260A12 | User Manual (English) - Page 6
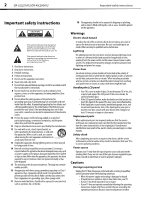
2 DX-32L221A12/DX-40L260A12 Important safety instructions Important safety instructions This symbol indicates that dangerous voltage constituting a risk of electric shock is present within your TV. This label is located on the back of your TV. This symbol indicates that there are important - Dynex DX-40L260A12 | User Manual (English) - Page 7
Important safety instructions DX-32L221A12/DX-40L260A12 3 controls may result in damage and will often require extensive work by a qualified technician to restore your TV to its normal operation. • If your TV has been dropped or damaged in any way. • When your TV exhibits a distinct change in - Dynex DX-40L260A12 | User Manual (English) - Page 8
instructions that came with the wall-mount bracket for screw lengths. DX-32L221A12 (32-inch) DX-40L260A12 (40-inch) 7.84 in. (200 mm) 7.84 in. (200) mm) Installing a wall-mount bracket Warning This apparatus is intended to be supported by a UL Listed wall mount bracket. To attach your TV to a wall - Dynex DX-40L260A12 | User Manual (English) - Page 9
TV components TV components Package contents • Remote control and batteries (2 AAA) • Stand with screws • Composite video cable • Power cord • Quick Setup Guide Front DX-32L221A12/DX-40L260A12 5 Back and Side # Item 1 MENU 2 INPUT 3 VOL+/VOL- 4 CH /CH 5 (power) 6 Remote control sensor 7 Power - Dynex DX-40L260A12 | User Manual (English) - Page 10
, see "Adjusting sound settings" on page 21. Press to turn your TV on or off (Standby mode). When your TV is off, power still flows into it. To disconnect power, unplug the power cord. In TV mode, press to return to the previous channel. Press to display the program guide. For more information - Dynex DX-40L260A12 | User Manual (English) - Page 11
Making connections DX-32L221A12/DX-40L260A12 7 Making connections What connection should I use? Your TV has several connection types for connecting devices to your TV. For the best video quality, you should connect a device to the best available connection. Use the following tables to identify - Dynex DX-40L260A12 | User Manual (English) - Page 12
Always unplug the AC power cord from the power outlet when you will not be using your TV for an extended period of time. HDMI cable Back of TV 4 Turn on your TV, then turn on the cable or satellite box. 5 Go through the setup wizard on page 18. Notes An HDMI cable carries both audio and video. You - Dynex DX-40L260A12 | User Manual (English) - Page 13
connections DX-32L221A12/DX-40L260A12 9 Using DVI (same as HDMI but requires an audio connection) Note A DVI device must be connected to the HDMI 1 jack. If you connect a DVI device to the HDMI 2 jack, you will not hear audio. To connect a cable or satellite box using DVI: 1 Turn off your TV and - Dynex DX-40L260A12 | User Manual (English) - Page 14
10 DX-32L221A12/DX-40L260A12 Making connections Using composite video (good) To connect a cable or satellite box using composite video: 1 Turn off your TV and all connected equipment. 2 Connect the incoming cable from the cable wall jack to the cable-in jack on the cable box. 3 Connect a - Dynex DX-40L260A12 | User Manual (English) - Page 15
the power cord or other cables. If the antenna is not installed correctly, contact qualified service personnel to correct the problem. Back of TV 3 Turn on your TV, then turn on the DVD or Blu-ray player. 4 Press INPUT to open the Input Source list. 5 Press or to highlight HDMI 1 or HDMI 2, then - Dynex DX-40L260A12 | User Manual (English) - Page 16
the PC/DVI AUDIO IN jacks, the audio output is analog. Your TV has a digital audio jack, so you can connect the video to the component video jacks and connect the audio to the digital audio jack to get digital audio output. 5 Turn on your TV. 6 Turn on the DVI device, then set it to the output mode - Dynex DX-40L260A12 | User Manual (English) - Page 17
connections DX-32L221A12/DX-40L260A12 13 Using composite video (good) To connect a DVD or Blu-ray player using composite video: 1 Make sure that your TV's power cord is unplugged and the DVD or Blu-ray player is turned off. 2 Connect a composite cable (included) to the Y/VIDEO and L/R (audio in - Dynex DX-40L260A12 | User Manual (English) - Page 18
TV's power cord is unplugged and the computer is turned off. 2 Connect a VGA cable (not included) to the VGA IN jack on the back of your TV and to the VGA jack on the computer. Camcorder or game console Audio cable Side of TV The audio cables are color coded (white and red) to the L and R audio - Dynex DX-40L260A12 | User Manual (English) - Page 19
Making connections DX-32L221A12/DX-40L260A12 15 Using HDMI To connect a computer using HDMI: 1 Make sure that your TV's power cord is unplugged and the computer is turned off. 2 Connect an HDMI cable (not included) to an HDMI jack on the side of your TV and to the HDMI OUT jack on the computer - Dynex DX-40L260A12 | User Manual (English) - Page 20
DX-32L221A12/DX-40L260A12 Making connections Using analog audio To connect a basic home theater system using analog audio: 1 Make sure that your TV's power cord is unplugged and the home system is turned off. 2 Connect an audio cable to the AUDIO OUT jacks on the back of your TV and to the AUDIO - Dynex DX-40L260A12 | User Manual (English) - Page 21
, time setting, picture mode, TV signal source, and the channel list. To set up your TV: 1 Make sure that you have: • Installed the remote control batteries. (See page 17 for details). • Connected an antenna, cable TV, or satellite TV. (See page 8 or 11 for details.) • Connected the power cord. (See - Dynex DX-40L260A12 | User Manual (English) - Page 22
this manual are described in TV mode, unless otherwise indicated. The screens shown in this manual are for explanation purposes and may vary from the actual screens on your TV. PICTURE menu (TV mode) Picture Mode Contrast Brightness Color Tint Sharpness Backlight PICTURE AUDIO SETTINGS CHANNELS - Dynex DX-40L260A12 | User Manual (English) - Page 23
menu (TV mode) Auto Channel Search Add/Skip Channels Favorites Channel Labels Channel Strength Audio Only Auto Zoom PICTURE AUDIO SETTINGS CHANNELS Off On Move Select Adjust channel options Menu Back Exit Exit DX-32L221A12/DX-40L260A12 19 Navigating the menus Press MENU to open the on-screen - Dynex DX-40L260A12 | User Manual (English) - Page 24
, TV rating, signal type, audio information, resolution, CC mode, current time, and current program start and end times. • Analog channel information-Displays channel number, channel label (if preset), signal type, audio information, and resolution. • Press GUIDE to show the digital program guide - Dynex DX-40L260A12 | User Manual (English) - Page 25
the sound DX-32L221A12/DX-40L260A12 21 • Reset Picture Settings-Resets all picture settings to factory mode. 3 Press MENU to return to the previous menu, or press EXIT to close the menu. Adjusting the computer image To adjust the computer image: 1 Make sure that your TV is in VGA mode. For - Dynex DX-40L260A12 | User Manual (English) - Page 26
22 DX-32L221A12/DX-40L260A12 Changing channel settings Playing TV audio only You can turn off the picture on your TV and listen to the program audio only. To play TV audio only: 1 Press MENU. The on-screen menu opens. Picture Mode Contrast Brightness Color Tint Sharpness Backlight PICTURE AUDIO - Dynex DX-40L260A12 | User Manual (English) - Page 27
settings DX-32L221A12/DX-40L260A12 23 Hiding channels You can hide channels in the channel list. When you press CH+ or CH-, your TV skips the hidden channels. You can still tune to a hidden channel by pressing the number buttons for the channel. To hide channels: 1 Press MENU. The on-screen - Dynex DX-40L260A12 | User Manual (English) - Page 28
24 DX-32L221A12/DX-40L260A12 Setting parental controls Viewing a favorite channel To view a favorite channel: picture degradation. To check the digital signal strength: 1 Press MENU. The on-screen menu opens. Picture Mode Contrast Brightness Color Tint Sharpness Backlight PICTURE AUDIO SETTINGS - Dynex DX-40L260A12 | User Manual (English) - Page 29
button lock is turned On, the buttons on the side of your TV are locked and you can only operate your TV using the remote control. To lock control buttons: 1 Press MENU. The on-screen menu opens. Picture Mode Contrast Brightness Color Tint Sharpness Backlight PICTURE AUDIO SETTINGS CHANNELS Energy - Dynex DX-40L260A12 | User Manual (English) - Page 30
26 DX-32L221A12/DX-40L260A12 Setting parental controls Setting parental control levels You can set parental controls for the U.S. and Canada. The following task shows how to set controls for U.S. TV ratings. You use similar steps for setting U.S. movie and Canadian TV ratings. To set parental - Dynex DX-40L260A12 | User Manual (English) - Page 31
: 1 Press MENU. The on-screen menu opens. Picture Mode Contrast Brightness Color Tint Sharpness Backlight PICTURE AUDIO SETTINGS CHANNELS Energy Savings 50 50 58 0 +10 43 Move Select Menu Back Adjust settings to affect picture quality Exit Exit DX-32L221A12/DX-40L260A12 27 2 Press or to - Dynex DX-40L260A12 | User Manual (English) - Page 32
28 DX-32L221A12/DX-40L260A12 Using closed captioning Using closed captioning Turning closed captioning on or off To turn closed captioning on or off: 1 Press MENU. The on-screen menu opens. Picture Mode Contrast Brightness Color Tint Sharpness Backlight PICTURE AUDIO SETTINGS CHANNELS Energy - Dynex DX-40L260A12 | User Manual (English) - Page 33
previous menu, press or to highlight Digital CC Settings, then press ENTER. The Digital CC Settings menu opens. Mode Font Style Font Size Font Edge Style Font Edge Color Font Color Background Color PICTURE AUDIO SETTINGS CHANNELS Custom Default Normal None Red White Black Move Select Menu Back - Dynex DX-40L260A12 | User Manual (English) - Page 34
30 DX-32L221A12/DX-40L260A12 Adjusting time settings Adjusting time settings Setting the clock To set the clock: 1 Press MENU. The on-screen menu opens. Picture Mode Contrast Brightness Color Tint Sharpness Backlight PICTURE AUDIO SETTINGS CHANNELS Energy Savings 50 50 58 0 +10 43 Move Select - Dynex DX-40L260A12 | User Manual (English) - Page 35
Adjusting menu settings DX-32L221A12/DX-40L260A12 31 4 Press or to highlight Sleep Timer, then press or to select the amount of time before your TV turns off automatically. To turn off the sleep timer, select Off. Labeling an input source To label an input source: 1 Press MENU. The on-screen menu - Dynex DX-40L260A12 | User Manual (English) - Page 36
the firmware: • Plug a USB flash drive into the SERVICE PORT on the side of your TV. 2 Press or to highlight SETTINGS, then press . The SETTINGS menu opens. Parental Controls Closed Caption Time Menu Settings Input Labels Computer Settings Component Settings PICTURE AUDIO SETTINGS CHANNELS - Dynex DX-40L260A12 | User Manual (English) - Page 37
-32L221A12/DX-40L260A12 33 Troubleshooting Warning Do not try to repair your TV yourself. Contact authorized service personnel. Video and audio Problem Solution Picture does not fill the screen. There are black bars around the picture. • Change the aspect ratio. An increasing amount of digital - Dynex DX-40L260A12 | User Manual (English) - Page 38
34 DX-32L221A12/DX-40L260A12 Troubleshooting Problem Solution Good picture, but no sound. • Increase the volume. • Make sure that the sound is not muted. • Make sure that the correct audio mode is selected. • Make sure that the audio cables are connected correctly and securely to the back of - Dynex DX-40L260A12 | User Manual (English) - Page 39
/60Hz Tuner Analog Digital Inputs DX-32L221A12 NTSC ATSC, 8-VSB, Clear-QAM DX-40L260A12 NTSC ATSC, 8-VSB, Clear-QAM HDMI Component video Composite video Shared audio (component and composite) S-Video PC/VGA 3.5mm PC audio input DVI USB (SERVICE PORT) Outputs DX-32L221A12 DX-40L260A12 1 (side - Dynex DX-40L260A12 | User Manual (English) - Page 40
32L221A12/DX-40L260A12 Programming universal remote controls Power Power consumption Power input Miscellaneous DX-32L221A12 On: 135 W Standby: - Dynex DX-40L260A12 | User Manual (English) - Page 41
or you wish to receive the complete corresponding GPL or LGPL licensed source code, please call the Dynex support line at 1-800-305-2204. This source code is available for a period of three (3) years from the date of the distribution of this product by Dynex. DX-32L221A12/DX-40L260A12 37 - Dynex DX-40L260A12 | User Manual (English) - Page 42
38 DX-32L221A12/DX-40L260A12 Legal notices - Dynex DX-40L260A12 | User Manual (English) - Page 43
DX-32L221A12/DX-40L260A12 39 One-year limited warranty Dynex Televisions US and Canada Market Definitions: Dynex Products ("Dynex") warrants to you, the original purchaser of this new Dynex voltage or power supply • Attempted repair by any person not authorized by Dynex to service the Product - Dynex DX-40L260A12 | User Manual (English) - Page 44
- (800) 305-2204 Distributed by Best Buy Purchasing, LLC 7601 Penn Ave. South, Richfield, MN 55423 U.S.A. © 2011 BBY Solutions, Inc. All rights reserved. DYNEX is a trademark of BBY Solutions, Inc. Registered in some countries. All other products and brand names are trademarks of their respective
-
 1
1 -
 2
2 -
 3
3 -
 4
4 -
 5
5 -
 6
6 -
 7
7 -
8
-
9
-
10
-
11
-
12
-
13
-
14
-
15
-
16
-
17
-
18
-
19
-
20
-
21
-
22
-
23
-
24
-
25
-
26
-
27
-
28
-
29
-
30
-
31
-
32
-
33
-
34
-
35
-
36
-
37
-
38
-
39
-
40
-
41
-
42
-
43
-
44
 |
 |

32”/ 40” LCD TV
DX-32L221A12/ DX-40L260A12
USER GUIDE