Dynex DX-55L150A11 User Manual (English)
Dynex DX-55L150A11 Manual
 |
View all Dynex DX-55L150A11 manuals
Add to My Manuals
Save this manual to your list of manuals |
Dynex DX-55L150A11 manual content summary:
- Dynex DX-55L150A11 | User Manual (English) - Page 1
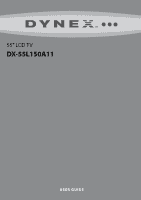
55" LCD TV DX-55L150A11 USER GUIDE - Dynex DX-55L150A11 | User Manual (English) - Page 2
ii Dynex DX-55L150A11 55" LCD TV Contents CHILD SAFETY 1 Important safety instructions 2 Warnings 2 Cautions 2 Accessories 3 Installing and removing the stand 3 Installing the stand 3 Removing the stand 4 Installing a wall-mount bracket 4 TV components 4 Front and side controls 4 Back - Dynex DX-55L150A11 | User Manual (English) - Page 3
iii Video and audio 16 Remote control 16 General 17 Maintenance 17 Cleaning 17 Specifications 17 Legal notices 17 One-year limited warranty 19 US and Canada Markets 19 Mexico Market 19 - Dynex DX-55L150A11 | User Manual (English) - Page 4
iv - Dynex DX-55L150A11 | User Manual (English) - Page 5
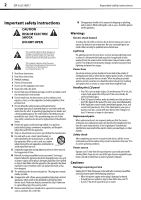
of wall mount does not fit all. Use only a wall mount rated for the weight of your TV and that has been recommended by this TV manufacturer, listed in this manual, or otherwise listed by an independent laboratory as suitable for your TV. • Follow all instructions supplied by the TV and wall mount - Dynex DX-55L150A11 | User Manual (English) - Page 6
service or repair to this device, ask the service technician to perform routine safety checks to determine that your TV is in correct operating condition. Power source Operate your TV only from the type of power source indicated on the marking label. If you are not sure of the type of power supplied - Dynex DX-55L150A11 | User Manual (English) - Page 7
TV: • Remote control • Composite video and audio cable • AAA batteries (2) • Stand • Power cord • Quick Setup Guide Installing and removing the stand You must install your TV into the stand in order for it to stand upright on a cabinet or other flat surface. If you intend to mount your TV on a wall - Dynex DX-55L150A11 | User Manual (English) - Page 8
4 DX-55L150A11 TV components 3 Align the base with the TV, then secure the stand to the TV with the six screws (M6 x 12) provided. 3 Secure the wall-mount bracket to the back of your TV using the four screws provided with the bracket. Baseplate 4 Carefully lift the TV into an upright position. - Dynex DX-55L150A11 | User Manual (English) - Page 9
TV components DX-55L150A11 5 Back connections Remote control TV INPUT VIDEO COMP HDMI VGA ZOOM GUIDE PICTURE AUDIO INFO VOL CH MUTE MENU EXIT ENTER Item Name Description AUDIO OUT Connect an analog sound system to these jacks 1 jacks to play the TV audio through the sound system. For - Dynex DX-55L150A11 | User Manual (English) - Page 10
the GUIDE button when viewing (EPG) function digital channals, the same color buttons will 12 buttons appear with explanations in the on-screen display (OSD). Follow the steps shown in the OSD. CCD 13 Press to turn closed captioning on or off. For more information, see "Adjusting TV settings - Dynex DX-55L150A11 | User Manual (English) - Page 11
Making connections DX-55L150A11 7 Aiming the remote control To aim the remote control: • Point the remote control towards the remote sensor on the front of your TV. TV INPUT VIDEO COMP HDMI VGA ZOOM GUIDE PICTURE AUDIO INFO VOL CH MUTE MENU EXIT ENTER 1 2 3 4 5 6 7 8 9 0 RECALL - Dynex DX-55L150A11 | User Manual (English) - Page 12
or cable TV connection • Where the TV has access to a power outlet Note: Watching TV in total darkness or with a reflection on the screen may cause eye strain. Connecting an HDMI device Note: If your device has an HDMI connection, we recommend you use it to get the best picture and sound quality - Dynex DX-55L150A11 | User Manual (English) - Page 13
Making connections DX-55L150A11 9 Connecting an antenna, cable TV, or satellite TV box If you are connecting a satellite TV or cable box, you can use one of the following (if available): • Best - HDMI cable • Better - Video component cables • Good - Video composite cable • Acceptable - 75-ohm - Dynex DX-55L150A11 | User Manual (English) - Page 14
INPUT SOURCE menu opens. 2 Press or to select VGA, then press ENTER. 3 Turn on the computer, then adjust the computer display properties as needed. Connecting a home theater system Connecting using a digital audio cable To connect using a digital optical cable: 1 Make sure that your TV's power cord - Dynex DX-55L150A11 | User Manual (English) - Page 15
first time DX-55L150A11 11 Turning on your TV for the first time To configure your TV: 1 Make sure that you have inserted the batteries in the remote control, connected your devices to the TV, and connected the AC power. 2 Press (Power), then wait several seconds. The Initial Setup screen opens - Dynex DX-55L150A11 | User Manual (English) - Page 16
the overall color of the picture (only supported in TV/AV mode). Sharpness Lets you adjust the focus of the picture. Increase sharpness for a clearer picture, or decrease sharpness for a smoother picture. Color Lets you select one of three preset color temperature temperature settings: Cool - Dynex DX-55L150A11 | User Manual (English) - Page 17
Adjusting the picture DX-55L150A11 13 Channel Block Lets you select certain channels to be blocked. Program Block Lets you select certain programs to be blocked. Input Block Lets you select certain input sources to be blocked. Parental Change Lets you set a new password for parental Password - Dynex DX-55L150A11 | User Manual (English) - Page 18
14 DX-55L150A11 Adjusting the sound Adjusting the sound To adjust the sound: 1 Press MENU. The Main menu opens. 2 Press or to highlight Audio, then press ENTER or . The Audio menu opens. Changing channel settings To change the channel settings: 1 Press MENU. The Main menu opens. 2 Press or to - Dynex DX-55L150A11 | User Manual (English) - Page 19
Adjusting TV settings DX-55L150A11 15 3 Press the number buttons to enter the four-digit password. The default password is 0000. You should change the password to a number you can remember. The Parental Controls menu opens. 4 Press or to highlight an option, then press or to adjust the option. - Dynex DX-55L150A11 | User Manual (English) - Page 20
the TV yourself. Refer all servicing to qualified repair personnel. Video and audio Problem Solution No picture (screen is not lit) and no sound. • Make sure that the power cord is plugged in. • Press POWER on the TV or the remote control. • Make sure that the correct video input source is - Dynex DX-55L150A11 | User Manual (English) - Page 21
to change without notice. Weight and dimensions shown are approximate. TV type TV panel TV system Receiving channels Audio multiples Audio out Power requirement Power consumption Dimensions (W × H × D with stand) Weight Input terminals Output terminals Control terminals LCD 55-inch FHD LCD NTSC - Dynex DX-55L150A11 | User Manual (English) - Page 22
18 DX-55L150A11 Cables Connections to this device must be made with shielded cables with metallic RF/EMI connector hoods to maintain compliance with FCC Rules and Regulations. - Dynex DX-55L150A11 | User Manual (English) - Page 23
• Plasma display panel damaged by static (non-moving) images applied for lengthy periods (burn-in). • Damage due to incorrect operation or maintenance • Connection to an incorrect voltage or power supply • Attempted repair by any person not authorized by Dynex to service the Product • Products - Dynex DX-55L150A11 | User Manual (English) - Page 24
20 DX-55L150A11 What does the warranty not cover? This warranty does not cover: • Customer instruction/education • Installation • Set up adjustments • Cosmetic damage • Damage due to acts of God, such as power surges • Accident(s) • Misuse • Abuse • Negligence • Commercial purposes/use, including - Dynex DX-55L150A11 | User Manual (English) - Page 25
If the power cord has been damaged, it should be replaced by the manufacturer, your service provider or DYNEX is a trademark of BBY Solutions, Inc. Registered in some countries. All other products and brand names are trademarks of their respective owners. Best Buy Imports, S. de R.L. de C.V. Av
-
 1
1 -
 2
2 -
 3
3 -
 4
4 -
 5
5 -
 6
6 -
 7
7 -
8
-
9
-
10
-
11
-
12
-
13
-
14
-
15
-
16
-
17
-
18
-
19
-
20
-
21
-
22
-
23
-
24
-
25
 |
 |

55" LCD TV
DX-55L150A11
USER GUIDE