Dynex DX-L321-10A User Manual (English)
Dynex DX-L321-10A Manual
 |
View all Dynex DX-L321-10A manuals
Add to My Manuals
Save this manual to your list of manuals |
Dynex DX-L321-10A manual content summary:
- Dynex DX-L321-10A | User Manual (English) - Page 1
DX-L321-10A_09-0407_MAN_ENG_V3.book Page 1 Wednesday, May 13, 2009 11:38 AM 32" LCD TV DX-L321-10A USER GUIDE - Dynex DX-L321-10A | User Manual (English) - Page 2
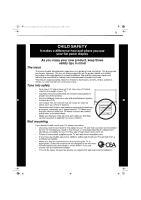
Dynex DX-L321-10A 32" LCD TV Contents CHILD SAFETY 1 Important safety instructions 2 Warnings 2 Cautions 2 Installing and removing the stand 3 Installing the stand 3 Removing the stand 4 Installing a wall-mount bracket 4 TV Adjusting the sound 15 Adjusting the sound 15 Changing channel - Dynex DX-L321-10A | User Manual (English) - Page 3
DX-L321-10A_09-0407_MAN_ENG_V3.book Page iii Wednesday, May 13, 2009 11:38 AM iii Setting or changing the PIN 16 Setting parental control levels 17 Blocking unrated TV 18 Locking control panel buttons 18 Using closed captioning 19 Turning closed captioning on or off 19 Selecting the closed - Dynex DX-L321-10A | User Manual (English) - Page 4
DX-L321-10A_09-0407_MAN_ENG_V3.book Page iv Wednesday, May 13, 2009 11:38 AM iv - Dynex DX-L321-10A | User Manual (English) - Page 5
a wall mount rated for the weight of your TV and that has been recommended by this TV manufacturer, listed in this manual, or otherwise listed by an independent laboratory as suitable for your TV. One size of wall mount does not fit all. • Follow all instructions supplied by the TV and wall mount - Dynex DX-L321-10A | User Manual (English) - Page 6
DX-L321-10A_09-0407_MAN_ENG_V3.book Page 2 Wednesday, May 13, 2009 11:38 AM 2 Important safety instructions Important safety instructions CAUTION RISK OF ELECTRIC SHOCK DO NOT OPEN This symbol indicates that dangerous voltage constituting a risk of electric shock is present within your TV. This - Dynex DX-L321-10A | User Manual (English) - Page 7
other flat surface. If you intend to mount your TV on a wall or other vertical surface, you must remove the stand column. Warning: Before attempting assembly or removal of the stand, unplug the AC power cord. Cautions: Read these instructions thoroughly before attempting this installation. Make sure - Dynex DX-L321-10A | User Manual (English) - Page 8
that contained in the operating instructions unless you are qualified to do so. • Secure the wall-mount bracket to the back of your TV using the four screws provided with the bracket. ANT/CABLE IN 6 7 8 ## Component Description 1 AC in Connect the AC power cord to this connector. 2 ANT/CABLE - Dynex DX-L321-10A | User Manual (English) - Page 9
Remote control 1 2 3 4 5 6 7 8 9 10 11 12 13 14 15 16 17 18 19 20 21 22 ## Component Description 1 Service port 2 PC VGA jack 3 PC Audio For service update analog audio amplifier R) 1 and 2 or receiver. # Button Description 1 (Power) Press to turn on your TV. Press again to put your TV - Dynex DX-L321-10A | User Manual (English) - Page 10
DX-L321-10A_09-0407_MAN_ENG_V3.book Page 6 Wednesday, May 13, 2009 11:38 AM 6 Using the remote control # Button 9 SLEEP 10 PICTURE 11 ZOOM 12 (Mute) 13 RECALL 14 CH / 15 INFO 16 17 EXIT 18 TV 19 INPUT 20 VGA 21 CH LIST 22 CCD Description Press to set the sleep timer to have your TV turn - Dynex DX-L321-10A | User Manual (English) - Page 11
, call technical support for your universal remote control or set-top box manufacturer, or call the Dynex Customer Care Center at 1-800-305-2204. Notes: Your TV should only be operated from the power source indicated on the label. Always unplug the AC power cord from the AC power outlet when you - Dynex DX-L321-10A | User Manual (English) - Page 12
the VCR. ANT/CABLE IN Notes: Use a coaxial cable to eliminate interference and noise from radio waves. Do not bundle the coaxial cable with the power cord or other cables. If the antenna is not installed correctly, contact qualified service personnel to correct the problem. - Dynex DX-L321-10A | User Manual (English) - Page 13
DX-L321-10A_09-0407_MAN_ENG_V3.book Page 9 Wednesday, May 13, 2009 11:38 AM Making connections 9 Connecting a camcorder or gaming console Tip: Some game consoles have an HDMI connector, which can be used for a better picture. To connect a camcorder or game: 1 Make sure that your TV's power cord - Dynex DX-L321-10A | User Manual (English) - Page 14
DX-L321-10A_09-0407_MAN_ENG_V3.book Page 10 Wednesday, May 13, 2009 11:38 AM 10 computer: 1 Make sure that your TV's power cord is unplugged and the computer is TV. Note: The VGA cable should be a 15-pin D-Sub (analog RGB) cable. Computer Side of TV VGA cable Note: Cables are often color-coded - Dynex DX-L321-10A | User Manual (English) - Page 15
in the remote control, connected the antenna to the TV, and connect the AC power. 2 Press (Power), then wait several seconds. The setup wizard opens (only the first time you turn on your TV) and guides you through setting up your TV's operational settings. Analog audio cables Digital optical - Dynex DX-L321-10A | User Manual (English) - Page 16
DX-L321-10A_09-0407_MAN_ENG_V3.book Page 12 Wednesday, May 13, 2009 11:38 AM 12 Understanding the basics Understanding the basics Turning your TV on or off To turn your TV on or off (standby mode): 1 Plug the power cord into an AC power outlet. 2 Press (Power). Your TV turns on. 3 Press (Power) - Dynex DX-L321-10A | User Manual (English) - Page 17
DX-L321-10A_09-0407_MAN_ENG_V3.book Page 13 Wednesday, May 13, 2009 11:38 AM Understanding the basics 13 Locks Ratings Locks Set allowable video content for TV programs based on their rating levels. This provides a level of parental control on the kind of programs children can access. Change PIN - Dynex DX-L321-10A | User Manual (English) - Page 18
DX-L321 TV, is Wide. For TV, the default settings is Normal. Adjusting Advanced Video settings Your TV supports . The display changes as you go a lower power consumption. • remote control, or MENU on the control panel of your TV. The on-screen menu bar automatic contrast adjustment based on the picture - Dynex DX-L321-10A | User Manual (English) - Page 19
with the regular programming, press FREEZE one more time. Adjusting the sound Adjusting the sound To adjust the sound: 1 Press MENU on the remote control, or MENU on the control panel of your TV. The on-screen menu bar opens. • Digital Audio-Select the preferred audio format for SPDIF audio signals - Dynex DX-L321-10A | User Manual (English) - Page 20
DX-L321-10A_09-0407_MAN_ENG_V3.book Page 16 Wednesday, May 13, 2009 11:38 AM 16 exceed the selected rating, you must enter a PIN. Setting or changing the PIN To set the parental controls PIN: 1 Press MENU on the remote control, or MENU on the control panel of your TV. The on-screen menu bar opens. 2 - Dynex DX-L321-10A | User Manual (English) - Page 21
DX-L321-10A_09-0407_MAN_ENG_V3.book Page 17 Wednesday, May 13, 2009 11:38 AM Setting parental controls 17 4 Enter the PIN again. The Locks menu opens. 3 Using the number keys, enter the PIN number you set. The Locks menu opens. To change the parental controls PIN: 1 Press MENU on the remote - Dynex DX-L321-10A | User Manual (English) - Page 22
DX-L321-10A_09-0407_MAN_ENG_V3.book Page 18 Wednesday, May 13, 2009 11:38 AM 18 Setting parental controls 9 When you are finished, select Done, then press ENTER. U.S. TV ratings (age-based) These ratings are determined by the Federal Communications Commission (FCC) TV-Y All children. TV-Y7 - Dynex DX-L321-10A | User Manual (English) - Page 23
sounds. Note: Closed caption availability and content depends on the TV provider and may vary across channels and programs. Turning closed captioning on or off To turn closed captioning on or off: 1 Press MENU on the remote control, or MENU on the control panel of your TV. The on-screen menu bar - Dynex DX-L321-10A | User Manual (English) - Page 24
DX-L321-10A_09- (CC)-an on-screen display of the program's dialogue, narration, and sound effects, or text-an on-screen display of information not related to closed captioning: 1 Press MENU on the remote control, or MENU on the control panel of your TV. The on-screen menu bar opens. 5 Press , , , or - Dynex DX-L321-10A | User Manual (English) - Page 25
DX-L321 date or time segment you want to change, then press or to adjust the remote control. The Sleep Timer popup screen opens. 2 Press the SLEEP button repeatedly to toggle each timer setting on. Options include: 10 remote control, or MENU on the control panel of your TV. The on-screen menu bar - Dynex DX-L321-10A | User Manual (English) - Page 26
the TV settings. Troubleshooting Warning: Do not try to repair your TV yourself. Contact authorized service personnel. Problem Solution No power Power is suddenly turned off Your PIN is compromised • Make sure that the power indicator is illuminated blue. • Make sure that the power cord is - Dynex DX-L321-10A | User Manual (English) - Page 27
non-alcohol-based glass cleaner onto a clean, soft, lint-free cloth, then wipe the screen. Specifications Design and specifications are subject to change without notice. Dimensions and weight are approximate. TV model DX-L321-10A TV panel Type Resolution 31.5-inch Active matrix WXGA TFT LCD 1366 - Dynex DX-L321-10A | User Manual (English) - Page 28
This Class B digital apparatus complies with Canadian ICES-003. Standard Television Receiving Apparatus - Appareil de réception télévision ordinaire, Canada BETS-7 / NTMR-7 Notices Specifications and features are subject to change without notice or obligation. For service and support call (800 - Dynex DX-L321-10A | User Manual (English) - Page 29
APPLY TO YOU. THIS WARRANTY GIVES YOU SPECIFIC LEGAL RIGHTS, AND YOU MAY ALSO HAVE OTHER RIGHTS, WHICH VARY FROM STATE TO STATE OR PROVINCE TO PROVINCE. Contact Dynex: For customer service please call 1-800-305-2204 www.dynexproducts.com Distributed by Best Buy Purchasing, LLC 7601 Penn Avenue South - Dynex DX-L321-10A | User Manual (English) - Page 30
DX-L321-10A_09-0407_MAN_ENG_V3.book Page 26 Wednesday, May 13, 2009 11:38 AM 26 One-year limited warranty - Dynex DX-L321-10A | User Manual (English) - Page 31
DX-L321-10A_09-0407_MAN_ENG_V3.book Page 27 Wednesday, May 13, 2009 11:38 AM One-year limited warranty 27 - Dynex DX-L321-10A | User Manual (English) - Page 32
DX-L321-10A_09-0407_MAN_ENG_V3.book Page 1 Wednesday, May 13, 2009 11:38 AM www.dynexproducts.com (800) 305-2204 Distributed by Best Buy Purchasing, LLC 7601 Penn Ave. South, Richfield, MN 55423 U.S.A. © 2009 Best Buy Enterprise Services, Inc. All rights reserved. DYNEX is a trademark of Best Buy
-
 1
1 -
 2
2 -
 3
3 -
 4
4 -
 5
5 -
 6
6 -
 7
7 -
8
-
9
-
10
-
11
-
12
-
13
-
14
-
15
-
16
-
17
-
18
-
19
-
20
-
21
-
22
-
23
-
24
-
25
-
26
-
27
-
28
-
29
-
30
-
31
-
32
 |
 |

32" LCD TV
DX-L321-10A
USER GUIDE
DX-L321-10A_09-0407_MAN_ENG_V3.book
Page 1
Wednesday, May 13, 2009
11:38 AM