Dynex DX-LDVD22-10A User Manual (English)
Dynex DX-LDVD22-10A - 22" LCD TV Manual
 |
UPC - 600603122385
View all Dynex DX-LDVD22-10A manuals
Add to My Manuals
Save this manual to your list of manuals |
Dynex DX-LDVD22-10A manual content summary:
- Dynex DX-LDVD22-10A | User Manual (English) - Page 1
22" LCD TV/DVD Combo DX-LDVD22-10A USER GUIDE - Dynex DX-LDVD22-10A | User Manual (English) - Page 2
ii Dynex DX-LDVD22-10A 22" LCD TV/DVD Combo Contents CHILD SAFETY 1 Important safety instructions 2 Warnings 2 Cautions 2 Installing the stand 3 Removing the stand 3 Removing the stand 4 Installing a wall-mount bracket 4 TV components 4 Front and side panels 4 Back 5 Remote control 5 - Dynex DX-LDVD22-10A | User Manual (English) - Page 3
22 Advanced playback 23 JPEG disc playback 23 Screen saver 23 DVD system setup 23 Playable discs 24 Troubleshooting 25 Video and audio 25 Remote control 25 General 25 Maintenance 25 Cleaning 25 Care and handling of discs 26 Servicing 26 Specifications 26 Legal notices 26 One-year - Dynex DX-LDVD22-10A | User Manual (English) - Page 4
iv - Dynex DX-LDVD22-10A | User Manual (English) - Page 5
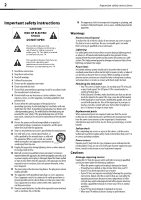
listed in this manual, or otherwise listed by an independent laboratory as suitable for your TV. One size of wall mount does not fit all. • Follow all instructions supplied by the TV and wall mount manufacturers. • If you have any doubts about your ability to safely wall mount your TV, get help from - Dynex DX-LDVD22-10A | User Manual (English) - Page 6
: • When the power supply cord or plug is damaged or frayed. • If liquid has been spilled or objects have fallen into your TV. • If your TV has been exposed to rain or water. • If your TV does not operate normally by following the operating instructions. Adjust only those controls that are covered - Dynex DX-LDVD22-10A | User Manual (English) - Page 7
base to the TV with four (4) ST4x8 screws. Screws Screws Removing the stand If you intend to mount your TV on a wall or other vertical surface, you must remove the stand. Warning: Before attempting removal of the stand, unplug the AC power cord. Cautions: Read these instructions thoroughly before - Dynex DX-LDVD22-10A | User Manual (English) - Page 8
from the remote control. Do not block. Back PC AUDIO IN HDMI VGA IN Installing a wall-mount bracket If you want to attach the TV to a wall-mount bracket (not provided), you should first remove the stand. To attach your TV to a wall-mount bracket: Warning: These servicing instructions are for - Dynex DX-LDVD22-10A | User Manual (English) - Page 9
to this jack. Remote control POWER INPUT DVD OPEN/CLOSE CCD MTS/SAP SLEEP PICTURE 123 4 5 60 GUIDE 789 RECALL CH+ POWER 2 INPUT 3 CCD 4 MTS/SAP 5 Numbers 6 RECALL Description Press to turn on your TV. Press again to put your TV in Standby mode. Press to select the input source. Press to turn - Dynex DX-LDVD22-10A | User Manual (English) - Page 10
old and new batteries. Remove batteries when they no longer have a charge. Chemicals may leak into the battery compartment. Battery chemicals can cause a rash. If chemicals leak, clean the battery compartment with a cloth. Remove the batteries if you do not intend to use the remote control for an - Dynex DX-LDVD22-10A | User Manual (English) - Page 11
below it. You will use the numbered code to program your remote control to work with your TV. Dynex TV codes for universal remote controls (for all Dynex TVs manufactured after Jan. 1, 2007) Universal remote control manufacturer and model Philips PHDVD5, PH5DSS, PMDVR8, PDVR8 RCA RCU807 One - Dynex DX-LDVD22-10A | User Manual (English) - Page 12
75 ohm cable with the power cord or other cables. If the antenna is not installed correctly, contact qualified service personnel to correct the problem. To improve picture quality in a poor signal area, purchase and install a signal amplifier. Connecting a cable TV or satellite box If you subscribe - Dynex DX-LDVD22-10A | User Manual (English) - Page 13
, and set it to the correct output mode. See the camcorder's or game's user guides for more information. Connecting an HDMI device To connect an HDMI device: 1 Make sure that your TV's power cord is unplugged and the HDMI device is turned off. 2 Connect an HDMI cable to the HDMI OUT jack on the HDMI - Dynex DX-LDVD22-10A | User Manual (English) - Page 14
turn on and configure your TV: 1 Make sure that you have inserted the batteries in the remote control, connected the antenna to the TV, and connected the AC power. 2 Press POWER , then wait several seconds. The power indicator LED turns blue and the TV turns directly by pressing the number buttons. - Dynex DX-LDVD22-10A | User Manual (English) - Page 15
turn off your TV, it goes into standby mode. Warning: When your TV is in standby mode, it is still receiving power. To completely disconnect power, unplug the power cord. Note: If your TV does not receive an input signal for several minutes, it automatically goes into standby mode. On-screen Controls - Dynex DX-LDVD22-10A | User Manual (English) - Page 16
turn off all sound (except the headphones). Press MUTE again to restore the sound. Adjusting basic settings To adjust basic settings: 1 Press MENU. The on-screen Controls Closed GUIDE to display EPG OSD of the channel, including program name. channel number, program description, channel label, TV - Dynex DX-LDVD22-10A | User Manual (English) - Page 17
the sound 13 • Color Temperature-Select Warm (increased red), Normal, or Cool (increased blue). • Backlight-Adjusts the overall brilliance of the screen. • Noise Reduction-Selects the noise reduction mode to reduce picture noise (snow). Choose High, Middle, Low, or Off. • Advanced Contrast-Turn - Dynex DX-LDVD22-10A | User Manual (English) - Page 18
are automatically preset in order. After the search is completed, the first channel number displays on the screen. This search automatically adds only the active channels in your area to the TV's memory. It deletes any channels on which there is no broadcast or a poor signal. The channels found - Dynex DX-LDVD22-10A | User Manual (English) - Page 19
is already labeled. To label a channel: 1 Press MENU. The on-screen menu opens. Picture Mode Brightness Contrast Color Tint Sharpness CH+ VOL VOL - you want to change, then press CH+ or CH- to select a new character. Repeat Steps 4 to 6 to label additional channels. 7 Press MENU to exit to - Dynex DX-LDVD22-10A | User Manual (English) - Page 20
highlight Channel Strength, then press ENTER/VOL+. The Channel Strength screen opens displaying the signal strength of the channel. 4 Press turn off 5 seconds after last remote command. If the backlight is off, pressing POWER on the remote control will turn off the TV. Pushing any other button turns - Dynex DX-LDVD22-10A | User Manual (English) - Page 21
to On to lock the buttons on the front of the TV. • Block Unrated TV-Set to On to block TV programs that are not rated. • USA Parental Locks-Select or changing the password To set the parental control password: 1 Press MENU. The on-screen menu opens. Picture Mode Brightness Contrast Color Tint - Dynex DX-LDVD22-10A | User Manual (English) - Page 22
Password, then press ENTER/VOL+. The Change Password screen opens. PICTURE Settings Parental Controls AUDIO CHANNELS SETTINGS Button Lock Off Block Unrated TV Off Enter New Password USA Parental Locks Canadian Parental LockCsonfrim New Password Change Password CH+ VOL VOL - + CH - Dynex DX-LDVD22-10A | User Manual (English) - Page 23
CH- to highlight Parental Controls, then press ENTER/VOL+. The Enter Password screen opens. Settings Parental Controls Closed Caption Time Menu is 0000. The Parental Controls sub-menu opens. PICTURE Settings Parental Controls Button Lock Block Unrated TV USA Parental Locks Canadian Parental - Dynex DX-LDVD22-10A | User Manual (English) - Page 24
screen when this option is selected. Turning closed captioning on or off To turn closed captioning on or off: 1 Press MENU. The on-screen Controls Closed guide or other information displayed by broadcasters. • Text2 to Text4-For additional modes of information displayed by broadcasters. • Off-Turns - Dynex DX-LDVD22-10A | User Manual (English) - Page 25
CH+/- to select Custom or Auto. To set the time manually, select Custom. When Auto is selected, the time is TV to wait before it automatically turns off. To set the sleep timer: 1 Press MENU. The on-screen The Settings menu opens. Settings Parental Controls Closed Caption Time Menu Settings Input - Dynex DX-LDVD22-10A | User Manual (English) - Page 26
Box • Satellite • Cable Box • Game • PC • Custom-To enter a custom screen.) 3 Press the cursor buttons on the remote control to select menu options, then press PLAY/ENTER to start playback. You can also press the digit buttons to select a menu option directly playback. The TV screen shows the start - Dynex DX-LDVD22-10A | User Manual (English) - Page 27
DVD setup To make changes to the general DVD setup: 1 Press SETUP on the remote control. The General Setup Page opens. -- General Setup Page --(1/2) Tv Display 4˖3 LB Angle Mark On Osd Lang ENG Caption On Screen Saver Off Hdcd Off Last Memory Off 4˖3/Ps 4˖3/Lb 16˖9 2 Press the (up) and - Dynex DX-LDVD22-10A | User Manual (English) - Page 28
CDs when HDCD is set to 2X to enhance the audio quality. • Last Memory-Select On or Off. When this option is On, your LCD TV/DVD combo remembers the DVD chapter you were viewing when you turned the player off. When you turn it back on, it starts playback at the chapter you were - Dynex DX-LDVD22-10A | User Manual (English) - Page 29
, then plug it back in and turn on your TV. Note: If the problem is not solved by using these troubleshooting instructions, turn off your TV, then turn it on again. Maintenance Cleaning • Before cleaning the screen, unplug your TV from the power outlet. • Clean your TV with a soft, dry cloth. If - Dynex DX-LDVD22-10A | User Manual (English) - Page 30
. There are no user-serviceable parts inside. Turn off your TV/DVD combo, unplug the power cord, then contact an authorized service center. Specifications Design and specifications are subject to change without notice. Dimensions and weight are approximate. Model Picture/sound system Audio output - Dynex DX-LDVD22-10A | User Manual (English) - Page 31
Legal notices 27 One-year limited warranty Dynex Products ("Dynex") warrants to you, the original purchaser of this new DX-LDVD22-10A ("Product"), that the Product shall be free of defects in the original manufacture of the material or workmanship for a period of one (1) year from the - Dynex DX-LDVD22-10A | User Manual (English) - Page 32
www.dynexproducts.com (800) 305-2204 Distributed by Best Buy Purchasing, LLC 7601 Penn Ave. South, Richfield, MN 55423 U.S.A. © 2009 Best Buy Enterprise Services, Inc. All rights reserved. DYNEX is a trademark of Best Buy Enterprise Services, Inc. Registered in some countries. All other products and
-
 1
1 -
 2
2 -
 3
3 -
 4
4 -
 5
5 -
 6
6 -
 7
7 -
8
-
9
-
10
-
11
-
12
-
13
-
14
-
15
-
16
-
17
-
18
-
19
-
20
-
21
-
22
-
23
-
24
-
25
-
26
-
27
-
28
-
29
-
30
-
31
-
32
 |
 |

22" LCD TV/DVD Combo
DX-LDVD22-10A
USER GUIDE